Note
Access to this page requires authorization. You can try signing in or changing directories.
Access to this page requires authorization. You can try changing directories.
In this tutorial, you create a Power Automate flow to extract text in an Excel spreadsheet without having to write code.
This flow uses a spreadsheet consisting of issues reported about an apartment complex, and classifies them into two categories: plumbing and other. It also extracts the names and phone numbers of the tenants who sent them. Lastly, the flow appends this information to the Excel sheet.
In this tutorial, you learn how to:
- Use Power Automate to create a flow
- Upload Excel data from OneDrive
- Extract text from Excel, and send it for Named Entity Recognition(NER)
- Use the information from the API to update an Excel sheet.
Prerequisites
- A Azure account. Create a Trial or sign in.
- A Language resource. If you don't have one, you can create one in the Azure portal and use the free tier to complete this tutorial.
- The key and endpoint that was generated for you when you created the resource.
- A spreadsheet containing tenant issues. Example data for this tutorial is available on GitHub.
- Microsoft 365, with OneDrive.
Add the Excel file to OneDrive
Download the example Excel file from GitHub. This file must be stored in your OneDrive account.
The issues are reported in raw text. We use the Named Entity Recognition (NER) feature to extract the person name and phone number. Then the flow looks for the word "plumbing" in the description to categorize the issues.
Create a new Power Automate workflow
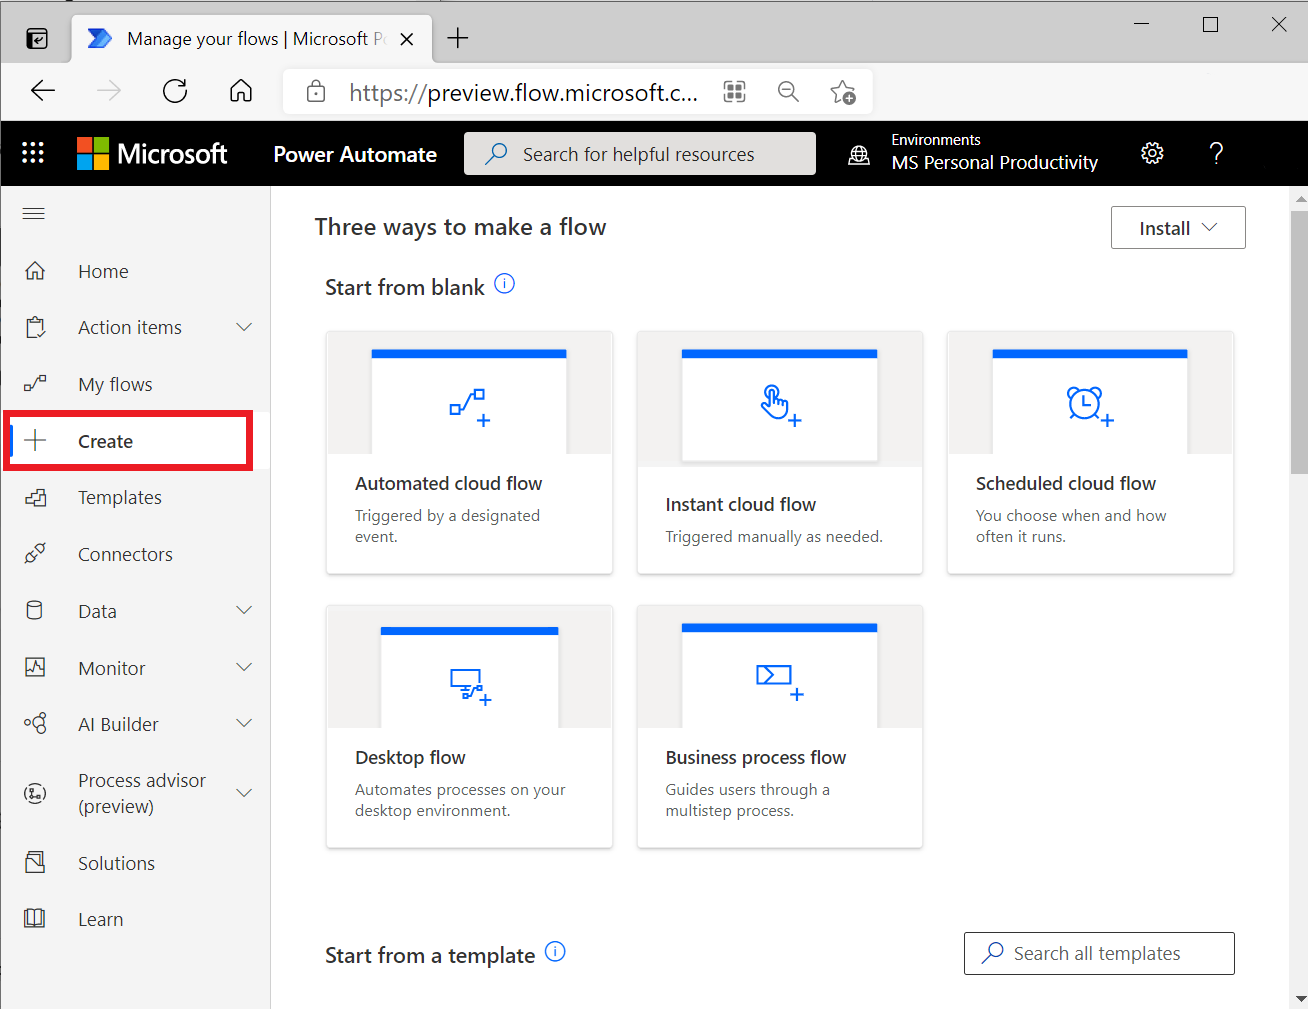
Go to the Power Automate site, and sign in. Then select Create and Scheduled flow.
On the Build a scheduled cloud flow page, initialize your flow with the following fields:
| Field | Value |
|---|---|
| Flow name | Scheduled Review or another name. |
| Starting | Enter the current date and time. |
| Repeat every | 1 hour |
Add variables to the flow
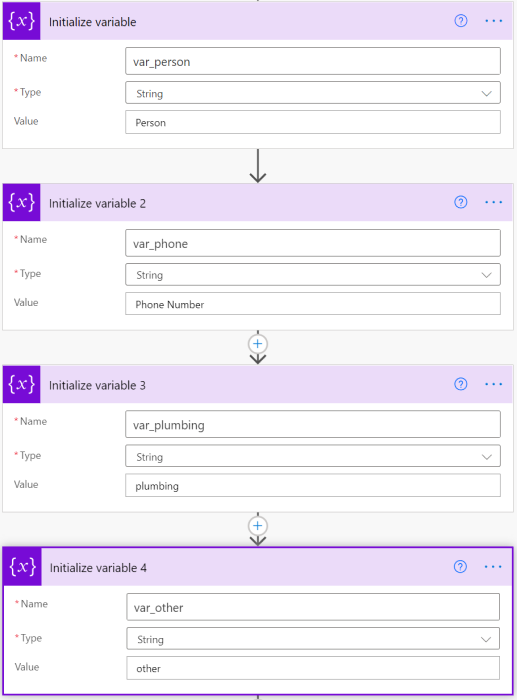
Create variables representing the information added to the Excel file. Select New Step and search for Initialize variable. Do this four times and create four variables.
Add the following information to the variables you created. They represent the columns of the Excel file. If any variables are collapsed, you can select them to expand them.
| Action | Name | Type | Value |
|---|---|---|---|
| Initialize variable | var_person | String | Person |
| Initialize variable 2 | var_phone | String | Phone Number |
| Initialize variable 3 | var_plumbing | String | plumbing |
| Initialize variable 4 | var_other | String | other |
Read the excel file
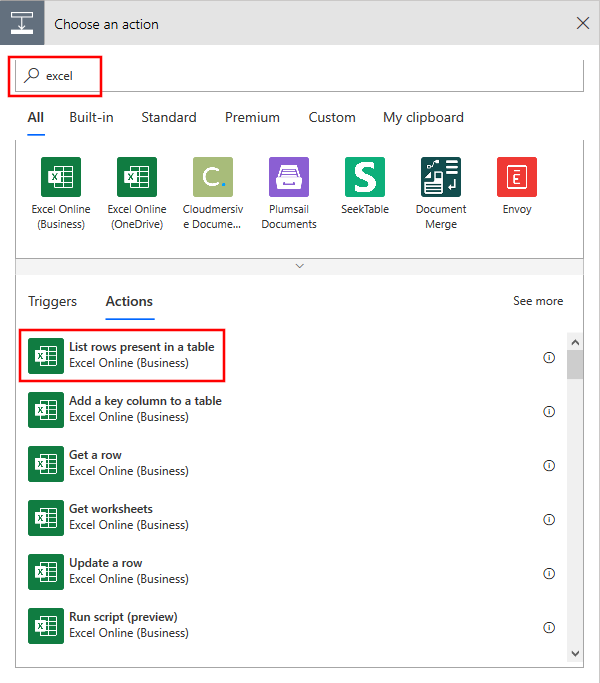
Select New Step and type Excel, then select List rows present in a table from the list of actions.
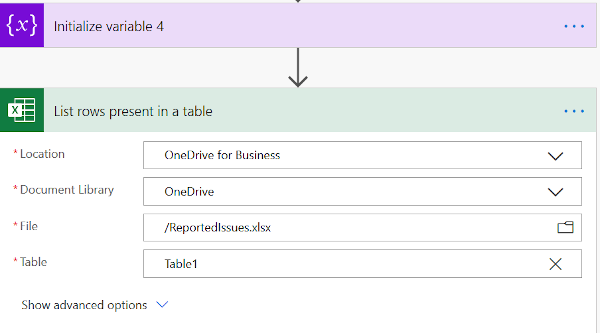
Add the Excel file to the flow by filling in the fields in this action. This tutorial requires that you upload the file to OneDrive.
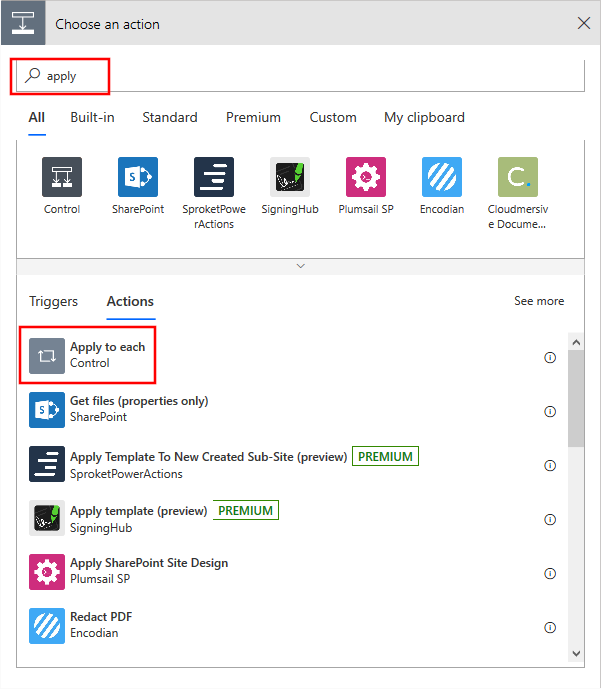
Select New Step and add an Apply to each action.
Select Select an output from previous step. In the Dynamic content box that appears, select value.
Send a request for entity recognition
If you haven't already, you need to create a Language resource in the Azure portal.
Create a Language connection
In the Apply to each, select Add an action. Go to your Language resource's key and endpoint page in the Azure portal, and get the key and endpoint for your Language resource.
In your flow, enter the following information to create a new Language connection.
Note
If you already created a Language connection and want to change your connection details, Select the ellipsis on the top right corner, and select + Add new connection.
| Field | Value |
|---|---|
| Connection Name | A name for the connection to your Language resource. For example, TAforPowerAutomate. |
| Account key | The key for your Language resource. |
| Site URL | The endpoint for your Language resource. |
Extract the Excel content
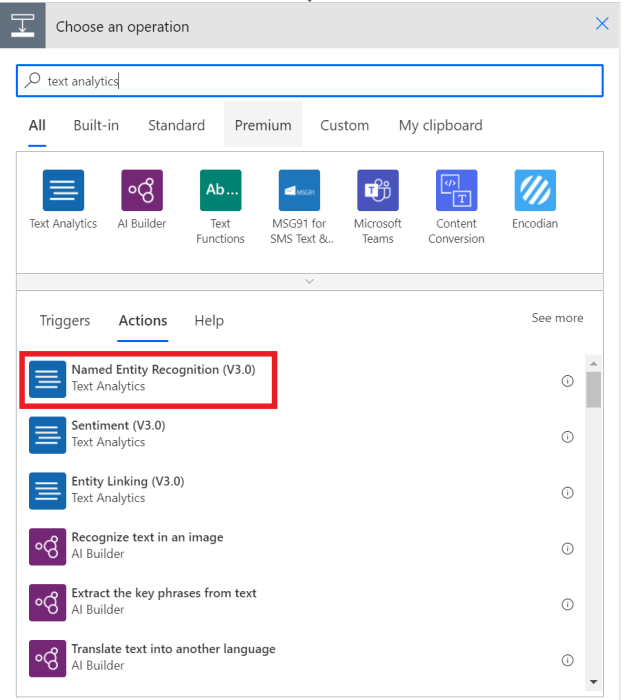
After the connection is created, search for Text Analytics and select Named Entity Recognition. This extracts information from the description column of the issue.
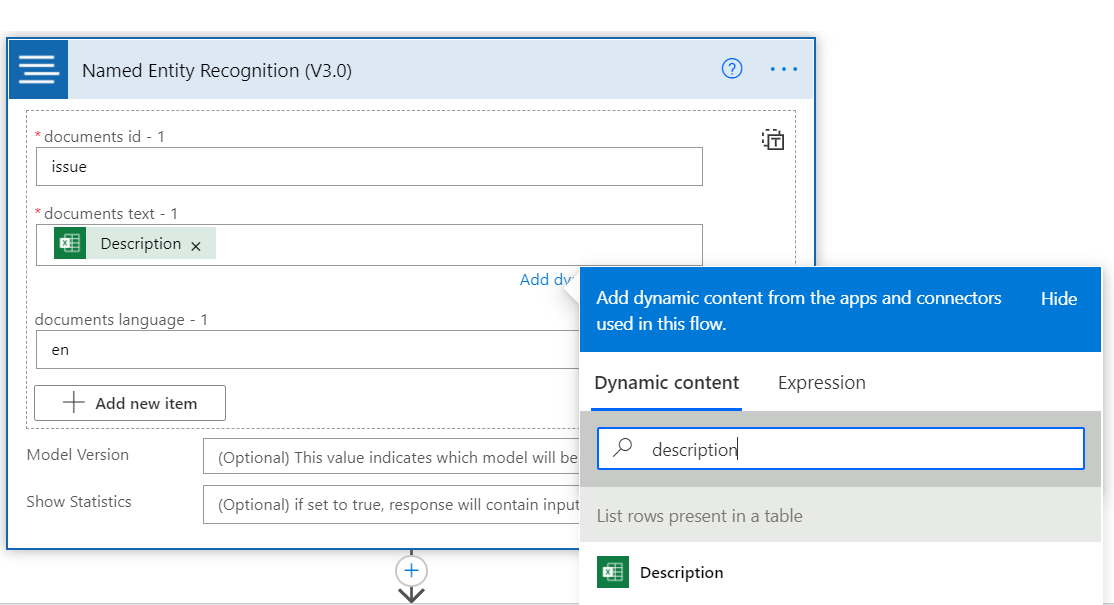
Select in the Text field and select Description from the Dynamic content windows that appears. Enter en for Language, and a unique name as the document ID (you might need to select Show advanced options).
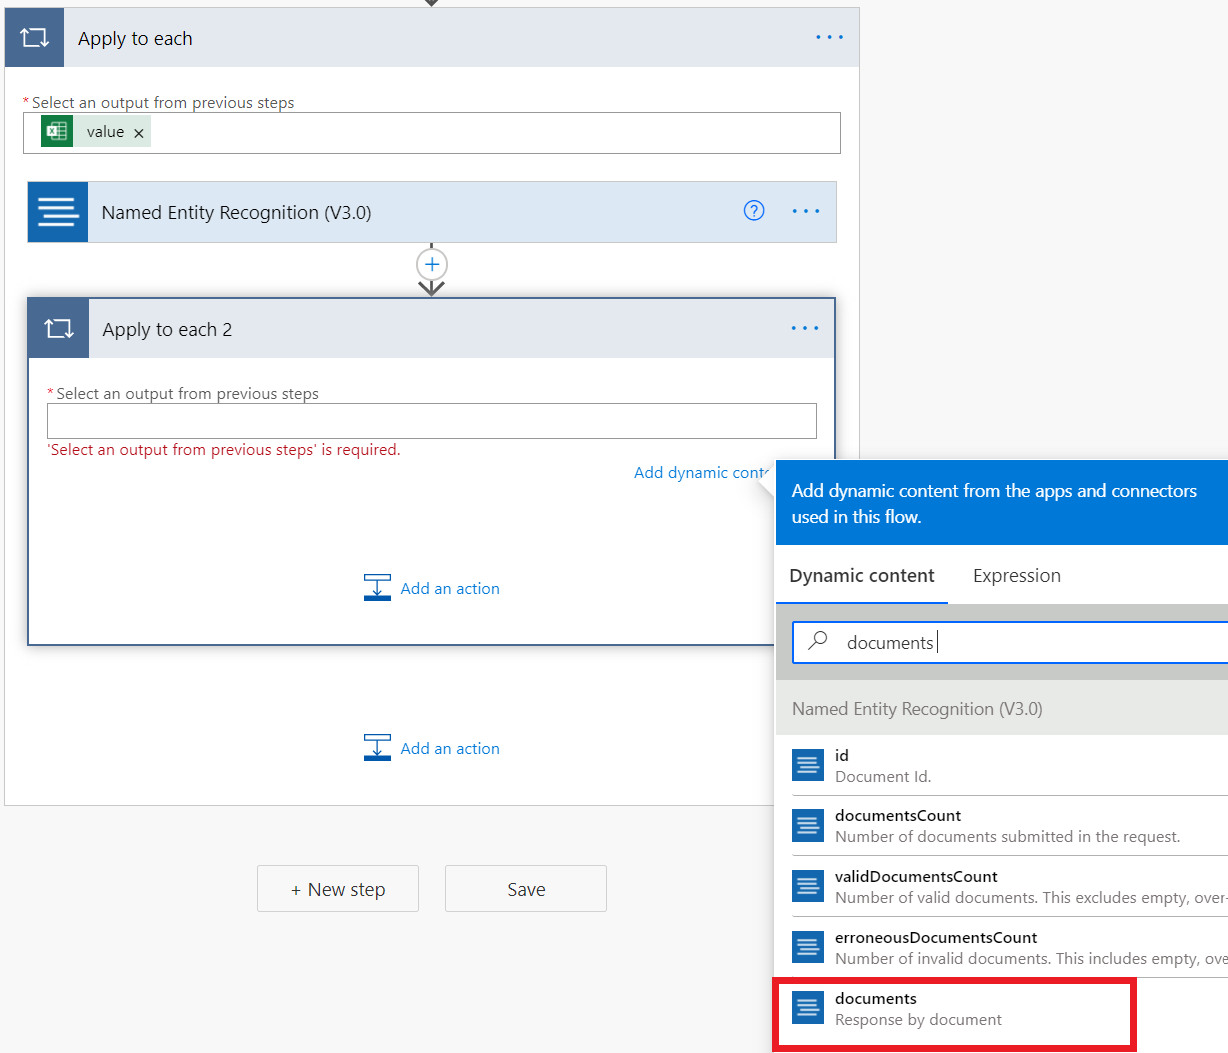
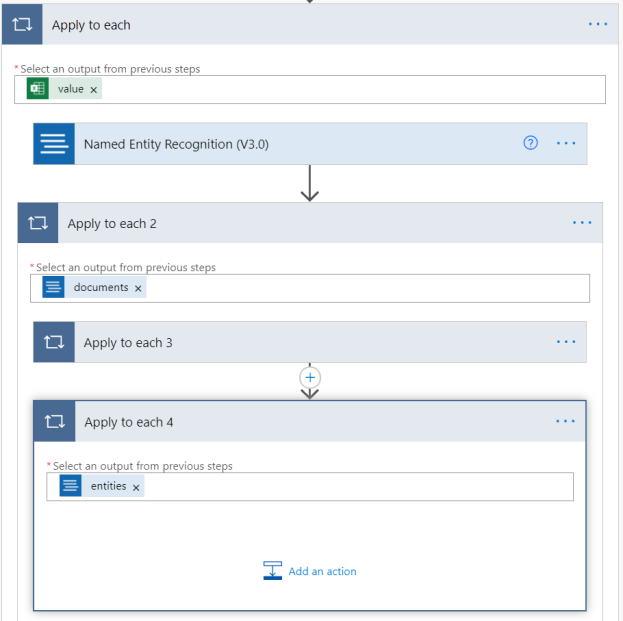
Within the Apply to each, select Add an action and create another Apply to each action. Select inside the text box and select documents in the Dynamic Content window that appears.
Extract the person name
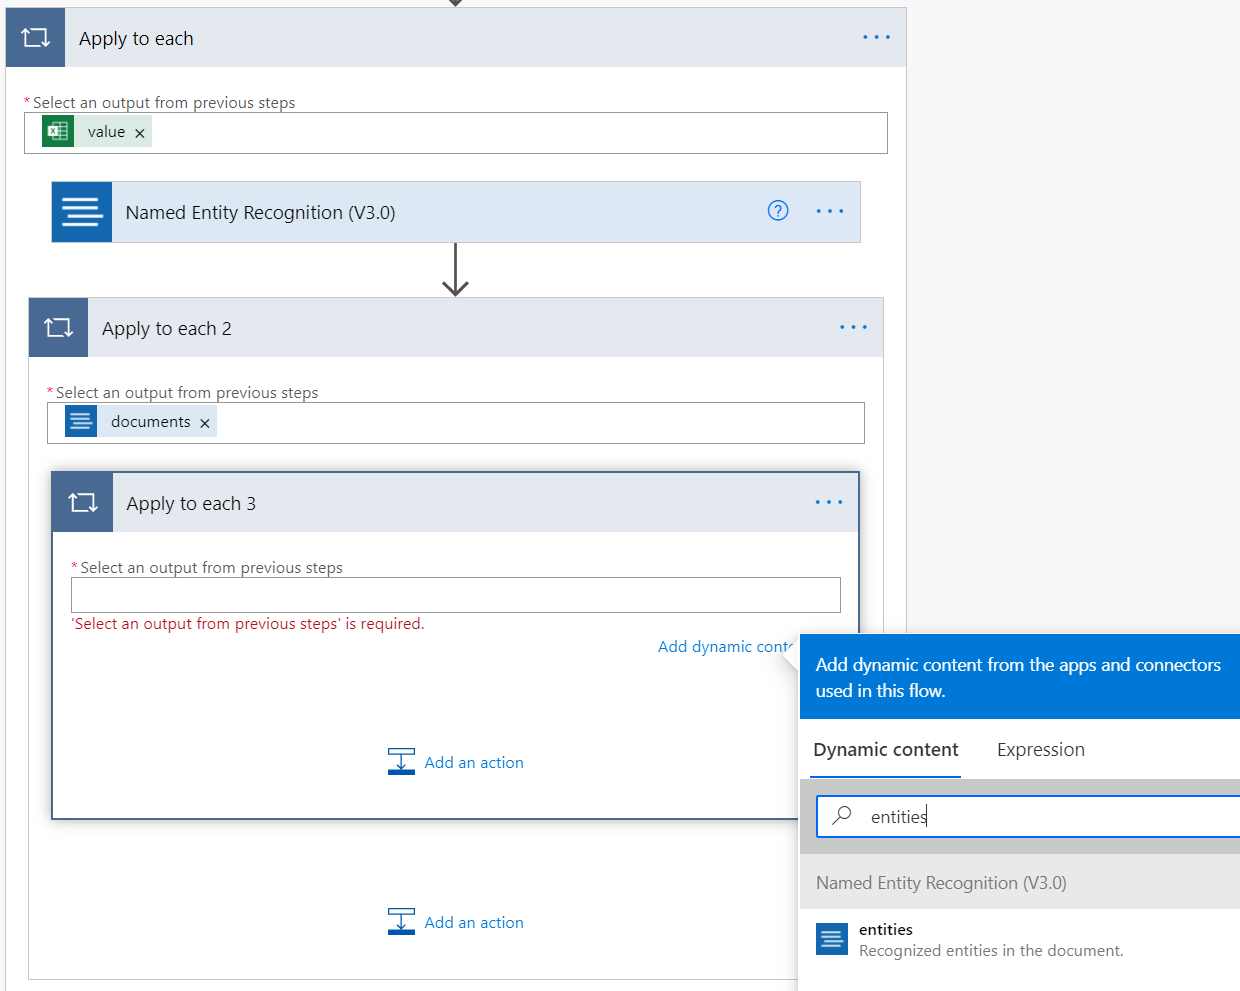
Next, we find the person entity type in the NER output. Within the Apply to each 2, select Add an action, and create another Apply to each action. Select inside the text box and select Entities in the Dynamic Content window that appears.
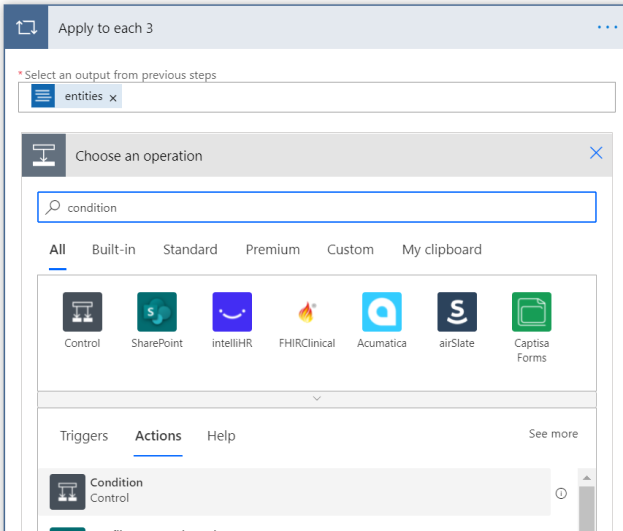
Within the newly created Apply to each 3 action, select Add an action, and add a Condition control.
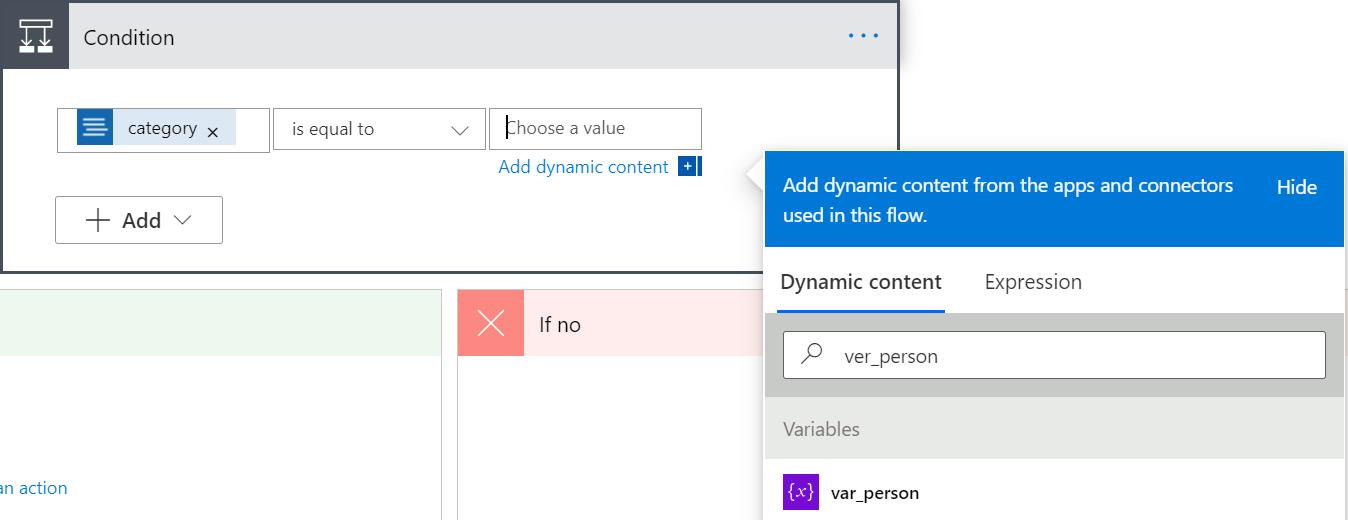
In the Condition window, select the first text box. In the Dynamic content window, search for Category and select it.
Make sure the second box is set to is equal to. Then select the third box, and search for var_person in the Dynamic content window.
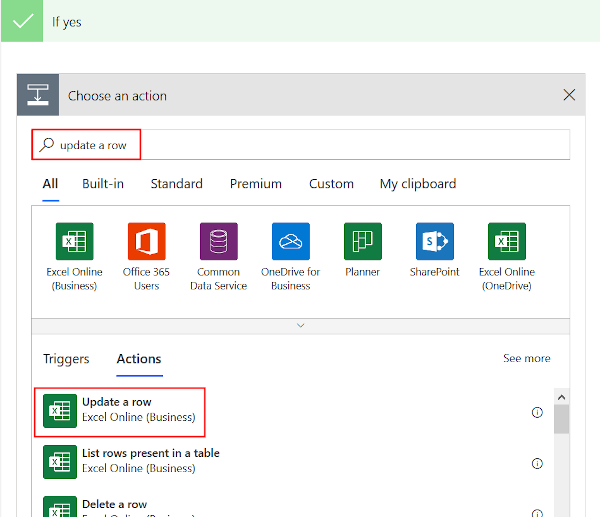
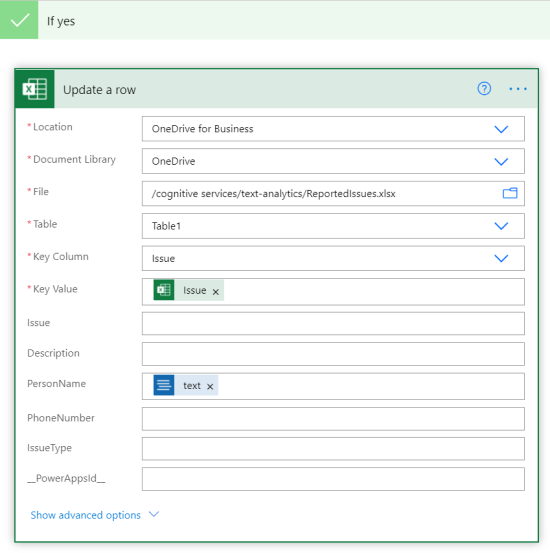
In the If yes condition, type in Excel then select Update a Row.
Enter the Excel information, and update the Key Column, Key Value, and PersonName fields. This step appends the name detected by the API to the Excel sheet.
Get the phone number
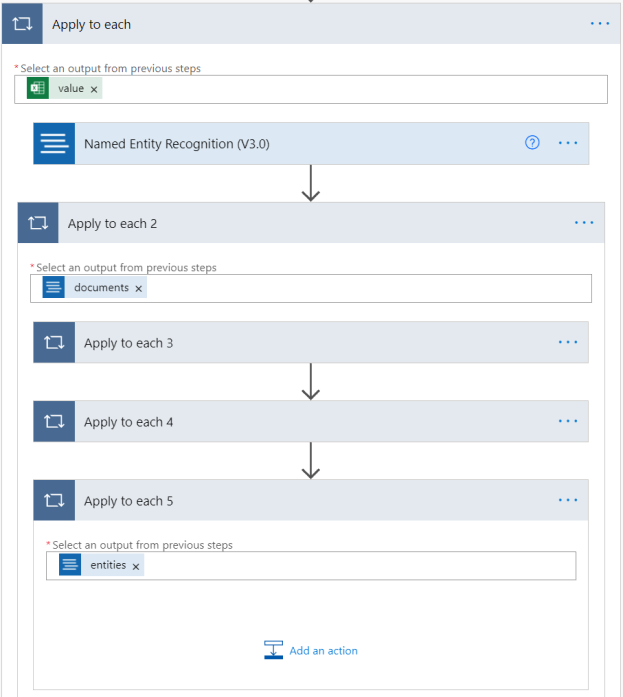
Minimize the Apply to each 3 action by selecting the name. Then add another Apply to each action to Apply to each 2, like before, action is named Apply to each 4. Select the text box, and add entities as the output for this action.
Within Apply to each 4, add a Condition control. This control is named Condition 2. In the first text box, search for, and add categories from the Dynamic content window. Be sure the center box is set to is equal to. Then, in the right text box, enter var_phone.
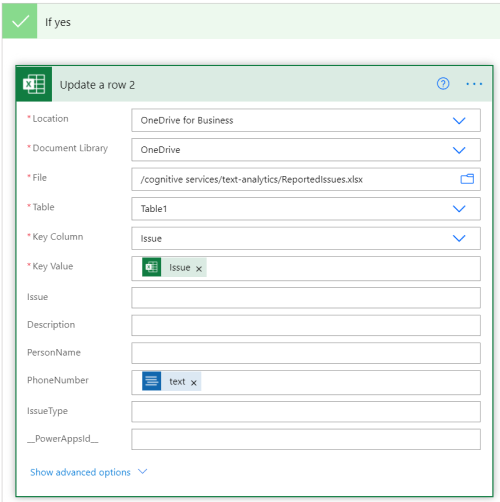
In the If yes condition, add an Update a row action. Then enter the information like we did before, for the phone numbers column of the Excel sheet. This step appends the phone number detected by the API to the Excel sheet.
Get the plumbing issues
Minimize Apply to each 4 by selecting the name. Then create another Apply to each in the parent action. Select the text box, and add Entities as the output for this action from the Dynamic content window.
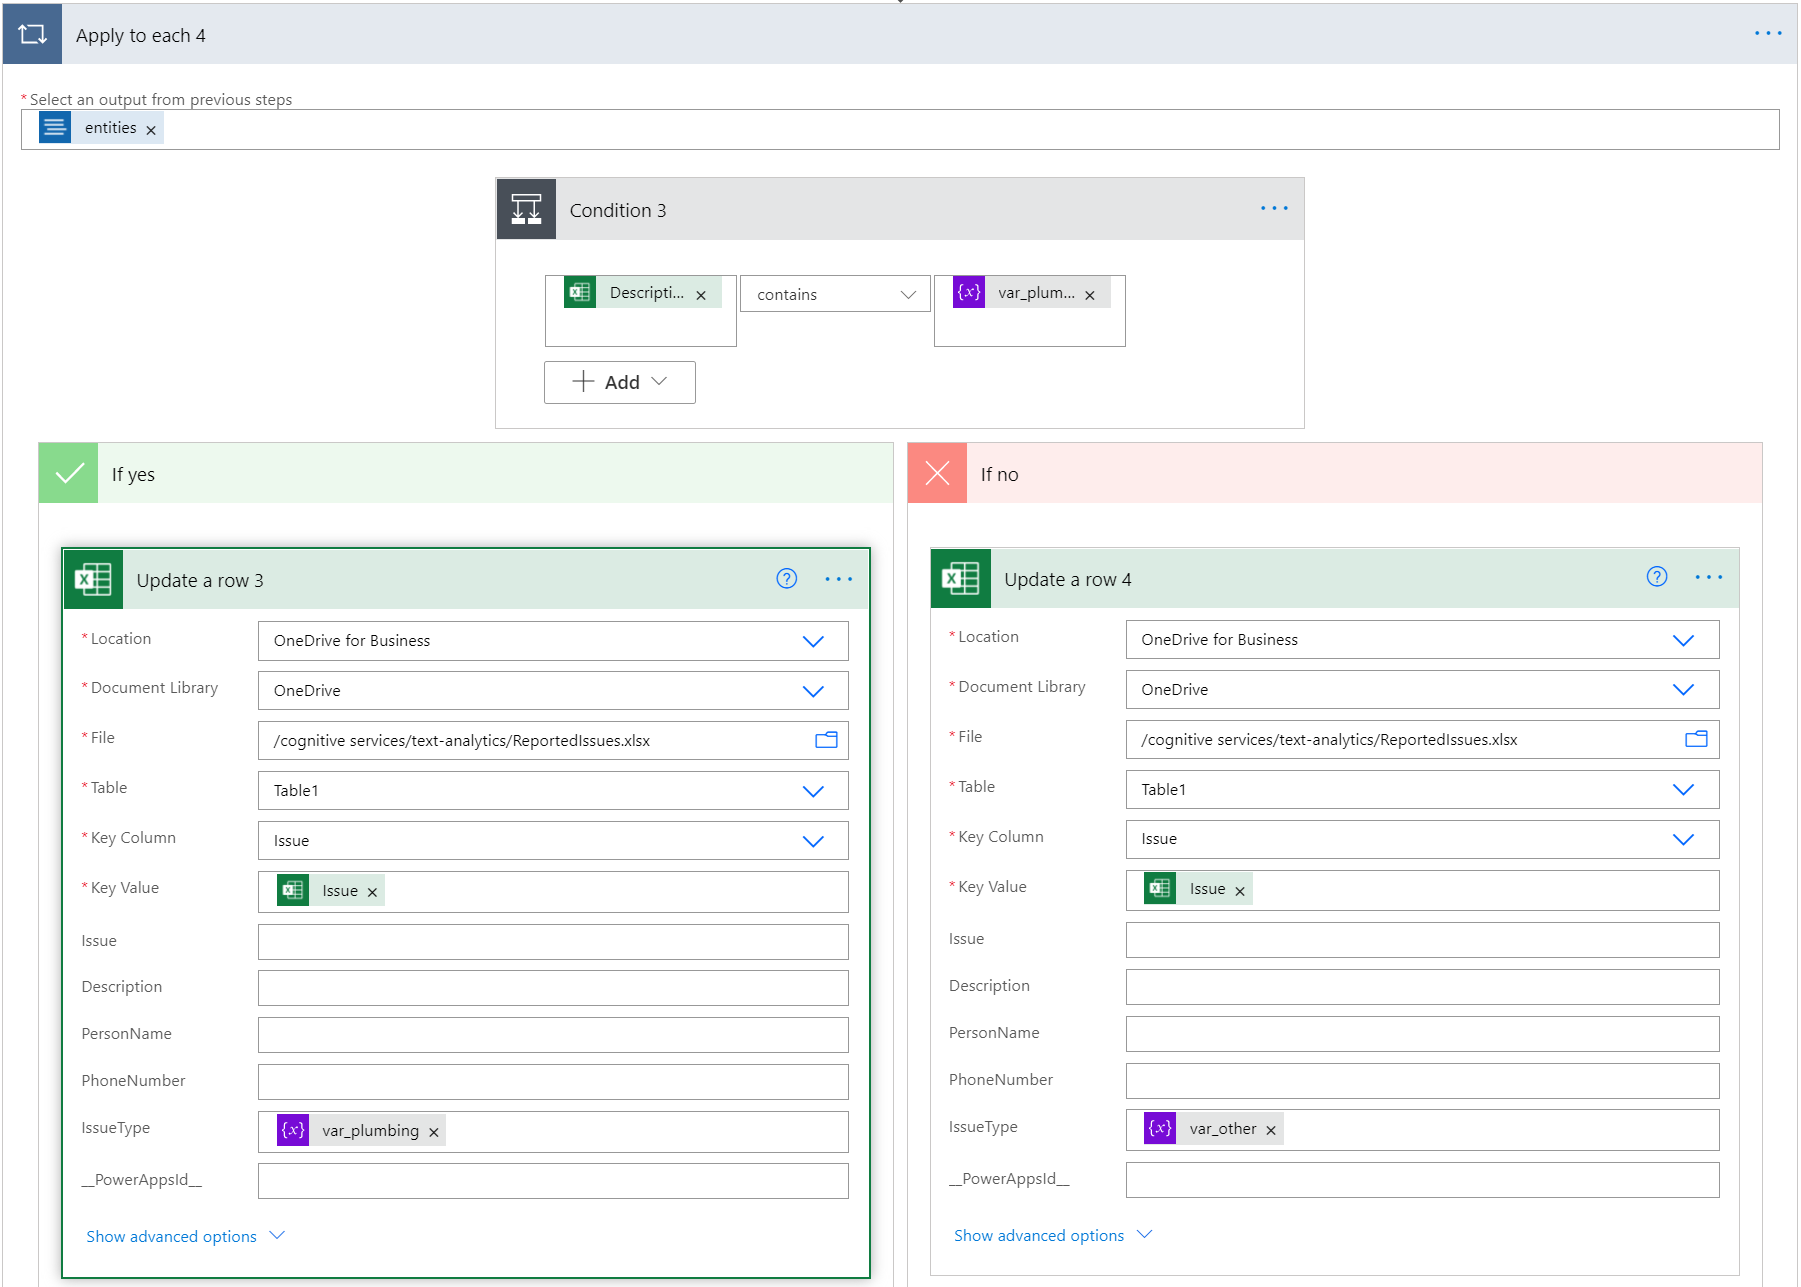
Next, the flow checks if the issue description from the Excel table row contains the word "plumbing." If yes, it adds "plumbing" in the IssueType column. If not, we enter "other."
Inside the Apply to each 4 action, add a Condition Control. Its named Condition 3. In the first text box, search for, and add Description from the Excel file, using the Dynamic content window. Be sure the center box says contains. Then, in the right text box, find and select var_plumbing.
In the If yes condition, select Add an action, and select Update a row. Then enter the information like before. In the IssueType column, select var_plumbing. This step applies a "plumbing" label to the row.
In the If no condition, select Add an action, and select Update a row. Then enter the information like before. In the IssueType column, select var_other. This step applies an "other" label to the row.
Test the workflow
In the top-right corner of the screen, select Save, then Test. Under Test Flow, select manually. Then select Test, and Run flow.
The Excel file gets updated in your OneDrive account. It looks like the following example:

