Note
Access to this page requires authorization. You can try signing in or changing directories.
Access to this page requires authorization. You can try changing directories.
This tutorial deploys a sample app from GitHub to an Azure Kubernetes Service (AKS) cluster by setting up continuous integration (CI) and continuous deployment (CD) in Jenkins. That way, when you update your app by pushing commits to GitHub, Jenkins automatically runs a new container build, pushes container images to Azure Container Registry (ACR), and then runs your app in AKS.
In this tutorial, you'll complete these tasks:
- Deploy a sample Azure vote app to an AKS cluster.
- Create a basic Jenkins project.
- Set up credentials for Jenkins to interact with ACR.
- Create a Jenkins build job and GitHub webhook for automated builds.
- Test the CI/CD pipeline to update an application in AKS based on GitHub code commits.
Prerequisites
To complete this tutorial, you need these items:
Basic understanding of Kubernetes, Git, CI/CD, and container images
An AKS cluster and
kubectlconfigured with the AKS cluster credentialsAn Azure Container Registry (ACR) registry, the ACR login server name, and the AKS cluster configured to authenticate with the ACR registry
The Azure CLI version 2.0.46 or later installed and configured. Run
az --versionto find the version. If you need to install or upgrade, see Install Azure CLI.Docker installed on your development system
A GitHub account, GitHub personal access token, and Git client installed on your development system
If you provide your own Jenkins instance rather than this sample scripted way to deploy Jenkins, your Jenkins instance needs Docker installed and configured and kubectl.
Prepare your app
In this article, you use a sample Azure vote application that contains a web interface hosted in one or more pods, and a second pod hosting Redis for temporary data storage. Before you integrate Jenkins and AKS for automated deployments, first manually prepare and deploy the Azure vote application to your AKS cluster. This manual deployment is version one of the application, and lets you see the application in action.
Note
The sample Azure vote application uses a Linux pod that is scheduled to run on a Linux node.
Fork the following GitHub repository for the sample application - https://github.com/Azure-Samples/azure-voting-app-redis. To fork the repo to your own GitHub account, select the Fork button in the top right-hand corner.
Clone the fork to your development system. Make sure you use the URL of your fork when cloning this repo:
git clone https://github.com/<your-github-account>/azure-voting-app-redis.git
Change to the directory of your cloned fork:
cd azure-voting-app-redis
To create the container images needed for the sample application, use the docker-compose.yaml file with docker-compose:
docker-compose up -d
The required base images are pulled and the application containers built. You can then use the docker images command to see the created image. Three images have been downloaded or created. The azure-vote-front image contains the application and uses the nginx-flask image as a base. The redis image is used to start a Redis instance:
$ docker images

REPOSITORY                   TAG        IMAGE ID            CREATED             SIZE
azure-vote-front             latest     9cc914e25834        40 seconds ago      694MB
redis                        latest     a1b99da73d05        7 days ago          106MB
tiangolo/uwsgi-nginx-flask   flask      788ca94b2313        9 months ago        694MB
Before you can push the azure-vote-front container image to ACR, get your ACR login server with the az acr list command. The following example gets the ACR login server address for a registry in the resource group named myResourceGroup:
az acr list --resource-group myResourceGroup --query "[].{acrLoginServer:loginServer}" --output table
Use the docker tag command to tag the image with the ACR login server name and a version number of v1. Provide your own <acrLoginServer> name obtained in the previous step:
docker tag azure-vote-front <acrLoginServer>/azure-vote-front:v1
Finally, push the azure-vote-front image to your ACR registry. Again, replace <acrLoginServer> with the login server name of your own ACR registry, such as myacrregistry.azurecr.cn:
docker push <acrLoginServer>/azure-vote-front:v1
Deploy the sample application to AKS
To deploy the sample application to your AKS cluster, you can use the Kubernetes manifest file in the root of the Azure vote repository repo. Open the azure-vote-all-in-one-redis.yaml manifest file with an editor such as vi. Replace microsoft with your ACR login server name. This value is found on line 47 of the manifest file:
containers:
- name: azure-vote-front
  image: dockerhub.azk8s.cn/microsoft/azure-vote-front:v1
Next, use the kubectl apply command to deploy the application to your AKS cluster:
kubectl apply -f azure-vote-all-in-one-redis.yaml
A Kubernetes load balancer service is created to expose the application to the internet. This process can take a few minutes. To monitor the progress of the load balancer deployment, use the kubectl get service command with the --watch argument. Once the EXTERNAL-IP address has changed from pending to an IP address, use Control + C to stop the kubectl watch process.
$ kubectl get service azure-vote-front --watch

NAME               TYPE           CLUSTER-IP    EXTERNAL-IP   PORT(S)        AGE
azure-vote-front   LoadBalancer   10.0.215.27   <pending>     80:30747/TCP   22s
azure-vote-front   LoadBalancer   10.0.215.27   40.117.57.239   80:30747/TCP   2m
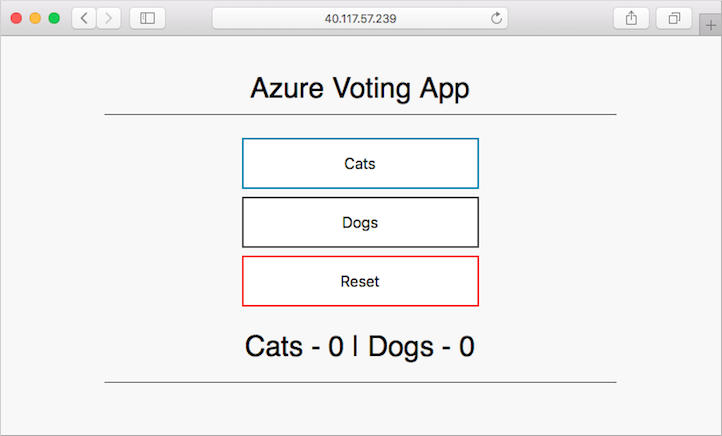
To see the application in action, open a web browser to the external IP address of your service. The Azure vote application is displayed, as shown in the following example:
Deploy Jenkins to an Azure VM
To quickly deploy Jenkins for use in this article, you can use the following script to deploy an Azure virtual machine, configure network access, and complete a basic installation of Jenkins. For authentication between Jenkins and the AKS cluster, the script copies your Kubernetes configuration file from your development system to the Jenkins system.
Warning
This sample script is for demo purposes to quickly provision a Jenkins environment that runs on an Azure VM. It uses the Azure custom script extension to configure a VM and then display the required credentials. Your ~/.kube/config is copied to the Jenkins VM.
Run the following commands to download and run the script. You should review the contents of any script prior to running it - https://raw.githubusercontent.com/Azure-Samples/azure-voting-app-redis/master/jenkins-tutorial/deploy-jenkins-vm.sh.
curl https://raw.githubusercontent.com/Azure-Samples/azure-voting-app-redis/master/jenkins-tutorial/deploy-jenkins-vm.sh > azure-jenkins.sh
sh azure-jenkins.sh
It takes a few minutes to create the VM and deploy the required components for Docker and Jenkins. When the script has completed, it outputs an address for the Jenkins server and a key to unlock the dashboard, as shown in the following example output:
Open a browser to http://40.115.43.83:8080
Enter the following to Unlock Jenkins:
667e24bba78f4de6b51d330ad89ec6c6
Open a web browser to the URL displayed and enter the unlock key. Follow the on-screen prompts to complete the Jenkins configuration:
- Choose Install suggested plugins
- Create the first admin user. Enter a username, such as azureuser, then provide your own secure password. Finally, type a full name and e-mail address.
- Select Save and Finish
- Once Jenkins is ready, select Start using Jenkins
- If your web browser displays a blank page when you start using Jenkins, restart the Jenkins service. To restart the service, SSH to the public IP address of your Jenkins instance and type
sudo service jenkins restart. Once the service has restarted, refresh you web browser.
- If your web browser displays a blank page when you start using Jenkins, restart the Jenkins service. To restart the service, SSH to the public IP address of your Jenkins instance and type
- Sign in to Jenkins with the username and password you created in the install process.
Create a Jenkins environment variable
A Jenkins environment variable is used to hold the ACR login server name. This variable is referenced during the Jenkins build job. To create this environment variable, complete the following steps:
On the left-hand side of the Jenkins portal, select Manage Jenkins > Configure System
Under Global Properties, select Environment variables. Add a variable with the name
ACR_LOGINSERVERand the value of your ACR login server.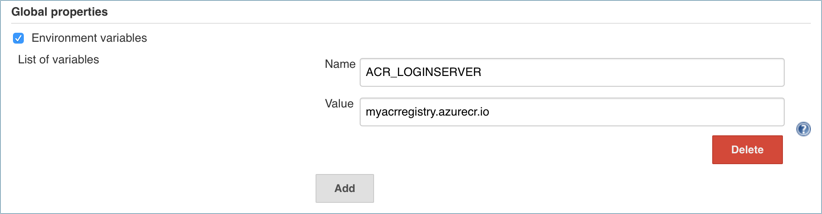
When complete, click Save at the bottom of the Jenkins configuration page.
Create a Jenkins credential for ACR
To allow Jenkins to build and then push updated container images to ACR, you need to specify credentials for ACR. This authentication can use Azure Active Directory service principals. In the pre-requisites, you configured the service principal for your AKS cluster with Reader permissions to your ACR registry. These permissions allow the AKS cluster to pull images from the ACR registry. During the CI/CD process, Jenkins builds new container images based on application updates, and needs to then push those images to the ACR registry. For separation of roles and permissions, now configure a service principal for Jenkins with Contributor permissions to your ACR registry.
Create a service principal for Jenkins to use ACR
First, create a service principal using the az ad sp create-for-rbac command:
$ az ad sp create-for-rbac --skip-assignment

{
  "appId": "626dd8ea-042d-4043-a8df-4ef56273670f",
  "displayName": "azure-cli-2018-09-28-22-19-34",
  "name": "http://azure-cli-2018-09-28-22-19-34",
  "password": "1ceb4df3-c567-4fb6-955e-f95ac9460297",
  "tenant": "72f988bf-86f1-41af-91ab-2d7cd011db48"
}
Make a note of the appId and password shown in your output. These values are used in following steps to configure the credential resource in Jenkins.
Get the resource ID of your ACR registry using the az acr show command, and store it as a variable. Provide your resource group name and ACR name:
ACR_ID=$(az acr show --resource-group myResourceGroup --name <acrLoginServer> --query "id" --output tsv)
Now create a role assignment to assign the service principal Contributor rights to the ACR registry. In the following example, provide your own appId shown in the output a previous command to create the service principal:
az role assignment create --assignee 626dd8ea-042d-4043-a8df-4ef56273670f --role Contributor --scope $ACR_ID
Create a credential resource in Jenkins for the ACR service principal
With the role assignment created in Azure, now store your ACR credentials in a Jenkins credential object. These credentials are referenced during the Jenkins build job.
Back on the left-hand side of the Jenkins portal, click Credentials > Jenkins > Global credentials (unrestricted) > Add Credentials
Ensure that the credential kind is Username with password and enter the following items:
- Username - The appId of the service principal created for authentication with your ACR registry.
- Password - The password of the service principal created for authentication with your ACR registry.
- ID - Credential identifier such as acr-credentials
When complete, the credentials form looks like the following example:

Click OK and return to the Jenkins portal.
Create a Jenkins project
From the home page of your Jenkins portal, select New item on the left-hand side:
Enter azure-vote as job name. Choose Freestyle project, then select OK
Under the General section, select GitHub project and enter your forked repo URL, such as https://github.com/<your-github-account>/azure-voting-app-redis
Under the Source code management section, select Git, enter your forked repo .git URL, such as https://github.com/<your-github-account>/azure-voting-app-redis.git
Under the Build Triggers section, select GitHub hook trigger for GITscm polling
Under Build Environment, select Use secret texts or files
Under Bindings, select Add > Username and password (separated)
Enter
ACR_IDfor the Username Variable, andACR_PASSWORDfor the Password Variable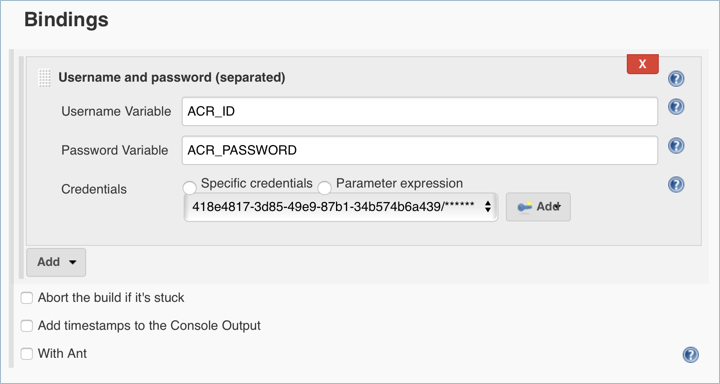
Choose to add a Build Step of type Execute shell and use the following text. This script builds a new container image and pushes it to your ACR registry.
# Build new image and push to ACR.
WEB_IMAGE_NAME="${ACR_LOGINSERVER}/azure-vote-front:kube${BUILD_NUMBER}"
docker build -t $WEB_IMAGE_NAME ./azure-vote
docker login ${ACR_LOGINSERVER} -u ${ACR_ID} -p ${ACR_PASSWORD}
docker push $WEB_IMAGE_NAME
Add another Build Step of type Execute shell and use the following text. This script updates the application deployment in AKS with the new container image from ACR.
# Update kubernetes deployment with new image.
WEB_IMAGE_NAME="${ACR_LOGINSERVER}/azure-vote-front:kube${BUILD_NUMBER}"
kubectl set image deployment/azure-vote-front azure-vote-front=$WEB_IMAGE_NAME --kubeconfig /var/lib/jenkins/config
Once completed, click Save.
Test the Jenkins build
Before you automate the job based on GitHub commits, first manually test the Jenkins build. This manual build validates that the job has been correctly configured, the proper Kubernetes authentication file is in place, and that the authentication with ACR works.
On the left-hand menu of the project, select Build Now.
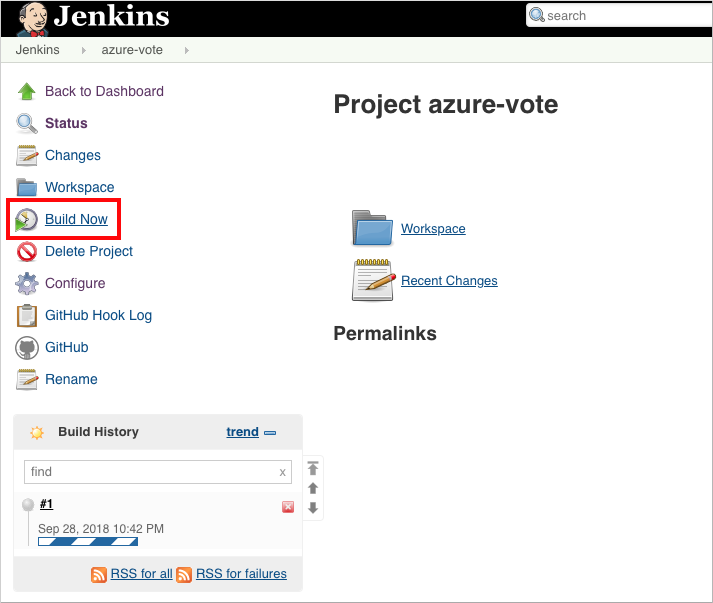
The first build takes a minute or two as the Docker image layers are pulled down to the Jenkins server. Subsequent builds can use the cached image layers to improve the build times.
During the build process, the GitHub repository is cloned to the Jenkins build server. A new container image is built and pushed to the ACR registry. Finally, the Azure vote application running on the AKS cluster is updated to use the new image. Because no changes have been made to the application code, the application is not changed if you view the sample app in a web browser.
Once the build job is complete, click on build #1 under build history. Select Console Output and view the output from the build process. The final line should indicate a successful build.
Create a GitHub webhook
With a successful manual build complete, now integrate GitHub into the Jenkins build. A webhook can be used to run the Jenkins build job each time a code commit is made in GitHub. To create the GitHub webhook, complete the following steps:
Browse to your forked GitHub repository in a web browser.
Select Settings, then select Webhooks on the left-hand side.
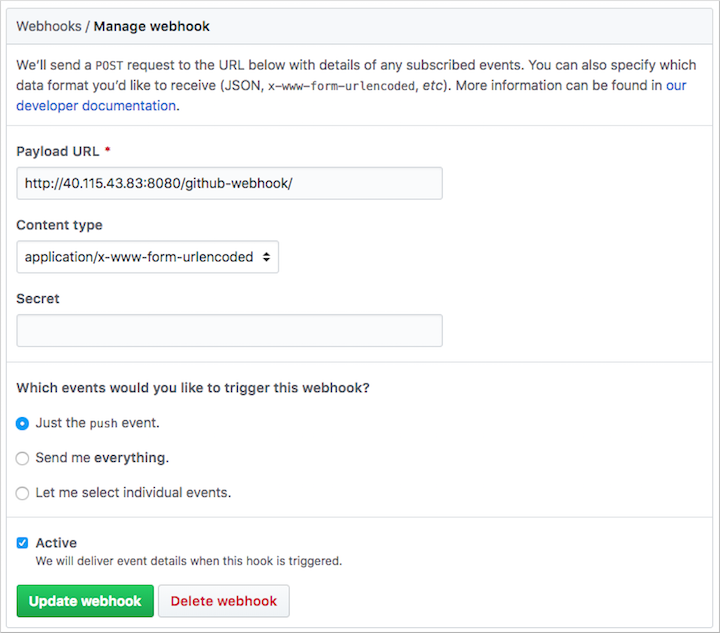
Choose to Add webhook. For the Payload URL, enter
http://<publicIp:8080>/github-webhook/, where<publicIp>is the IP address of the Jenkins server. Make sure to include the trailing /. Leave the other defaults for content type and to trigger on push events.Select Add webhook.
Test the complete CI/CD pipeline
Now you can test the whole CI/CD pipeline. When you push a code commit to GitHub, the following steps happen:
- The GitHub webhook reaches out to Jenkins.
- Jenkins starts the build job and pulls the latest code commit from GitHub.
- A Docker build is started using the updated code, and the new container image is tagged with the latest build number.
- This new container image is pushed to Azure Container Registry.
- Your application deployed to Azure Kubernetes Service updates with the latest container image from the Azure Container Registry registry.
On your development machine, open up the cloned application with a code editor. Under the /azure-vote/azure-vote directory, open the file named config_file.cfg. Update the vote values in this file to something other than cats and dogs, as shown in the following example:
# UI Configurations
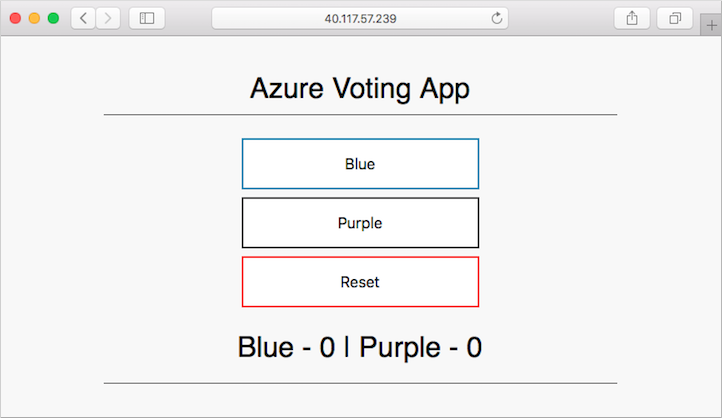
TITLE = 'Azure Voting App'
VOTE1VALUE = 'Blue'
VOTE2VALUE = 'Purple'
SHOWHOST = 'false'
When updated, save the file, commit the changes, and push these to your fork of the GitHub repository. The GitHub webhook triggers a new build job in Jenkins. In the Jenkins web dashboard, monitor the build process. It takes a few seconds to pull the latest code, create and push the updated image, and deploy the updated application in AKS.
Once the build is complete, refresh your web browser of the sample Azure vote application. Your changes are displayed, as shown in the following example: