Note
Access to this page requires authorization. You can try signing in or changing directories.
Access to this page requires authorization. You can try changing directories.
This quickstart helps you configure a firewall for your Azure Analysis Services server. Enabling a firewall and configuring IP address ranges for only those computers accessing your server are an important part of securing your server and data.
Prerequisites
- An Analysis Services server in your subscription. To learn more, see Quickstart: Create a server - Portal or Quickstart: Create a server - PowerShell
- One or more IP address ranges for client computers (if needed).
Sign in to the Azure portal
Configure a firewall
Click on your server to open the Overview page.
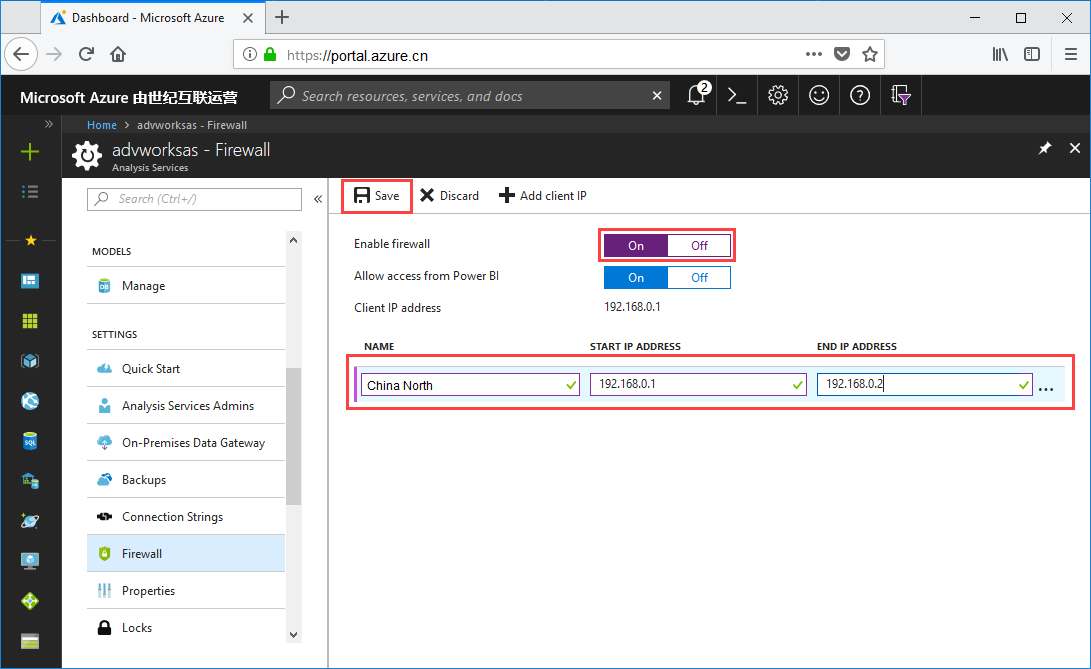
In SETTINGS > Firewall > Enable firewall, select On.
To enable connections from Power BI and Power BI Premium, in Allow access from Power BI, select On.
(Optional) Specify one or more IP address ranges. Enter a name, starting, and ending IP address for each range. Firewall rule name should be limited to 128 characters and can only contain uppercase characters, lowercase characters, numbers, underscore, and hyphen. Blank spaces and other special characters are not allowed.
Click Save.
Clean up resources
When no longer needed, delete IP address ranges, or disable the firewall.
Next steps
In this quickstart, you learned how to configure a firewall for your server. Now that you have server, and secured it with a firewall, you can add a basic sample data model to it from the portal. Having a sample model is helpful to learn about configuring model database roles and testing client connections. To learn more, continue to the tutorial for adding a sample model.