Note
Access to this page requires authorization. You can try signing in or changing directories.
Access to this page requires authorization. You can try changing directories.
App Service Environment is a single-tenant deployment of Azure App Service. You use it with an Azure virtual network, and you're the only user of this system. Apps deployed are subject to the networking features that are applied to the subnet. There aren't any additional features that need to be enabled on your apps to be subject to those networking features.
Create an app
To create an app in your App Service Environment, you use the same process as when you normally create an app, but with a few small differences. When you create a new App Service plan:
- Instead of choosing a geographic location in which to deploy your app, you choose an App Service Environment as your location.
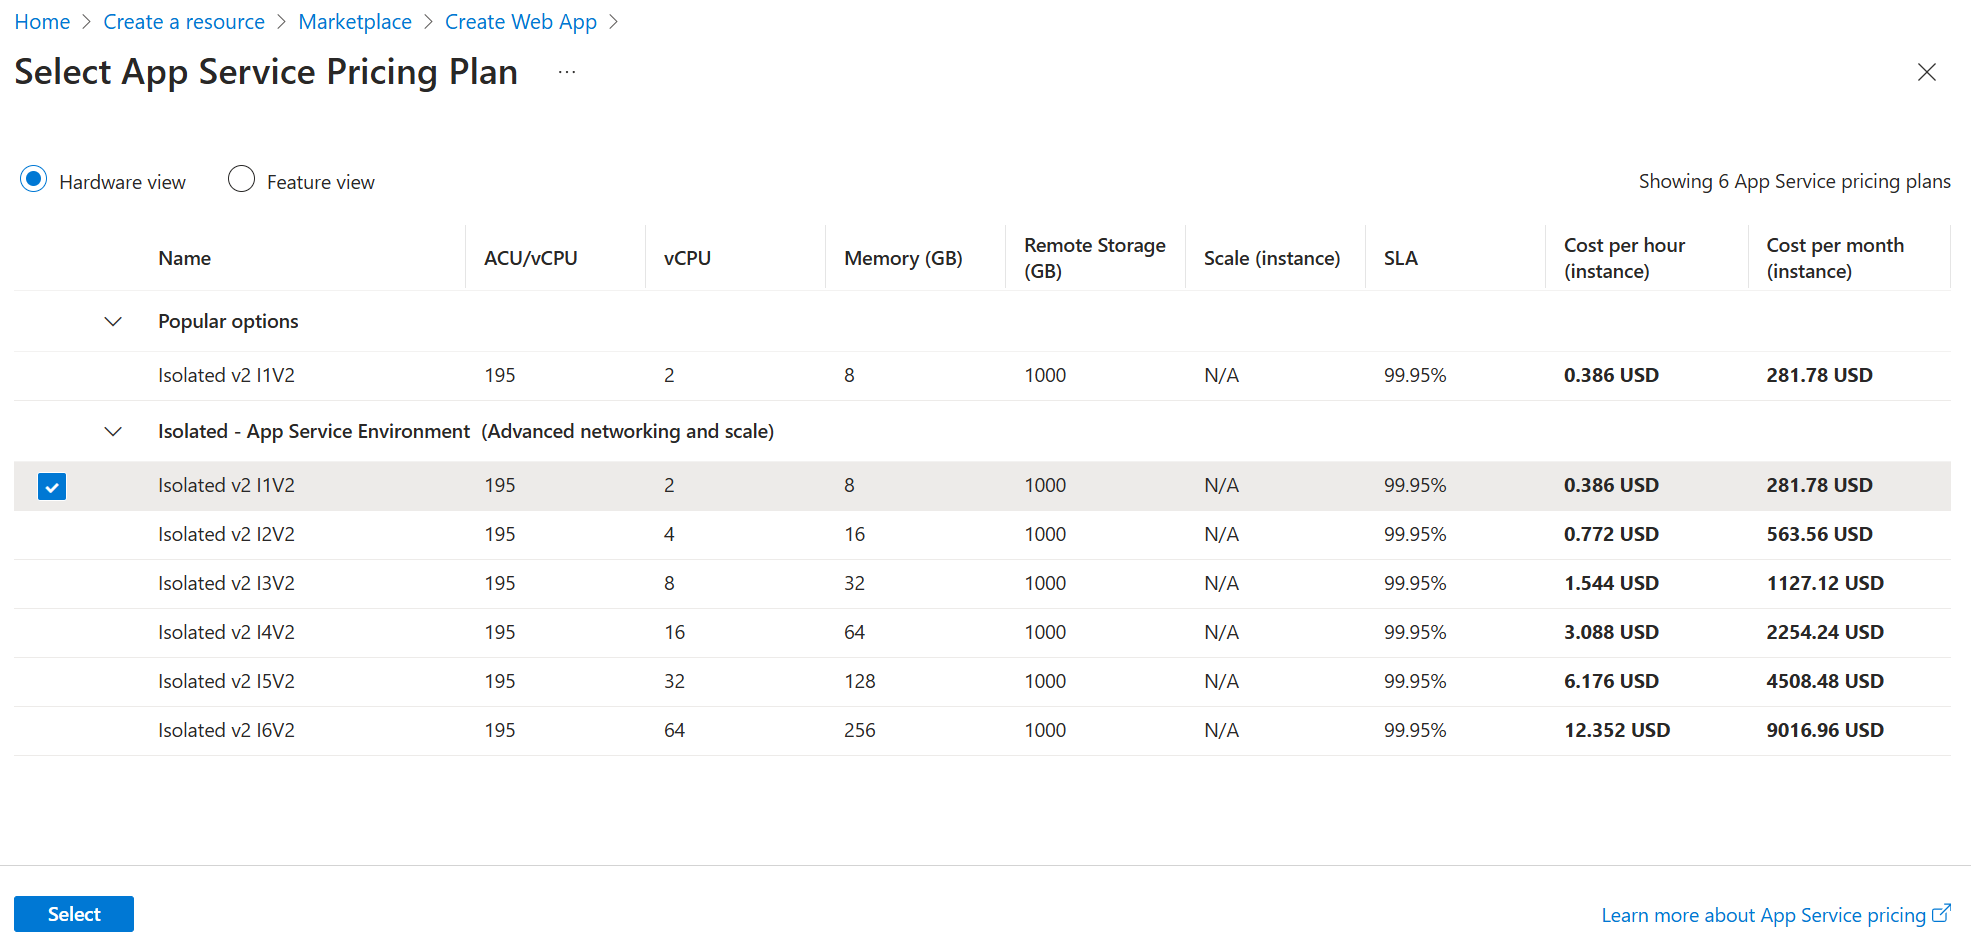
- All App Service plans created in an App Service Environment can only be in an isolated v2 pricing tier.
If you don't yet have one, create an App Service Environment.
To create an app in an App Service Environment:
- Select Create a resource > Web + Mobile > Web App.
- Select a subscription.
- Enter a name for a new resource group, or select Use existing and select one from the dropdown list.
- Enter a name for the app. If you already selected an App Service plan in an App Service Environment, the domain name for the app reflects the domain name of the App Service Environment.
- For Publish, Runtime stack, and Operating System, make your selections as appropriate.
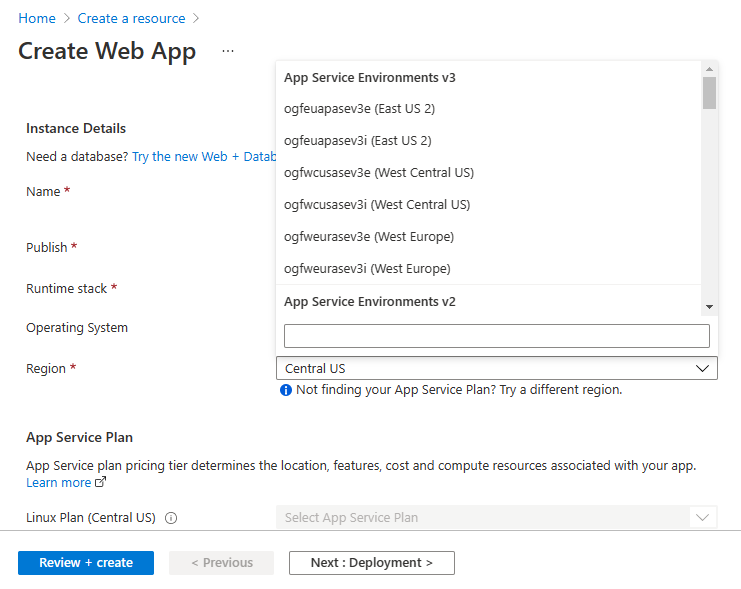
- For Region, select a pre-existing App Service Environment v3. If you want to create a new App Service Environment, select a region.
- Select an existing App Service plan, or create a new one. If you're creating a new plan, select the size that you want for your App Service plan. The only SKU you can select for your app is an Isolated v2 pricing SKU. Making a new App Service plan will normally take less than 20 minutes.
- If you chose to create a new App Service Environment as part of creating your new App Service plan, fill out the name and virtual IP type.
- Select Next: Monitoring. If you want to enable Application Insights with your app, you can do it here during the creation flow.
- Select Next: Tags, and add any tags you want to the app.
- Select Review + create. Make sure that the information is correct, and then select Create.
Windows and Linux apps can be in the same App Service Environment, but can't be in the same App Service plan.
How scale works
Every App Service app runs in an App Service plan. App Service Environments hold App Service plans, and App Service plans hold apps. When you scale an app, you also scale the App Service plan and all the apps in that same plan.
When you scale an App Service plan, the needed infrastructure is added automatically. Be aware that there's a time delay to scale operations while the infrastructure is being added. For example, when you scale an App Service plan, and you have another scale operation of the same operating system and size running, there might be a delay of a few minutes until the requested scale starts.
A scale operation on one size and operating system won't affect scaling of the other combinations of size and operating system. For example, if you are scaling a Windows I2v2 App Service plan, a scale operation to a Windows I3v2 App Service plan starts immediately. Scaling normally takes less than 15 minutes but can take up to 45 minutes.
In a multitenant App Service, scaling is immediate, because a pool of shared resources is readily available to support it. App Service Environment is a single-tenant service, so there's no shared buffer, and resources are allocated based on need.
App access
In an App Service Environment with an internal virtual IP (VIP), the domain suffix used for app creation is .<asename>.appserviceenvironment.cn. If your App Service Environment is named my-ase, and you host an app called contoso, you reach it at these URLs:
contoso.my-ase.appserviceenvironment.cncontoso.scm.my-ase.appserviceenvironment.cn
Apps hosted on an App Service Environment that uses an internal VIP are only accessible if you're in the same virtual network, or are connected to that virtual network. Similarly, publishing is only possible if you're in the same virtual network or are connected to that virtual network.
In an App Service Environment with an external VIP, the domain suffix used for app creation is .<asename>.p.chinacloudsites.cn. If your App Service Environment is named my-ase, and you host an app called contoso, you reach it at these URLs:
contoso.my-ase.p.chinacloudsites.cncontoso.scm.my-ase.p.chinacloudsites.cn
You use the scm URL to access the Kudu console, or for publishing your app by using web deploy. For more information, see Kudu console for Azure App Service. The Kudu console gives you a web UI for debugging, uploading files, and editing files.
DNS configuration
If your App Service Environment is made with an external VIP, your apps are automatically put into public DNS. If your App Service Environment is made with an internal VIP, you might need to configure DNS for it.
If you selected having Azure DNS private zones configured automatically, then DNS is configured in the virtual network of your App Service Environment. If you selected to configure DNS manually, you need to use your own DNS server or configure Azure DNS private zones.
To find the inbound address, in the App Service Environment portal, select IP addresses.
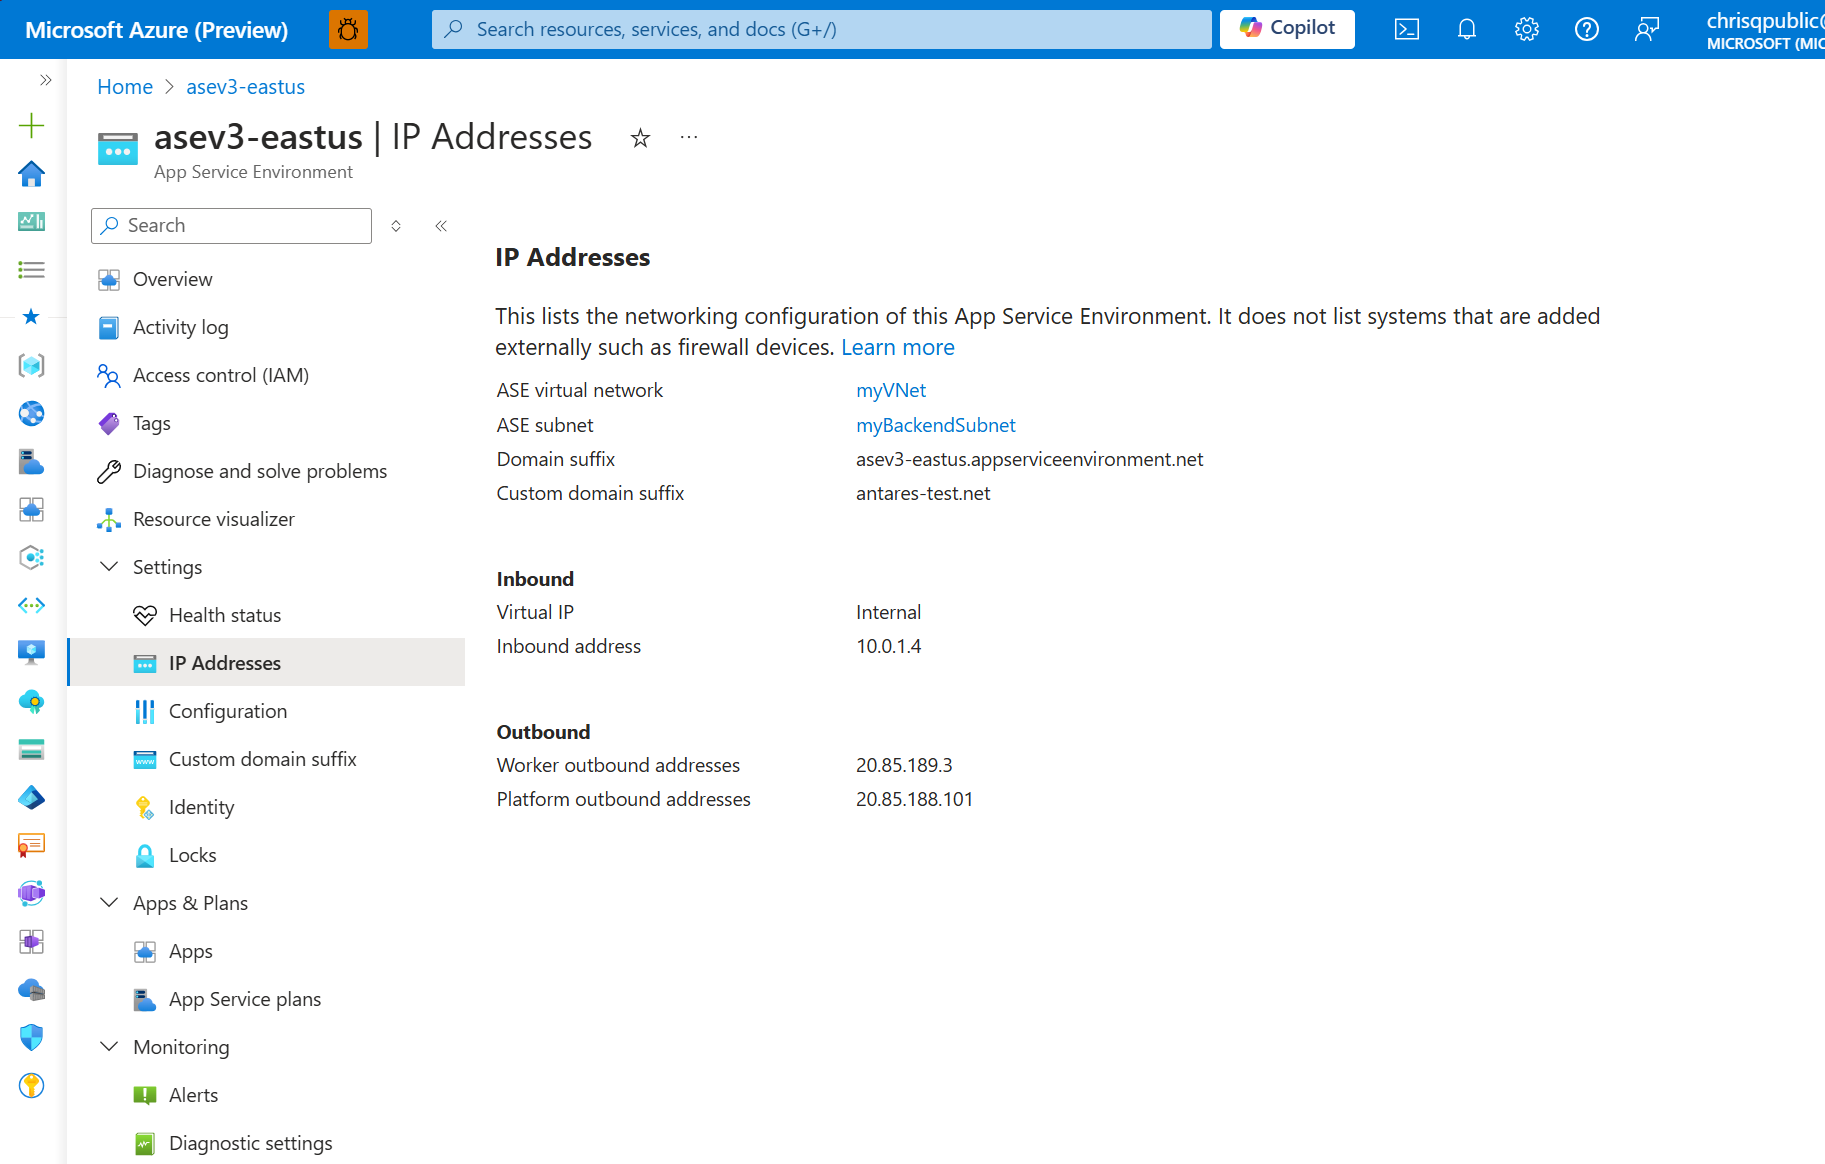
If you want to use your own DNS server, add the following records:
- Create a zone for
<App Service Environment-name>.appserviceenvironment.cn. - Create an A record in that zone that points * to the inbound IP address used by your App Service Environment.
- Create an A record in that zone that points @ to the inbound IP address used by your App Service Environment.
- Create a zone in
<App Service Environment-name>.appserviceenvironment.cnnamedscm. - Create an A record in the
scmzone that points * to the inbound address used by your App Service Environment.
To configure DNS in Azure DNS private zones:
- Create an Azure DNS private zone named
<App Service Environment-name>.appserviceenvironment.cn. - Create an A record in that zone that points * to the inbound IP address.
- Create an A record in that zone that points @ to the inbound IP address.
- Create an A record in that zone that points *.scm to the inbound IP address.
The DNS settings for the default domain suffix of your App Service Environment don't restrict your apps to only being accessible by those names. You can set a custom domain name without any validation on your apps in an App Service Environment. If you then want to create a zone named contoso.net, you can do so and point it to the inbound IP address. The custom domain name works for app requests, and if the custom domain suffix certificate includes a wildcard SAN for scm, custom domain name also work for scm site and you can create a *.scm record and point it to the inbound IP address.
Publishing
You can publish by any of the following methods:
- Web deployment
- Continuous integration (CI)
- Drag-and-drop in the Kudu console
- An integrated development environment (IDE), such as Visual Studio, Eclipse, or IntelliJ IDEA
With an internal VIP App Service Environment, the publishing endpoints are only available through the inbound address. If you don't have network access to the inbound address, you can't publish any apps on that App Service Environment. Your IDEs must also have network access to the inbound address on the App Service Environment to publish directly to it.
Without additional changes, internet-based CI systems like GitHub and Azure DevOps don't work with an internal VIP App Service Environment. The publishing endpoint isn't internet accessible. You can enable publishing to an internal VIP App Service Environment from Azure DevOps, by installing a self-hosted release agent in the virtual network.
Storage
You have 1 TB of storage for all the apps in your App Service Environment. An App Service plan in the isolated pricing SKU has a limit of 250 GB. In an App Service Environment, 250 GB of storage is added per App Service plan, up to the 1 TB limit. You can have more App Service plans than just four, but there is no additional storage beyond the 1 TB limit.
Monitoring
The platform infrastructure in App Service Environment v3 is being monitored and managed by Microsoft, and is scaled as needed. As a customer, you should only monitor the App Service plans and the individual apps running and take appropriate actions. You will see some metrics visible for your App Service Environment, but these are used for older version only and will not omit any values for this version. If you are using v1 or v2 of App Service Environment, refer to this section for guidance on monitoring and scaling.
Logging
You can integrate with Azure Monitor to send logs to Azure Storage, Azure Event Hubs, or Azure Monitor Logs. The following table shows the situations and messages you can log:
| Situation | Message |
|---|---|
| App Service Environment subnet is almost out of space. | The specified App Service Environment is in a subnet that is almost out of space. There are {0} remaining addresses. Once these addresses are exhausted, the App Service Environment will not be able to scale. |
| App Service Environment is approaching total instance limit. | The specified App Service Environment is approaching the total instance limit of the App Service Environment. It currently contains {0} App Service Plan instances of a maximum 200 instances. |
| App Service Environment is suspended. | The specified App Service Environment is suspended. The App Service Environment suspension may be due to an account shortfall or an invalid virtual network configuration. Resolve the root cause and resume the App Service Environment to continue serving traffic. |
| App Service Environment upgrade has started. | A platform upgrade to the specified App Service Environment has begun. Expect delays in scaling operations. |
| App Service Environment upgrade has completed. | A platform upgrade to the specified App Service Environment has finished. |
| App Service plan creation has started. | An App Service plan ({0}) creation has started. Desired state: {1} I{2}v2 workers. |
| Scale operations have completed. | An App Service plan ({0}) creation has finished. Current state: {1} I{2}v2 workers. |
| Scale operations have failed. | An App Service plan ({0}) creation has failed. This may be due to the App Service Environment operating at peak number of instances, or run out of subnet addresses. |
| Scale operations have started. | An App Service plan ({0}) has begun scaling. Current state: {1} I(2)v2. Desired state: {3} I{4}v2 workers. |
| Scale operations have completed. | An App Service plan ({0}) has finished scaling. Current state: {1} I{2}v2 workers. |
| Scale operations were interrupted. | An App Service plan ({0}) was interrupted while scaling. Previous desired state: {1} I{2}v2 workers. New desired state: {3} I{4}v2 workers. |
| Scale operations have failed. | An App Service plan ({0}) has failed to scale. Current state: {1} I{2}v2 workers. |
To enable logging, follow these steps:
- In the portal, go to Diagnostic settings.
- Select Add diagnostic setting.
- Provide a name for the log integration.
- Select and configure the log destinations that you want.
- Select AppServiceEnvironmentPlatformLogs.
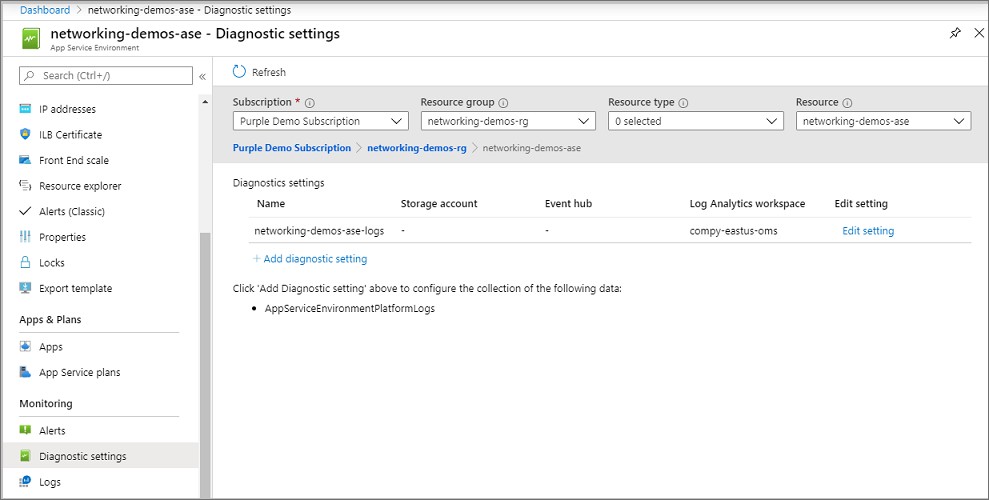
If you integrate with Azure Monitor Logs, you can see the logs by selecting Logs from the App Service Environment portal, and creating a query against AppServiceEnvironmentPlatformLogs. Logs are only emitted when your App Service Environment has an event that triggers the logs. If your App Service Environment doesn't have such an event, there won't be any logs. To quickly see an example of logs, perform a scale operation with an App Service plan. You can then run a query against AppServiceEnvironmentPlatformLogs to see those logs.
Create an alert
To create an alert against your logs, follow the instructions in Create, view, and manage log alerts by using Azure Monitor. In brief:
- Open the Alerts page in your App Service Environment portal.
- Select New alert rule.
- For Resource, select your Azure Monitor Logs workspace.
- Set your condition with a custom log search to use a query. For example, you might set the following: AppServiceEnvironmentPlatformLogs | where ResultDescription contains has begun scaling. Set the threshold as appropriate.
- Add or create an action group (optional). The action group is where you define the response to the alert, such as sending an email or an SMS message.
- Name your alert and save it.
Internal encryption
You can't see the internal components or the communication within the App Service Environment system. To enable higher throughput, encryption isn't enabled by default between internal components. The system is secure because the traffic is inaccessible to being monitored or accessed. If you have a compliance requirement for complete encryption of the data path, you can enable this. Select Configuration, as shown in the following screenshot.
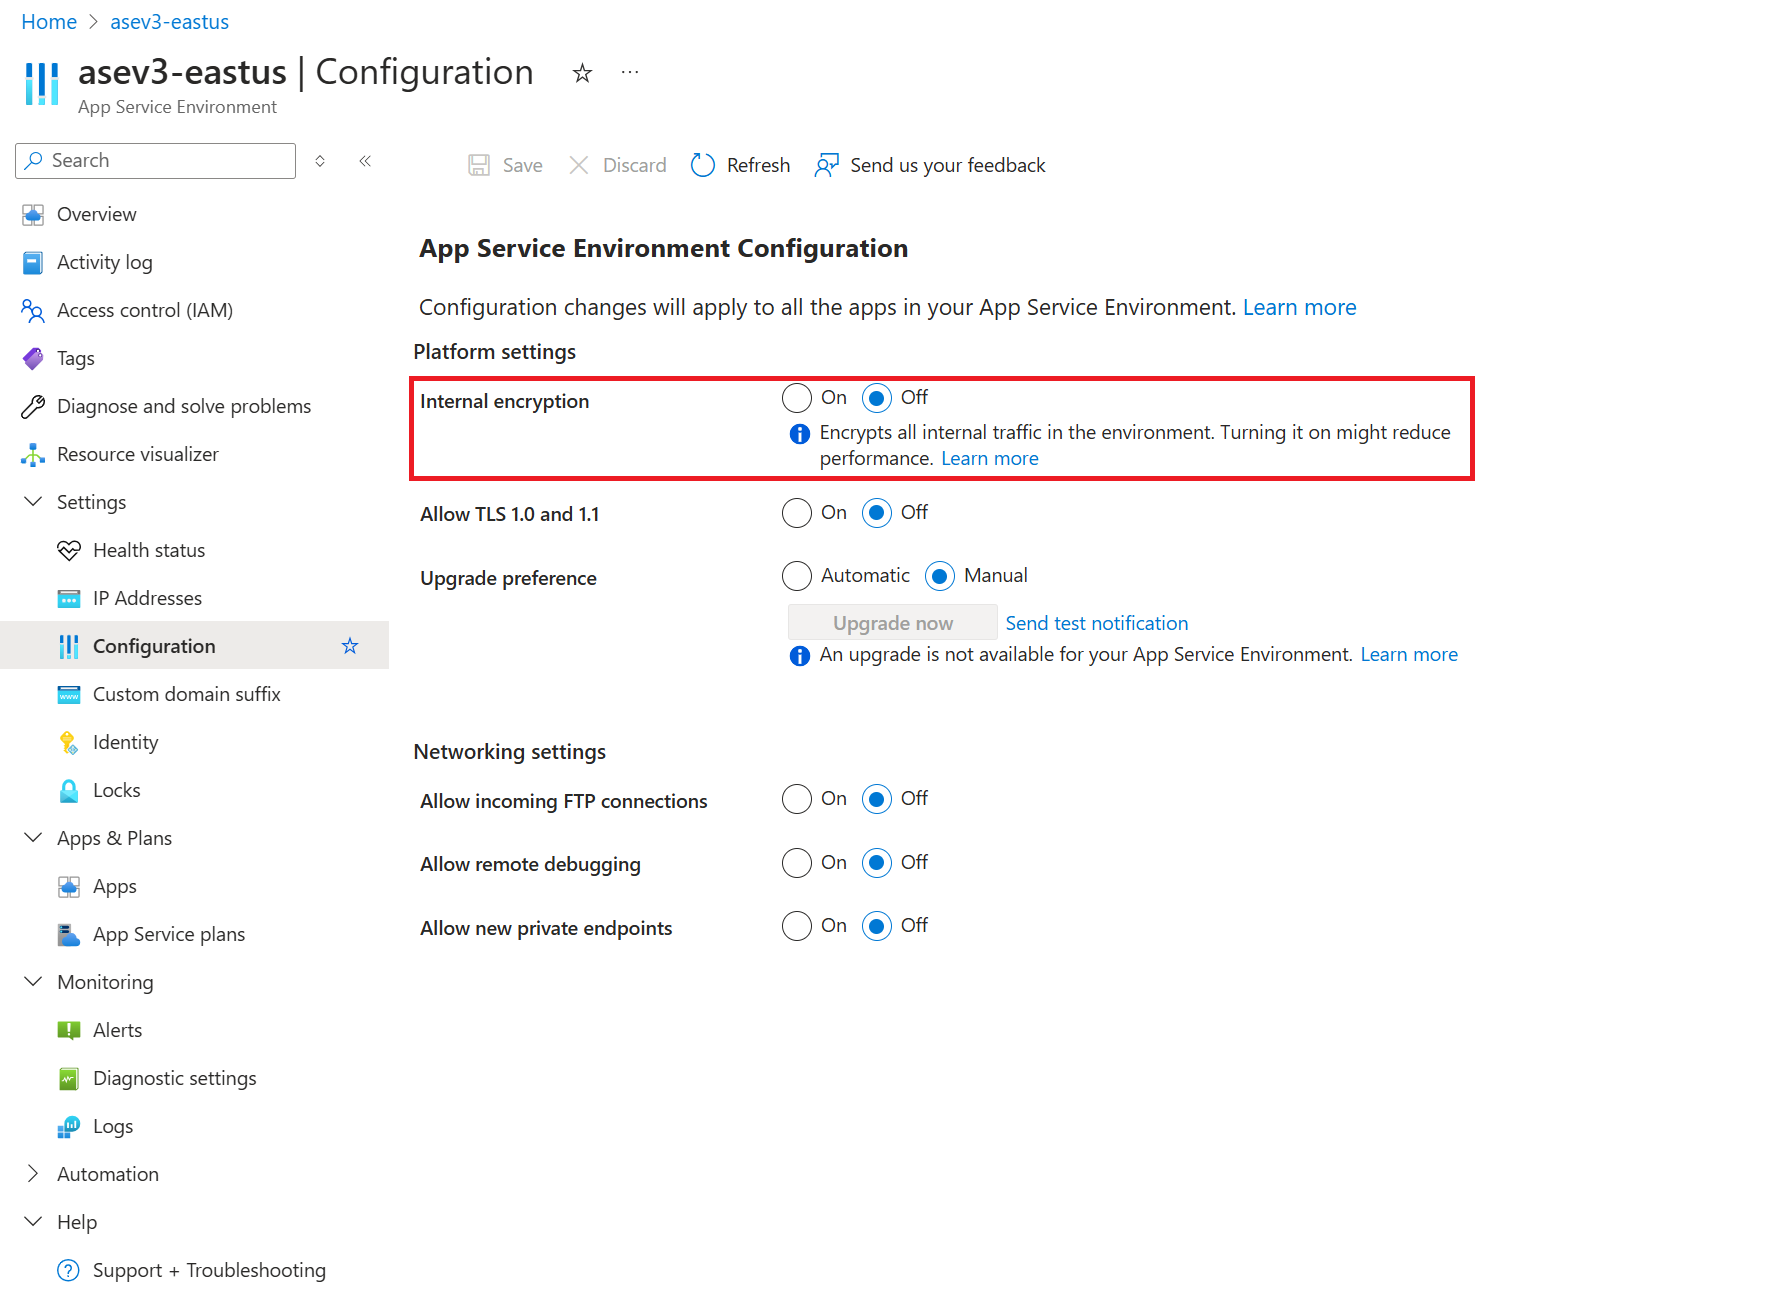
This option encrypts internal network traffic, and also encrypts the pagefile and the worker disks. Be aware that this option can affect your system performance. Your App Service Environment will be in an unstable state until the change is fully propagated. Complete propagation of the change can take a few hours to complete, depending on how many instances you have.
Avoid enabling this option while you're using App Service Environment. If you must do so, it's a good idea to divert traffic to a backup until the operation finishes.
Upgrade preference
If you have multiple App Service Environments, you might want some of them to be upgraded before others. You can enable this behavior through your App Service Environment portal. Under Configuration, you have the option to set Upgrade preference. The possible values are:
- None: Azure upgrades in no particular batch. This value is the default.
- Early: Upgrade in the first half of the App Service upgrades.
- Late: Upgrade in the second half of the App Service upgrades.
- Manual: Get 15 days window to deploy the upgrade manually.
Select the value you want, and then select Save.
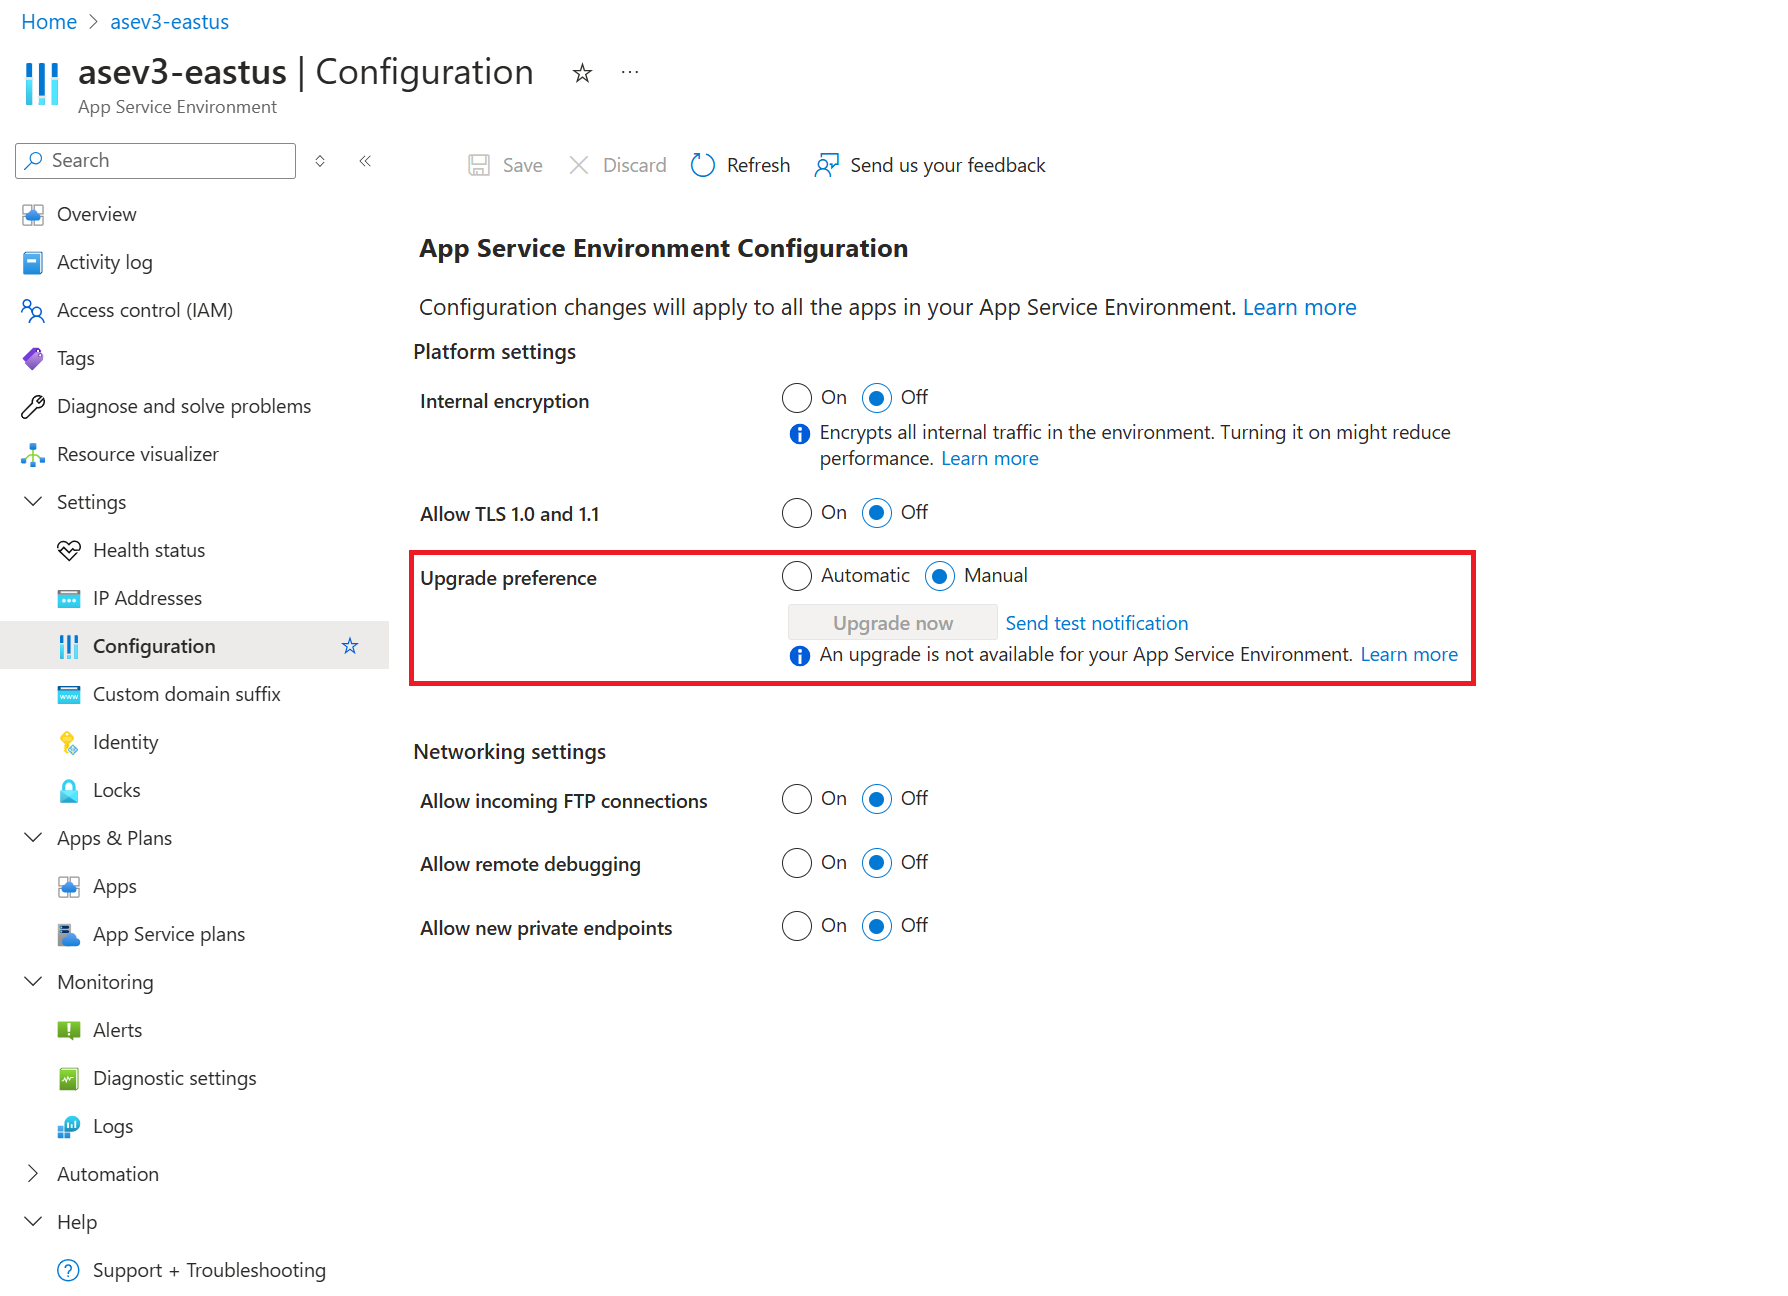
This feature makes the most sense when you have multiple App Service Environments, and you might benefit from sequencing the upgrades. For example, you might set your development and test App Service Environments to be early, and your production App Service Environments to be late.
Delete an App Service Environment
To delete:
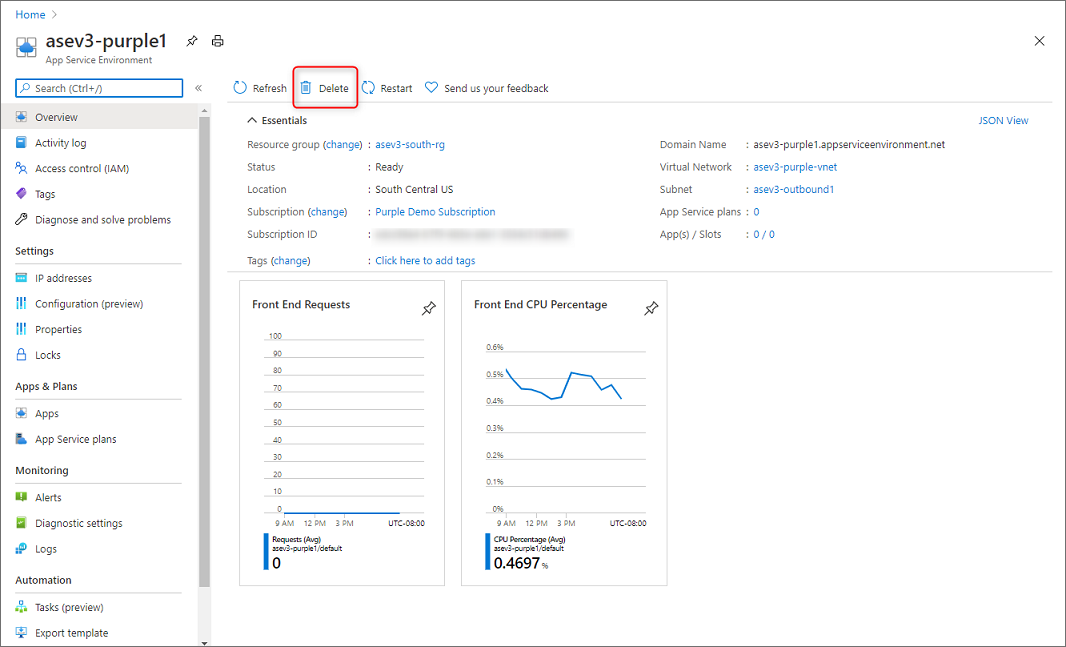
- At the top of the App Service Environment pane, select Delete.
- Enter the name of your App Service Environment to confirm that you want to delete it. When you delete an App Service Environment, you also delete all the content within it.
- Select OK.