Note
Access to this page requires authorization. You can try signing in or changing directories.
Access to this page requires authorization. You can try changing directories.
Rather than creating your own runbooks and modules in Azure Automation, you can access scenarios that have already been built by Microsoft and the community. You can get Azure-related PowerShell and Python runbooks from the Runbook Gallery in the Azure portal, and modules and runbooks (which may or may not be specific to Azure) from the PowerShell Gallery. You can also contribute to the community by sharing scenarios that you develop.
Note
The TechNet Script Center is retiring. All of the runbooks from Script Center in the Runbook gallery have been moved to our Automation GitHub organization For more information, see Azure Automation Runbooks moving to GitHub.
Import runbooks from GitHub with the Azure portal
Note
- The Browse gallery option in the Azure portal has an enhanced user experience.
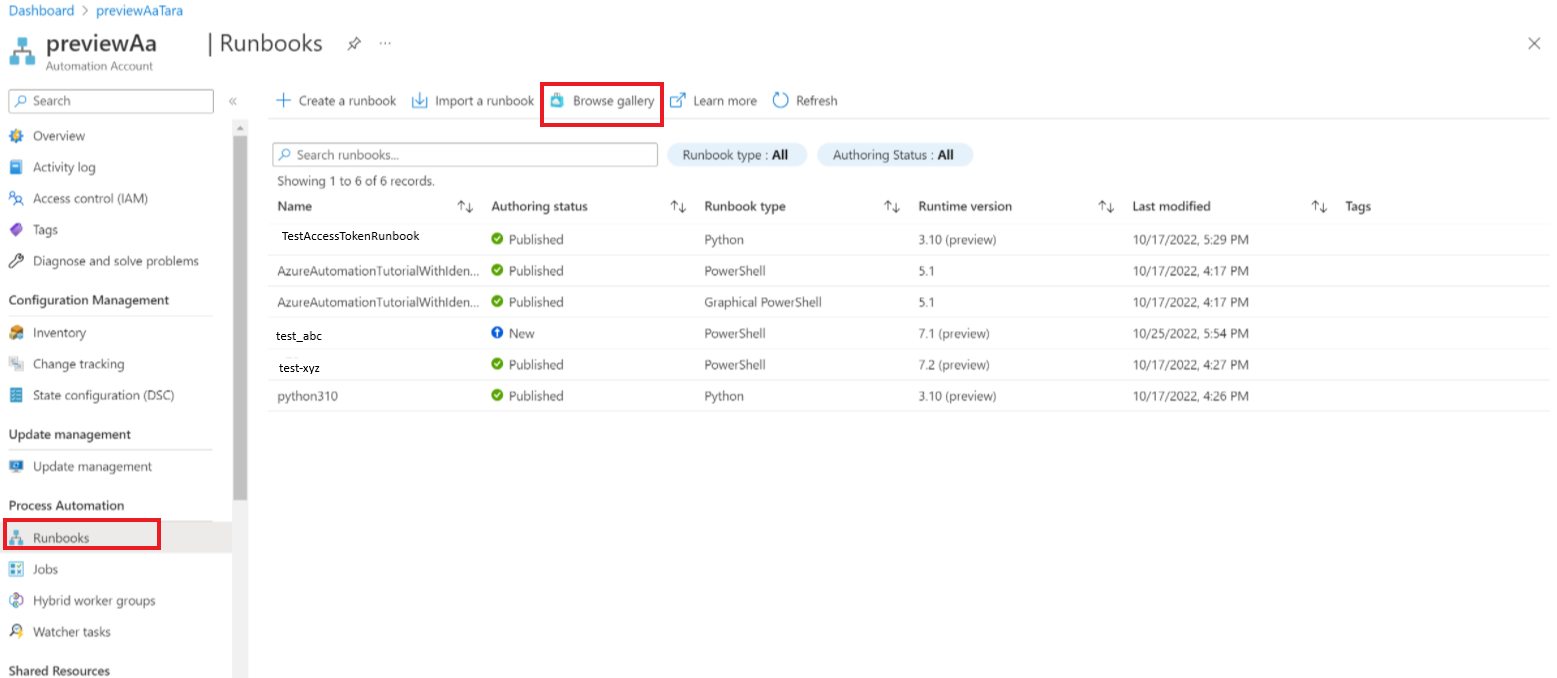
- In Process Automation > Runbook blade, you can import runbooks either by Import a runbook or Browse gallery option and the Runbooks page displays two new columns - Runtime version and Runbook type.
In the Azure portal, open your Automation account.
Select Runbooks blade under Process Automation.
Click Import a runbook in the Runbooks page.
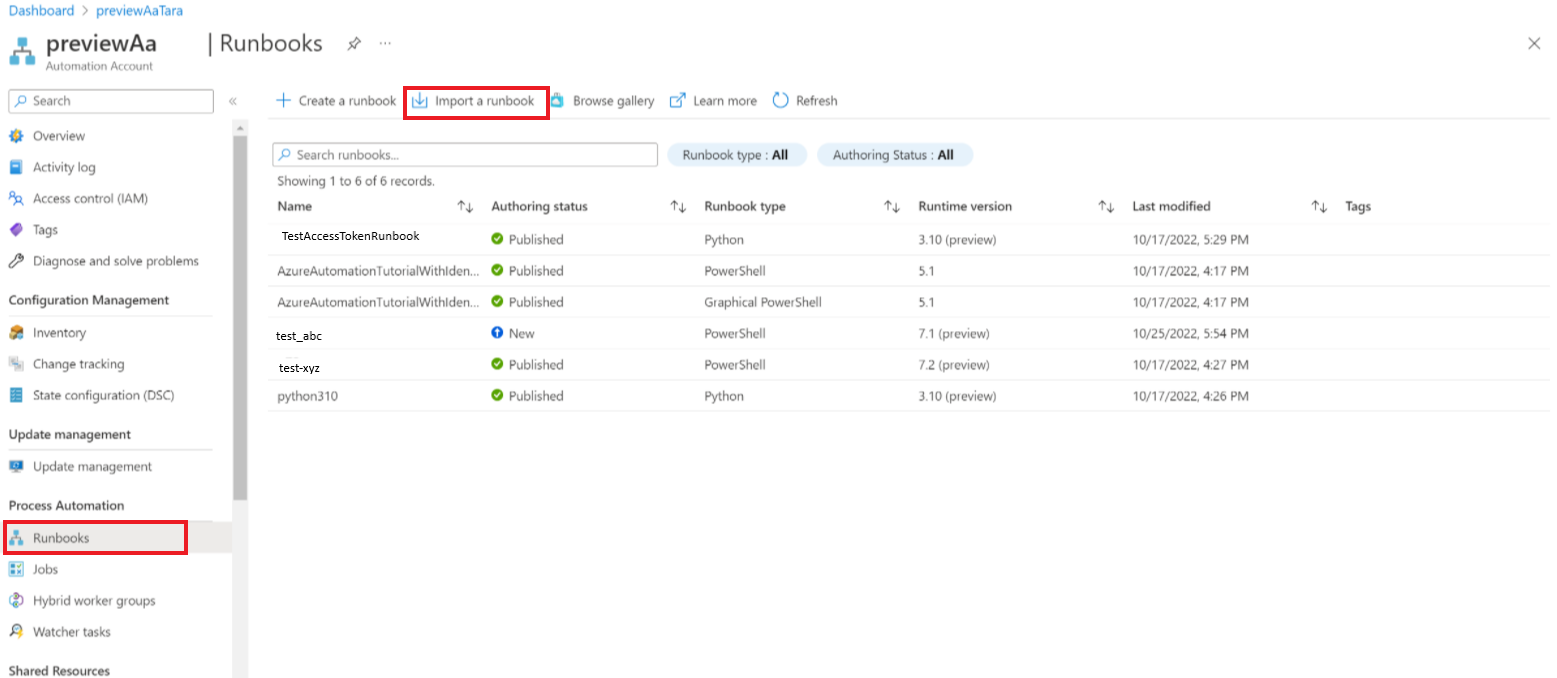
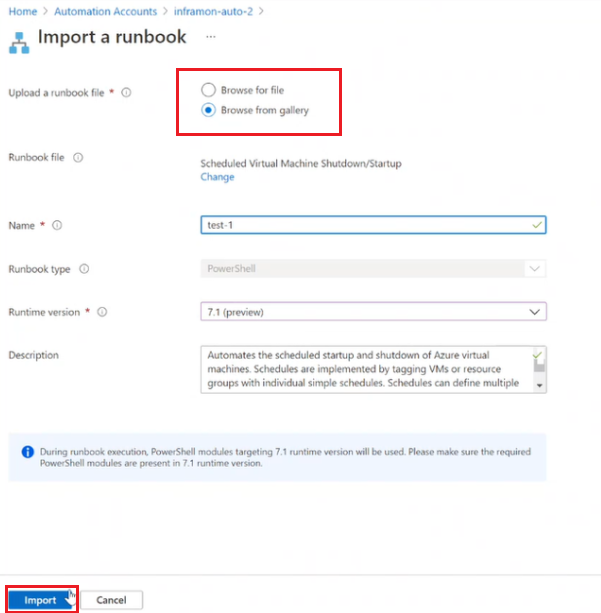
In the Import a runbook page, you can either import a file stored on your local machine or from GitHub using Browse for file or Browse from gallery respectively.
Select the file.
Enter the Name, Runtime version, and Description.
Click Import.
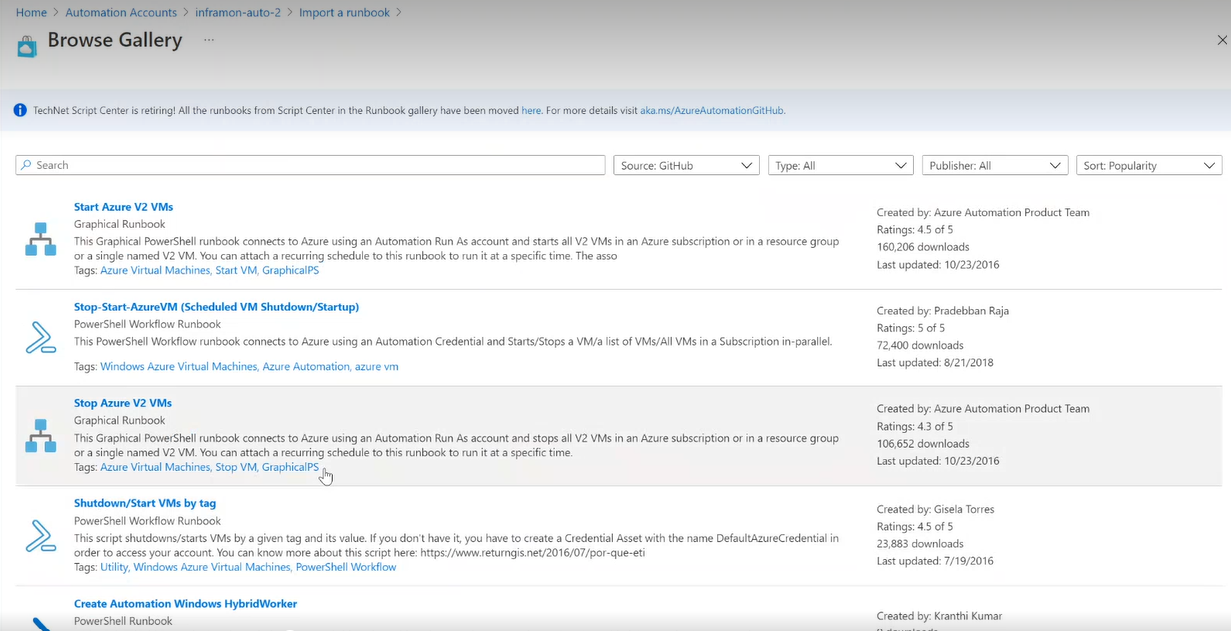
Alternatively, Select Browse Gallery in the Runbooks page to browse the available runbooks.
You can use the filters above the list to narrow the display by publisher, type, and sort. Locate the gallery item you want and select it to view its details.
Click Select to select a chosen runbook.
In the Import a runbook page, enter the Name and select the Runtime versions.
The Runbook type and Description are auto populated.
Click Import.
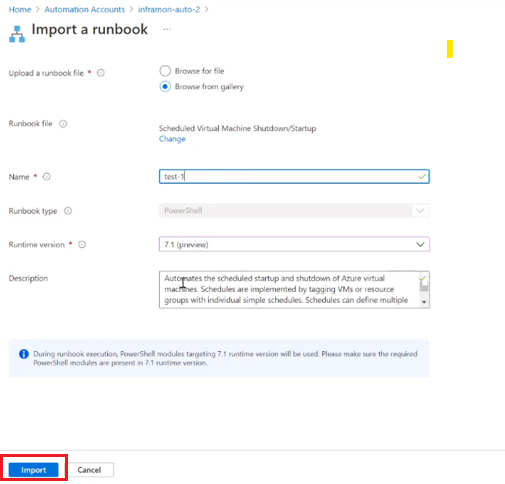
The runbook appears on the Runbooks tab for the Automation account.
Runbooks in the PowerShell Gallery
Important
You should validate the contents of any runbooks that you get from the PowerShell Gallery. Use extreme caution in installing and running them in a production environment.
The PowerShell Gallery provides various runbooks from Microsoft and the community that you can import into Azure Automation. To use one, download a runbook from the gallery, or you can directly import runbooks from the gallery, or from your Automation account in the Azure portal.
Note
Graphical runbooks are not supported in PowerShell Gallery.
You can only import directly from the PowerShell Gallery using the Azure portal. You cannot perform this function using PowerShell. The procedure is the same as shown in Import runbooks from GitHub with the Azure portal, except that the Source will be PowerShell Gallery.
Modules in the PowerShell Gallery
PowerShell modules contain cmdlets that you can use in your runbooks. Existing modules that you can install in Azure Automation are available in the PowerShell Gallery. You can launch this gallery from the Azure portal and install the modules directly into Azure Automation, or you can manually download and install them.
You can also find modules to import in the Azure portal. They're listed for your Automation Account in the Modules under Shared resources.
Important
Do not include the keyword "AzureRm" in any script designed to be executed with the Az module. Inclusion of the keyword, even in a comment, may cause the AzureRm to load and then conflict with the Az module.
Common scenarios available in the PowerShell Gallery
The list below contains a few runbooks that support common scenarios. For a full list of runbooks created by the Azure Automation team, see AzureAutomationTeam profile.
- Update-ModulesInAutomationToLatestVersion - Imports the latest version of all modules in an Automation account from PowerShell Gallery.
- Enable-AzureDiagnostics - Configures Azure Diagnostics and Log Analytics to receive Azure Automation logs containing job status and job streams.
- Copy-ItemFromAzureVM - Copies a remote file from a Windows Azure virtual machine.
- Copy-ItemToAzureVM - Copies a local file to an Azure virtual machine.
Contribute to the community
We strongly encourage you to contribute and help grow the Azure Automation community. Share the amazing runbooks you've built with the community. Your contributions will be appreciated!
Add a runbook to the GitHub Runbook gallery
You can add new PowerShell or Python runbooks to the Runbook gallery with this GitHub workflow.
Create a public repository on GitHub, and add the runbook and any other necessary files (like readme.md, description, and so on).
Add the topic
azureautomationrunbookgalleryto make sure the repository is discovered by our service, so it can be displayed in the Automation Runbook gallery.If the runbook that you created is a PowerShell workflow, add the topic
PowerShellWorkflow. If it's a Python 3 runbook, addPython3. No other specific topics are required for Azure runbooks, but we encourage you to add other topics that can be used for categorization and search in the Runbook Gallery.Note
Check out existing runbooks in the gallery for things like formatting, headers, and existing tags that you might use (like
Azure AutomationorLinux Azure Virtual Machines).
To suggest changes to an existing runbook, file a pull request against it.
If you decide to clone and edit an existing runbook, best practice is to give it a different name. If you re-use the old name, it will show up twice in the Runbook gallery listing.
Note
Please allow at least 12 hours for synchronization between GitHub and the Automation Runbook Gallery, for both updated and new runbooks.
Add a PowerShell runbook to the PowerShell gallery
We encourage you to add runbooks to the PowerShell Gallery that you think would be useful to other customers. The PowerShell Gallery accepts PowerShell modules and PowerShell scripts. You can add a runbook by uploading it to the PowerShell Gallery.
Import a module from the Modules gallery in the Azure portal
In the Azure portal, open your Automation account.
Under Shared Resources, select Modules.
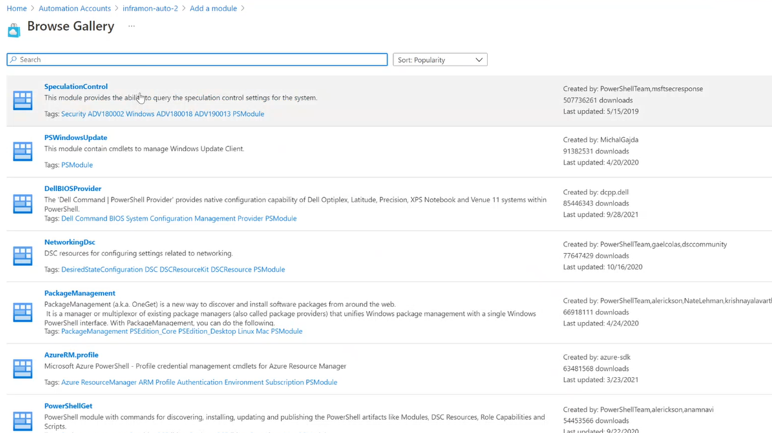
In Modules page, select Browse gallery to open the list of modules.
On the Browse gallery page, you can search by the following fields:
- Module Name
- Tags
- Author
- Cmdlet/DSC resource name
Locate a module that you're interested in and select it to view its details.
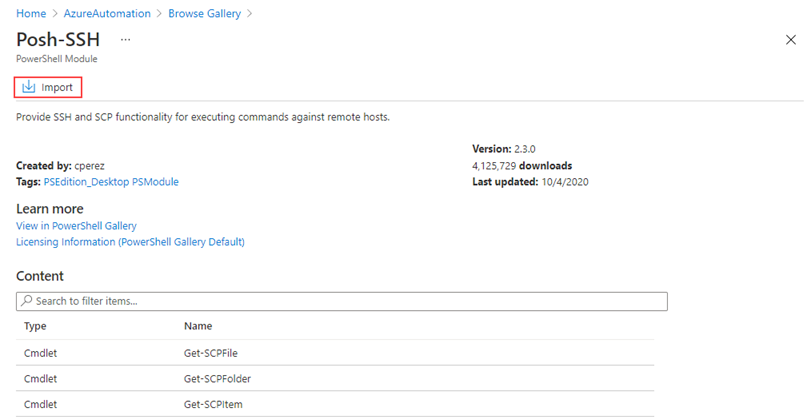
When you drill into a specific module, you can view more information. This information includes a link back to the PowerShell Gallery, any required dependencies, and all of the cmdlets or DSC resources that the module contains.
To install the module directly into Azure Automation, click Import.
On the Import pane, you can see the name of the module to import. If all the dependencies are installed, the OK button is activated. If you're missing dependencies, you need to import those dependencies before you can import this module.
On the Import pane, click OK to import the module. While Azure Automation imports a module to your account, it extracts metadata about the module and the cmdlets. This action might take a couple of minutes since each activity needs to be extracted.
You receive an initial notification that the module is being deployed and another notification when it has completed.
After the module is imported, you can see the available activities. You can use module resources in your runbooks and DSC resources.
Note
Modules that only support PowerShell core are not supported in Azure Automation and are unable to be imported in the Azure portal, or deployed directly from the PowerShell Gallery.
Next steps
- To get started with PowerShell runbooks, see Tutorial: Create a PowerShell runbook.
- To work with runbooks, see Manage runbooks in Azure Automation.
- For more info on PowerShell scripting, see PowerShell Docs.
- For a PowerShell cmdlet reference, see Az.Automation.
