Note
Access to this page requires authorization. You can try signing in or changing directories.
Access to this page requires authorization. You can try changing directories.
Feature flags provide a way to activate or deactivate functionality in your application. A basic feature flag is either on or off. The application behaves according to the value of the flag in all circumstances. For example, you can roll out a new feature behind a feature flag. When the feature flag is turned on, all users experience the new feature. Turning off the feature flag hides the new feature.
In contrast, when you use a conditional feature flag, you can dynamically turn the feature flag on or off. The behavior of the application depends on the feature flag criteria. This capability is useful when you want to show your new feature to a small subset of users at first. You can use a conditional feature flag to turn on the feature flag for some users while turning it off for others.
This article shows you how to set criteria for dynamically changing the state of a conditional feature flag.
Prerequisites
- An Azure subscription. If you don't have one, create a trial subscription.
- An Azure App Configuration store.
What is a feature filter?
Feature filters are conditions for determining the state of a feature flag. When you add feature filters to a feature flag, you can invoke custom code each time the feature flag is evaluated.
The Azure feature management libraries include the following built-in feature filters, which you can configure in the Azure portal:
- The Time window filter type turns on a feature flag during a specified window of time.
- The Targeting filter type turns on a feature flag for specified users and groups.
You can create custom feature filters that turn on features based on specific criteria in your code. This article guides you through adding a custom feature filter to a feature flag. In the last step, you can follow links to instructions for implementing the feature filter in your application.
Add a custom feature filter
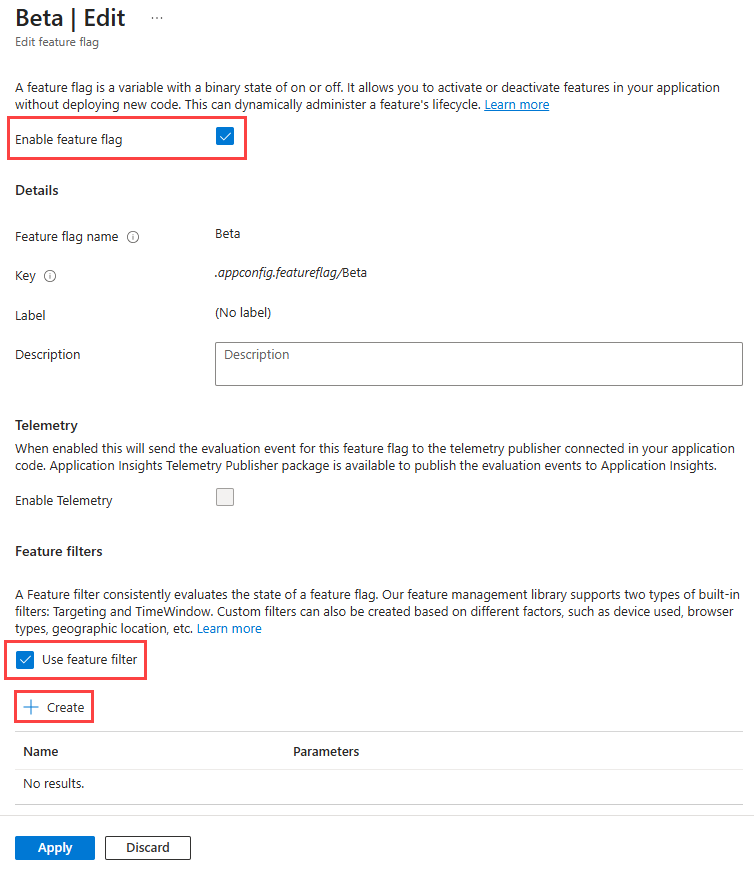
Create a feature flag named Beta in your App Configuration store and open it for editing. For more information about how to add and edit a feature flag, see Create a feature flag and Edit feature flags.
In the Edit feature flag dialog, select Enable feature flag if it isn't already selected. Select Use feature filter, and then select Create.
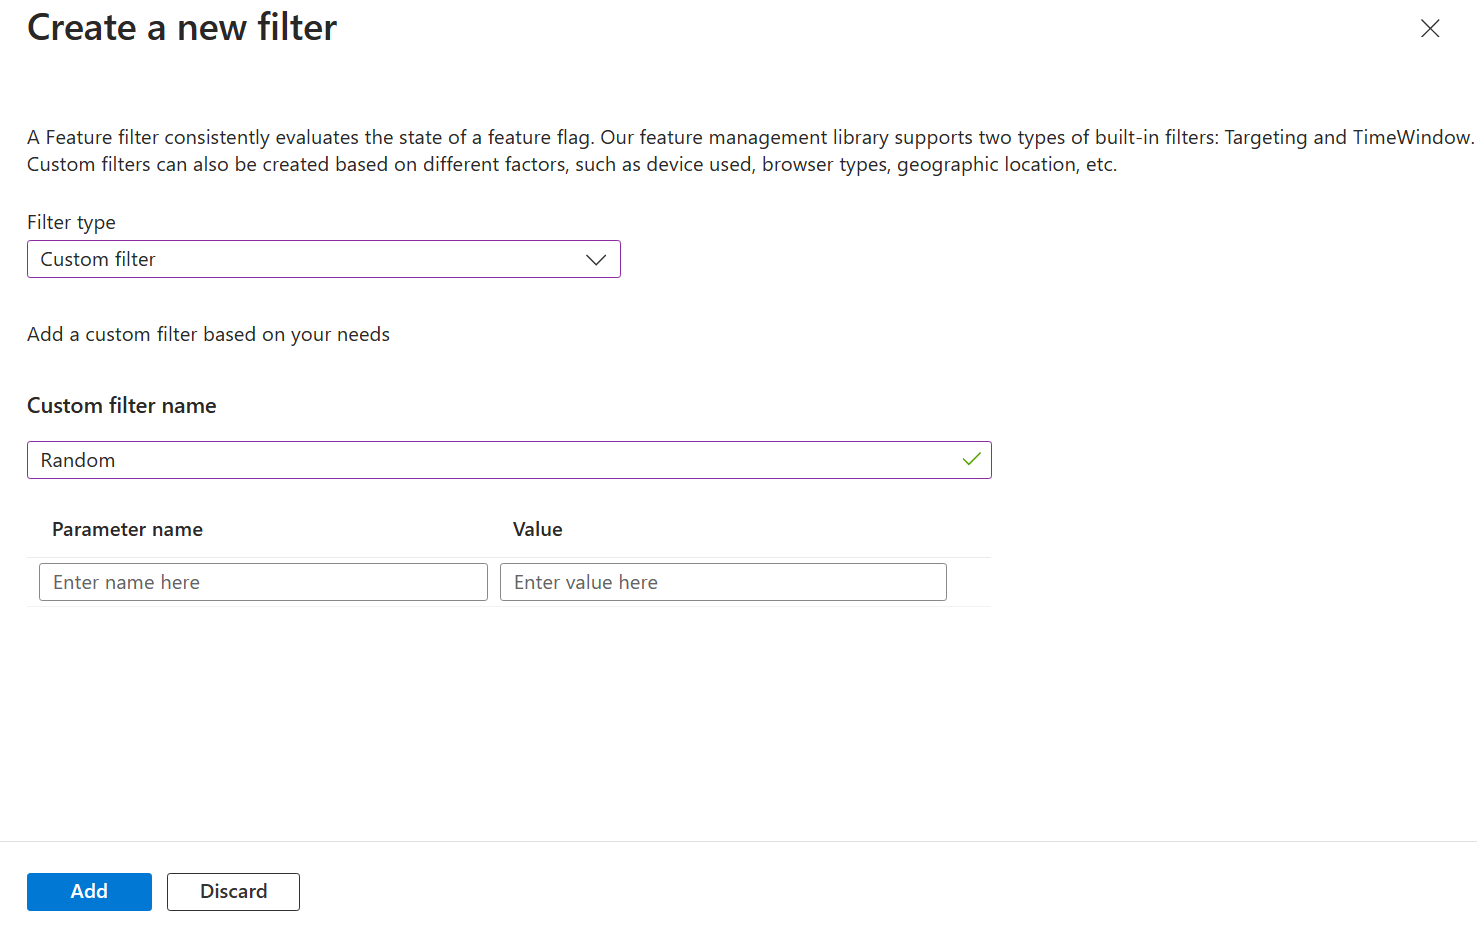
In the Create a new filter dialog, enter the following information:
- Under Filter type, select Custom filter.
- Under Custom filter name, enter Random.
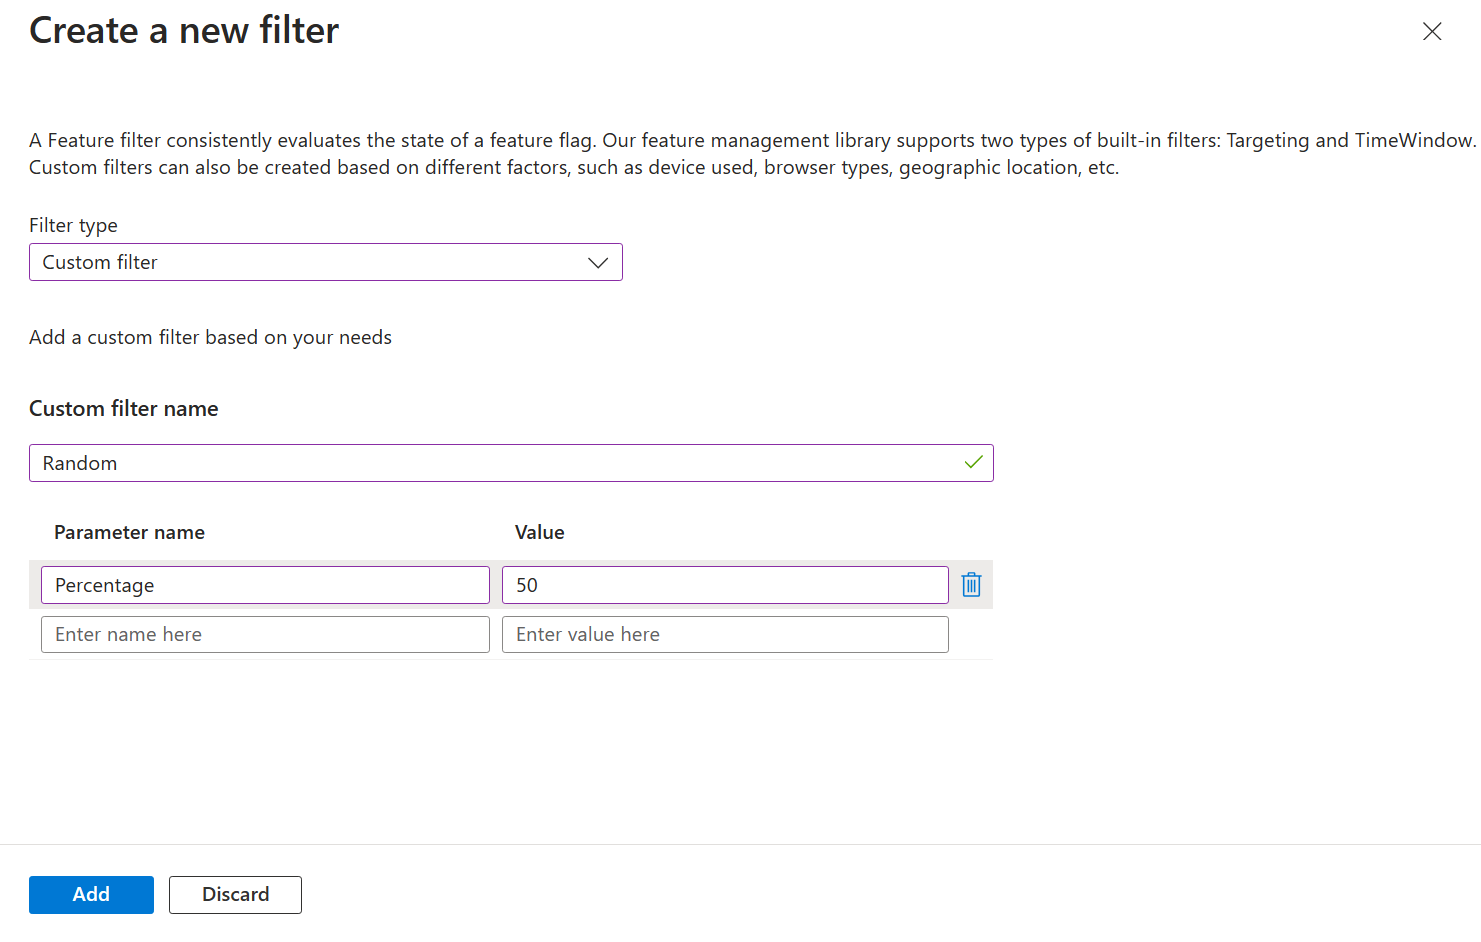
Add a parameter by taking the following steps:
- Under Parameter name, enter Percentage.
- Under Value, enter 50.
Feature filters can optionally use parameters for configurable conditions. In this example, you configure the filter to turn on the feature flag with a 50 percent chance. When you implement the filter in your code, you use the specified percentage and a random number to evaluate the state of the feature flag.
To save the new feature filter, select Add. In the Edit feature flag dialog, the Random filter is now listed in the Feature filters section.
To save the feature flag, select Apply.
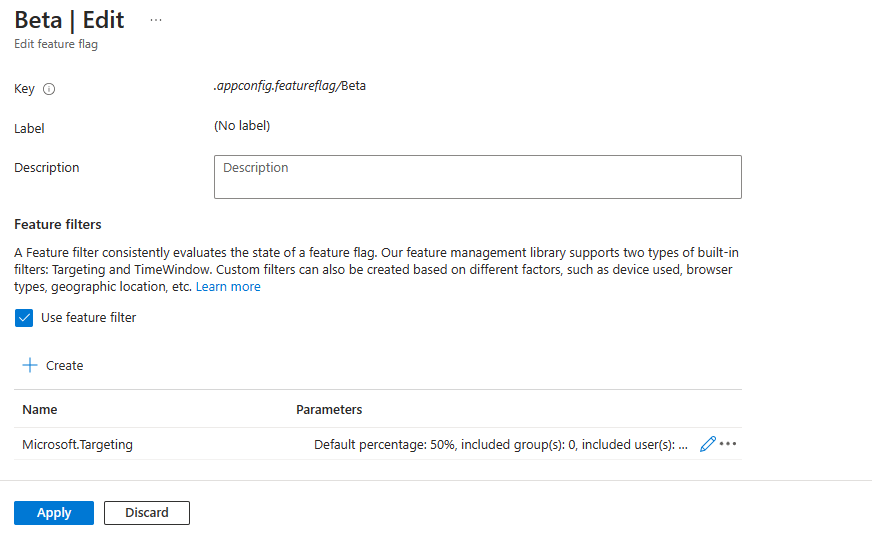
The Edit feature flag dialog closes, and your custom filter is added to your feature flag.
To implement the feature filter in your application, see the instructions that are appropriate for your language or platform:


