Note
Access to this page requires authorization. You can try signing in or changing directories.
Access to this page requires authorization. You can try changing directories.
In Kubernetes, you can set up pods to consume configuration data from ConfigMaps. This practice improves the portability of your applications, because you can decouple configuration data from your container images.
Azure App Configuration Kubernetes Provider offers a way to construct Kubernetes ConfigMaps and Secrets from key-values and Azure Key Vault references that are stored in App Configuration. When you use this provider, you can use App Configuration to centrally store and manage your configuration data without making changes to your application code.
A ConfigMap can be consumed as environment variables or a mounted file. In this quickstart, you incorporate Azure App Configuration Kubernetes Provider in your AKS workload. The provider creates a ConfigMap from data in your App Configuration store. In the workload, you run a basic ASP.NET Core app in a pod that consumes the ConfigMap as a JSON file mounted in a data volume.
Tip
For other ways to access App Configuration from a workload that's hosted in Kubernetes, see Azure Kubernetes Service access to App Configuration.
Note
This quickstart walks you through setting up Azure App Configuration Kubernetes Provider. Optionally, you can use the following Azure Developer CLI commands to provision Azure resources and deploy the sample application that this quickstart uses. These commands use the azure-appconfig-aks template for this purpose. For more information about this template, see the azure-appconfig-aks GitHub repo.
azd init -t azure-appconfig-aks
azd up
Prerequisites
- An App Configuration store. Create a store.
- An instance of Azure Container Registry. Create a registry.
- An AKS cluster that has permission to pull images from your container registry. Create an AKS cluster.
- .NET SDK 8.0 or later.
- The Azure CLI.
- Docker Desktop.
- Helm.
- kubectl.
Create an application that runs in AKS
In this section, you create a basic ASP.NET Core web application that runs in AKS. The application reads configuration data from a local JSON file. In the next section, you enable the application to consume configuration data from App Configuration without changing the application code.
If you already have an AKS application that reads configuration from a file, you can skip this section and go to Use Azure App Configuration Kubernetes Provider. If you skip this section, ensure the configuration file that the provider generates matches the file path that your application uses.
Create an application
Use the .NET command-line interface (CLI) to run the following command. It creates an ASP.NET Core web app project in a new MyWebApp directory.
dotnet new webapp --output MyWebApp --framework net8.0In the MyWebApp directory, go to the Pages directory, and then open Index.cshtml. Replace the content with the following code:
@page
@model IndexModel
@using Microsoft.Extensions.Configuration
@inject IConfiguration Configuration
@{
    ViewData["Title"] = "Home page";
}

<style>
    h1 {
        color: @Configuration["Settings:FontColor"];
    }
</style>

<div class="text-center">
    <h1>@Configuration["Settings:Message"]</h1>
</div>
Create a config directory in the root of your project. In the config directory, add a mysettings.json file that contains the following content:
{
  "Settings": {
    "FontColor": "Black",
    "Message": "Message from the local configuration"
  }
}
In your project root directory, open Program.cs, and then add the JSON file to the configuration source by calling the
AddJsonFilemethod.// Existing code in Program.cs // ... ... // Add a JSON configuration source. builder.Configuration.AddJsonFile("config/mysettings.json", reloadOnChange: true, optional: false); var app = builder.Build(); // The rest of the existing code in Program.cs // ... ...
Containerize the application
To build the app in release mode and create the assets in the published directory, run the dotnet publish command.
dotnet publish -c Release -o publishedCreate a file named Dockerfile at the root of your project directory, open it in a text editor, and enter the following content. A Dockerfile is a text file that doesn't have an extension. You use it to create a container image.
FROM mcr.microsoft.com/dotnet/aspnet:8.0 AS runtime
WORKDIR /app
COPY published/ ./
ENTRYPOINT ["dotnet", "MyWebApp.dll"]
Build a container image named
aspnetappby running the following command:docker build --tag aspnetapp .
Push the image to Container Registry
To sign in to your container registry, run the az acr login command. The following code signs in to a registry named
myregistry. Replace that registry name with the name of your registry.az acr login --name myregistryThe command returns
Login Succeededif you successfully sign in.To create a tag called
myregistry.azurecr.cn/aspnetapp:v1for theaspnetappimage, use the docker tag command. Replacemyregistrywith the name of your registry.docker tag aspnetapp myregistry.azurecr.cn/aspnetapp:v1Tip
To review the list of your existing Docker images and tags, run
docker image ls. In this scenario, the output should list at least two images:aspnetappandmyregistry.azurecr.cn/aspnetapp.To upload the image to the container registry, use the docker push command. For example, the following command pushes the image to a repository named
aspnetappwith tagv1under the registrymyregistry:docker push myregistry.azurecr.cn/aspnetapp:v1
Deploy the application
Create a Deployment directory in the root directory of your project.
To define a deployment, add a deployment.yaml file with the following content to the Deployment directory. Replace the value of
template.spec.containers.imagewith the tag you created in the previous section.apiVersion: apps/v1 kind: Deployment metadata: name: aspnetapp-demo labels: app: aspnetapp-demo spec: replicas: 1 selector: matchLabels: app: aspnetapp-demo template: metadata: labels: app: aspnetapp-demo spec: containers: - name: aspnetapp image: myregistry.azurecr.cn/aspnetapp:v1 ports: - containerPort: 80To define a
LoadBalancerservice, add a service.yaml file with the following content to the Deployment directory:apiVersion: v1 kind: Service metadata: name: aspnetapp-demo-service spec: type: LoadBalancer ports: - port: 80 selector: app: aspnetapp-demoTo make it possible for kubectl to connect to your AKS cluster, run the following command. It downloads the credentials for your AKS cluster and merges them into the context for your cluster.
az aks get-credentials --name <your-AKS-instance-name> --resource-group <your-AKS-resource-group>To deploy the application to the AKS cluster and create the resources, run the following commands:
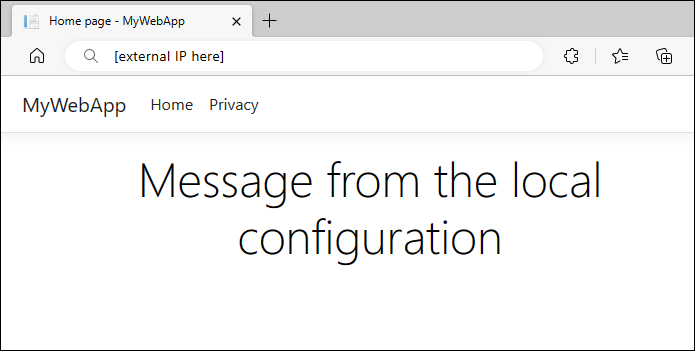
kubectl create namespace appconfig-demo
kubectl apply -f ./Deployment -n appconfig-demo
To get the external IP address exposed by the
LoadBalancerservice, run the following command:kubectl get service aspnetapp-demo-service -n appconfig-demoIn a browser window, go to the IP address you obtained in the previous step. The webpage should look similar to the following screenshot:
Use Azure App Configuration Kubernetes Provider
Now that you have an application running in AKS, the next step is to deploy Azure App Configuration Kubernetes Provider to your AKS cluster to run as a Kubernetes controller. The provider retrieves data from your App Configuration store and creates a ConfigMap, which is consumable as a JSON file mounted in a data volume.
Set up the App Configuration store
Add the following keys and values to the App Configuration store. For each one, use default values for Label and Content Type. For more information about how to add key-values to a store by using the Azure portal or the Azure CLI, see Create a key-value.
| Key | Value |
|---|---|
| Settings:FontColor | Green |
| Settings:Message | Hello from Azure App Configuration |
Set up Azure App Configuration Kubernetes Provider
Install Azure App Configuration Kubernetes Provider on your AKS cluster. You can install the provider either as an AKS extension or by using a Helm chart. The AKS extension provides seamless installation and management via the Azure CLI, Azure Resource Manager templates (ARM templates), or Bicep files. Also, using the AKS extension facilitates automatic minor and patch version updates, helping to ensure your system remains up to date.
Add the
k8s-extensionto your Azure CLI extensions.az extension add --name k8s-extensionRegister the
KubernetesConfigurationresource provider.az provider register --namespace Microsoft.KubernetesConfigurationInstall the AKS extension for App Configuration. Replace the
cluster-nameandresource-groupparameter values with the corresponding values from your AKS instance. By default, the provider is installed in theazappconfig-systemnamespace.az k8s-extension create --cluster-type managedClusters \ --cluster-name <your-AKS-instance-name> \ --resource-group <your-AKS-resource-group> \ --name appconfigurationkubernetesprovider \ --extension-type Microsoft.AppConfigurationFor more information, see Install Azure App Configuration AKS extension.
To define an
AzureAppConfigurationProviderresource, add an appConfigurationProvider.yaml file with the following content to the Deployment directory.AzureAppConfigurationProvideris a custom resource. It defines the data to download from an App Configuration store. It also creates a ConfigMap.apiVersion: azconfig.io/v1 kind: AzureAppConfigurationProvider metadata: name: appconfigurationprovider-sample spec: endpoint: <your-app-configuration-store-endpoint> target: configMapName: configmap-created-by-appconfig-provider configMapData: type: json key: mysettings.json auth: workloadIdentity: serviceAccountName: <your-service-account-name>Replace the value of the
endpointfield with the endpoint of your Azure App Configuration store. Proceed to the next step to update theauthsection with your authentication information.Note
AzureAppConfigurationProvideris a declarative API object. It defines the desired state of the ConfigMap that's created from the data in your App Configuration store. The definition of the desired state specifies the following behavior:- ConfigMap creation fails if a ConfigMap with the same name already exists in the same namespace.
- The ConfigMap is reset based on the present data in your App Configuration store if it's deleted or modified by any other means.
- The ConfigMap is deleted if Azure App Configuration Kubernetes Provider is uninstalled.
To authenticate with your App Configuration store, follow the instructions for using the workload identity. Update the appConfigurationProvider.yaml file by replacing the
serviceAccountNamefield with the name of the service account you create when you follow the instructions. For more information about other authentication methods, see the examples in Authentication.As shown in the following code, update the deployment.yaml file in the Deployment directory to use the ConfigMap
configmap-created-by-appconfig-provideras a mounted data volume. It's important that thevolumeMounts.mountPathvalue matches theWORKDIRvalue specified in your Dockerfile and the config directory you created earlier. Also, ensure that the value oftemplate.spec.containers.imagematches the name of the image you created earlier.apiVersion: apps/v1 kind: Deployment metadata: name: aspnetapp-demo labels: app: aspnetapp-demo spec: replicas: 1 selector: matchLabels: app: aspnetapp-demo template: metadata: labels: app: aspnetapp-demo spec: containers: - name: aspnetapp image: myregistry.azurecr.cn/aspnetapp:v1 ports: - containerPort: 80 volumeMounts: - name: config-volume mountPath: /app/config volumes: - name: config-volume configMap: name: configmap-created-by-appconfig-providerTo deploy the changes, run the following command. Update the namespace if you're using your existing AKS application.
kubectl apply -f ./Deployment -n appconfig-demoRefresh the browser. The page shows updated content.

Troubleshooting
If your application doesn't read the data from your App Configuration store, run the following command to verify that the ConfigMap is created properly:
kubectl get configmap configmap-created-by-appconfig-provider -n appconfig-demo
If the ConfigMap isn't created, run the following command to get the data retrieval status:
kubectl get AzureAppConfigurationProvider appconfigurationprovider-sample -n appconfig-demo -o yaml
If Azure App Configuration Kubernetes Provider retrieves data from your App Configuration store successfully, the phase property in the status section of the output should be Complete, as shown in the following example:
$ kubectl get AzureAppConfigurationProvider appconfigurationprovider-sample -n appconfig-demo -o yaml

apiVersion: azconfig.io/v1
kind: AzureAppConfigurationProvider
  ... ... ...
status:
  lastReconcileTime: "2025-08-04T13:58:02Z"
  lastSyncTime: "2025-08-04T13:58:02Z"
  message: Complete sync key-values from App Configuration to target ConfigMap or
    Secret.
  phase: Complete
If the phase property isn't COMPLETE, the data isn't downloaded from your App Configuration store properly. To access the logs of Azure App Configuration Kubernetes Provider, run the following command:
kubectl logs deployment/az-appconfig-k8s-provider -n azappconfig-system
Use the logs for further troubleshooting. For solutions to common issues, see FAQ.
FAQ
Why isn't the ConfigMap or Secret being generated?
To collect logs that contain detailed error information, follow the steps in Troubleshooting. Here are some common causes of this issue:
- RESPONSE 403: 403 Forbidden: The configured identity lacks the necessary permissions to access the App Configuration store. For examples that match the identity you're using, see Authentication.
- A Key Vault reference is found in App Configuration, but 'spec.secret' was not configured: One or more Key Vault references are included in the selected key-values, but the authentication information for Key Vault isn't provided. To maintain the integrity of the configuration, the entire configuration fails to load. Configure the
spec.secretsection to provide the necessary authentication information. For examples and more information, see Key Vault references .
Why doesn't the generated ConfigMap contain the expected data?
Ensure that the key-value selectors you specify match the expected data. If you don't specify any selectors, all key-values without a label get downloaded from your App Configuration store. When you use a key filter, verify that it matches the prefix of your expected key-values. If your key-values have labels, make sure to specify the label filter in the selectors. For more examples, see Key-value selection.
How can I customize the installation of Azure App Configuration Kubernetes Provider?
You can customize the installation by providing extra Helm values when you install Azure App Configuration Kubernetes Provider. For example, you can set the log level, configure the provider to run on a specific node, or disable the workload identity. For more information, see Installation.
How can I trigger an on-demand refresh of the ConfigMap and Secret?
You can configure the data to automatically refresh. But there are times when you might want to trigger an on-demand refresh to get the latest data from App Configuration and Key Vault. To trigger a refresh, you can modify the metadata.annotations section of AzureAppConfigurationProvider. The Kubernetes provider then updates the ConfigMap and Secret with the latest data from your App Configuration store and Key Vault. For an example, see On-demand refresh.
We don't recommend deleting or modifying the ConfigMap and Secret generated by the Kubernetes provider. New ones are generated from the latest data, but this situation can cause downtime for your applications during failures.
Why can't I authenticate with App Configuration by using workload identity after upgrading the provider to version 2.0.0?
Starting with version 2.0.0, a user-provided service account is required for authenticating with App Configuration by using workload identity. This change enhances security through namespace isolation. Previously, a Kubernetes provider's service account was used for all namespaces. For updated instructions, see the documentation on using workload identity. If you need time to migrate when upgrading to version 2.0.0, you can temporarily use the workloadIdentity.globalServiceAccountEnabled=true setting during provider installation. Note that support for using the provider's service account is scheduled for deprecation in a future release.
Clean up resources
If you want to uninstall Azure App Configuration Kubernetes Provider but keep your AKS cluster, use the following command to uninstall the provider:
az k8s-extension delete --cluster-type managedClusters \
    --cluster-name <your-AKS-instance-name> \
    --resource-group <your-AKS-resource-group> \
    --name appconfigurationkubernetesprovider
If you don't want to continue using the resources created in this article, delete the resource group you created here to avoid charges.
Important
Deleting a resource group is irreversible. The resource group and all the resources in it are permanently deleted. Ensure that you don't accidentally delete the wrong resource group or resources. If you created the resources for this article inside a resource group that contains other resources you want to keep, delete each resource individually from its respective pane instead of deleting the resource group.
- Sign in to the Azure portal, and select Resource groups.
- In the Filter by name box, enter the name of your resource group.
- In the result list, select the resource group name to see an overview.
- Select Delete resource group.
- You're asked to confirm the deletion of the resource group. Enter the name of your resource group to confirm, and select Delete.
After a few moments, the resource group and all its resources are deleted.
Note
If you use the Azure Developer CLI to set up the resources, you can run the azd down command to delete all resources created by the azure-appconfig-aks template.
Next steps
In this quickstart, you:
- Created an application running in AKS.
- Connected your AKS cluster to your App Configuration store by using Azure App Configuration Kubernetes Provider.
- Created a ConfigMap with data from your App Configuration store.
- Ran the application with configuration data from your App Configuration store without changing your application code.
To find out how to update your AKS workloads to dynamically refresh configuration data, continue to the next tutorial.
For more information about Azure App Configuration Kubernetes Provider, see Azure App Configuration Kubernetes Provider reference.