Note
Access to this page requires authorization. You can try signing in or changing directories.
Access to this page requires authorization. You can try changing directories.
In this quickstart, you use Azure App Configuration in an app running in Azure Container Apps. This way, you can centralize the storage and management of the configuration of your apps in Container Apps. This quickstart leverages the ASP.NET Core app created in Quickstart: Create an ASP.NET Core app with App Configuration. You containerize the app and deploy it to Azure Container Apps. Complete the quickstart before you continue.
Tip
While following this quickstart, preferably register all new resources within a single resource group, so that you can regroup them all in a single place and delete them faster later on if you don't need them anymore.
- An application using an App Configuration store. If you don't have one, create an instance using the Quickstart: Create an ASP.NET Core app with App Configuration.
- An Azure Container Apps instance. If you don't have one, create an instance using the Azure portal or the CLI.
- Docker Desktop
- The Azure CLI
- In the Azure portal, navigate to your Container App instance.
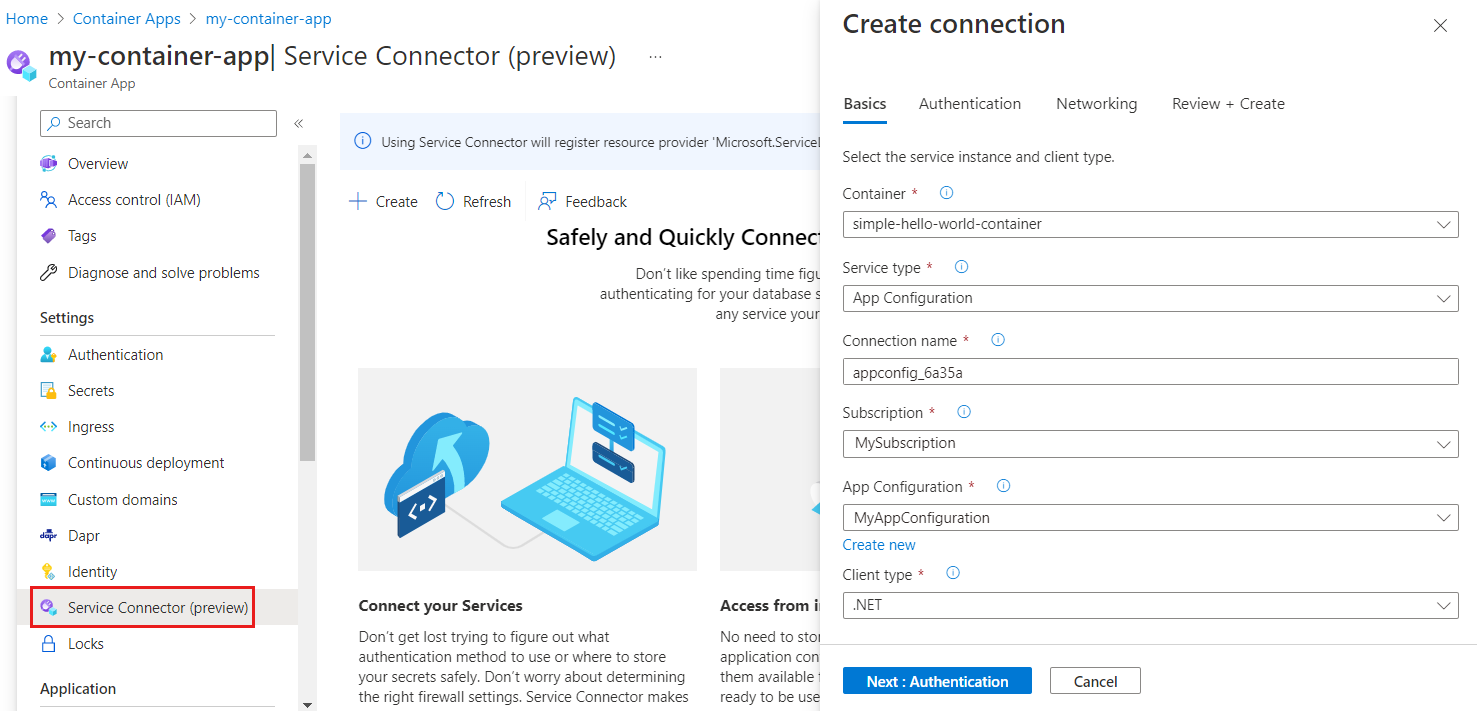
In the Azure portal, navigate to your Container App instance. Create a service connection with your App Configuration store using the settings below.
In the Basics tab:
Under Service type, select App Configuration
Under App Configuration, select your App Configuration store.
In the Authentication tab:
- Select the System-assigned managed identity authentication type
- Expand the Advanced menu
- Assign your identity the App Configuration Data Reader role
- Under Configuration information, you find an environment variable named
AZURE_APPCONFIGURATION_ENDPOINT. Select the pencil icon on the right and edit the environment variable name to match the variable name in your application that you load your App Configuration endpoint from. If you built your application following the ASP.NET Core quickstart, your variable name isEndpoints:AppConfiguration. When editing the variable name, replace the colon with double underscores so that it becomesEndpoints__AppConfiguration. If you're working with another application, enter the corresponding environment variable name, then select Done.
Use default values for everything else.

When the connection is created, an environment variable named Endpoints__AppConfiguration is added to the container of your Container App resource. Its value is a reference of the Container App secret, the endpoint of your App Configuration store.
Run the dotnet publish command to build the app in release mode and create the assets in the published folder.
dotnet publish -c Release -o publishedCreate a file named Dockerfile in the directory containing your .csproj file, open it in a text editor, and enter the following content. A Dockerfile is a text file that doesn't have an extension and that is used to create a container image.
FROM mcr.microsoft.com/dotnet/aspnet:6.0 AS runtime
WORKDIR /app
COPY published/ ./
ENTRYPOINT ["dotnet", "TestAppConfig.dll"]
Build the container by running the following command.
docker build --tag aspnetapp .
Create an Azure Container Registry (ACR). ACR enables you to build, store, and manage container images.
- To create the container registry, follow the Azure Container Registry quickstart.
- Once the deployment is complete, open your ACR instance and from the left menu, select Settings > Access keys.
- Take note of the Login server value listed on this page. You'll use this information in a later step.
- Switch Admin user to Enabled. This option lets you connect the ACR to Azure Container Apps using admin user credentials. Alternatively, you can leave it disabled and configure the container app to pull images from the registry with a managed identity.
Push the Docker image to the ACR created earlier.
Run the az acr login command to log in to the registry.
az acr login --name myregistryThe command returns
Login Succeededonce login is successful.Use docker tag to tag the image appropriate details.
docker tag aspnetapp myregistry.azurecr.cn/aspnetapp:v1Tip
To review the list of your existing docker images and tags, run
docker image ls. In this scenario, you should see at least two images:aspnetappandmyregistry.azurecr.cn/aspnetapp.Use docker push to push the image to the container registry. This example creates the aspnetapp repository in ACR containing the
aspnetappimage. In the example below, replace the placeholders<login-server,<image-name>and<tag>by the ACR's log-in server value, the image name and the image tag.Method:
docker push <login-server>/<image-name>:<tag>Example:
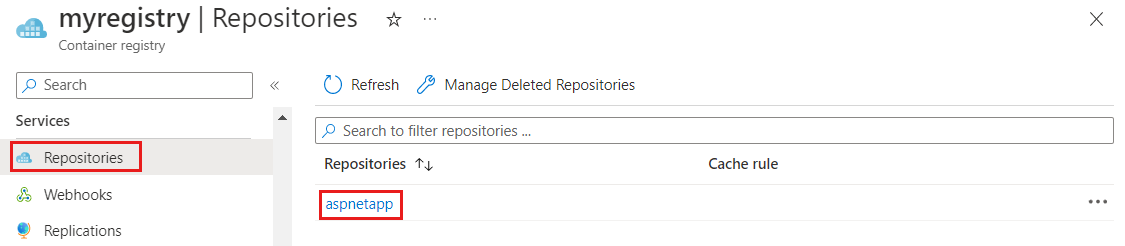
docker push myregistry.azurecr.cn/aspnetapp:v1Open your Azure Container Registry in the Azure portal and confirm that under Repositories, you can see your new repository.
Update your Container App to load the container image from your ACR.
In the Azure portal, open your Azure Container Apps instance.
In the left menu, under Application, select Containers.
Select Edit and deploy.
Under Container image, click on the name of the existing container image.
Update the following settings:
Setting Suggested value Description Image source Azure Container Registry Select Azure Container Registry as your image source. Authentication Admin Credentials Use the admin user credential option that was enabled earlier in the container registry. If you didn't enable the admin user but configured to use a managed identity, you would need to manually enter the image and tag in the form. Registry myregistry.azurecr.cn Select the Azure Container Registry you created earlier. Image aspnetapp Select the docker image you created and pushed to ACR earlier. Image tag v1 Select your image tag from the list. Select Save and then Create to deploy the update to Azure Container App.
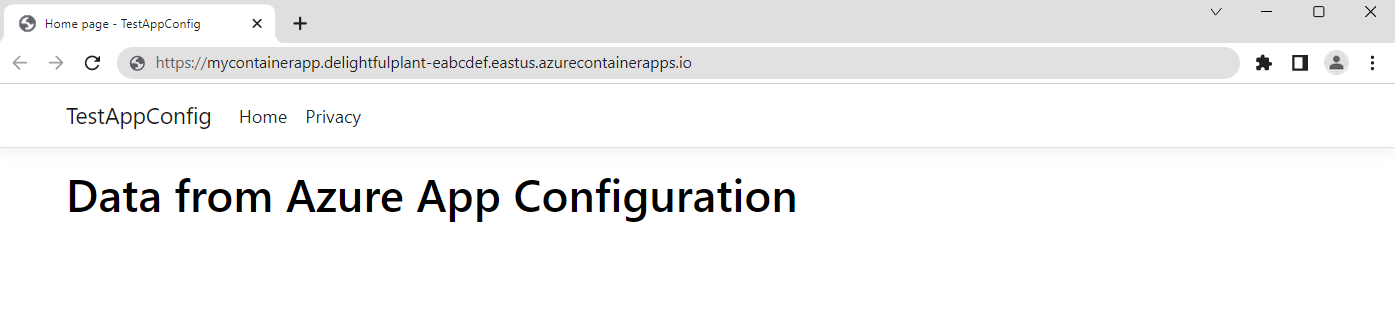
In the Azure portal, in the Azure Container Apps instance, go to the Overview tab and open the Application Url.
The web page looks like this:
If you don't want to continue using the resources created in this article, delete the resource group you created here to avoid charges.
Important
Deleting a resource group is irreversible. The resource group and all the resources in it are permanently deleted. Ensure that you don't accidentally delete the wrong resource group or resources. If you created the resources for this article inside a resource group that contains other resources you want to keep, delete each resource individually from its respective pane instead of deleting the resource group.
- Sign in to the Azure portal, and select Resource groups.
- In the Filter by name box, enter the name of your resource group.
- In the result list, select the resource group name to see an overview.
- Select Delete resource group.
- You're asked to confirm the deletion of the resource group. Enter the name of your resource group to confirm, and select Delete.
After a few moments, the resource group and all its resources are deleted.
In this quickstart, you:
- Connected Azure App Configuration to Azure Container Apps
- Used Docker to build a container image from an ASP.NET Core app with App Configuration settings
- Created an Azure Container Registry instance
- Pushed the image to the Azure Container Registry instance
- Added the container image to Azure Container Apps
- Browsed to the URL of the Azure Container Apps instance updated with the settings you configured in your App Configuration store.
The managed identity enables one Azure resource to access another without you maintaining secrets. You can streamline access from Container Apps to other Azure resources. For more information, see how to access App Configuration using the managed identity and how to access Container Registry using the managed identity.
To learn how to configure your ASP.NET Core web app to dynamically refresh configuration settings, continue to the next tutorial.