Note
Access to this page requires authorization. You can try signing in or changing directories.
Access to this page requires authorization. You can try changing directories.
You can integrate Azure Resource Manager templates (ARM templates) with Azure Pipelines for continuous integration and continuous deployment (CI/CD). In this article, you learn two more advanced ways to deploy templates with Azure Pipelines.
Select your option
Before proceeding with this article, let's consider the different options for deploying an ARM template from a pipeline.
Use ARM template deployment task. This option is the easiest option. This approach works when you want to deploy a template directly from a repository. This option isn't covered in this article but instead is covered in the tutorial Continuous integration of ARM templates with Azure Pipelines. It shows how to use the ARM template deployment task to deploy a template from your GitHub repo.
Add task that runs an Azure PowerShell script. This option has the advantage of providing consistency throughout the development life cycle because you can use the same script that you used when running local tests. Your script deploys the template but can also perform other operations such as getting values to use as parameters. This option is shown in this article. See Azure PowerShell task.
Visual Studio provides the Azure Resource Group project that includes a PowerShell script. The script stages artifacts from your project to a storage account that Resource Manager can access. Artifacts are items in your project such as linked templates, scripts, and application binaries. If you want to continue using the script from the project, use the PowerShell script task shown in this article.
Add tasks to copy and deploy tasks. This option offers a convenient alternative to the project script. You configure two tasks in the pipeline. One task stages the artifacts to an accessible location. The other task deploys the template from that location. This option is shown in this article. See Copy and deploy tasks.
Prepare your project
This article assumes your ARM template and Azure DevOps organization are ready for creating the pipeline. The following steps show how to make sure you're ready:
You have an Azure DevOps organization. If you don't have one, create one. If your team already has an Azure DevOps organization, make sure you're an administrator of the Azure DevOps project that you want to use.
You've configured a service connection to your Azure subscription. The tasks in the pipeline execute under the identity of the service principal. For steps to create the connection, see Create a DevOps project.
You have an ARM template that defines the infrastructure for your project.
Create pipeline
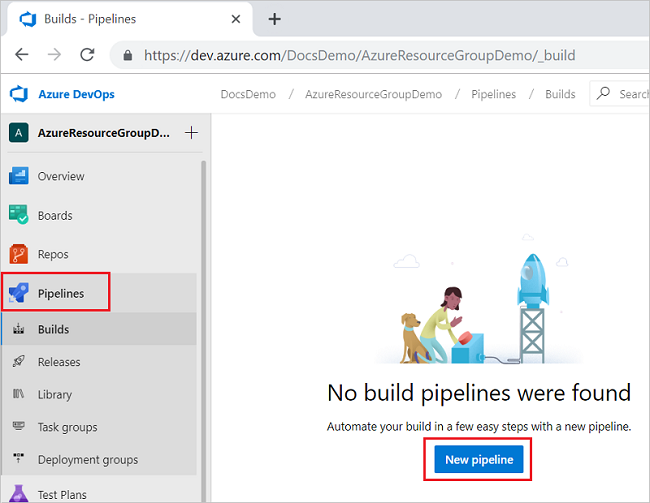
If you haven't added a pipeline previously, you need to create a new pipeline. From your Azure DevOps organization, select Pipelines and New pipeline.
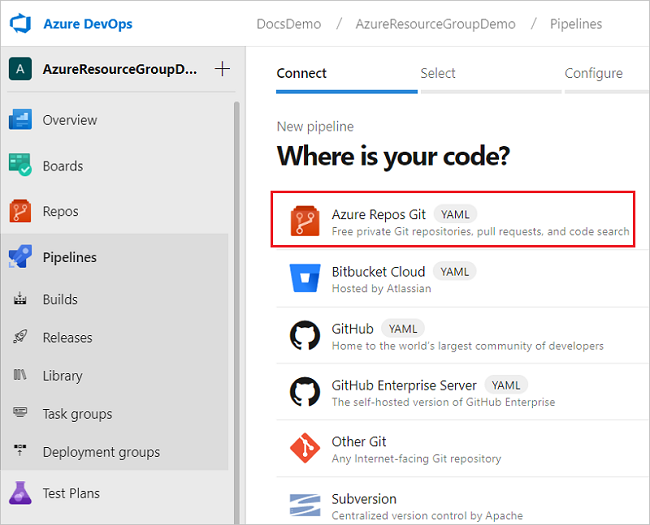
Specify where your code is stored. The following image shows selecting Azure Repos Git.
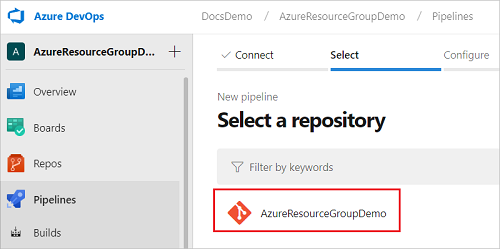
From that source, select the repository that has the code for your project.
Select the type of pipeline to create. You can select Starter pipeline.

You're ready to either add an Azure PowerShell task or the copy file and deploy tasks.
Azure PowerShell task
This section shows how to configure continuous deployment by using a single task that runs the PowerShell script in your project. If you need a PowerShell script that deploys a template, see Deploy-AzTemplate.ps1 or Deploy-AzureResourceGroup.ps1.
The following YAML file creates an Azure PowerShell task:
trigger:
- master

pool:
  vmImage: 'ubuntu-latest'

steps:
- task: AzurePowerShell@5
  inputs:
    azureSubscription: 'script-connection'
    ScriptType: 'FilePath'
    ScriptPath: './Deploy-AzTemplate.ps1'
    ScriptArguments: -Location 'chinaeast2' -ResourceGroupName 'demogroup' -TemplateFile templates\mainTemplate.json
    azurePowerShellVersion: 'LatestVersion'
When you set the task to AzurePowerShell@5, the pipeline uses the Az module. If you're using the AzureRM module in your script, set the task to AzurePowerShell@3.
steps:
- task: AzurePowerShell@3
For azureSubscription, provide the name of the service connection you created.
inputs:
    azureSubscription: '<your-connection-name>'
For scriptPath, provide the relative path from the pipeline file to your script. You can look in your repository to see the path.
ScriptPath: '<your-relative-path>/<script-file-name>.ps1'
In ScriptArguments, provide any parameters needed by your script. The following example shows some parameters for a script, but you'll need to customize the parameters for your script.
ScriptArguments: -Location 'chinaeast2' -ResourceGroupName 'demogroup' -TemplateFile templates\mainTemplate.json
When you select Save, the build pipeline is automatically run. Go back to the summary for your build pipeline, and watch the status.
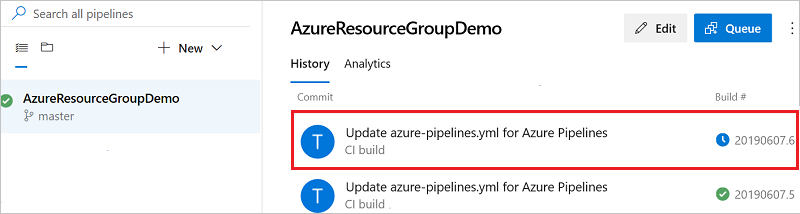
You can select the currently running pipeline to see details about the tasks. When it finishes, you see the results for each step.
Copy and deploy tasks
This section shows how to configure continuous deployment by using two tasks. The first task stages the artifacts to a storage account and the second task deploys the template.
To copy files to a storage account, the service principal for the service connection must be assigned the Storage Blob Data Contributor or Storage Blob Data Owner role. For more information, see Get started with AzCopy.
The following YAML shows the Azure file copy task.
trigger:
- master

pool:
  vmImage: 'windows-latest'

steps:
- task: AzureFileCopy@4
  inputs:
    SourcePath: 'templates'
    azureSubscription: 'copy-connection'
    Destination: 'AzureBlob'
    storage: 'demostorage'
    ContainerName: 'projecttemplates'
  name: AzureFileCopy
There are several parts of this task to revise for your environment. The SourcePath indicates the location of the artifacts relative to the pipeline file.
SourcePath: '<path-to-artifacts>'
For azureSubscription, provide the name of the service connection you created.
azureSubscription: '<your-connection-name>'
For storage and container name, provide the names of the storage account and container you want to use for storing the artifacts. The storage account must exist.
storage: '<your-storage-account-name>'
ContainerName: '<container-name>'
After creating the copy file task, you're ready to add the task to deploy the staged template.
The following YAML shows the Azure Resource Manager template deployment task:
- task: AzureResourceManagerTemplateDeployment@3
  inputs:
    deploymentScope: 'Resource Group'
    azureResourceManagerConnection: 'copy-connection'
    subscriptionId: 'aaaa0a0a-bb1b-cc2c-dd3d-eeeeee4e4e4e'
    action: 'Create Or Update Resource Group'
    resourceGroupName: 'demogroup'
    location: 'China North 2'
    templateLocation: 'URL of the file'
    csmFileLink: '$(AzureFileCopy.StorageContainerUri)templates/mainTemplate.json$(AzureFileCopy.StorageContainerSasToken)'
    csmParametersFileLink: '$(AzureFileCopy.StorageContainerUri)templates/mainTemplate.parameters.json$(AzureFileCopy.StorageContainerSasToken)'
    deploymentMode: 'Incremental'
    deploymentName: 'deploy1'
There are several parts of this task to review in greater detail.
deploymentScope: Select the scope of deployment from the options:Management Group,Subscription, andResource Group. To learn more about the scopes, see Deployment scopes.azureResourceManagerConnection: Provide the name of the service connection you created.subscriptionId: Provide the target subscription ID. This property only applies to the Resource Group deployment scope and the subscription deployment scope.resourceGroupNameandlocation: provide the name and location of the resource group you want to deploy to. The task creates the resource group if it doesn't exist.resourceGroupName: '<resource-group-name>' location: '<location>'csmFileLink: Provide the link for the staged template. When setting the value, use variables returned from the file copy task. The following example links to a template named mainTemplate.json. The folder named templates is included because that where the file copy task copied the file to. In your pipeline, provide the path to your template and the name of your template.csmFileLink: '$(AzureFileCopy.StorageContainerUri)templates/mainTemplate.json$(AzureFileCopy.StorageContainerSasToken)'
Your pipeline look like:
trigger:
- master

pool:
  vmImage: 'windows-latest'

steps:
- task: AzureFileCopy@4
  inputs:
    SourcePath: 'templates'
    azureSubscription: 'copy-connection'
    Destination: 'AzureBlob'
    storage: 'demostorage'
    ContainerName: 'projecttemplates'
  name: AzureFileCopy
- task: AzureResourceManagerTemplateDeployment@3
  inputs:
    deploymentScope: 'Resource Group'
    azureResourceManagerConnection: 'copy-connection'
    subscriptionId: 'aaaa0a0a-bb1b-cc2c-dd3d-eeeeee4e4e4e'
    action: 'Create Or Update Resource Group'
    resourceGroupName: 'demogroup'
    location: 'China North 2'
    templateLocation: 'URL of the file'
    csmFileLink: '$(AzureFileCopy.StorageContainerUri)templates/mainTemplate.json$(AzureFileCopy.StorageContainerSasToken)'
    csmParametersFileLink: '$(AzureFileCopy.StorageContainerUri)templates/mainTemplate.parameters.json$(AzureFileCopy.StorageContainerSasToken)'
    deploymentMode: 'Incremental'
    deploymentName: 'deploy1'
When you select Save, the build pipeline is automatically run. Under the Jobs frame, select Job to see the job status.
Next steps
- To use the what-if operation in a pipeline, see Test ARM templates with What-If in a pipeline.
- To learn about using ARM templates with GitHub Actions, see Deploy Azure Resource Manager templates by using GitHub Actions.