Change languages in Azure Stack HCI
Applies to: Azure Stack HCI, versions 22H2 and 21H2; Windows Server 2022, Windows Server 2019
You can change your preferred language in a management PC, Windows Admin Center, Microsoft Edge, and the Azure Stack HCI operating system on the servers that you manage. Windows Admin Center remains in your language of choice regardless of language changes in these other resources.
This article explains how to change languages in:
- Windows 10
- Windows Admin Center
- Microsoft Edge
- Server Core in the Azure Stack HCI operating system
Change the language in the management PC
If you are using Windows 10 on your management PC, you can install a language pack for use in Windows 10, the apps you use, and the websites that you visit. You also can change your keyboard language, and set the input language in a language-preference order for websites and apps.
Changing either the language that you use in Windows 10 or the keyboard language doesn't affect the display language in Windows Admin Center.
Important
After changing your language in Windows 10, we recommend to set your preferred keyboard language as the default before signing out to avoid potential keyboard input issues.
To learn more, see Manage the input and display language settings in Windows 10.
Change the language in Windows Admin Center
You can change the language in Windows Admin Center and the region format as needed according to your location. Changing either of these options in Windows Admin Center has no effect on the language setting of the management PC running Windows 10.
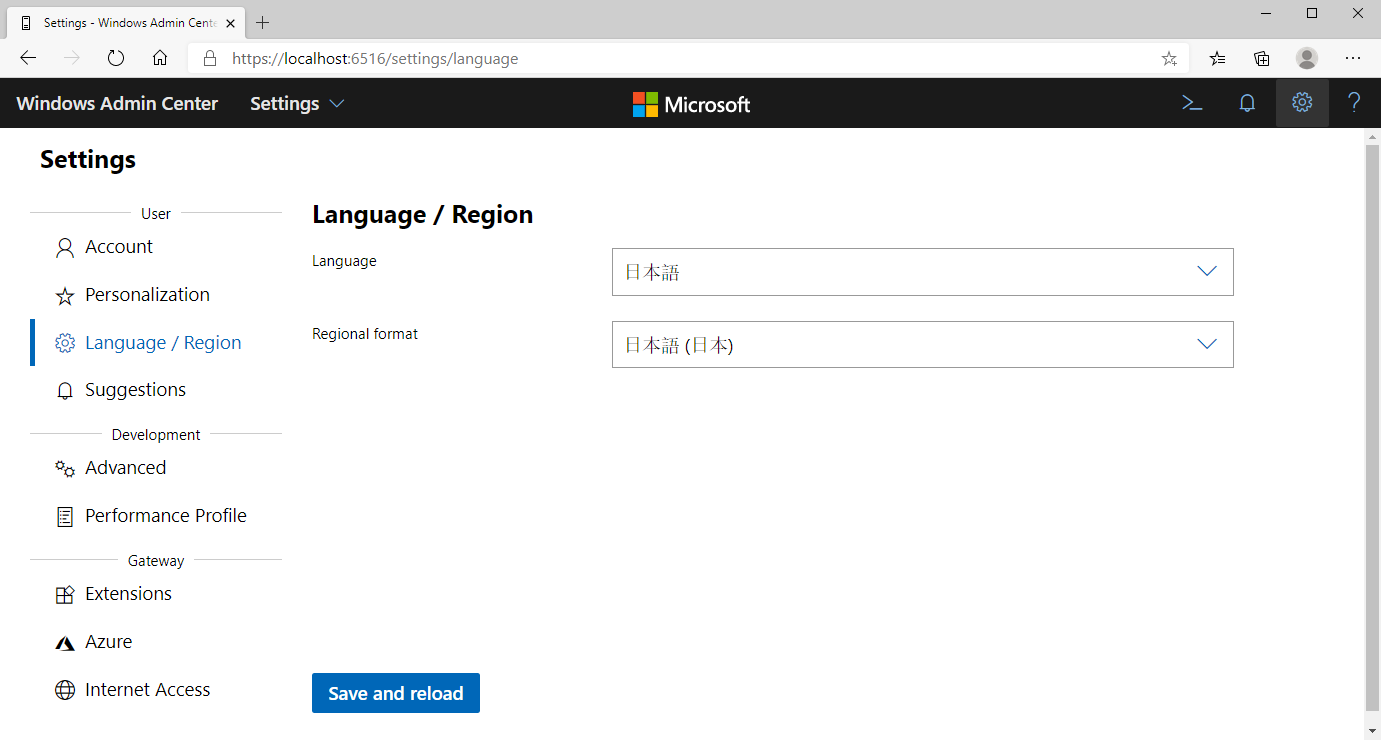
To change the language in Windows Admin Center:
On the All connections pane, select the Settings gear icon, and then under Settings, select Language / Region.
Expand the Language drop-down list to select your preferred language, and then expand the Regional format drop-down list to select a different region if needed.
Select Save and reload.

To learn more, see Windows Admin Center Settings.
Change the language in Microsoft Edge
You can add supported languages to Microsoft Edge, and reorder your language preferences in the browser. You also can add a foreign language translator extension to the browser to get translations.
To learn more, see Microsoft Edge language support.
Change the language in Server Core
If you need to change the language in Server Core of the Azure Stack HCI operating system, we recommend doing so after clustering your servers. You can add supported language packs to Server Core, and then change the language and keyboard layout to the one you want to use. You can also use a Windows PowerShell command to override the current language and keyboard input method.
Each language pack is installed in the directory %SystemRoot%\System32\%Language-ID%. For example, C:\Windows\System32\es-ES is the location of the Spanish language pack. Each language pack is about 50 MB. If you want to install all 38 language packs, the size of the required image that you create is about 2 GB.
To learn more, see Available languages for Windows.
To manually obtain and add language packs to the operating system:
Add a language pack to Server Core using the DISM / Add-WindowsPackage tool. The
Add-WindowsPackagePowerShell command is the equivalent of the DISM executable.To learn more, see Add languages to Windows images.
We recommend adding Language Features on Demand (FODs) to enable additional functionality to the language you added, as in the following example:
dism /online /add-capability /capabilityname:Language.Basic~~~de-de~0.0.1.0To learn more, see Language and region Features on Demand (FOD).
You can use the PowerShell Set-WinUILanguageOverride cmdlet to change the Windows UI language in the operating system of the current user account. In the following example,
de-DEspecifies German as the current language setting in the operating system:Set-WinUILanguageOverride de-DETo learn more, see Set-WinUILanguageOverride.
Next steps
For more information, see also: