Manage tenant logical networks
Applies to: Azure Stack HCI, versions 22H2; Windows Server 2022, Windows Server 2019, Windows Server 2016
This topic provides step-by-step instructions on how to use Windows Admin Center to create, update, and delete logical networks after you have deployed Network Controller. A Software Defined Networking (SDN) logical network is a traditional VLAN-based network.
By modeling a VLAN-based network as an SDN logical network, you can apply network policies to workloads that are attached to these networks. For example, you can apply a network security group to workloads that are attached to SDN logical networks. Applying the ACLs protects your VLAN-based workloads from both external and internal attacks.
Create a logical network
Use the following steps in Windows Admin Center to create a logical network.
On the Windows Admin Center home screen, under All connections, select the cluster that you want to create the logical network on.
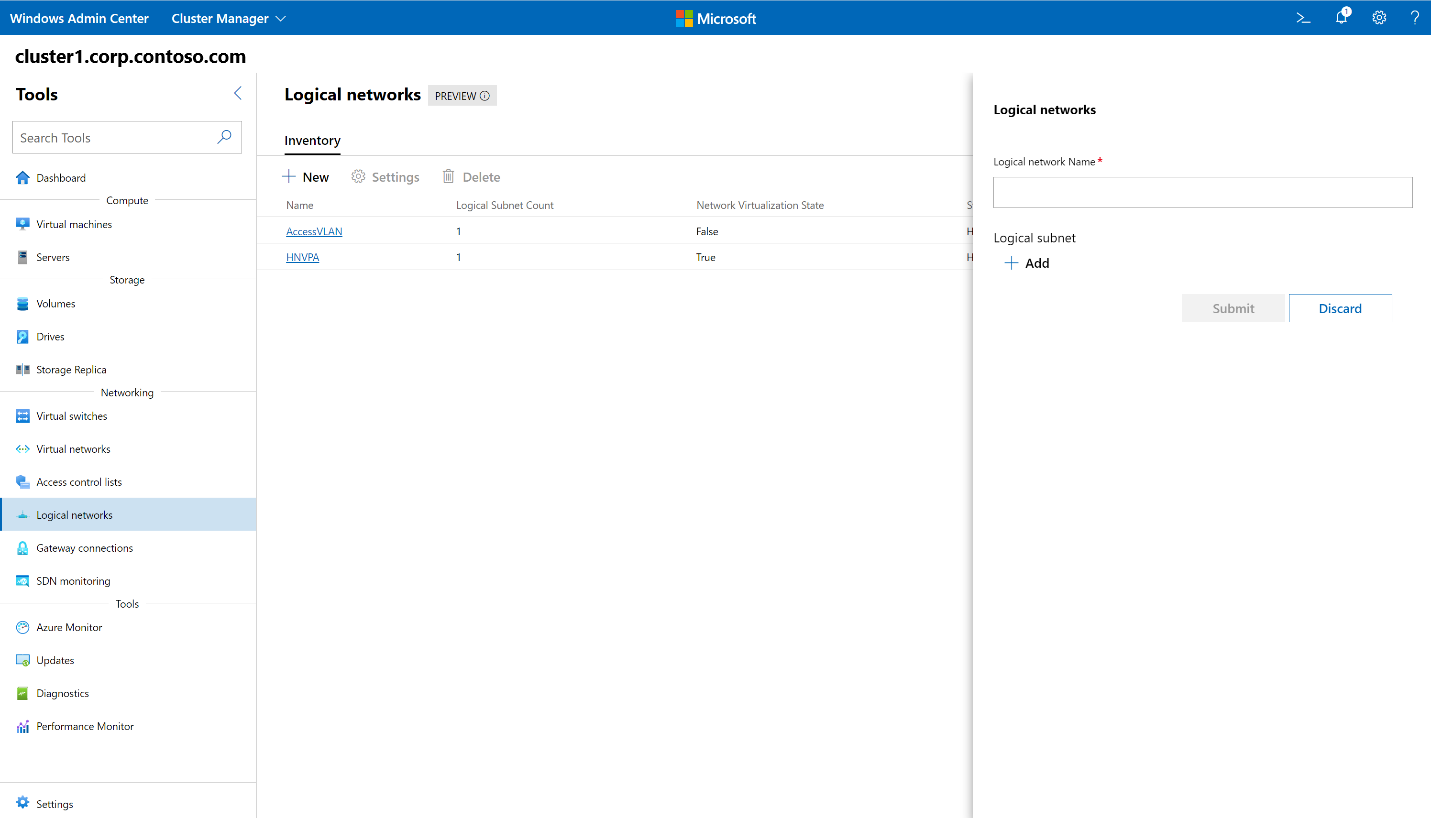
Under Tools, scroll down to the Networking area, and select Logical networks.
Under Logical networks, select the Inventory tab, then select New.
In the Logical networks pane, type a name for the logical network.
Under Logical subnet, select Add.
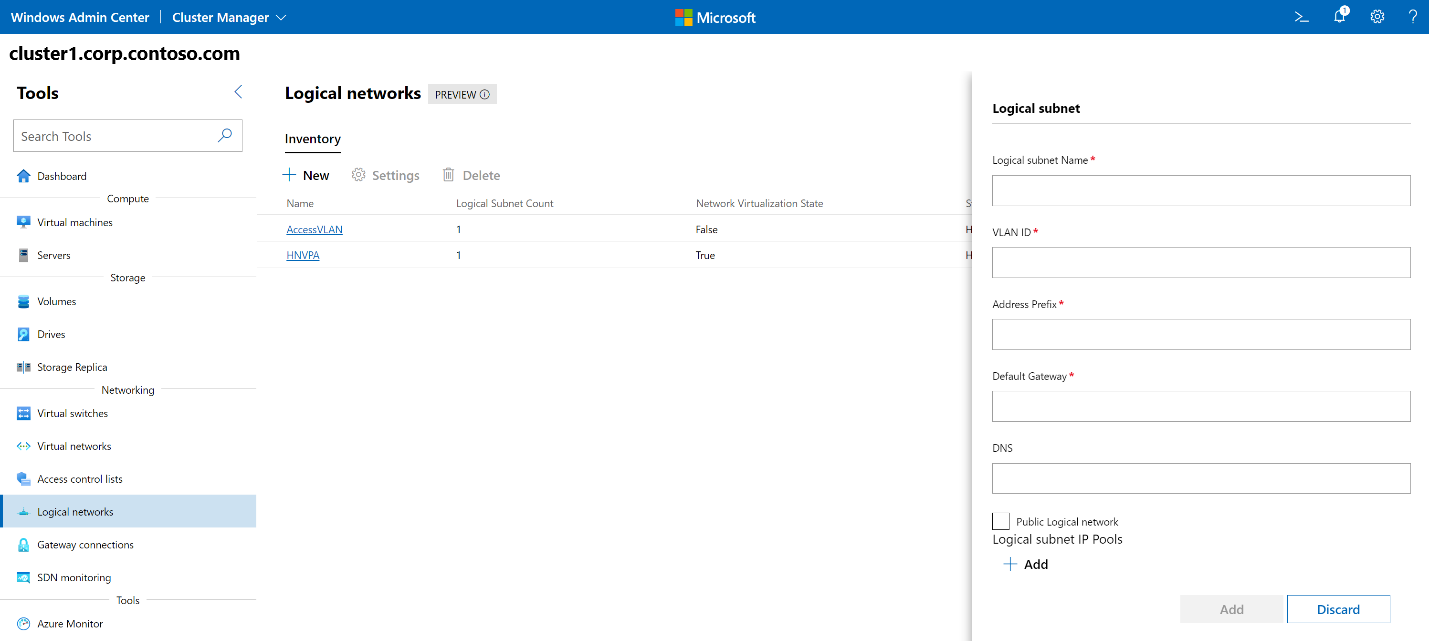
In the Logical subnet pane, type a name for the subnet, and then provide the following information:
- A VLAN ID for the network.
- An Address Prefix in Classless Interdomain Routing (CIDR) notation.
- The Default Gateway for the network.
- The DNS server address, if needed.
- Select the Public Logical network checkbox if the logical network is to provide connectivity for external clients.
Under Logical subnet IP Pools, select Add and then provide the following information:
- A logical IP Pool Name.
- A Start IP address.
- An End IP address. The start and end IP addresses must be within the address prefix provided for the subnet.
- Select Add.
On the Logical Subnet page, select Add.
On the Logical networks page, select Submit.
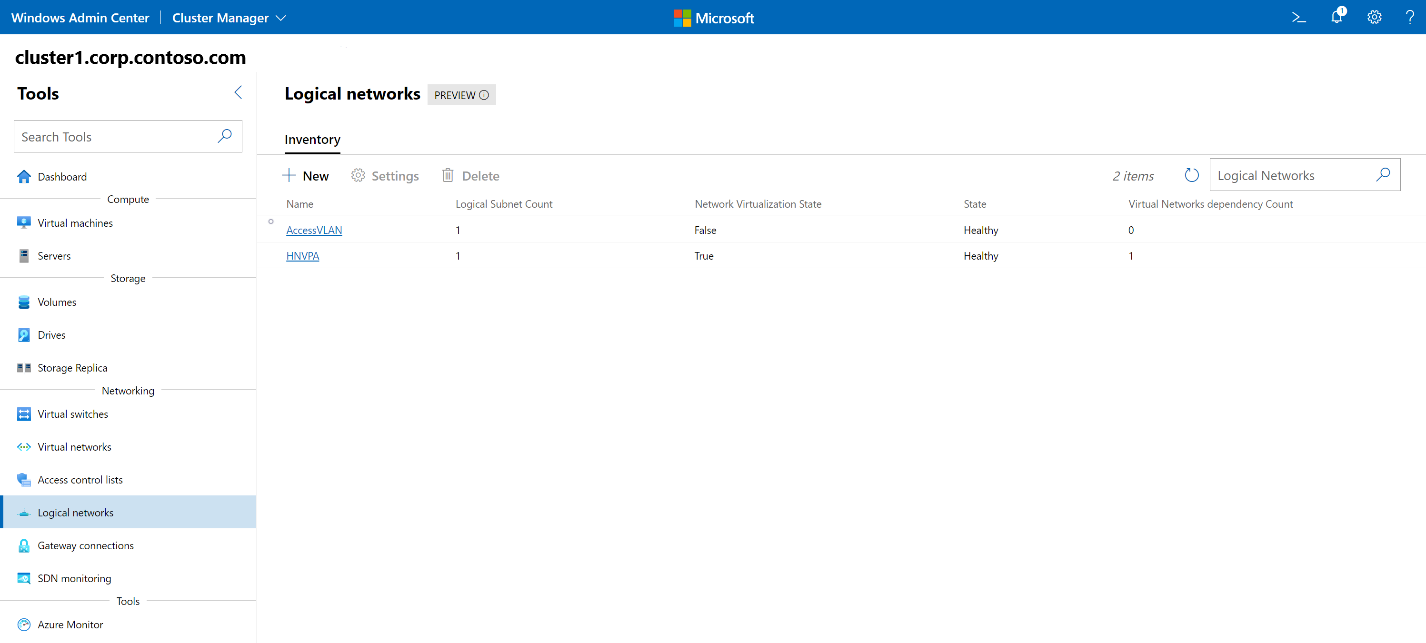
In the Logical networks list, verify that the state of the logical network is Healthy.
Get a list of logical networks
You can easily see all of the logical networks in your cluster.
- On the Windows Admin Center home screen, under All connections, select the cluster on which you want to view logical networks.
- Under Tools, scroll down to the Networking area, and select Logical networks.
- The Inventory tab lists all logical networks available on the cluster, and provides commands to manage individual logical networks. You can:
- View the list of logical networks.
- View logical network settings, the state of each logical network, and whether network virtualization is enabled for each logical network. If network virtualization is enabled, you can also view the number of virtual networks associated with each logical network.
- Change the settings of a logical network.
- Delete a logical network.
View logical network details
You can view detailed information for a specific logical network from its dedicated page.
- Under Tools, scroll down to the Networking area, and select Logical networks.
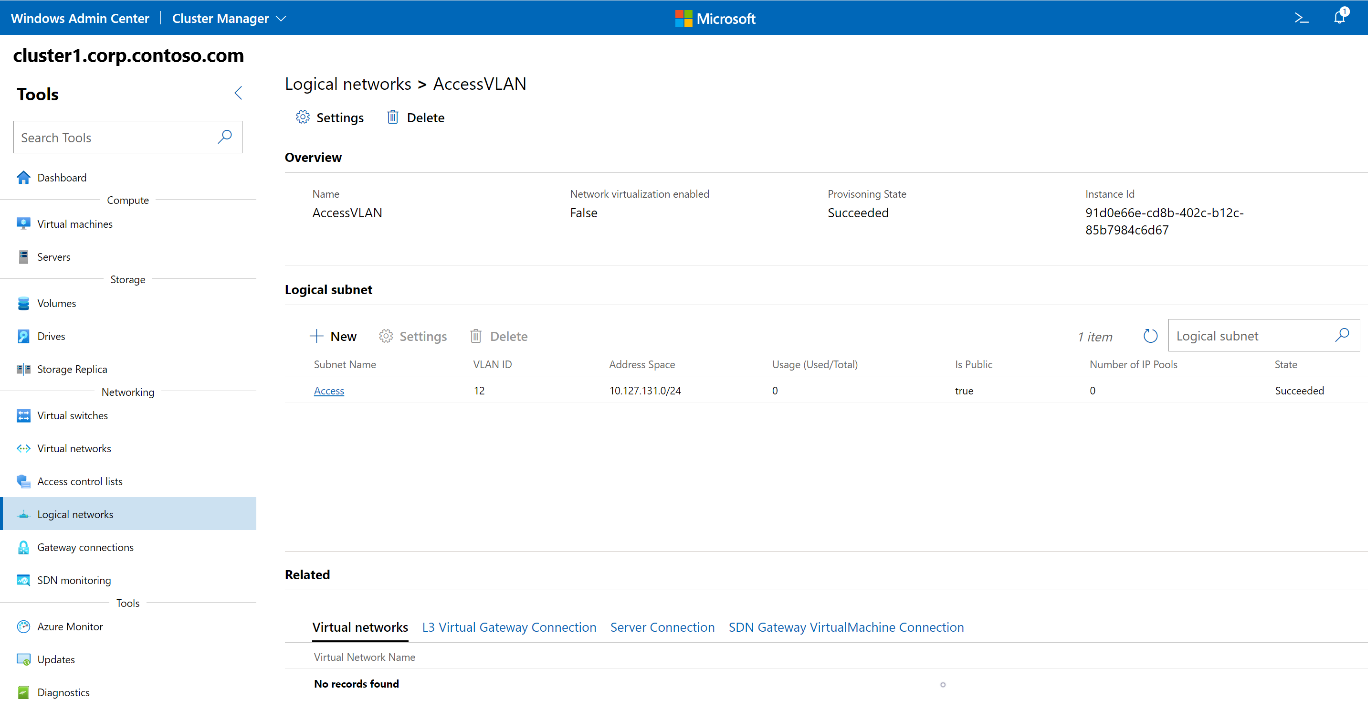
- Select the Inventory tab, and then select the logical network that you want to view details on. On the subsequent page, you can:
- View the provisioning state of the logical network (Succeeded, Failed).
- View whether network virtualization is enabled for the logical network.
- View the subnets in the logical network.
- Add new subnets, delete existing subnets, and modify the settings for a logical network subnet.
- Select each subnet to go to its Subnet page, where you can add, remove, and modify logical subnet IP pools.
- View virtual networks and connections associated with the logical network.
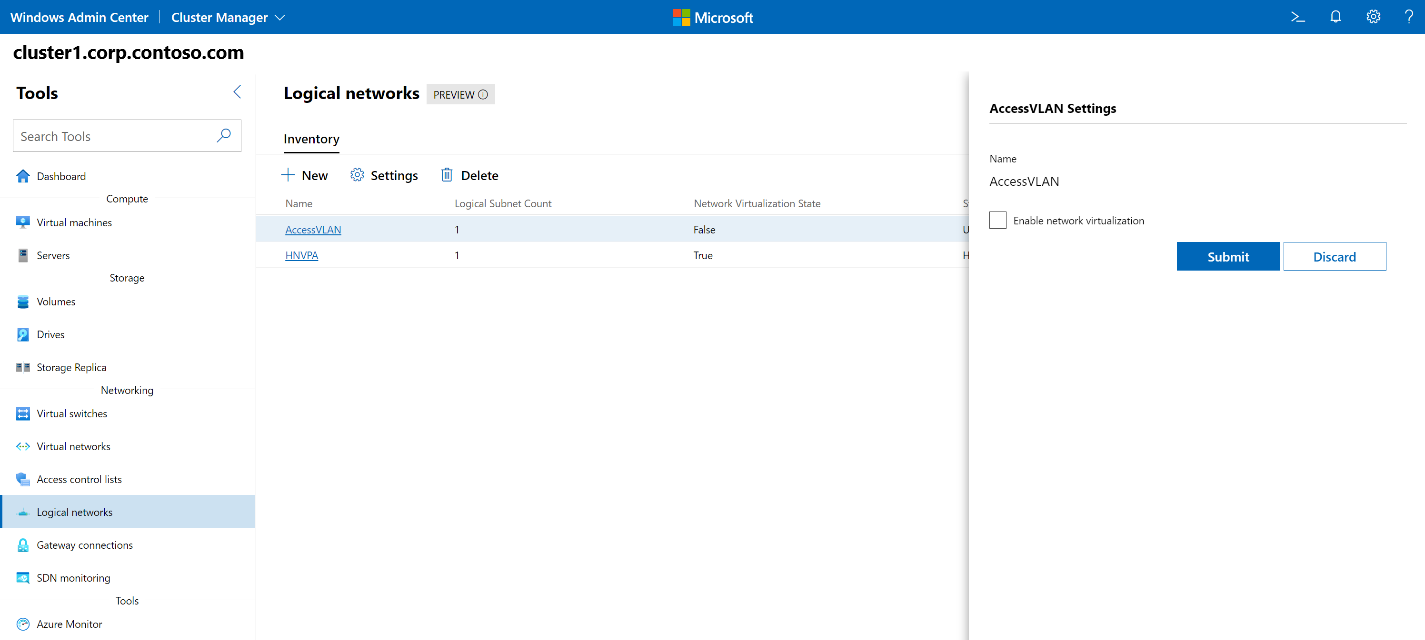
Change a logical network's virtualization setting
You can change the network virtualization setting for a logical network.
- Under Tools, scroll down to the Networking area, and select Logical networks.
- Select the Inventory tab, select the logical network, and then select Settings.
- If you plan to deploy virtual networks on top of the logical network, under the logical network name, select the Enable network virtualization checkbox, and then select Submit.
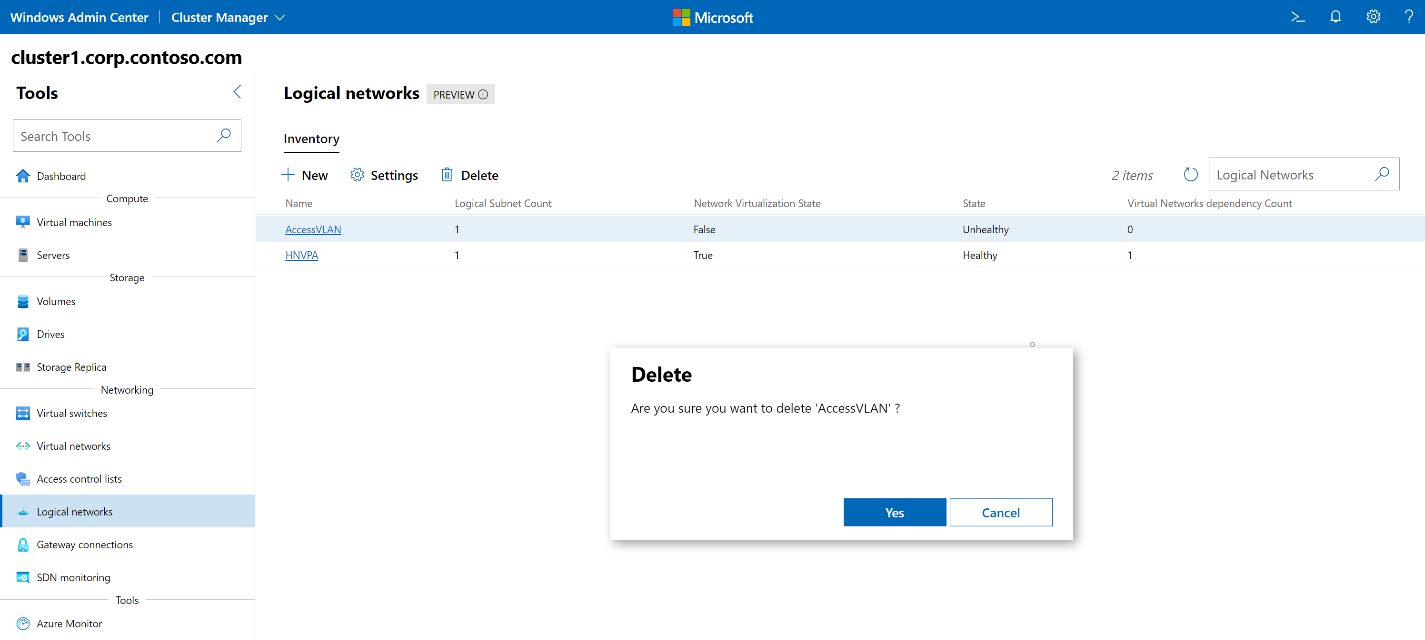
Delete a logical network
You can delete a logical network if you no longer need it.
- Under Tools, scroll down to the Networking area, and select Logical networks.
- Select the Inventory tab, select the logical network, and then select Delete.
- On the Delete confirmation prompt, select Yes.
- Next to the Logical networks search box, select Refresh to ensure that the logical network has been deleted.
Next steps
For more information, see also:
