In this article, you can find the steps to remove a virtual machine (VM) and its dependencies from Azure Stack Hub.
If you remove a VM from Azure Stack Hub, the component dependencies; that is, data disks, virtual network interfaces, and diagnostic containers, remain in the resource group. These items won't be automatically deleted along with your OS disk. Follow the steps in this article to remove your OS disc and component dependencies.
When you create a new VM, you typically create a new resource group and put all the dependencies in that resource group. When you want to delete the VM and all of its dependencies, you can delete the resource group. Azure Resource Manager successfully deletes the dependencies. There are times when you cannot delete the resource group to remove the VM; for example, the VM might contain resources that are not dependencies of the VM that you want to keep.
You can use the Azure portal or PowerShell to remove your VM and its dependencies.
If you cannot delete the resource group, either the dependencies are not in the same resource group, or there are other resources. Follow these steps:
- Open the Azure Stack user portal.
- Select Virtual machines. Find your virtual machine, and then select your machine to open the Virtual machine blade.
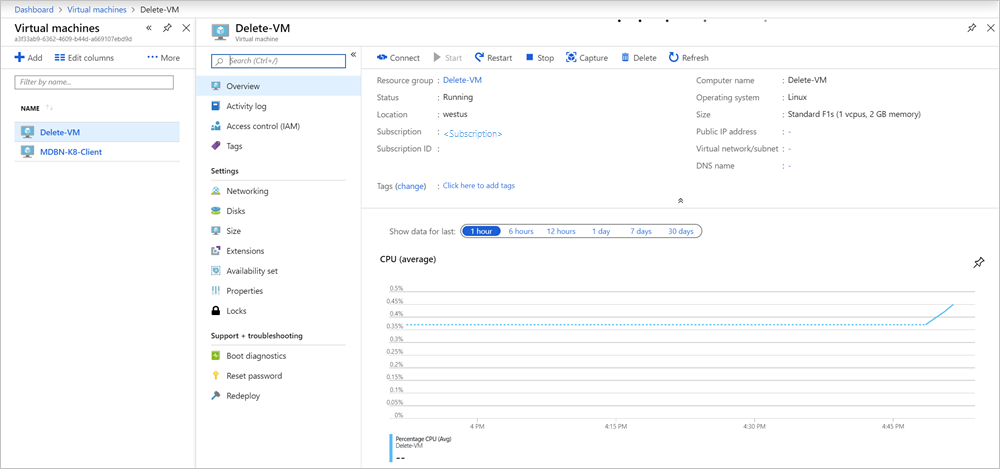
- Make a note of the resource group that contains the VM and VM dependencies.
- Select Networking and make a note of the networking interface.
- Select Disks and make a note of the OS disk and data disks.
- Return to the Virtual machine blade, and select Delete.
- Type yes to confirm the delete, and then select Delete.
- Select Resource groups, and then select the resource group.
- Delete the dependencies by manually selecting the items you noted. For each item, select Delete:
- Type yes to confirm the delete and select Delete.
- Wait for the resource to delete completely.
- You can then delete the next dependency.
If you cannot delete the resource group, either the dependencies are not in the same resource group, or there are other resources. Follow the steps in this section.
Connect to your Azure Stack Hub environment, and then update the following variables with your VM name and resource group. For instructions on connecting your PowerShell session to Azure Stack Hub, see Connect to Azure Stack Hub with PowerShell as a user.
$machineName = 'VM_TO_DELETE'
$resGroupName = 'RESOURCE_GROUP'
$machine = Get-AzVM -Name $machineName -ResourceGroupName $resGroupName
Retrieve the VM information and name of dependencies. In the same session, run the following cmdlets:
$azResParams = @{
'ResourceName' = $machineName
'ResourceType' = 'Microsoft.Compute/virtualMachines'
    'ResourceGroupName' = $resGroupName
}
$vmRes = Get-AzResource @azResParams
$vmId = $vmRes.Properties.VmId
Delete the boot diagnostic storage container. If your machine name is shorter than 9 characters, change the index to your string length in the substring when creating the $diagContainer variable.
In the same session, run the following cmdlets:
$container = [regex]::match($machine.DiagnosticsProfile.bootDiagnostics.storageUri, '^http[s]?://(.+?)\.').groups[1].value
$diagContainer = ('bootdiagnostics-{0}-{1}' -f $machine.Name.ToLower().Substring(0, 9), $vmId)
$containerRg = (Get-AzStorageAccount | where { $_.StorageAccountName -eq $container }).ResourceGroupName
$storeParams = @{
    'ResourceGroupName' = $containerRg
    'Name' = $container }
Get-AzStorageAccount @storeParams | Get-AzStorageContainer | where { $_.Name-eq $diagContainer } | Remove-AzStorageContainer -Force
Remove the virtual network interface:
$machine | Remove-AzNetworkInterface -Force
Delete the operating system disk:
$osVhdUri = $machine.StorageProfile.OSDisk.Vhd.Uri
$osDiskConName = $osVhdUri.Split('/')[-2]
$osDiskStorageAcct = Get-AzStorageAccount | where { $_.StorageAccountName -eq $osVhdUri.Split('/')[2].Split('.')[0] }
$osDiskStorageAcct | Remove-AzStorageBlob -Container $osDiskConName -Blob $osVhdUri.Split('/')[-1] -Confirm:$true
Remove the data disks attached to your VM:
if ($machine.StorageProfile.DataDisks.Name.Count -gt 0)
 {
    Write-Verbose -Message 'Deleting disks...'
        foreach ($uri in $machine.StorageProfile.DataDisks.Vhd.Uri )
        {
            $dataDiskStorageAcct = Get-AzStorageAccount | where { $_.StorageAccountName -eq $uri.Split('/')[2].Split('.')[0]
             $dataDiskStorageAcct | Remove-AzStorageBlob -Container $uri.Split('/')[-2] -Blob $uri.Split('/')[-1] -ea Ignore -Confirm:$true
        }
 }
Finally, delete the VM. The cmdlet takes some time to run. You can audit the components attached to the VM by reviewing the VM object in PowerShell. To review the object, refer to the variable that contains the VM object. Type $machine.
To delete the VM, in the same session, run the following command:
$machine | Remove-AzVM -Force
If you cannot delete the resource group, either the dependencies are not in the same resource group, or there are other resources. Follow the steps in this section.
Connect to your Azure Stack Hub environment, and then update the following variables with your VM name and resource group. For instructions on connecting your PowerShell session to Azure Stack Hub, see Connect to Azure Stack Hub with PowerShell as a user.
$machineName = 'VM_TO_DELETE'
$resGroupName = 'RESOURCE_GROUP'
$machine = Get-AzureRmVM -Name $machineName -ResourceGroupName $resGroupName
Retrieve the VM information and name of dependencies. In the same session, run the following cmdlets:
$azResParams = @{
'ResourceName' = $machineName
'ResourceType' = 'Microsoft.Compute/virtualMachines'
    'ResourceGroupName' = $resGroupName
}
$vmRes = Get-AzureRmResource @azResParams
$vmId = $vmRes.Properties.VmId
Delete the boot diagnostic storage container. If your machine name is shorter than 9 characters, change the index to your string length in the substring when creating the $diagContainer variable.
In the same session, run the following cmdlets:
$container = [regex]::match($machine.DiagnosticsProfile.bootDiagnostics.storageUri, '^http[s]?://(.+?)\.').groups[1].value
$diagContainer = ('bootdiagnostics-{0}-{1}' -f $machine.Name.ToLower().Substring(0, 9), $vmId)
$containerRg = (Get-AzureRmStorageAccount | where { $_.StorageAccountName -eq $container }).ResourceGroupName
$storeParams = @{
    'ResourceGroupName' = $containerRg
    'Name' = $container }
Get-AzureRmStorageAccount @storeParams | Get-AzureStorageContainer | where { $_.Name-eq $diagContainer } | Remove-AzureStorageContainer -Force
Remove the virtual network interface:
$machine | Remove-AzureRmNetworkInterface -Force
Delete the operating system disk:
$osVhdUri = $machine.StorageProfile.OSDisk.Vhd.Uri
$osDiskConName = $osVhdUri.Split('/')[-2]
$osDiskStorageAcct = Get-AzureRmStorageAccount | where { $_.StorageAccountName -eq $osVhdUri.Split('/')[2].Split('.')[0] }
$osDiskStorageAcct | Remove-AzureStorageBlob -Container $osDiskConName -Blob $osVhdUri.Split('/')[-1]
Remove the data disks attached to your VM:
if ($machine.DataDiskNames.Count -gt 0)
 {
    Write-Verbose -Message 'Deleting disks...'
        foreach ($uri in $machine.StorageProfile.DataDisks.Vhd.Uri )
        {
            $dataDiskStorageAcct = Get-AzureRmStorageAccount -Name $uri.Split('/')[2].Split('.')[0]
             $dataDiskStorageAcct | Remove-AzureStorageBlob -Container $uri.Split('/')[-2] -Blob $uri.Split('/')[-1] -ea Ignore
        }
 }
Finally, delete the VM. The cmdlet takes some time to run. You can audit the components attached to the VM by reviewing the VM object in PowerShell. To review the object, refer to the variable that contains the VM object. Type $machine.
To delete the VM, in the same session, run the following command:
$machine | Remove-AzureRmVM -Force