Note
Access to this page requires authorization. You can try signing in or changing directories.
Access to this page requires authorization. You can try changing directories.
In this article, you learn how to use Azure OpenAI Service and Azure Container Apps to create a natural language interface for the Spring PetClinic sample application.
For information on the architectural details of this application, see Java PetClinic AI sample in Container Apps overview.
Considerations
Deployment time: The AI-enable application deployed in this article requires a series of connected services to operate. Deployment times can take upwards of 15 minutes to complete. Plan your time accordingly as you work through this tutorial.
Model availability: The sample application uses Azure OpenAI Service deployment modules
gpt-4oandtext-embedding-ada-002, which might not be available in all Azure regions.For more information on availability, see Azure OpenAI Service models and select your desired deployment region.
Prerequisites
- An Azure subscription. Create one for free..
ContributorandUser Access Administratorroles, or theOwnerrole. For more information, see Assign Azure roles using the Azure portal.- A GitHub account.
- The latest version of git.
- The Microsoft Build of Open JDK, version 17 or higher.
- Azure Developer CLI.
- Azure CLI.
- Maven.
Setup
Clone the sample application to your machine by using the following command:
git clone https://github.com/Azure-Samples/spring-petclinic-ai.gitNavigate to the spring-petclinic-ai folder by using the following command:
cd spring-petclinic-aiIf you don't already have it, install the
containerappextension for the Azure CLI by using the following command:az extension add --name containerapp --upgradeSecurely log in to your Azure account by using the following command:
az auth loginThis command opens a web page where you can enter your Azure credentials to authenticate.
Deploy
Automatically deploy the application by using the following command:
azd upWhen you're prompted, enter my-first-ai for the environment name.
After that, enter values for
Azure SubscriptionandAzure location, substituting your actual values for the<..>placeholders in the following prompts:? Enter a new environment name: my-first-ai ? Select an Azure Subscription to use: <SUBSCRIPTION> ? Select an Azure location to use: <REGION>Once you provide all the required values, you might need to wait upwards of 15 minutes for the application to deploy.
When deployment is complete, you see output similar to the following to notify you of a successful deployment:
(✓) Done: Resource group: rg-my-first-ai (5.977s)
(✓) Done: Virtual Network: vnet-my-first-ai (7.357s)
(✓) Done: Container Registry: crb36onby7z5ooc (25.742s)
(✓) Done: Azure OpenAI: openai-my-first-ai (25.324s)
(✓) Done: Azure AI Services Model Deployment: openai-my-first-ai/text-embedding-ada-002 (42.909s)
(✓) Done: Azure AI Services Model Deployment: openai-my-first-ai/gpt-4o (44.21s)
(✓) Done: Container Apps Environment: aca-env-my-first-ai (3m1.361s)
(✓) Done: Container App: petclinic-ai (22.701s)

INFO: Deploy finish succeed!
INFO: App url: petclinic-ai.<CLUSTER>.<REGION>.azurecontainerapps.cn

Packaging services (azd package)

(✓) Done: Packaging service petclinic-ai

Deploying services (azd deploy)

(✓) Done: Deploying service petclinic-ai
- Endpoint: https://petclinic-ai.<CLUSTER>.<REGION>.azurecontainerapps.cn/

SUCCESS: Your up workflow to provision and deploy to Azure completed in 17 minutes 40 seconds.
Locate the application URL.
Inspect the output and find the deployment success message and copy the URL to the clipboard.
The success message resembles the following output:
INFO: Deploy finish succeed!
INFO: App url: https://petclinic-ai.<CLUSTER>.<REGION>.azurecontainerapps.cn
Try your application
View the application in a web browser using the URL you copied at the end of the last section.
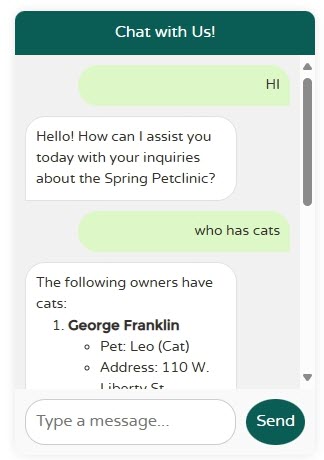
You can interact with the chatbot via prompts like the following:
- List all registered pet owners.
- Add a new pet owner named Steve.
- Change Steve's name to Steven.
- Add a pet named Spot.
- List all vets in your system.
The following image shows the result of asking the application to add a new pet owner to the system:
Updates
As you experiment with the sample, if you want to deploy any changes to the application, you can use the following commands to publish your changes:
azd package
azd deploy
Clean up resources
If you plan to continue working with subsequent tutorials, you might want to retain these resources. When you no longer need the resources, delete the resource group, which also deletes its resources.
To delete the resources, use the Azure portal to find the resource group of this sample, and then delete it.

