Note
Access to this page requires authorization. You can try signing in or changing directories.
Access to this page requires authorization. You can try changing directories.
This quickstart shows how to create an Azure Container Registry instance by using a Bicep file.
Bicep is a domain-specific language (DSL) that uses declarative syntax to deploy Azure resources. It provides concise syntax, reliable type safety, and support for code reuse. Bicep offers the best authoring experience for your infrastructure-as-code solutions in Azure.
Prerequisites
If you don't have an Azure subscription, create a trial subscription account before you begin.
Review the Bicep file
Use Visual Studio Code or your favorite editor to create a file with the following content and name it main.bicep:
@minLength(5)
@maxLength(50)
@description('Provide a globally unique name of your Azure Container Registry')
param acrName string = 'acr${uniqueString(resourceGroup().id)}'

@description('Provide a location for the registry.')
param location string = resourceGroup().location

@description('Provide a tier of your Azure Container Registry.')
param acrSku string = 'Basic'

resource acrResource 'Microsoft.ContainerRegistry/registries@2023-01-01-preview' = {
  name: acrName
  location: location
  sku: {
    name: acrSku
  }
  properties: {
    adminUserEnabled: false
  }
}

@description('Output the login server property for later use')
output loginServer string = acrResource.properties.loginServer
The following resource is defined in the Bicep file:
- Microsoft.ContainerRegistry/registries: create an Azure container registry
More Azure Container Registry template samples can be found in the quickstart template gallery.
Deploy the Bicep file
To deploy the file you've created, open PowerShell or Azure CLI. If you want to use the integrated Visual Studio Code terminal, select the ctrl + ` key combination. Change the current directory to where the Bicep file is located.
az group create --name myContainerRegRG --location chinaeast2

az deployment group create --resource-group myContainerRegRG --template-file main.bicep --parameters acrName={your-unique-name}
Note
Replace {your-unique-name}, including the curly braces, with a unique container registry name.
When the deployment finishes, you should see a message indicating the deployment succeeded.
Review deployed resources
Use the Azure portal or a tool such as the Azure CLI to review the properties of the container registry.
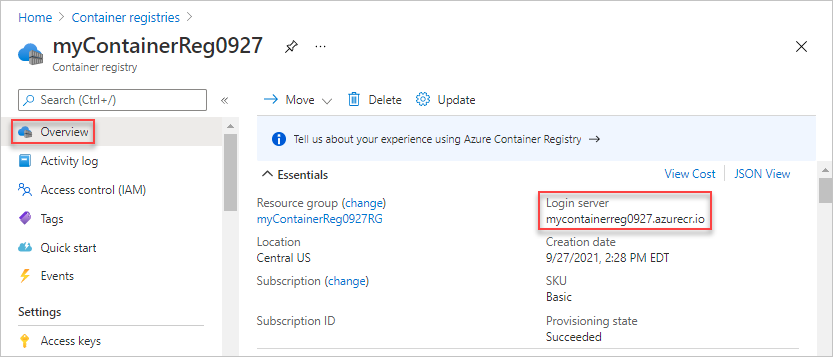
In the portal, search for Container Registries, and select the container registry you created.
On the Overview page, note the Login server of the registry. Use this URI when you use Docker to tag and push images to your registry. For information, see Push your first image using the Docker CLI.
Clean up resources
When you no longer need the resource, delete the resource group, and the registry. To do so, go to the Azure portal, select the resource group that contains the registry, and then select Delete resource group.
Next steps
- Learn more about registries, repositories, and artifacts.
- Learn how to push and pull images to your container registry using the Docker CLI.
- Learn how to create Bicep files with Visual Studio Code.