Note
Access to this page requires authorization. You can try signing in or changing directories.
Access to this page requires authorization. You can try changing directories.
Azure customers with an Enterprise Agreement can now initiate a change of channel partner (COCP) request through the Azure portal.
This change moves the ability to initiate the COCP process away from partners and enables the customers to start the process instead.
When a customer initiates a COCP, the new chosen partner receives a notification via email. The partner can either accept or decline the request. When the partner accepts, the Azure customer is notified and given the effective date when the new partner becomes active.
Prerequisites
The Public Customer Number (PCN) of your new partner: Ask your new partner to give you their partner PCN. This information is mandatory. The partner can obtain their PCN by accessing any existing contract within the Volume Licensing Central Contracts workspace.
Partner notification contact: When you initiate a COCP request, you need to provide the email address of a partner notification contact from your new partner organization. Ideally, your new partner should provide you with this contact information, because this person will be your primary point of contact for all future communications regarding your agreement.
If you don't have this information, you can enter any email address to proceed. However, if Microsoft can't verify the email address you provide, it doesn't send automatic notifications about the COCP request to your new partner (for privacy reasons). You have to go outside the system to directly inform your new partner about the initiation of the COCP process.
Tip
Always try to get the correct partner notification contact from your new partner before you start the COCP process. This action helps ensure a smooth and timely transition.
Make sure that the partner accepts the request within 10 days.
In scope for self-service COCP
- Only enterprise admins can initiate COCP requests via the Azure portal.
- The agreement type must be Enterprise Agreement and Enterprise Agreements Subscription.
- The agreement status must be active.
Out of scope for self-service COCP
You can't use the self-service COCP process in the following situations:
- Non-Enterprise Agreement programs, including:
- Select
- Select Plus
- Open Value
- Open Value Subscription
- EDU or Campus
- SPLA
- IVR
- MPSA
- Open license
- EAs with Microsoft Enterprise Direct Support (MSEDS) as the Bill to or Software Advisor
- EAs with expired or ended status
- Backdated COCP requests or early COCP requests that initiate before the anniversary date
Use the Azure portal to request a COCP
Make sure you're an enterprise admin on the Enterprise Agreement billing account.
Go to the Azure portal. Select Cost management + Billing > Billing scopes > Change Partner.
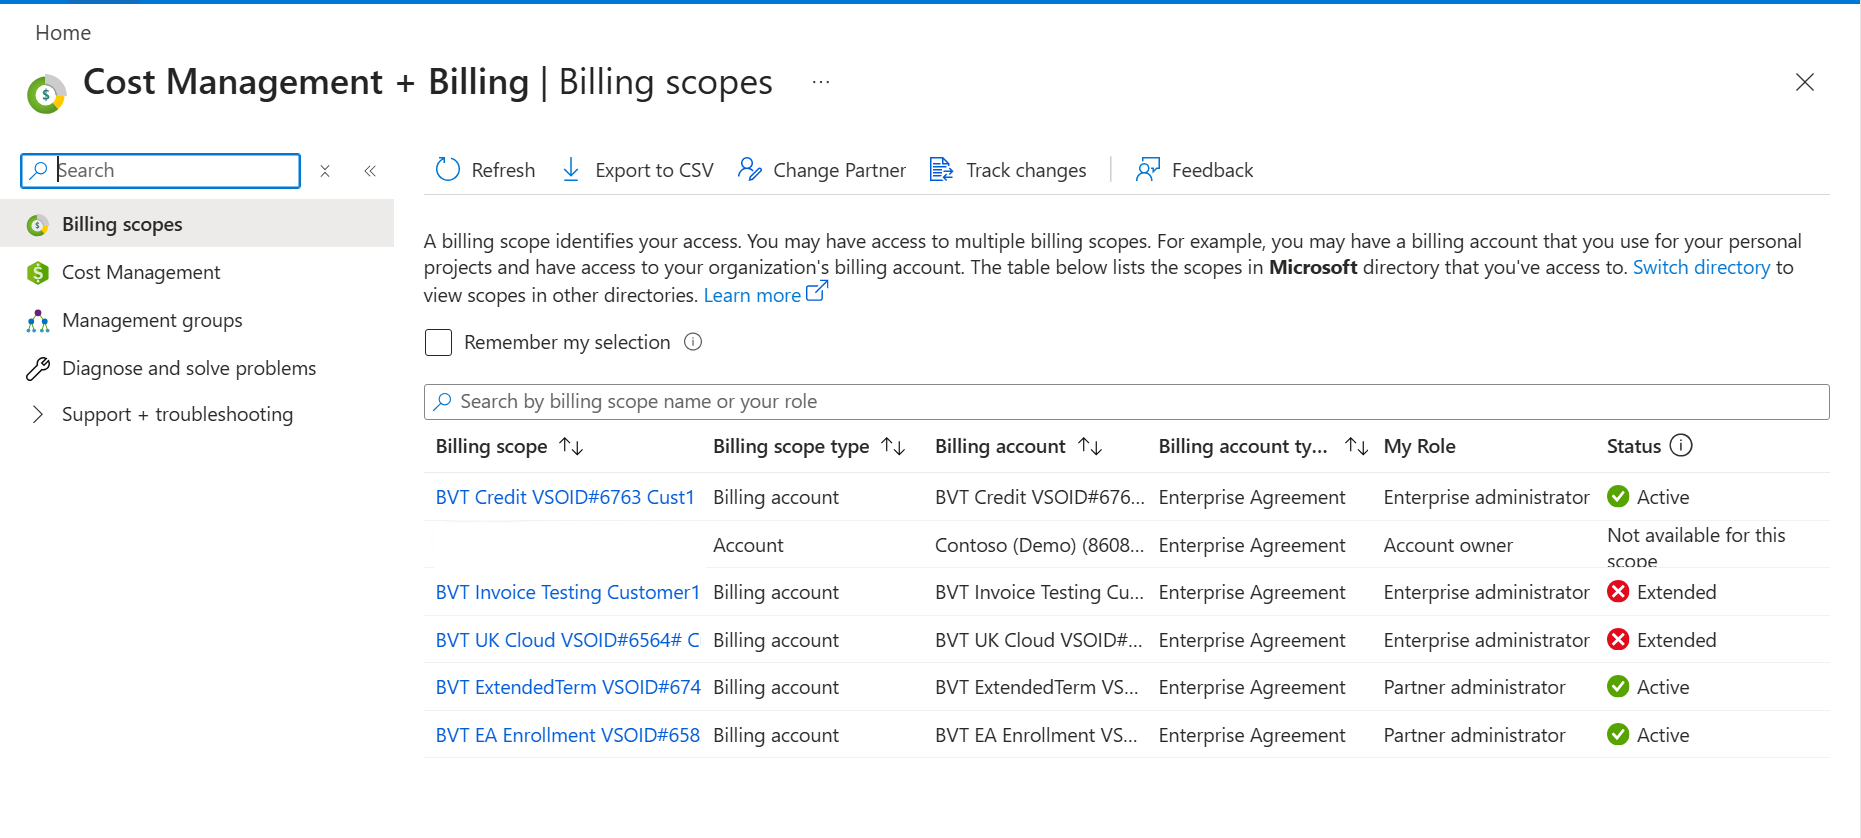
After you select Change Partner, you're redirected to a page that shows only the billing accounts that are eligible for a COCP request. You can select multiple billing accounts (up to a maximum of 20). Select the billing accounts that you want to transfer, and then select Next.
To change the partner on a specific billing account, select the account, select the three dots, and then select Change Partner.
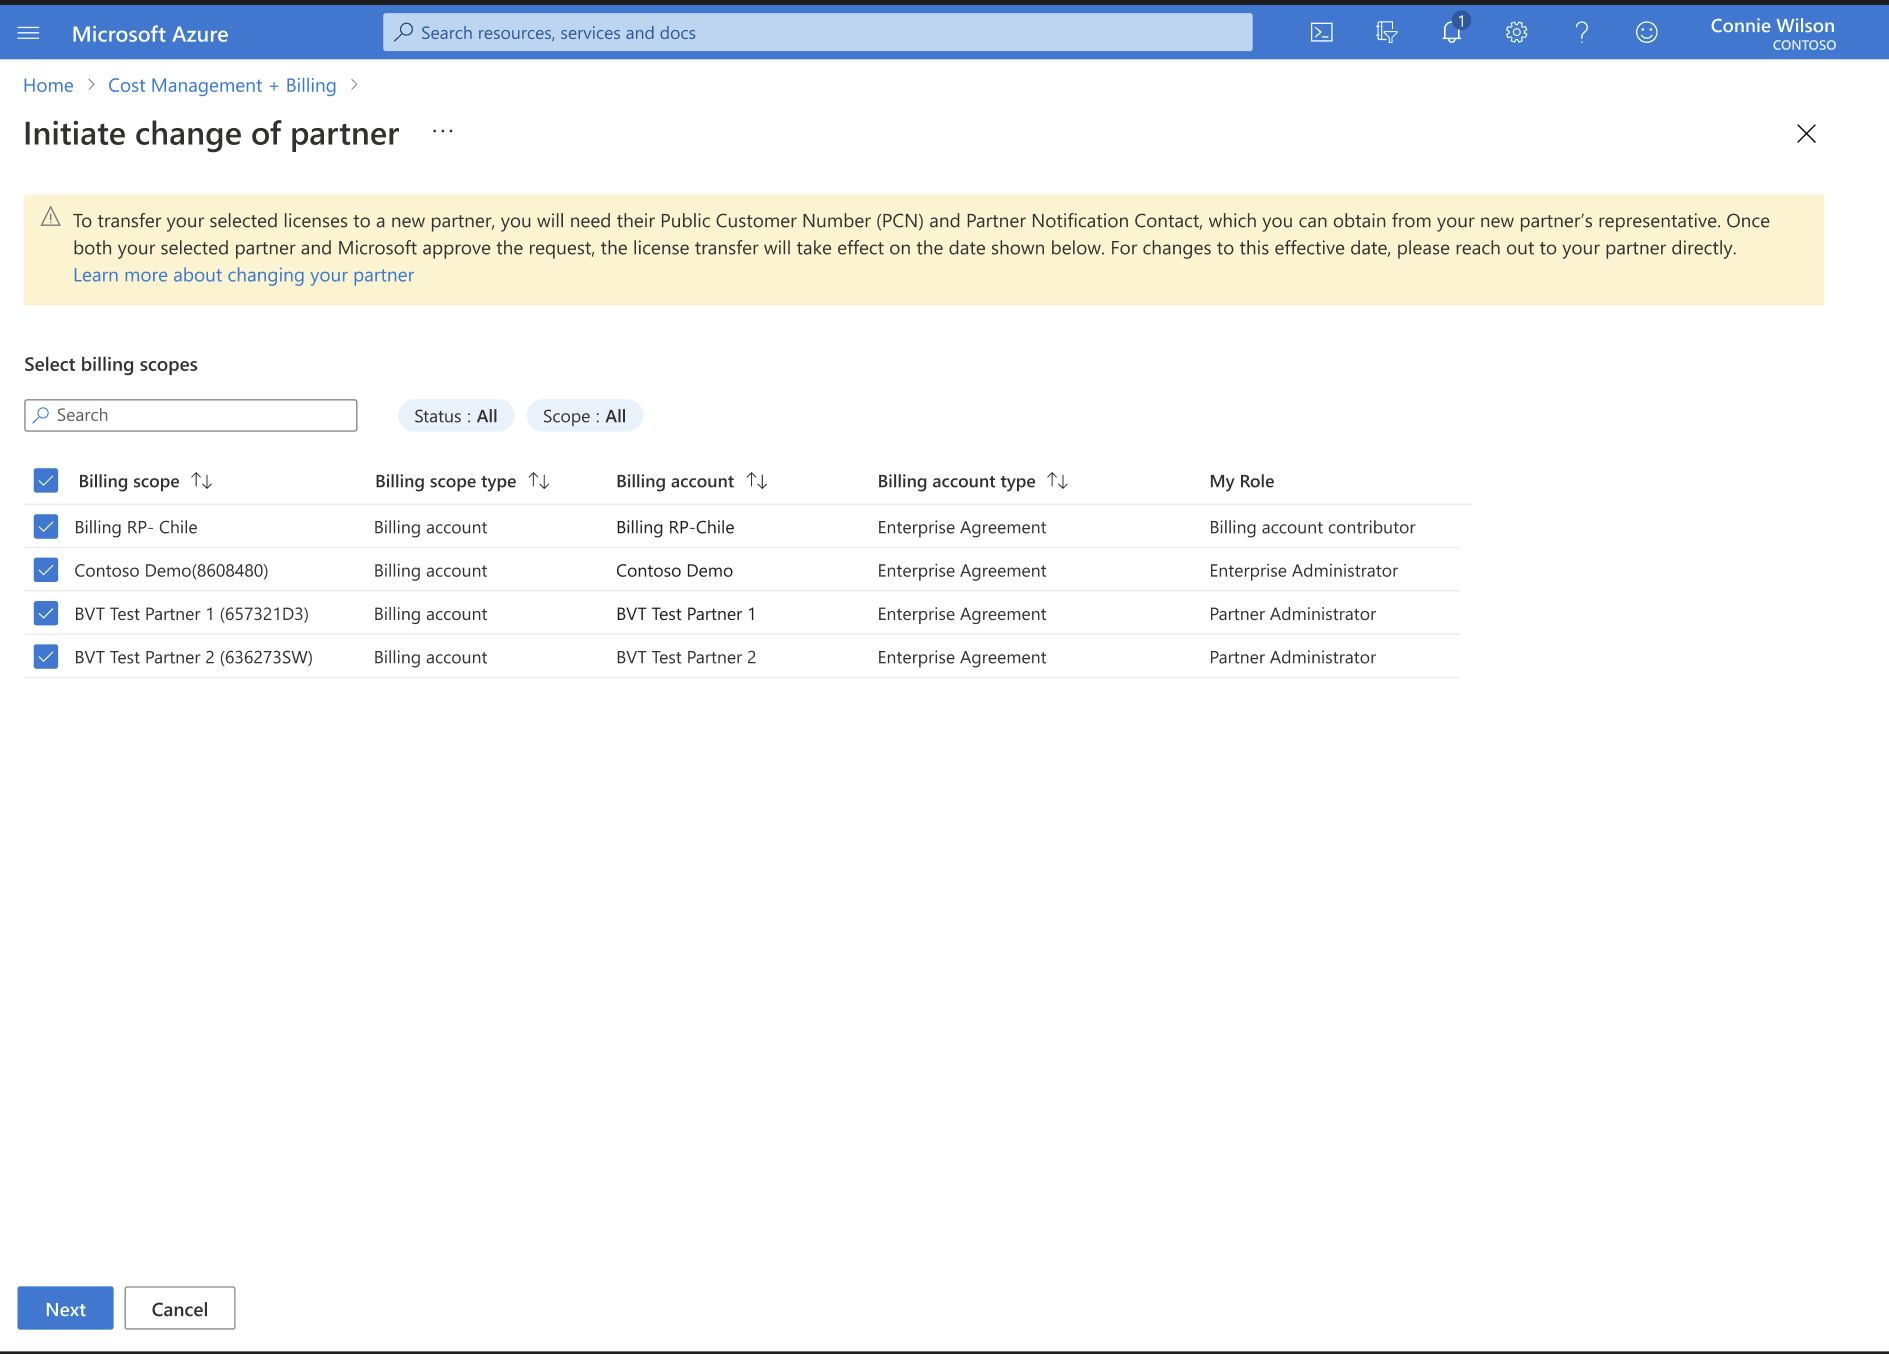
On the Initiate change of partner page:
Enter the PCN of the new partner.
Enter the appropriate email address in Partner Notification Contact.
Select the reason that you want to change partners from the available options on the dropdown menu. The options are:
- Unsatisfactory service by current partner
- Current partner is being offboarded by Microsoft
- Other
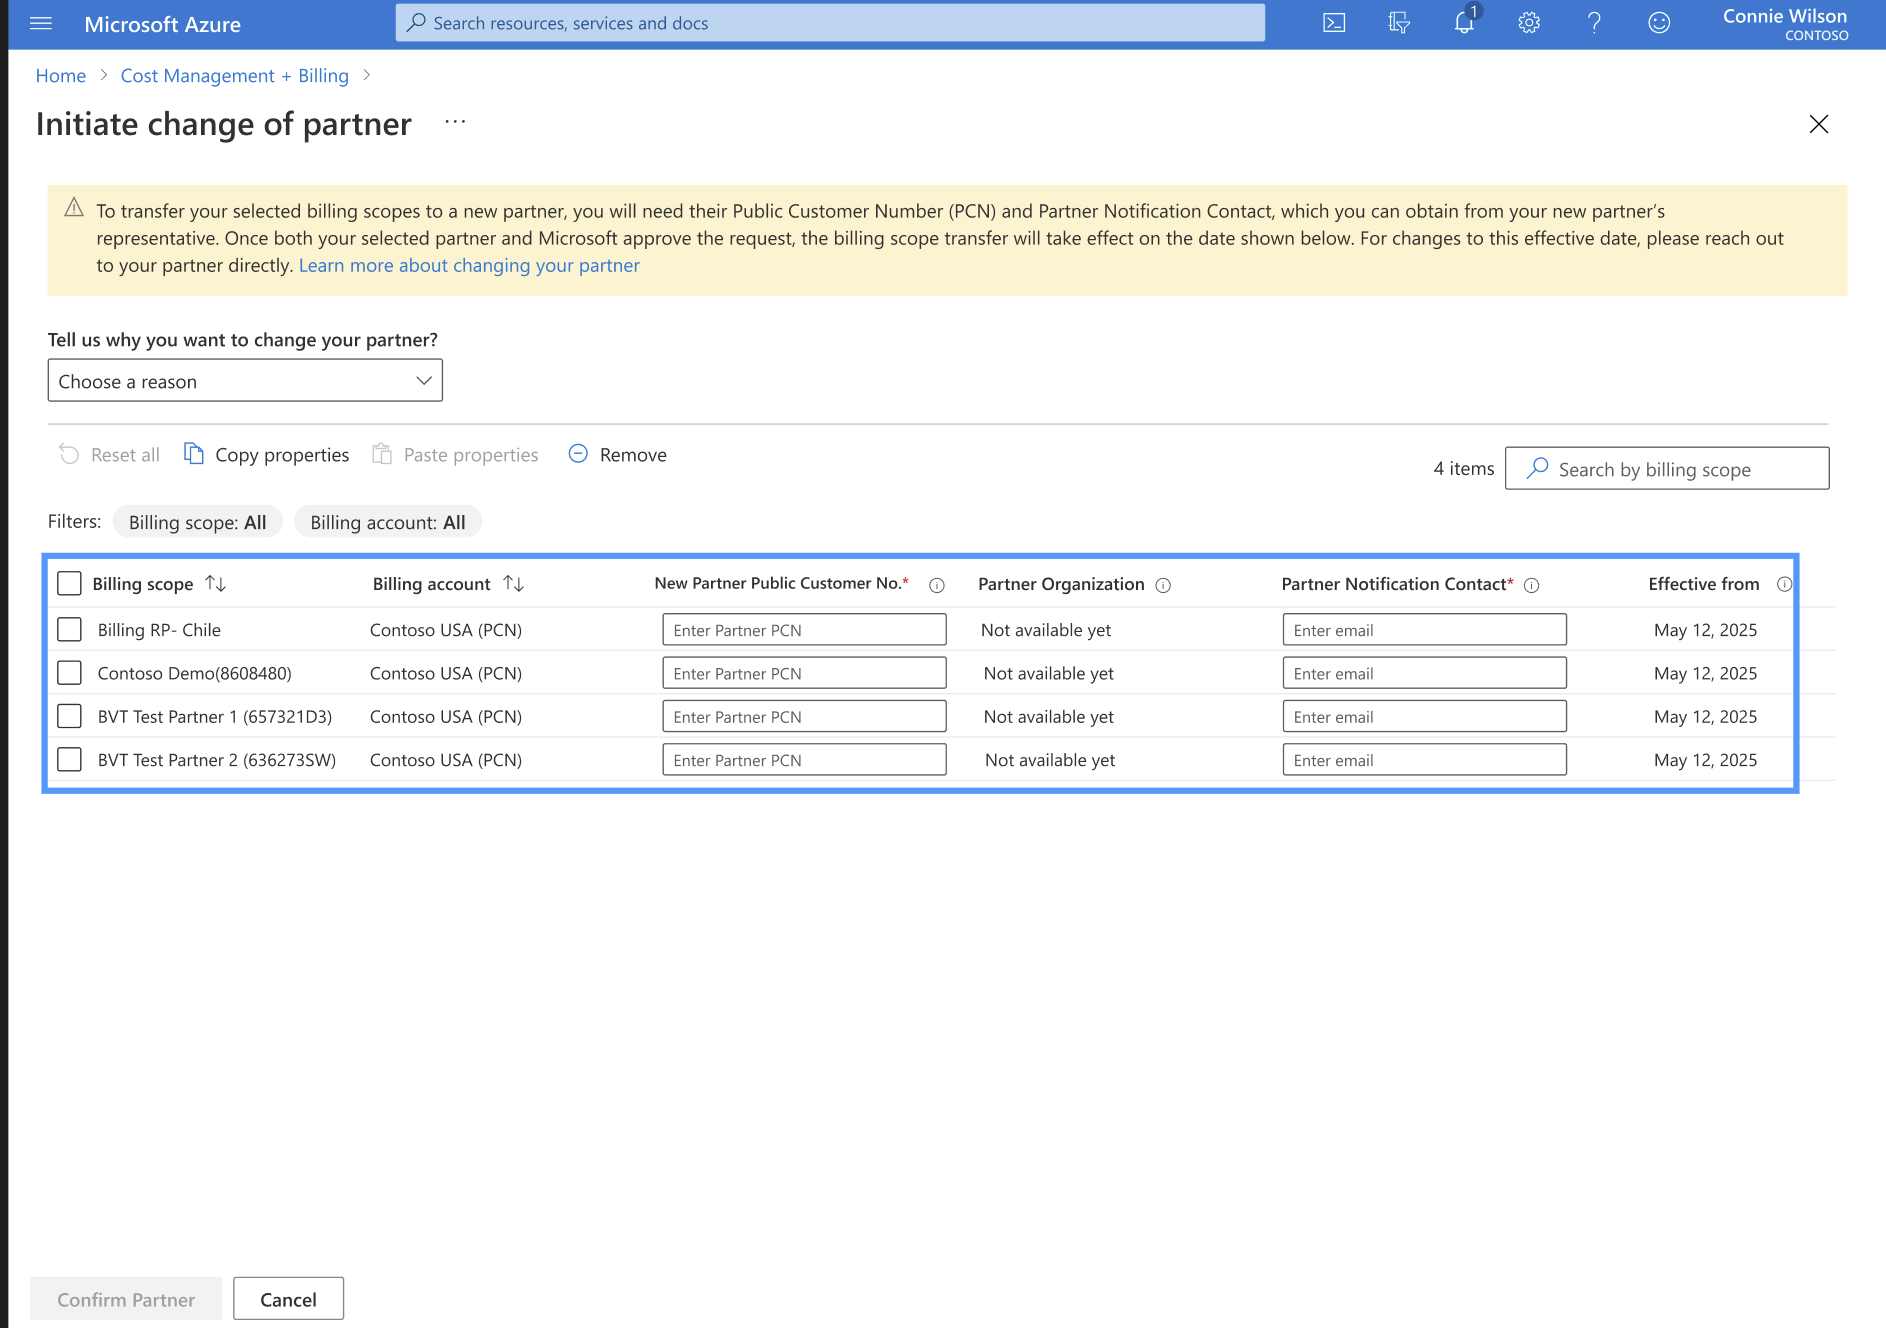
You can check to see if the partner is allowed to do business by entering the partner PCN and selecting the Confirm partner button in the lower-left corner. The partner organization name should appear. If you get an error, you can reach out to the partner to make sure you have the correct PCN.


Troubleshoot
Ideally, the partner notification contact is the person who accepts the COCP request in Volume Licensing Central. If no such contact exists, the system doesn't send a notification, but the customer admin can still initiate the request.
The effective date defaults to 90 days from the initiation date. If customers need a different date, they should ask their partner to submit an Early COCP form to the Microsoft Operations Service Center via My Cases in Volume Licensing Central.
If you select an agreement that isn't eligible for a COCP, the Azure portal displays a message that informs the user that the agreement isn't eligible.

The user must expand the message to see the reasons blocking the COCP request for each impacted billing account.
Scenario 1: User selects an invalid partner PCN
It's up to the new partner contact who directly engages with the customer to provide their PCN and partner notification contact details to the customer. If there's an error, reach out to the partner to get the correct PCN.

Scenario 2: The partner email address that the customer entered doesn't have access to Volume Licensing Central
The customer might enter an email address in the Partner Notification Contact field, but the user on the partner side doesn't have the permissions in Volume Licensing Central to be able to accept the COCP request. The Azure portal displays a warning but allows the user to proceed.
This rule means the notification goes to the email address listed on the COCP request rather than the partner user who has Volume Licensing Central access. That partner user with Volume Licensing Central access can see and accept the COCP request in Volume Licensing Central even if they don't receive the COCP notification.

Review the change partner terms
Various change partner terms display, depending on the type of agreement.
- If the selected billing accounts are all Enterprise Agreement direct, the Change of Software Advisor form displays.
- If the selected billing accounts are all Enterprise Agreement indirect, the Change of Reseller form displays.
- If the selected billing accounts are a combination of Enterprise Agreement direct and indirect, one form with sections for Change of SA Advisor and Change of Reseller is displayed. The form is scrollable.


The user needs to enter their first name and last name and agree to the terms and conditions by selecting the checkbox.
A message appears and confirms that the COCP request is successfully submitted. Make sure that the partner accepts the request within 10 days.

The COCP request is sent to the partner notification contact in the COCP request.

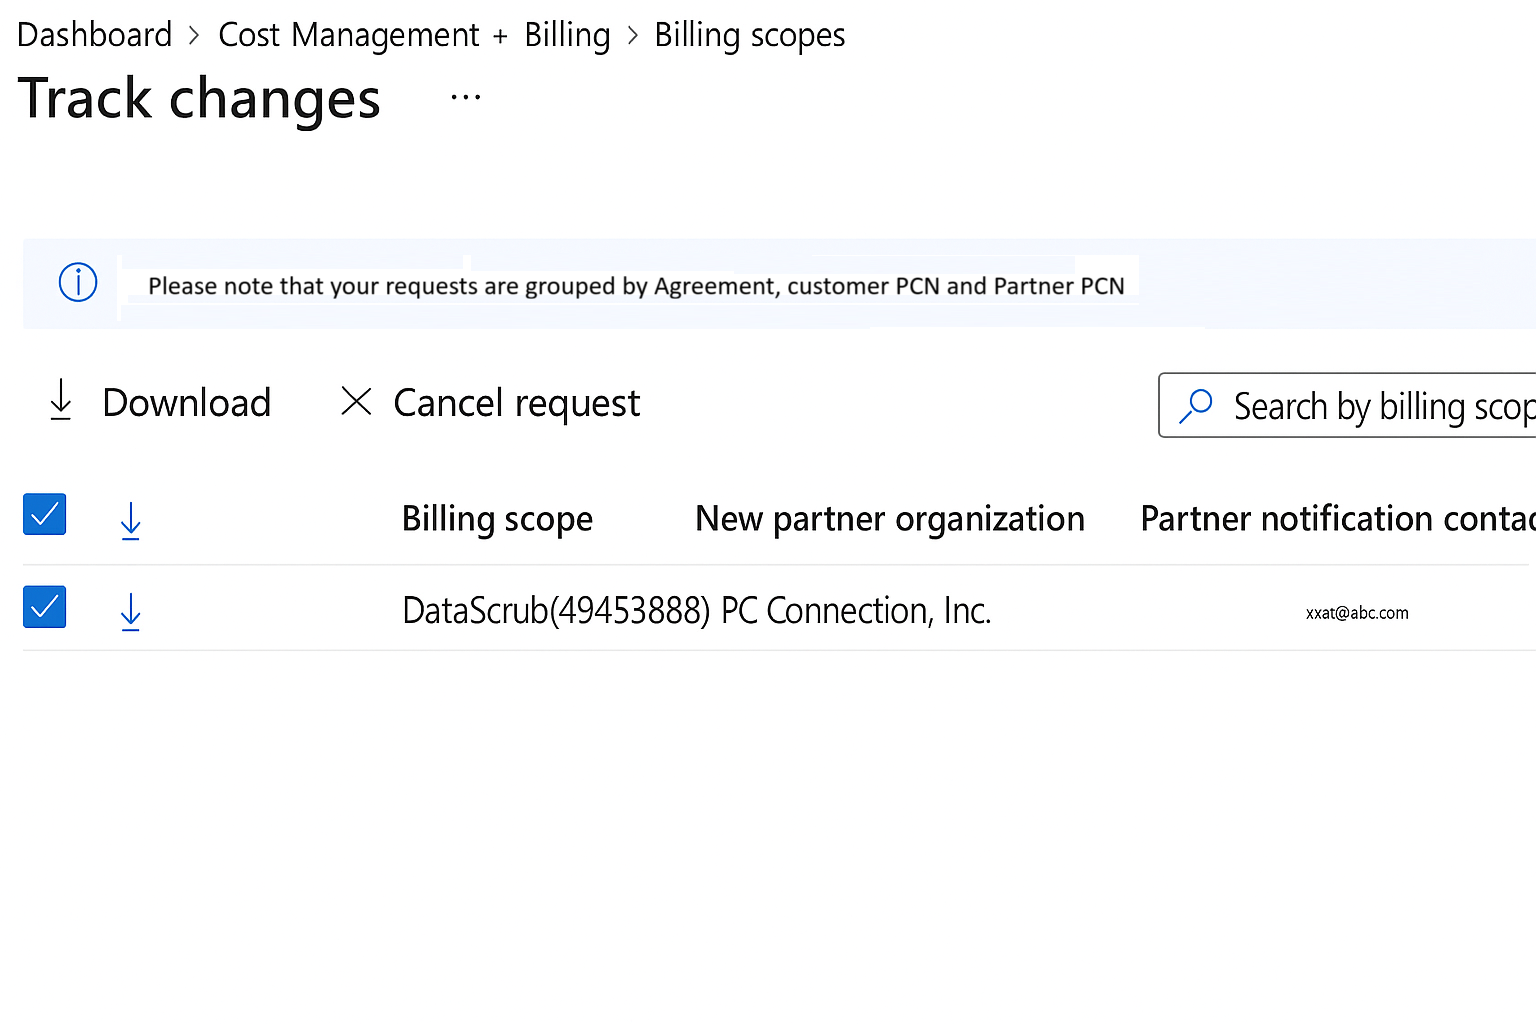
Track the status of your COCP request in the Azure portal
Enterprise admins can view the status of the request by going to Cost management + Billing > Track changes.
You see a Request ID value for each billing account in the COCP request. If multiple billing accounts are in the same COCP package, you see the same Request ID value for all the records.
You can interpret the COCP status messages with the following definitions:
- In-progress: The COCP request was sent to the new partner, who must accept or decline before the request can complete.
- Accepted: The partner accepted the COCP request. The Microsoft Operations Service Center will process the request, typically in 24–48 hours.
- Declined: The partner declined the COCP request.
- Pending Microsoft Review: The Microsoft Operations Service Center is reviewing and processing the request.
- In Grace Period (for Enterprise Accounts): The request is in a 90‑day grace period. During this time, the new partner doesn't have access to agreements, and the old partner remains the partner of record.
- Cancellation in Progress: The customer requested cancellation, and the COCP request is queued to be canceled.
- Canceled: The customer canceled the request, and its status is marked as canceled.
- Expired: The partner didn't accept the COCP request within 30 days.
- Completed: Microsoft completed the COCP.
The portal displays an effective date value. Beginning on this date, the new partner can place orders on the agreement.

Get a COCP Request ID in the Azure portal
To get a COCP Request ID, go to Cost Management + Billing > Billing scopes > Track changes.
Get the COCP form by selecting the Download button. You can only download the COCP form after the partner accepts the request and if the request wasn't canceled.

Cancel a COCP request in the Azure portal
If your COCP request has a status of In-progress, you can cancel it in full or partially (remove just some billing accounts from the request).
Go to Cost Management + Billing > Billing scopes > Track changes. In a specific COCP, select the billing scopes you want to cancel.
Select Cancel Request from the action menu at the top, or the three dots next to Billing scope.
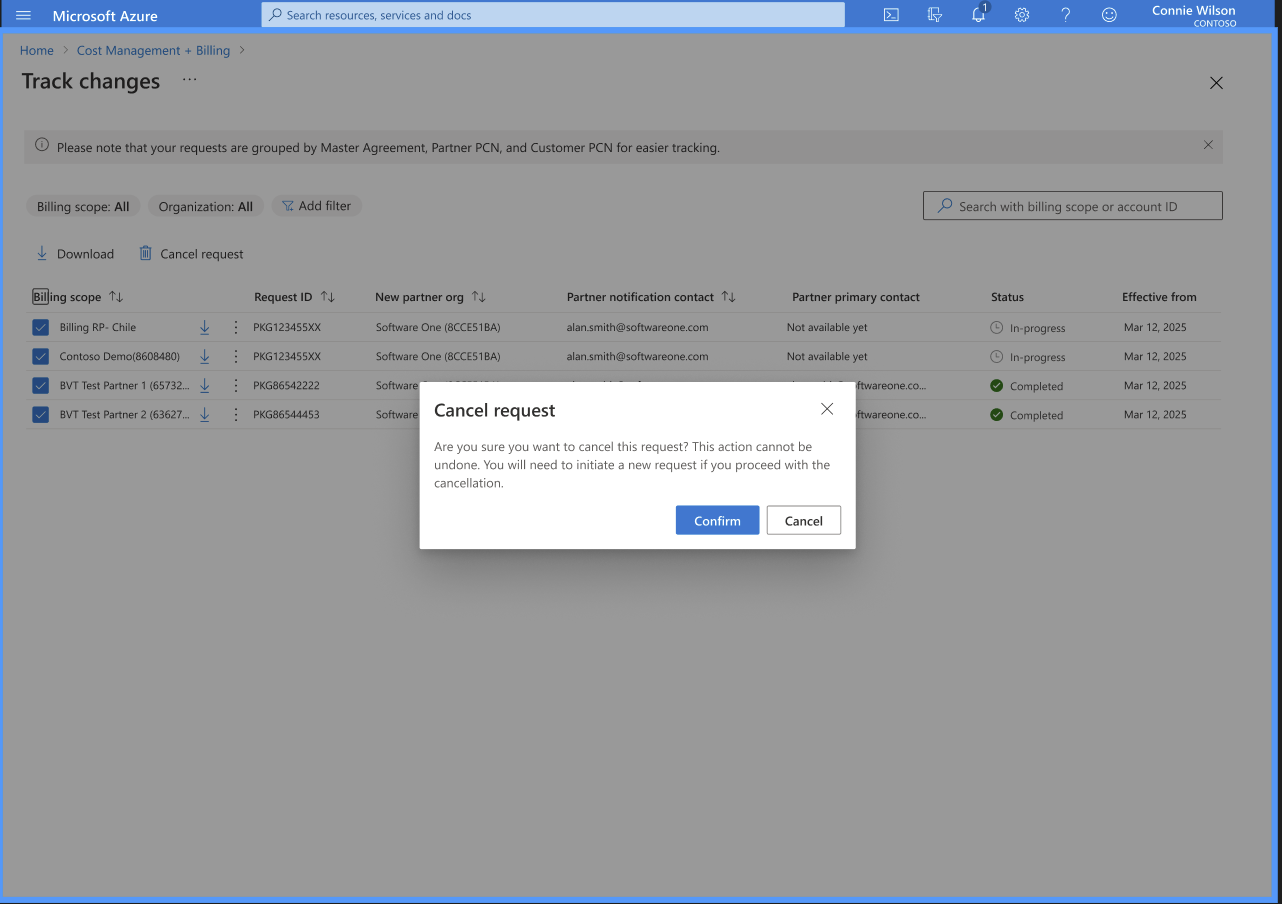

This process initiates a notification to the partner that lets them know that you canceled the request.