Note
Access to this page requires authorization. You can try signing in or changing directories.
Access to this page requires authorization. You can try changing directories.
This article shows you how to ingest data into Azure Data Explorer from IoT Hub, a big data streaming platform and IoT ingestion service.
To learn how to create the connection in the Azure portal or with an ARM template, see Create an IoT data connection.
For general information about ingesting into Azure Data Explorer from IoT Hub, see Connect to IoT Hub.
Note
Only events enqueued after you create the data connection are ingested.
For code samples based on previous SDK versions, see the archived article.
Prerequisites
- An Azure subscription. Create a Azure account.
- An Azure Data Explorer cluster and database. Create a cluster and database.
- A destination table. Create a table or use an existing table.
- An ingestion mapping for the table.
- An IoT Hub with data for ingestion.
Create an IoT Hub data connection
In this section, you'll establish a connection between the IoT Hub and your Azure Data Explorer table. As long as this connection is in place, data is transmitted from the IoT Hub into your target table.
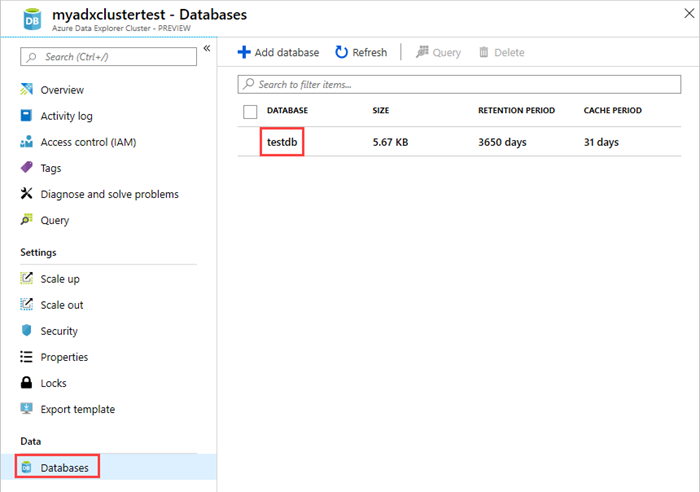
In the left menu of your Azure Data Explorer cluster, select Databases then select the database that contains your target table.
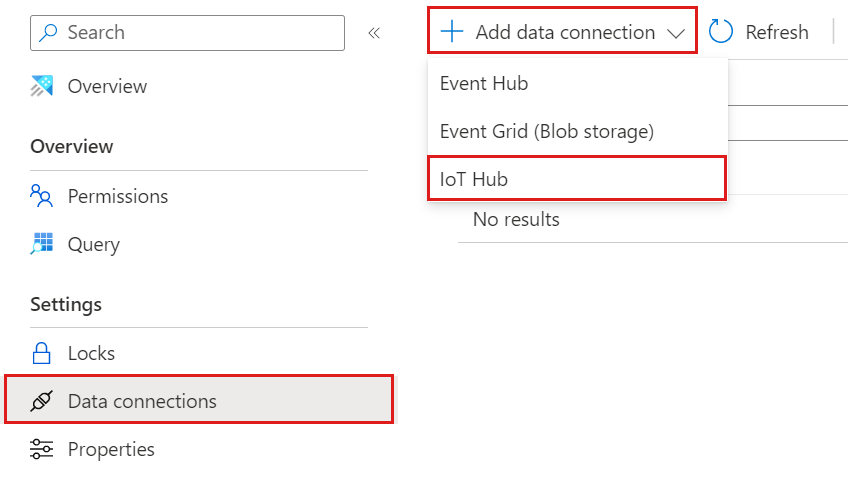
Select Data connections and Add data connection. From the dropdown, select IoT Hub.
Fill out the form with the following information.
Setting Field description Data connection name The name of the connection you want to create in Azure Data Explorer Subscription The subscription ID where the Event Hubs resource is located. IoT Hub IoT Hub name Shared access policy The name of the shared access policy. Must have read permissions Consumer group The consumer group defined in the IoT Hub built-in endpoint Event system properties The IoT Hub event system properties. When adding system properties, create or update table schema and mapping to include the selected properties. 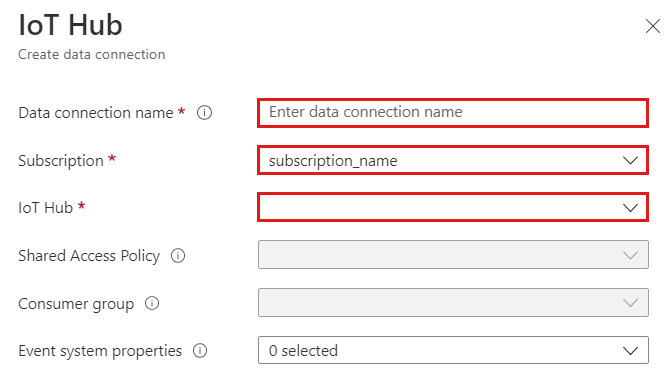
Note
- Event system properties are supported for single-record events.
- For CSV mapping, properties are added at the beginning of the record. For JSON mapping, properties are added according to the name that appears in the dropdown list.
Depending on your use case, you may want to turn on multi-database routing. For more information about database routing, see Events routing.

Fill out the following routing settings:
Setting Suggested value Field description Table name TestTable The table you created in testdb. Data format JSON Supported formats are AVRO, CSV, JSON, ORC, PARQUET, PSV, SCSV, SOHSV, TSV, TXT, TSVE, APACHE AVRO, and W3CLOG. Mapping TestMapping The mapping you created in testdb, which maps incoming data to the column names and data types of testdb. If not specified, an identity data mapping derived from the table's schema is used. 
Note
- JSON data is parsed as multijson by default. Select Ignore format errors to ingest the data in strict JSON format.
- If you selected Event system properties, you must include system properties in the table schema and mapping.
Select Create.
Warning
In case of a manual failover, recreate the data connection.
Remove an IoT Hub data connection
To remove the IoT Hub connection from the Azure portal, do the following:
- Go to your cluster. From the left menu, select Databases. Then, select the database that contains the target table.
- From the left menu, select Data connections. Then, select the checkbox next to the relevant IoT Hub data connection.
- From the top menu bar, select Delete.