Note
Access to this page requires authorization. You can try signing in or changing directories.
Access to this page requires authorization. You can try changing directories.
Applies to: ✅ Azure Data Explorer
Microsoft Entra application authentication requires creating and registering an application with Microsoft Entra ID. A service principal is automatically created when the application registration is created in a Microsoft Entra tenant.
The app registration can either be created in the Azure portal, or programatically with Azure CLI. Choose the tab that fits your scenario.
Register the app
Sign in to Azure portal and open the Microsoft Entra ID blade.
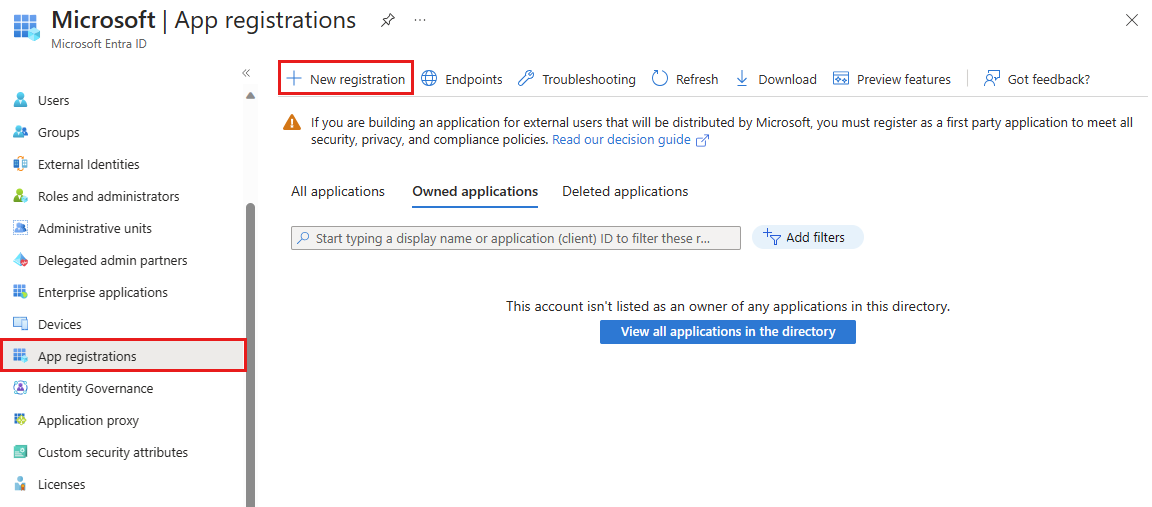
Browse to App registrations and select New registration.
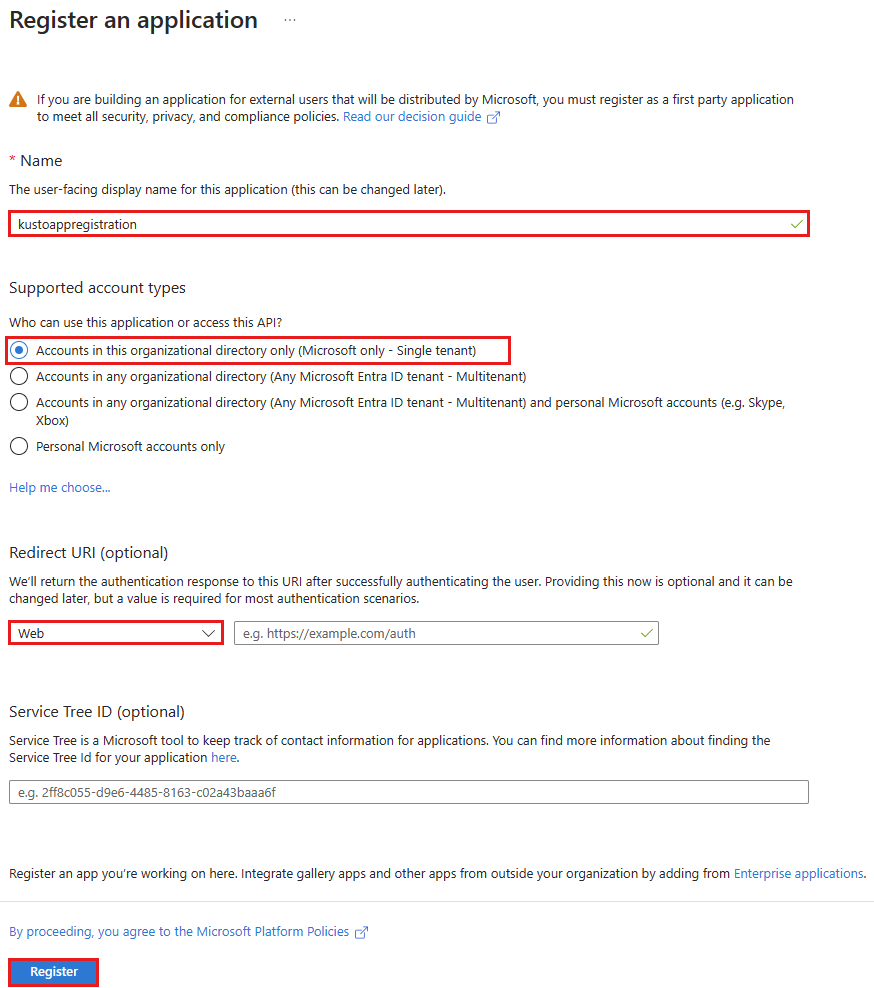
Name the application, for example "example-app".
Select a supported account type, which determines who can use the application.
Under Redirect URI, select Web for the type of application you want to create. The URI is optional and is left blank in this case.
Select Register.
Set up authentication
There are two types of authentication available for service principals: password-based authentication (application secret) and certificate-based authentication. The following section describes using a password-based authentication for the application's credentials. You can alternatively use an X509 certificate to authenticate your application.
Through the course of this section, you'll copy the following values: Application ID and key value. Paste these values somewhere, like a text editor, for use in the step configure client credentials to the database.
Browse to the Overview blade.
Copy the Application (client) ID and the Directory (tenant) ID.
Note
You'll need the application ID and the tenant ID to authorize the service principal to access the database.
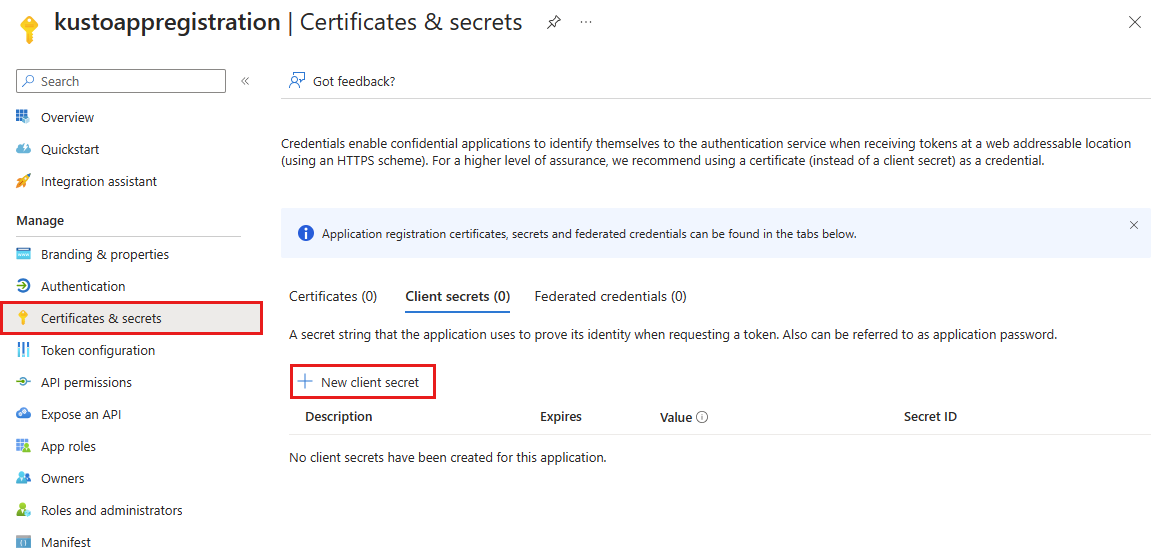
In the Certificates & secrets blade, select New client secret.
Enter a description and expiration.
Select Add.
Copy the key value.
Note
When you leave this page, the key value won't be accessible.
You've created your Microsoft Entra application and service principal.
Configure delegated permissions for the application - optional
If your application needs to access your database using the credentials of the calling user, configure delegated permissions for your application. For example, if you're building a web API and you want to authenticate using the credentials of the user who is calling your API.
If you only need access to an authorized data resource, you can skip this section and continue to Grant a service principal access to the database.
Browse to the API permissions blade of your App registration.
Select Add a permission.
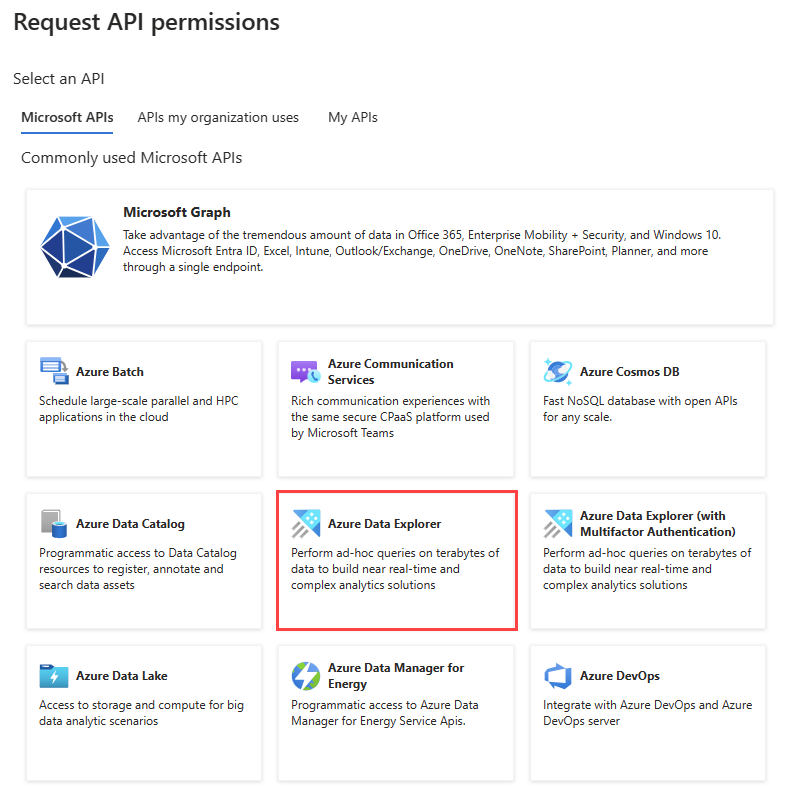
Select APIs my organization uses.
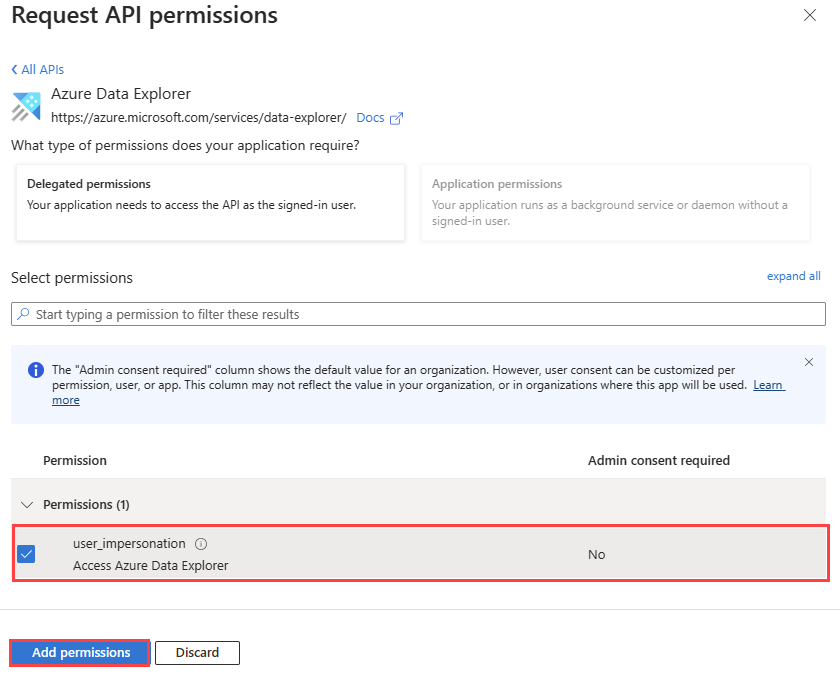
Search for and select Azure Data Explorer.
In Delegated permissions, select the user_impersonation box.
Select Add permissions.
Grant a service principal access to the database
Once your application registration is created, you need to grant the corresponding service principal access to your database. The following example gives viewer access. For other roles, see Kusto role-based access control.
Use the values of Application ID and Tenant ID as copied in a previous step.
Execute the following command in your query editor, replacing the placeholder values ApplicationID and TenantID with your actual values:
.add database <DatabaseName> viewers ('aadapp=<ApplicationID>;<TenantID>') '<Notes>'For example:
.add database Logs viewers ('aadapp=00001111-aaaa-2222-bbbb-3333cccc4444;9876abcd-e5f6-g7h8-i9j0-1234kl5678mn') 'App Registration'The last parameter is a string that shows up as notes when you query the roles associated with a database.
Note
After creating the application registration, there might be a several minute delay until it can be referenced. If you receive an error that the application is not found, wait and try again.
For more information on roles, see Role-based access control.
Use application credentials to access a database
Use the application credentials to programmatically access your database by using the client library.
. . .
string applicationClientId = "<myClientID>";
string applicationKey = "<myApplicationKey>";
string authority = "<myApplicationTenantID>";
. . .
var kcsb = new KustoConnectionStringBuilder($"https://{clusterName}.kusto.chinacloudapi.cn/{databaseName}")
    .WithAadApplicationKeyAuthentication(
        applicationClientId,
        applicationKey,
        authority);
var client = KustoClientFactory.CreateCslQueryProvider(kcsb);
var queryResult = client.ExecuteQuery($"{query}");
Note
Specify the application id and key of the application registration (service principal) created earlier.
For more information, see How to authenticate with Microsoft Authentication Library (MSAL) in apps and use Azure Key Vault with .NET Core web app.
Troubleshooting
Invalid resource error
If your application is used to authenticate users, or applications for access, you must set up delegated permissions for the service application. Declare your application can authenticate users or applications for access. Not doing so will result in an error similar to the following, when an authentication attempt is made:
AADSTS650057: Invalid resource. The client has requested access to a resource which is not listed in the requested permissions in the client's application registration...
You'll need to follow the instructions to configure delegated permissions for the application.
Enable user consent error
Your Microsoft Entra tenant administrator might enact a policy that prevents tenant users from giving consent to applications. This situation will result in an error similar to the following, when a user tries to sign in to your application:
AADSTS65001: The user or administrator has not consented to use the application with ID '<App ID>' named 'App Name'
You'll need to contact your Microsoft Entra administrator to grant consent for all users in the tenant, or enable user consent for your specific application.
