Note
Access to this page requires authorization. You can try signing in or changing directories.
Access to this page requires authorization. You can try changing directories.
The Microsoft Logic Apps connector allows you to run queries and commands automatically as part of a scheduled or triggered task.
Note
In order for a logic app to access to a network protected cluster, you must add the outbound IP addresses associated with the region of your logic app to the firewall allowlist. For more information, see Manage public access to your Azure Data Explorer cluster.
Create a logic app with Azure Data Explorer
Open the Azure portal.
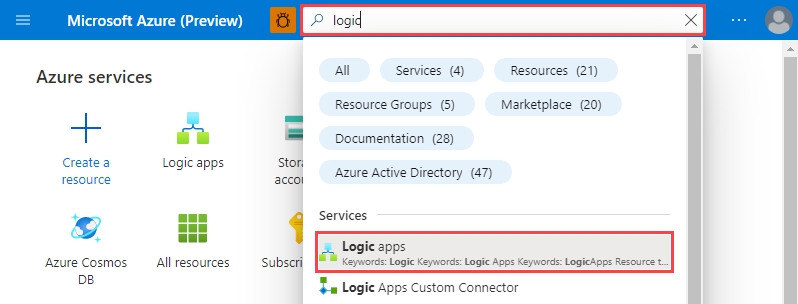
Search for "Logic apps" and select the Logic apps service.
Select +Add.

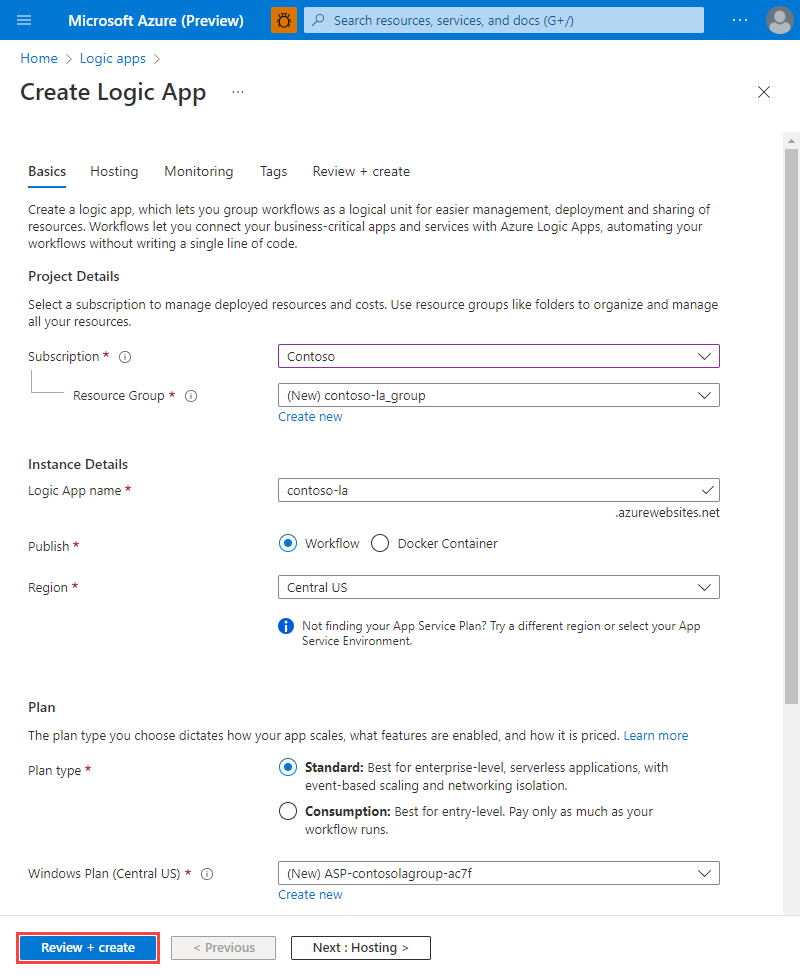
In the Create Logic App pane, fill out your app details, and then select Review + create.
Verify that the details are correct, and then select Create.
When the logic app is created, go to the resource Overview page.
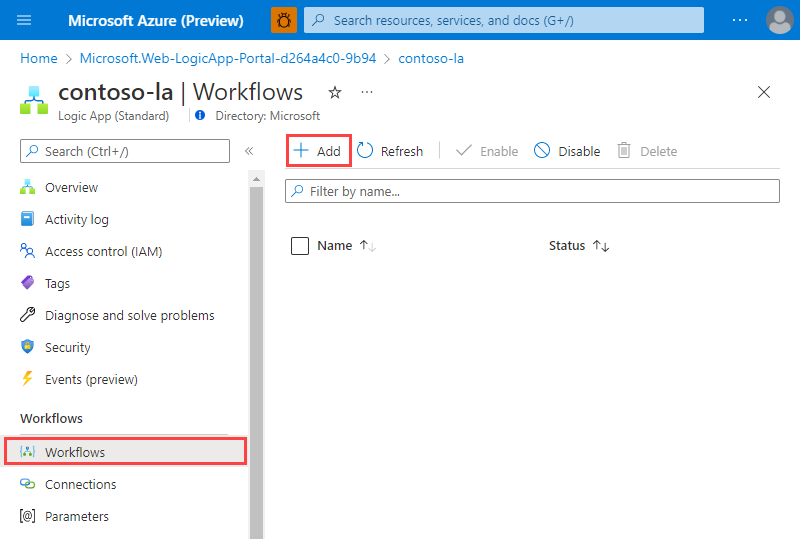
On the left menu, select Workflows, and then select + Add.
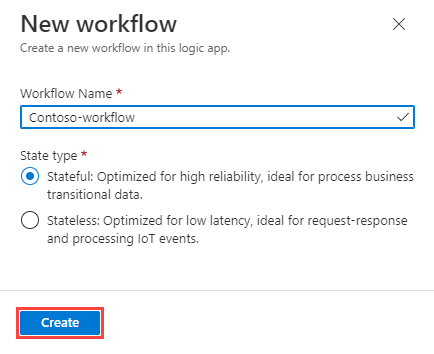
In the New workflow pane, fill out the workflow details, and then select Create.
In the list of workflows, select your workflow.
On the left menu, select Designer.
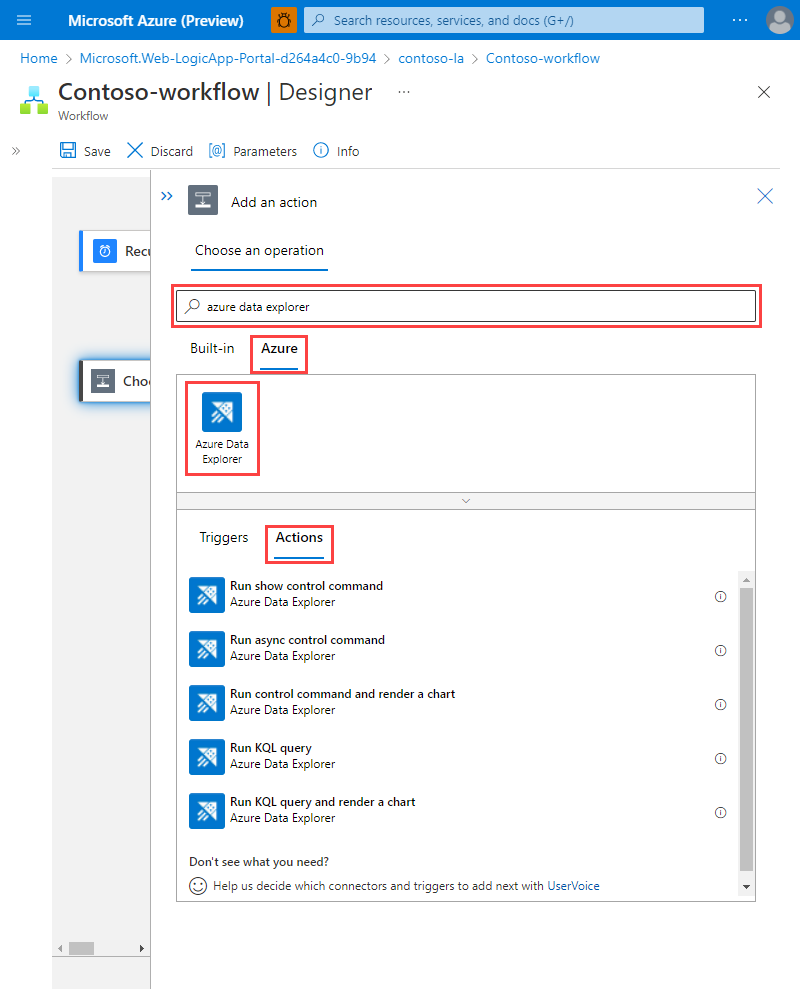
Add a recurrence trigger, and under Choose an operation, search for Azure Data Explorer, and select then the Azure results tab.
Select Azure Data Explorer, and then under Actions choose the action you want to use.
