Note
Access to this page requires authorization. You can try signing in or changing directories.
Access to this page requires authorization. You can try changing directories.
This article provides guidance on using multiple top-level domains and subdomains when federating with Microsoft 365 or Microsoft Entra domains.
Multiple top-level domain support
Federating multiple, top-level domains with Microsoft Entra ID requires some extra configuration that isn't required when federating with one top-level domain.
When a domain is federated with Microsoft Entra ID, several properties are set on the domain in Azure. One important property is IssuerUri. This property is a URI that is used by Microsoft Entra ID to identify the domain that the token is associated with. The URI doesn’t need to resolve to anything, but it must be a valid URI. By default, Microsoft Entra ID sets the URI to the value of the federation service identifier in your on-premises AD FS configuration.
Note
The federation service identifier is a URI that uniquely identifies a federation service. The federation service is an instance of AD FS that acts as the security token service.
You can view the IssuerUri by using the PowerShell command Get-EntraDomainFederationSettings -DomainName <your domain>.
A problem occurs when you add more than one top-level domain. For example, let's say you have set up federation between Microsoft Entra ID and your on-premises environment. For this document, the domain bmcontoso.com is used. Now a second, top-level domain, bmfabrikam.com has been added.
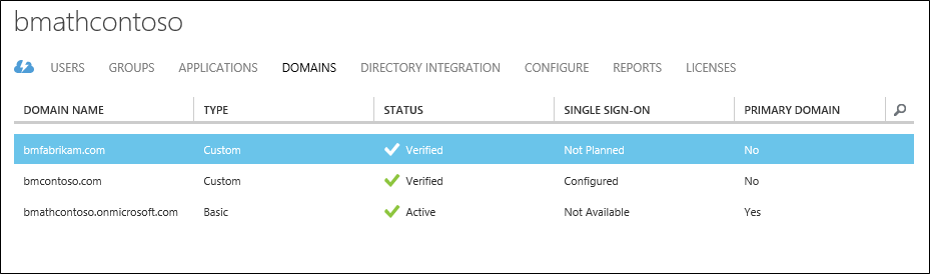
When you attempt to federate the bmfabrikam.com domain, an error occurs. This occurs because Microsoft Entra ID doesn’t allow the IssuerUri property to have the same value for more than one domain.
SupportMultipleDomain Parameter
Note
SupportMultipleDomain parameter is no longer available and does not work with the following modules:
Microsoft.GraphMicrosoft.Entra
Important
To federate multiple domains, you might need to make changes one by one because the -SupportMultipleDomain parameter is no longer available.
How to update the trust between AD FS and Microsoft Entra ID
If you've added a new domain in the Microsoft Entra admin center and changed the token signing certificate, you're one step away from updating your federation information in Entra ID.
Follow these steps to update your federation information in Entra ID:
Open a new PowerShell session and run the below commands to install the Microsoft Entra PowerShell module:
Note
-allowclobberwill override warning messages about installation conflicts and overwrite existing commands that have the same name as commands being installed by a module. Use this value if you already have installed Microsoft.Graph module:-
Install-Module -Name Microsoft.Entra -allowClobberImport-Module -Name Microsoft.Entra.DirectoryManagementConnect-Entra -Environment China -ClientId 'YOUR_CLIENT_ID' -TenantId 'YOUR_TENANT_ID' -Scopes 'Domain.Read.All'Get-EntraFederationProperty -domainname domain.com

Once you have copied the ID displayed in the second column from the output, run:
Update-MgDomainFederationConfiguration -DomainID domain.com -InternalDomainFederationId 0f6ftrte-xxxx-xxxx-xxxx-19xxxxxxxx23'
Follow these steps to add the new top-level domain using PowerShell:
- On a machine that has Azure AD PowerShell module installed on it run the following PowerShell:
$cred=Get-Credential. - Enter the username and password of a hybrid identity administrator for the Microsoft Entra domain you're federating with.
- In PowerShell, enter
Connect-Entra -Environment China -ClientId 'YOUR_CLIENT_ID' -TenantId 'YOUR_TENANT_ID' -Scopes 'Domain.ReadWrite.All' - Enter all the values as the below example to add a new domain:
New-MgDomainFederationConfiguration -DomainId "contoso.com" -ActiveSigninUri " https://sts.contoso.com/adfs/services/trust/2005/usernamemixed" -DisplayName "Contoso" -IssuerUri " http://contoso.com/adfs/services/trust" -MetadataExchangeUri " https://sts.contoso.com/adfs/services/trust/mex" -PassiveSigninUri " https://sts.contoso.com/adfs/ls/" -SignOutUri " https://sts.contoso.com/adfs/ls/" -SigningCertificate <*Base64 Encoded Format cert*> -FederatedIdpMfaBehavior "acceptIfMfaDoneByFederatedIdp" -PreferredAuthenticationProtocol "wsFed"
Follow these steps to add the new top-level domain using Microsoft Entra Connect:
- Launch Microsoft Entra Connect from the desktop or start menu
- Choose Add an additional Microsoft Entra Domain
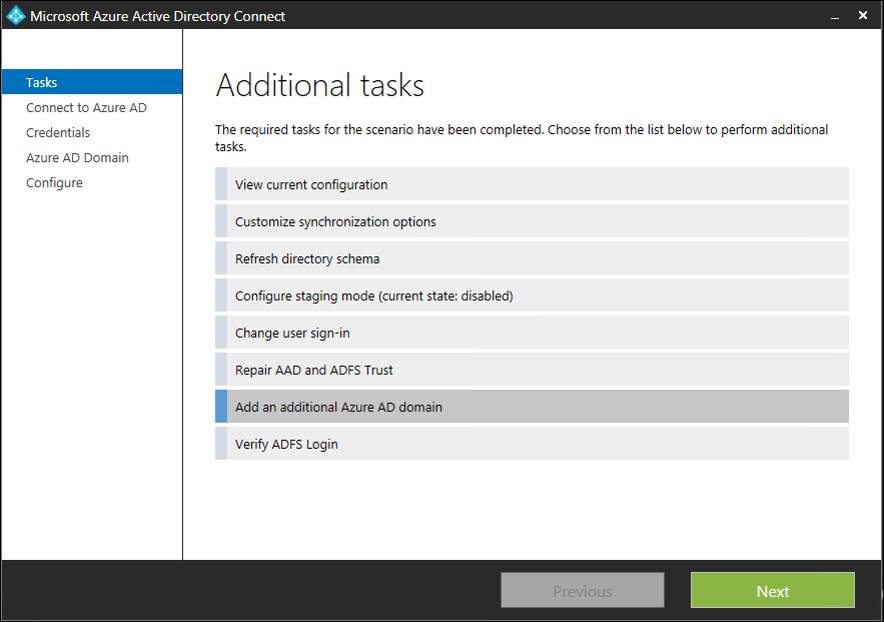
- Enter your Microsoft Entra ID and Active Directory credentials
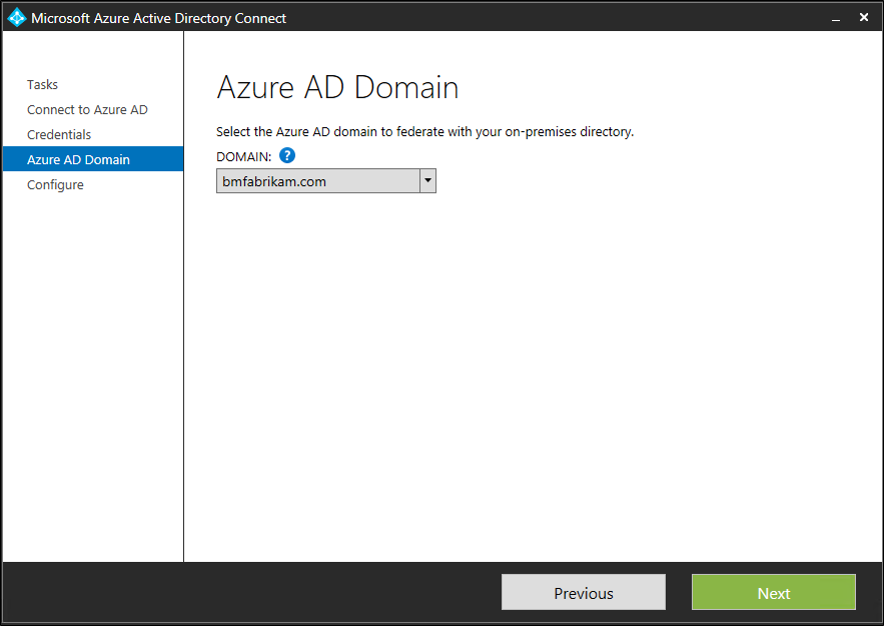
- Select the second domain you wish to configure for federation
- Select Install.
Verify the new top-level domain
Use the PowerShell command Get-MgDomainFederationConfiguration -DomainName <your domain> to view the updated IssuerUri. The screenshot below shows that the federation settings are updated on the original domain http://bmcontoso.com/adfs/services/trust.
And the IssuerUri on the new domain has been set to https://bmcontoso.com/adfs/services/trust
Support for subdomains
When you add a subdomain, because of the way Microsoft Entra ID handles domains, it inherits the settings of the parent. So, the IssuerUri needs to match the parent domain.
For example, if you have bmcontoso.com and then add corp.bmcontoso.com, The IssuerUri for a user from corp.bmcontoso.com needs to be http://bmcontoso.com/adfs/services/trust. However the standard rule implemented above for Microsoft Entra ID, generates a token with an issuer as http://corp.bmcontoso.com/adfs/services/trust, which won't match the domain's required value and authentication fails.
How to enable support for subdomains
To work around this behavior, update the AD FS relying party trust for Microsoft Online. To do this, you must configure a custom claim rule so that it strips off any subdomains from the user’s UPN suffix when constructing the custom Issuer value.
Use the following claim:
c:[Type == "http://schemas.xmlsoap.org/claims/UPN"] => issue(Type = "http://schemas.microsoft.com/ws/2008/06/identity/claims/issuerid", Value = regexreplace(c.Value, "^.*@([^.]+\.)*?(?<domain>([^.]+\.?){2})$", "http://${domain}/adfs/services/trust/"));
Note
The last number in the regular expression set is how many parent domains there are in your root domain. Here bmcontoso.com is used, so two parent domains are necessary. If three parent domains were to be kept (that is, corp.bmcontoso.com), then the number would have been three. Eventually a range can be indicated, the match is made to match the maximum of domains. "{2,3}" matches two to three domains (that is, bmfabrikam.com and corp.bmcontoso.com).
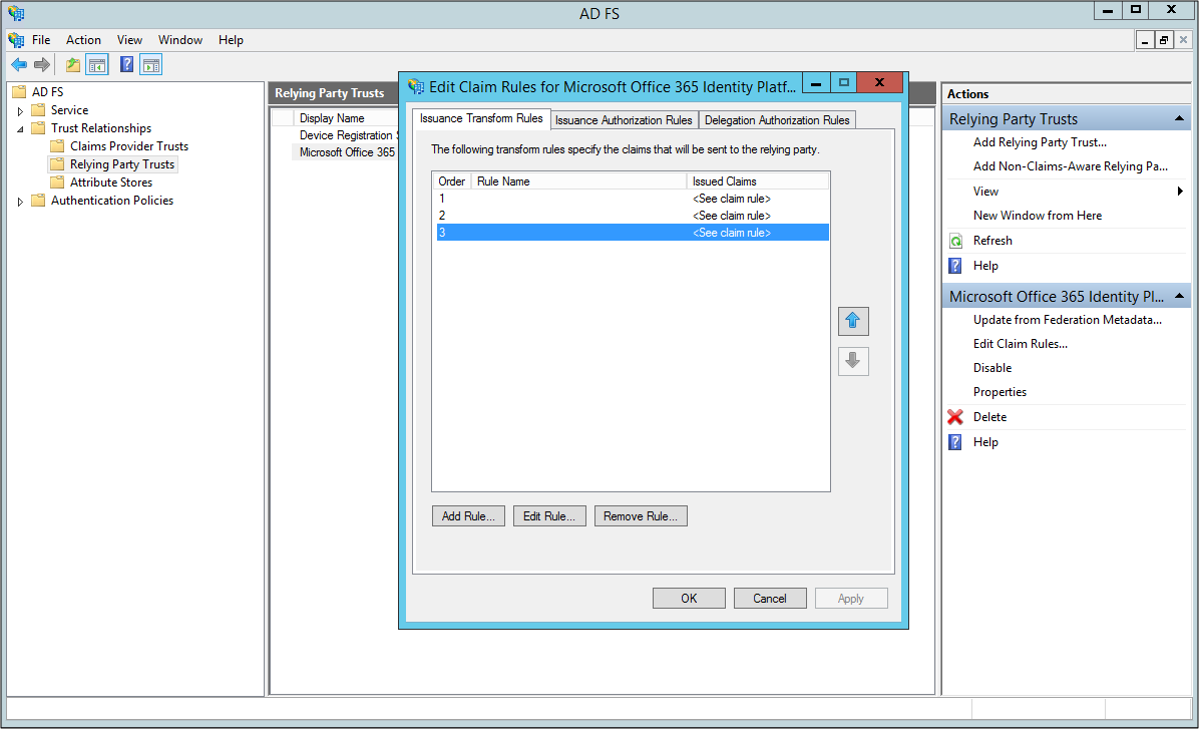
Use the following steps to add a custom claim to support subdomains.
- Open AD FS Management
- Right-click the Microsoft Online RP trust and select Edit Claim Rules.
- Select the third claim rule, and replace
- Replace the current claim:
c:[Type == "http://schemas.xmlsoap.org/claims/UPN"] => issue(Type = "http://schemas.microsoft.com/ws/2008/06/identity/claims/issuerid", Value = regexreplace(c.Value, ".+@(?<domain>.+)","http://${domain}/adfs/services/trust/"));
with
c:[Type == "http://schemas.xmlsoap.org/claims/UPN"] => issue(Type = "http://schemas.microsoft.com/ws/2008/06/identity/claims/issuerid", Value = regexreplace(c.Value, "^.*@([^.]+\.)*?(?<domain>([^.]+\.?){2})$", "http://${domain}/adfs/services/trust/"));
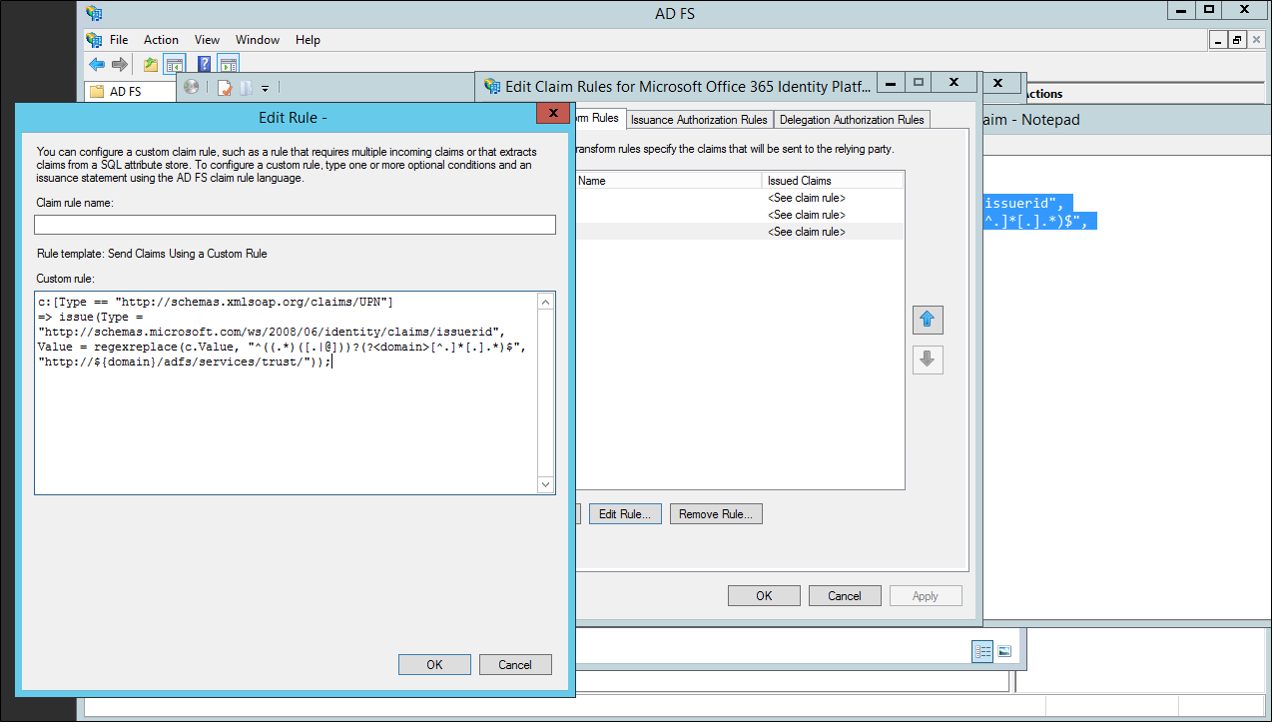
- Select OK, then select Apply, and finally select OK again. Close AD FS Management.
Next steps
Now that you have Microsoft Entra Connect installed, you can verify the installation and assign licenses.
Learn more about these features enabled during installation: Automatic upgrade, Prevent accidental deletes.
Explore these common topics: scheduler and how to trigger sync.
Read about integrating your on-premises identities with Microsoft Entra ID.