Step 1: Upload image data in the cloud with Azure Storage
This tutorial is part one of a series. In this tutorial, you learn how to deploy a web app. The web app uses the Azure Blob Storage client library to upload images to a storage account.
In part one of the series, you do the following tasks:
- Create a storage account
- Create a container and set permissions
- Retrieve an access key
- Deploy a web app to Azure
- Configure app settings
- Interact with the web app
Prerequisites
To complete this tutorial, you need an Azure subscription. Create a Trial before you begin.
To install and use the CLI locally, run Azure CLI version 2.0.4 or later. Run az --version to find the version. If you need to install or upgrade, see Install the Azure CLI.
Create a resource group
Important
In step 2 of the tutorial, you use Azure Event Grid with the blob storage you create in this step. Create your storage account in an Azure region that supports Event Grid. For a list of supported regions, see Azure products by region.
Create a resource group with the az group create command. An Azure resource group is a logical container into which Azure resources are deployed and managed.
Note
Set appropriate values for
regionandrgName(resource group name).region="chinanorth" rgName="egridtutorialrg" az group create --name $rgName --location $region
Create a storage account
The sample uploads images to a blob container in an Azure storage account.
Create a storage account in the resource group you created by using the az storage account create command.
blobStorageAccount="myblobstorage$RANDOM"

az storage account create --name $blobStorageAccount --location $region \
  --resource-group $rgName --sku Standard_LRS --kind StorageV2 --access-tier hot --allow-blob-public-access true
Create Blob storage containers
The app uses two containers in the Blob storage account. The images container is where the app uploads full-resolution images. In the second step of the series, an Azure function app uploads resized image thumbnails to the thumbnails container.
The images container's public access is set to off. The thumbnails container's public access is set to container. The container public access setting permits users who visit the web page to view the thumbnails.
Get the storage account key by using the az storage account keys list command. Then, use this key to create two containers with the az storage container create command.
blobStorageAccountKey=$(az storage account keys list -g $rgName \
  -n $blobStorageAccount --query "[0].value" --output tsv)

az storage container create --name images \
  --account-name $blobStorageAccount \
  --account-key $blobStorageAccountKey

az storage container create --name thumbnails \
  --account-name $blobStorageAccount \
  --account-key $blobStorageAccountKey --public-access container
The sample app connects to the storage account using its name and access key.
Create an App Service plan
An App Service plan specifies the location, size, and features of the web server farm that hosts your app. The following example creates an App Service plan named myAppServicePlan in the Free pricing tier:
Create an App Service plan with the az appservice plan create command.
planName="MyAppServicePlan"
az appservice plan create --name $planName --resource-group $rgName --sku Free
Create a web app
The web app provides a hosting space for the sample app code that's deployed from the GitHub sample repository.
Create a web app in the myAppServicePlan App Service plan with the az webapp create command.
webapp="mywebapp$RANDOM"

az webapp create --name $webapp --resource-group $rgName --plan $planName
Deploy the sample app from the GitHub repository
App Service supports several ways to deploy content to a web app. In this tutorial, you deploy the web app from a public GitHub sample repository. Configure GitHub deployment to the web app with the az webapp deployment source config command.
The sample project contains an ASP.NET MVC app. The app accepts an image, saves it to a storage account, and displays images from a thumbnail container. The web app uses the Azure.Storage, Azure.Storage.Blobs, and Azure.Storage.Blobs.Models namespaces to interact with the Azure Storage service.
az webapp deployment source config --name $webapp --resource-group $rgName \
  --branch master --manual-integration \
  --repo-url https://github.com/Azure-Samples/storage-blob-upload-from-webapp
Configure web app settings
The sample web app uses the Azure Storage APIs for .NET to upload images. Storage account credentials are set in the app settings for the web app. Add app settings to the deployed app with the az webapp config appsettings set or New-AzStaticWebAppSetting command.
az webapp config appsettings set --name $webapp --resource-group $rgName \
  --settings AzureStorageConfig__AccountName=$blobStorageAccount \
    AzureStorageConfig__ImageContainer=images \
    AzureStorageConfig__ThumbnailContainer=thumbnails \
    AzureStorageConfig__AccountKey=$blobStorageAccountKey
After you deploy and configure the web app, you can test the image upload functionality in the app.
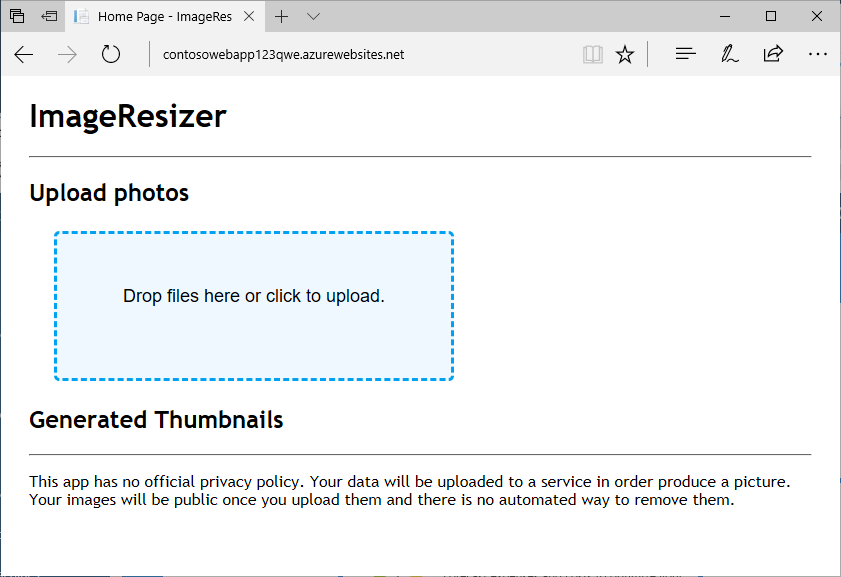
Upload an image
To test the web app, browse to the URL of your published app. The default URL of the web app is https://<web_app>.chinacloudsites.cn. Then, select the Upload photos region to specify and upload a file, or drag a file onto the region. The image disappears if successfully uploaded. The Generated Thumbnails section remains empty until we test it later in this tutorial.
Note
Run the following command to get the name of the web app: echo $webapp
In the sample code, the UploadFileToStorage task in the Storagehelper.cs file is used to upload the images to the images container within the storage account using the UploadAsync method. The following code sample contains the UploadFileToStorage task.
public static async Task<bool> UploadFileToStorage(Stream fileStream, string fileName,
                                                    AzureStorageConfig _storageConfig)
{
    // Create a URI to the blob
    Uri blobUri = new Uri("https://" +
                          _storageConfig.AccountName +
                          ".blob.core.chinacloudapi.cn/" +
                          _storageConfig.ImageContainer +
                          "/" + fileName);

    // Create StorageSharedKeyCredentials object by reading
    // the values from the configuration (appsettings.json)
    StorageSharedKeyCredential storageCredentials =
        new StorageSharedKeyCredential(_storageConfig.AccountName, _storageConfig.AccountKey);

    // Create the blob client.
    BlobClient blobClient = new BlobClient(blobUri, storageCredentials);

    // Upload the file
    await blobClient.UploadAsync(fileStream);

    return await Task.FromResult(true);
}
The following classes and methods are used in the preceding task:
| Class | Method |
|---|---|
| Uri | Uri constructor |
| StorageSharedKeyCredential | StorageSharedKeyCredential(String, String) constructor |
| BlobClient | UploadAsync |
Verify the image is shown in the storage account
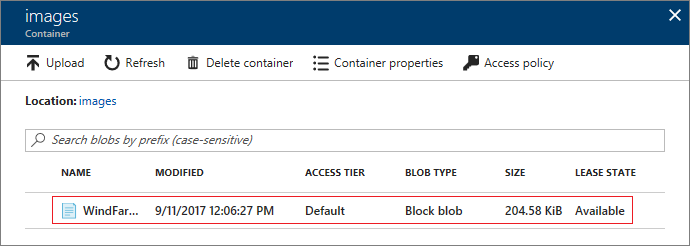
Sign in to the Azure portal. From the left menu, select Storage accounts, then select the name of your storage account.
Note
Run the following to get the name of the storage account:
echo $blobStorageAccount.On the left menu, in the Data storage section, select Containers.
Select the images blob container.
Verify the image is shown in the container.
Test thumbnail viewing
To test thumbnail viewing, you upload an image to the thumbnails container to check whether the app can read the thumbnails container.
Sign in to the Azure portal. From the left menu, select Storage accounts, then select the name of your storage account. Select Containers, then select the thumbnails container. Select Upload to open the Upload blob pane.
Choose a file with the file picker and select Upload.
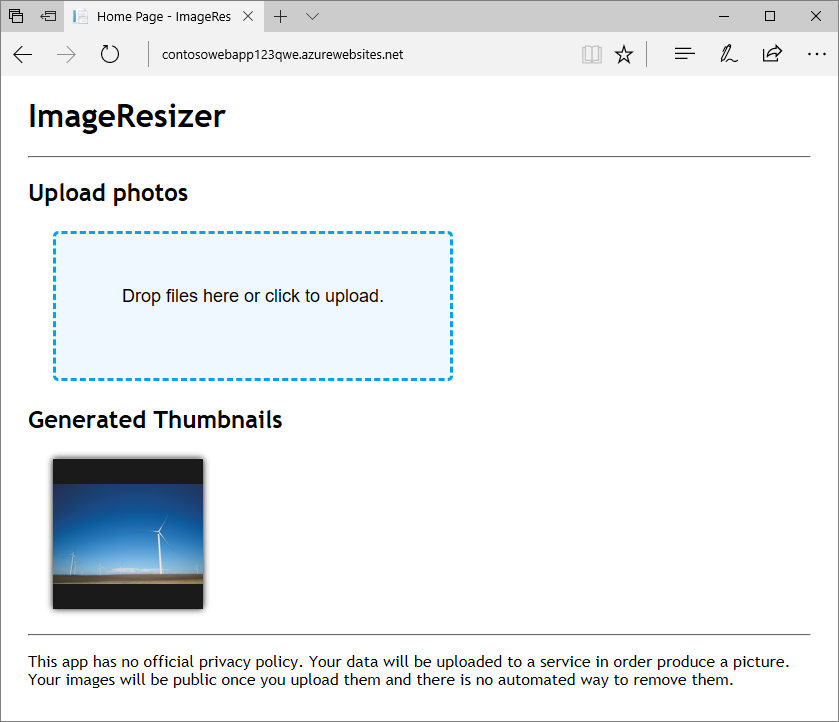
Navigate back to your app to verify that the image uploaded to the thumbnails container is visible.
In part two of the series, you automate thumbnail image creation so you don't need this image. In the thumbnails container, select the image you uploaded, and select Delete to remove the image.