Note
Access to this page requires authorization. You can try signing in or changing directories.
Access to this page requires authorization. You can try changing directories.
Applies to: ✔️ Front Door Standard ✔️ Front Door Premium
Azure Front Door Standard and Premium offer two mechanisms for controlling TLS policy. You can use either a predefined policy or a custom policy based on your own needs.
Azure Front Door offers several predefined TLS policies. You can configure your Azure Front Door with any of these policies to get the appropriate level of security. The Microsoft Security team configures these predefined policies based on best practices and recommendations. Use the newest TLS policies to ensure the best TLS security.
If you need to configure a TLS policy for your own business and security requirements, use a custom TLS policy. By using a custom TLS policy, you have complete control over the minimum TLS protocol version to support, and the supported cipher suites.
In this article, you learn how to configure TLS policy on a Front Door custom domain.
Prerequisites
- A Front Door.
- A custom domain. If you don't have a custom domain, you must first purchase one from a domain provider.
- If you're using Azure to host your DNS domains, you must delegate the domain provider's domain name system (DNS) to an Azure DNS. For more information, see Delegate a domain to Azure DNS. Otherwise.
Configure TLS policy
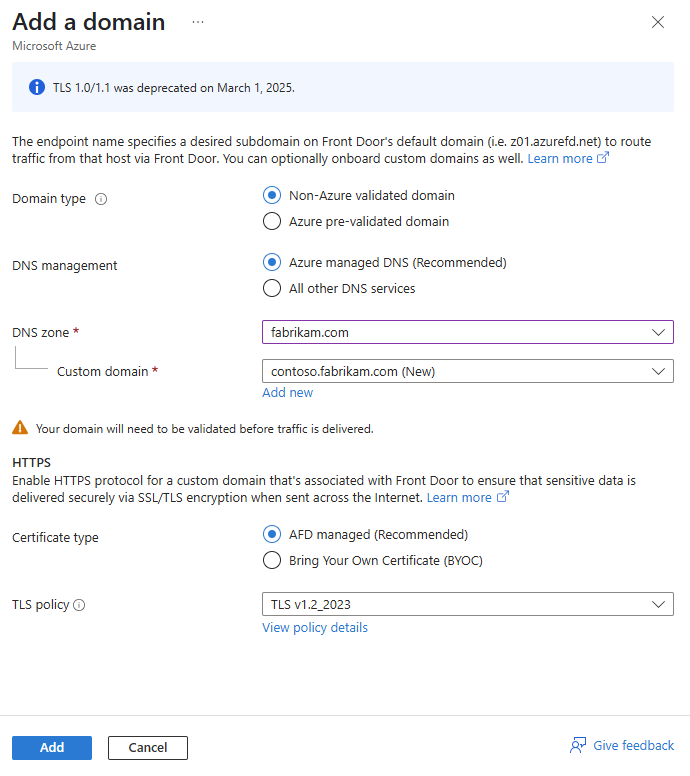
Go to your Azure Front Door profile that you want to configure the TLS policy for.
Under Settings, select Domains. Then select + Add to add a new domain.
On the Add a domain page, follow the instructions in Configure a custom domain on Azure Front Door and Configure HTTPS on an Azure Front Door custom domain to configure the domain.
For TLS policy, select the predefined policy from the dropdown list.
Note
To reuse the custom TLS policy setting from other domains in the portal, select the domain in Reuse setting from other domain.
After you customize the TLS policy, select Add to add the domain.
