Note
Access to this page requires authorization. You can try signing in or changing directories.
Access to this page requires authorization. You can try changing directories.
Note
Are you looking for Microsoft Purview Information Protection, formerly Microsoft Information Protection (MIP)?
The Azure Information Protection add-in is retired and replaced with labels that are built in to your Microsoft 365 apps and services. Learn more about the support status of other Azure Information Protection components.
After planning, creating, and configuring your tenant key as needed, continue with the following steps:
For more information about the life-cycle operations supported for your tenant key, see Operations for your Azure Information Protection tenant key.
If your organization requires on-premises protection for highly sensitive content, configure DKE protection (unified labeling client only).
Start using your tenant key
Activate the Rights Management service if it's not yet activated, to enable your organization to start using Azure Information Protection. Users immediately start to use your tenant key.
For more information, see Activating the protection service from Azure Information Protection.
Note
If you decided to manage your own tenant key after the Rights Management service was activated, users are gradually transitioned from the old key to the new key over the course of a few weeks.
During this transition, documents and files that were protected with the old tenant key remain accessible to authorized users.
Consider usage logging
Usage logging logs every transaction that the Azure Rights Management service performs.
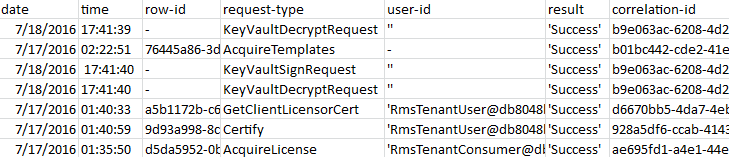
Depending on your key management method, logging information may include details about your tenant key. The following image shows an example from a log file displayed in Excel, where the KeyVaultDecryptRequest and KeyVaultSignRequest request types show that the tenant key is being used.
For more information about usage logging, see Logging and analyzing the protection usage from Azure Information Protection.