Note
Access to this page requires authorization. You can try signing in or changing directories.
Access to this page requires authorization. You can try changing directories.
Azure IoT Hub SDKs provide first tier support for popular platforms such as Windows, Linux, OSX, MBED, and mobile platforms like Android and iOS. As part of our commitment to enable greater choice and flexibility in IoT deployments, the Java SDK also supports Android Things platform. Developers can leverage the benefits of Android Things operating system on the device side, while using Azure IoT Hub as the central message hub that scales to millions of simultaneously connected devices.
This tutorial outlines the steps to build a device side application on Android Things using the Azure IoT Java SDK.
Prerequisites
An Android Things supported hardware with Android Things OS running. You can follow Android Things documentation on how to flash Android Things OS. Make sure your Android Things device is connected to the internet with essential peripherals such as keyboard, display, and mouse attached. This tutorial uses Raspberry Pi 3.
Latest version of Android Studio
Latest version of Git
You can use the local Azure CLI.
If you prefer, install the Azure CLI to run CLI reference commands.
Local Azure CLI, see how to install the Azure CLI. If you're running on Windows or macOS, consider running Azure CLI in a Docker container. For more information, see How to run the Azure CLI in a Docker container.
Sign in to the Azure CLI by using the az login command. To finish the authentication process, follow the steps displayed in your terminal. For other sign-in options, see Sign in with the Azure CLI.
When you're prompted, install the Azure CLI extension on first use. For more information about extensions, see Use extensions with the Azure CLI.
Run az version to find the version and dependent libraries that are installed. To upgrade to the latest version, run az upgrade.
Create an IoT hub
This section describes how to create an IoT hub using the Azure portal.
Sign in to the Azure portal.
On the Azure homepage, select the + Create a resource button.
From the Categories menu, select Internet of Things, and then select IoT Hub.
On the Basics tab, complete the fields as follows:
Important
Because the IoT hub will be publicly discoverable as a DNS endpoint, be sure to avoid entering any sensitive or personally identifiable information when you name it.
Property Value Subscription Select the subscription to use for your hub. Resource group Select a resource group or create a new one. To create a new one, select Create new and fill in the name you want to use. IoT hub name Enter a name for your hub. This name must be globally unique, with a length between 3 and 50 alphanumeric characters. The name can also include the dash ( '-') character.Region Select the region, closest to you, where you want your hub to be located. Some features, such as IoT Hub device streams, are only available in specific regions. For these limited features, you must select one of the supported regions. Tier Select the tier that you want to use for your hub. Tier selection depends on how many features you want and how many messages you send through your solution per day.
The free tier is intended for testing and evaluation. The free tier allows 500 devices to be connected to the hub and up to 8,000 messages per day. Each Azure subscription can create one IoT hub in the free tier.
To compare the features available to each tier, select Compare tiers. For more information, see Choose the right IoT Hub tier and size for your solution.Daily message limit Select the maximum daily quota of messages for your hub. The available options depend on the tier you select for your hub. To see the available messaging and pricing options, select See all options and select the option that best matches the needs of your hub. For more information, see IoT Hub quotas and throttling. 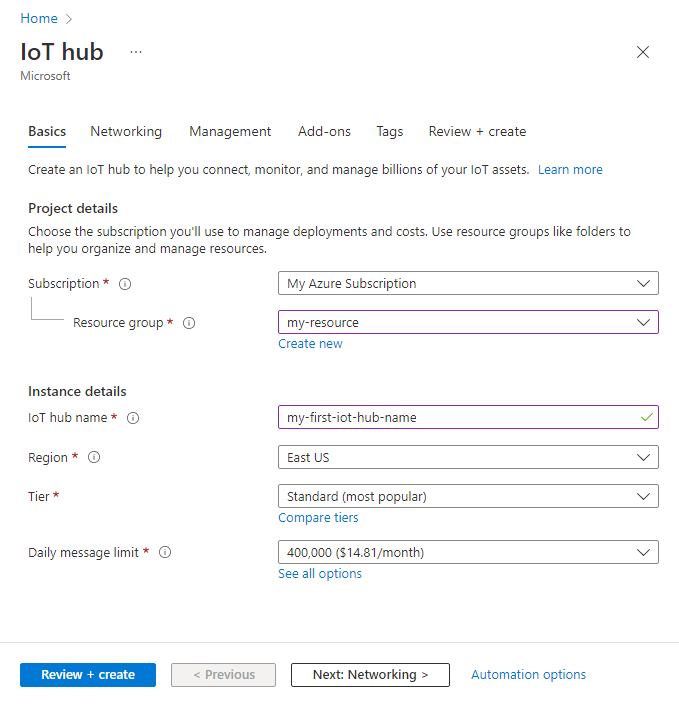
Note
Prices shown are for example purposes only.
Select Next: Networking to continue creating your hub.
On the Networking tab, complete the fields as follows:
Property Value Connectivity configuration Choose the endpoints that devices can use to connect to your IoT hub. Accept the default setting, Public access, for this example. You can change this setting after the IoT hub is created. For more information, see IoT Hub endpoints. Minimum TLS Version Select the minimum TLS version supported by your IoT hub. Once the IoT hub is created, this value can't be changed. Accept the default setting, 1.0, for this example. 
Select Next: Management to continue creating your hub.
On the Management tab, accept the default settings. If desired, you can modify any of the following fields:
Property Value Permission model Part of role-based access control, this property decides how you manage access to your IoT hub. Allow shared access policies or choose only role-based access control. For more information, see Control access to IoT Hub by using Microsoft Entra ID. Assign me You might need access to IoT Hub data APIs to manage elements within an instance. If you have access to role assignments, select IoT Hub Data Contributor role to grant yourself full access to the data APIs.
To assign Azure roles, you must haveMicrosoft.Authorization/roleAssignments/writepermissions, such as User Access Administrator or Owner.Device-to-cloud partitions This property relates the device-to-cloud messages to the number of simultaneous readers of the messages. Most IoT hubs need only four partitions. 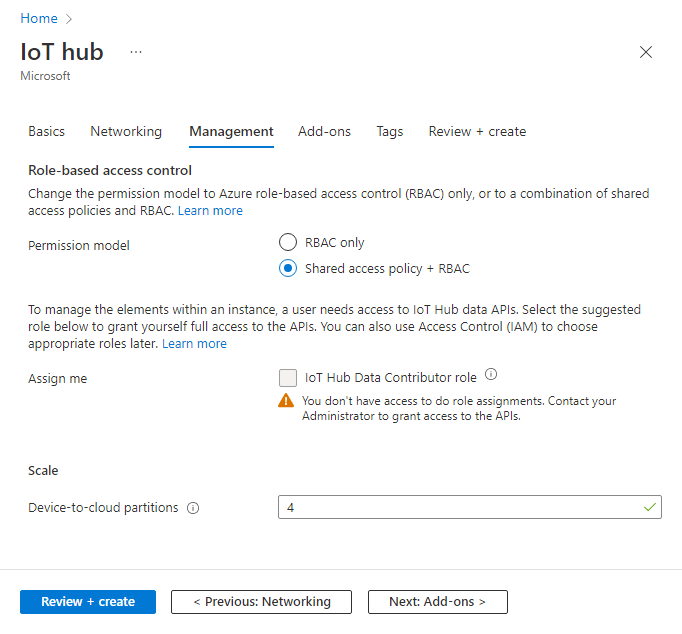
Select Next: Add-ons to continue to the next screen.
On the Add-ons tab, accept the default settings. If desired, you can modify any of the following fields:
Property Value Enable Device Update for IoT Hub Turn on Device Update for IoT Hub to enable over-the-air updates for your devices. If you select this option, you're prompted to provide information to provision a Device Update for IoT Hub account and instance. For more information, see What is Device Update for IoT Hub? Enable Defender for IoT Turn Defender for IoT on to add an extra layer of protection to IoT and your devices. This option isn't available for hubs in the free tier. For more information, see Security recommendations for IoT Hub in Microsoft Defender for IoT documentation. 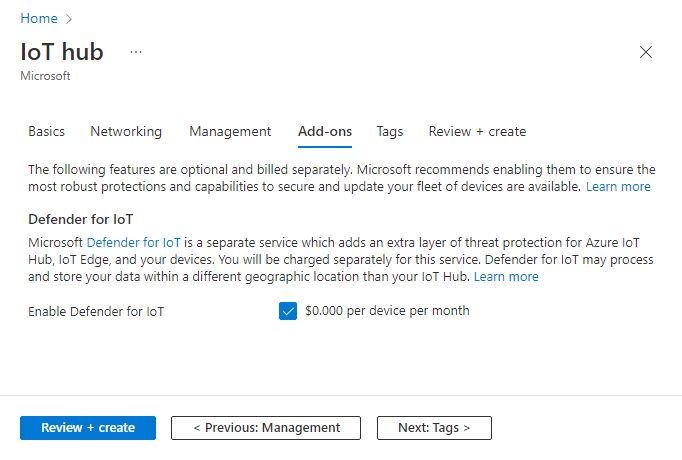
Note
Prices shown are for example purposes only.
Select Next: Tags to continue to the next screen.
Tags are name/value pairs. You can assign the same tag to multiple resources and resource groups to categorize resources and consolidate billing. In this document, you don't add any tags. For more information, see Use tags to organize your Azure resources and management hierarchy.
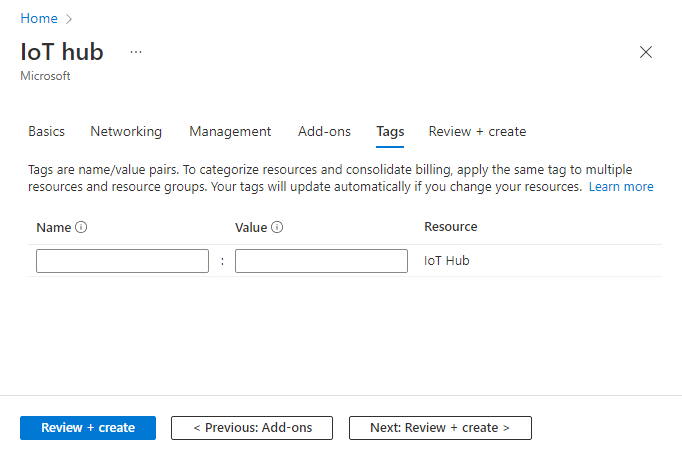
Select Next: Review + create to review your choices.
Select Create to start the deployment of your new hub. Your deployment might progress for a few minutes while the hub is being created. Once the deployment is complete, select Go to resource to open the new hub.
Register a device
A device must be registered with your IoT hub before it can connect. In this quickstart, you use the Azure local Shell to register a simulated device.
Run the following commands in Azure local Shell to add the IoT Hub CLI extension and to create the device identity.
YourIoTHubName : Replace this placeholder below with the name you choose for your IoT hub.
MyAndroidThingsDevice : This is the name given for the registered device. Use MyAndroidThingsDevice as shown. If you choose a different name for your device, you will also need to use that name throughout this article, and update the device name in the sample applications before you run them.
az extension add --name azure-iot
az iot hub device-identity create --hub-name YourIoTHubName --device-id MyAndroidThingsDevice
Run the following commands in Azure local Shell to get the device connection string for the device you just registered. Replace
YourIoTHubNamebelow with the name you choose for your IoT hub.az iot hub device-identity connection-string show --hub-name YourIoTHubName --device-id MyAndroidThingsDevice --output tableMake a note of the device connection string, which looks like:
HostName={YourIoTHubName}.azure-devices.cn;DeviceId=MyAndroidThingsDevice;SharedAccessKey={YourSharedAccessKey}You use this value later in the quickstart.
Building an Android Things application
The first step to building an Android Things application is connecting to your Android Things devices. Connect your Android Things device to a display and connect it to the internet. Android Things provide documentation on how to connect to WiFi. After you have connected to the internet, take a note of the IP address listed under Networks.
Use the adb tool to connect to your Android Things device with the IP address noted above. Double check the connection by using this command from your terminal. You should see your devices listed as "connected".
adb devicesDownload our sample for Android/Android Things from the Azure IoT SDKs for Java repository or use Git to clone the repository as shown in the following example.
git clone https://github.com/Azure/azure-iot-sdk-java.gitIn Android Studio, open the Android Project from the \azure-iot-sdk-java\device\iot-device-samples\android-sample folder in your copy of the repository.
Open gradle.properties file, and replace "Device_connection_string" with your device connection string noted earlier.
Click on Run - Debug and select your device to deploy this code to your Android Things devices.
When the application is started successfully, you can see an application running on your Android Things device. This sample application sends randomly generated temperature readings.
Read the telemetry from your hub
You can view the data through your IoT hub as it is received. The IoT Hub CLI extension can connect to the service-side Events endpoint on your IoT Hub. The extension receives the device-to-cloud messages sent from your simulated device. An IoT Hub back-end application typically runs in the cloud to receive and process device-to-cloud messages.
Run the following commands in Azure local Shell, replacing YourIoTHubName with the name of your IoT hub:
az iot hub monitor-events --device-id MyAndroidThingsDevice --hub-name YourIoTHubName
Clean up resources
If you're continuing to the next recommended article, you can keep the resources you already created and reuse them.
Otherwise, you can delete the Azure resources created in this article to avoid charges.
Important
Deleting a resource group is irreversible. The resource group and all the resources contained in it are permanently deleted. Make sure that you don't accidentally delete the wrong resource group or resources. If you created the IoT hub inside an existing resource group that contains resources you want to keep, only delete the IoT Hub resource itself instead of deleting the resource group.
To delete a resource group by name:
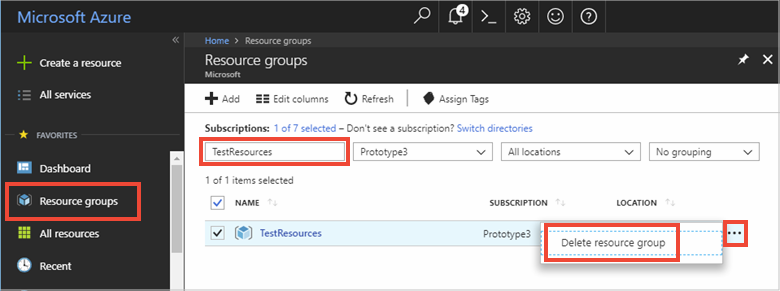
Sign in to the Azure portal and select Resource groups.
In the Filter for any field textbox, type the name of the resource group containing your IoT hub.
In the result list, select the resource group containing your IoT hub.
In the working pane for the resource group, select Delete resource group from the command bar.
You're asked to confirm the deletion of the resource group. Type the name of your resource group again to confirm, and then select Delete. After a few moments, the resource group and all of its contained resources are deleted.
Next steps
- Learn about how to manage connectivity and reliable messaging using the IoT Hub SDKs.
- Learn about how to develop for mobile platforms such as iOS and Android.