Note
Access to this page requires authorization. You can try signing in or changing directories.
Access to this page requires authorization. You can try changing directories.
Azure Key Vault is a cloud service that provides a secure store for secrets, such as keys, passwords, and certificate. This quickstart focuses on the process of deploying a Bicep file to create a key vault and a key.
Bicep is a domain-specific language (DSL) that uses declarative syntax to deploy Azure resources. It provides concise syntax, reliable type safety, and support for code reuse. Bicep offers the best authoring experience for your infrastructure-as-code solutions in Azure.
Prerequisites
To complete this article:
- If you don't have an Azure subscription, create a trial subscription before you begin.
- User would need to have an Azure built-in role assigned, recommended role contributor. Learn more here
Review the Bicep file
@description('The name of the key vault to be created.')
param vaultName string

@description('The name of the key to be created.')
param keyName string

@description('The location of the resources')
param location string = resourceGroup().location

@description('The SKU of the vault to be created.')
@allowed([
  'standard'
  'premium'
])
param skuName string = 'standard'

@description('The JsonWebKeyType of the key to be created.')
@allowed([
  'EC'
  'EC-HSM'
  'RSA'
  'RSA-HSM'
])
param keyType string = 'RSA'

@description('The permitted JSON web key operations of the key to be created.')
param keyOps array = []

@description('The size in bits of the key to be created.')
param keySize int = 2048

@description('The JsonWebKeyCurveName of the key to be created.')
@allowed([
  ''
  'P-256'
  'P-256K'
  'P-384'
  'P-521'
])
param curveName string = ''

resource vault 'Microsoft.KeyVault/vaults@2021-11-01-preview' = {
  name: vaultName
  location: location
  properties: {
    accessPolicies:[]
    enableRbacAuthorization: true
    enableSoftDelete: true
    softDeleteRetentionInDays: 90
    enabledForDeployment: false
    enabledForDiskEncryption: false
    enabledForTemplateDeployment: false
    tenantId: subscription().tenantId
    sku: {
      name: skuName
      family: 'A'
    }
    networkAcls: {
      defaultAction: 'Allow'
      bypass: 'AzureServices'
    }
  }
}

resource key 'Microsoft.KeyVault/vaults/keys@2021-11-01-preview' = {
  parent: vault
  name: keyName
  properties: {
    kty: keyType
    keyOps: keyOps
    keySize: keySize
    curveName: curveName
  }
}

output proxyKey object = key.properties
Two resources are defined in the Bicep file:
More Azure Key Vault template samples can be found in Azure Quickstart Templates.
Parameters and definitions
| Parameter | Definition |
|---|---|
| keyOps | Specifies operations that can be performed by using the key. If you don't specify this parameter, all operations can be performed. The acceptable values for this parameter are a comma-separated list of key operations as defined by the JSON Web Key (JWK) specification: ["sign", "verify", "encrypt", "decrypt", " wrapKey", "unwrapKey"] |
| CurveName | Elliptic curve (EC) name for EC key type. See JsonWebKeyCurveName |
| Kty | The type of key to create. For valid values, see JsonWebKeyType |
| Tags | Application-specific metadata in the form of key-value pairs. |
| nbf | Specifies the time, as a DateTime object, before which the key can't be used. The format would be Unix time stamp (the number of seconds after Unix Epoch on January 1st, 1970 at UTC). |
| exp | Specifies the expiration time, as a DateTime object. The format would be Unix time stamp (the number of seconds after Unix Epoch on January 1st, 1970 at UTC). |
Deploy the Bicep file
Save the Bicep file as main.bicep to your local computer.
Deploy the Bicep file using either Azure CLI or Azure PowerShell.
az group create --name exampleRG --location chinaeast az deployment group create --resource-group exampleRG --template-file main.bicep --parameters vaultName=<vault-name> keyName=<key-name>Note
Replace <vault-name> with the name of the key vault. Replace <vault-name> with the name of the key vault, and replace <key-name> with the name of the key.
When the deployment finishes, you should see a message indicating the deployment succeeded.
Review deployed resources
You can use the Azure portal to check the key vault and the key. Alternatively, use the following Azure CLI or Azure PowerShell script to list the key created.
echo "Enter your key vault name:" &&
read keyVaultName &&
az keyvault key list --vault-name $keyVaultName &&
echo "Press [ENTER] to continue ..."
Creating key using ARM template is different from creating key via data plane
Creating a key via ARM
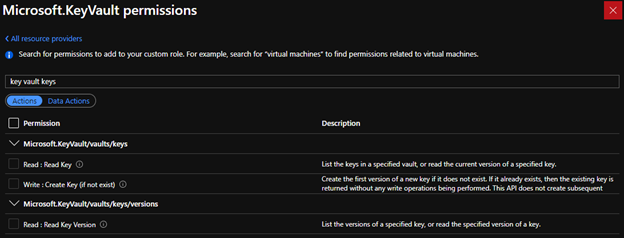
It's only possible to create new keys. It isn't possible to update existing keys, nor create new versions of existing keys. If the key already exists, then the existing key is retrieved from storage and used (no write operations will occur).
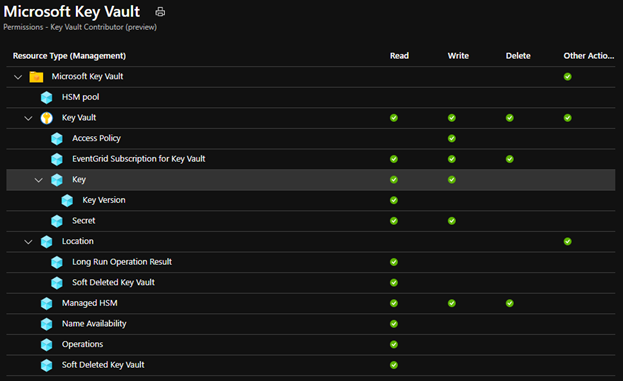
To be authorized to use this API, the caller needs to have the "Microsoft.KeyVault/vaults/keys/write" role-based access control (Azure RBAC) Action. The built-in "Key Vault Contributor" role is sufficient, since it authorizes all Azure RBAC Actions that match the pattern "Microsoft.KeyVault/*".


Existing API (creating key via data plane)
- It's possible to create new keys, update existing keys, and create new versions of existing keys.
- The caller must be authorized to use this API. If the vault uses access policies, the caller must have "create" key permission; if the vault is enabled for Azure RBAC, the caller must have "Microsoft.KeyVault/vaults/keys/create/action" Azure RBAC DataAction.
Clean up resources
Other Key Vault quickstarts and tutorials build upon this quickstart. If you plan to continue on to work with subsequent quickstarts and tutorials, you may wish to leave these resources in place. When no longer needed, delete the resource group, which deletes the Key Vault and related resources. To delete the resource group by using Azure CLI or Azure PowerShell:
echo "Enter the Resource Group name:" &&
read resourceGroupName &&
az group delete --name $resourceGroupName &&
echo "Press [ENTER] to continue ..."
Next steps
In this quickstart, you created a key vault and a key using a Bicep file, and validated the deployment. To learn more about Key Vault and Azure Resource Manager, see these articles.
- Read an Overview of Azure Key Vault
- Learn more about Azure Resource Manager
- Review the Key Vault security overview