Note
Access to this page requires authorization. You can try signing in or changing directories.
Access to this page requires authorization. You can try changing directories.
Applies to: Azure Logic Apps (Consumption + Standard)
When you have existing web APIs or REST APIs that you want to call from workflows in Azure Logic Apps, you must first complete some setup steps before you can call these APIs. Primarily, you must deploy your APIs as web apps or API apps. You can perform this task by hosting your APIs on Azure App Service, a cloud platform that provides highly scalable, easy API hosting.
In App Service, you can deploy your APIs as web apps but consider deploying your APIs as API apps instead. This approach makes your job easier when you build, host, and consume APIs in the cloud and in on-premises environments. You don't have to change any code in your APIs to deploy to an API app.
You can call any API from a workflow, but for the best experience, add Swagger metadata to your web app or API app. This Swagger document describes your API operations and parameters, which helps logic app workflows work better and more easily with your API. You must also set up Cross-Origin Resource Sharing (CORS) on your web app or API app so your workflow can access your API.
This guide shows how to add a Swagger document, set up CORS for your web app or API app, and provide options for calling your API from a workflow after you complete deployment and hosting for your API in App Service.
For more information, see:
- Azure App Service
- Create and deploy an ASP.NET web app
- Create host a RESTful API with CORS in Azure App Service
Prerequisites
An Azure account with an active subscription. If you don't have a subscription, create a Trial.
A web API or REST API that follows one of the patterns compatible with workflows in Azure Logic Apps and is deployed to App Service as a web app or API app.
For more information, see:
Add Swagger and CORS access to your web app or API app
When you add a Swagger document to your web app or API app, the workflow designer in Azure Logic Apps can more easily find and show the available operations and parameters in your API. You must also set up Cross-Origin Resource Sharing (CORS) on your web app or API app so your workflow can access your API.
To make your Swagger document readable from your workflow in the designer, on your web app or API app, set the API definition properties and CORS access.
In the Azure portal, find and open your web app or API app resource.
On the app resource sidebar, select Overview.
On the Properties tab, under Domains, from the Default domain property, copy and save the website name somewhere for the next step.
On the app resource sidebar, under API, select API definition. For API definition location, enter the URL for your Swagger JSON file, which typically uses the following format, but might differ if your Swagger file uses a newer API specification:
https://<website-name>/swagger/docs/v1The following example shows a Swagger URL with the newer API specification:
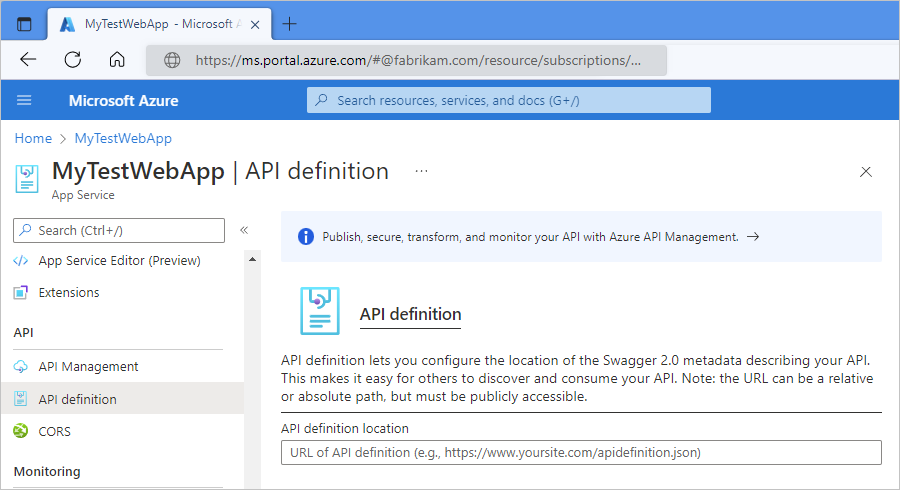
When you're done, select Save.
On the app resource sidebar, under API, select CORS.
For Allowed Origin, set the CORS policy to '*', which means to allow all.
This setting permits requests from the workflow designer in Azure Logic Apps.
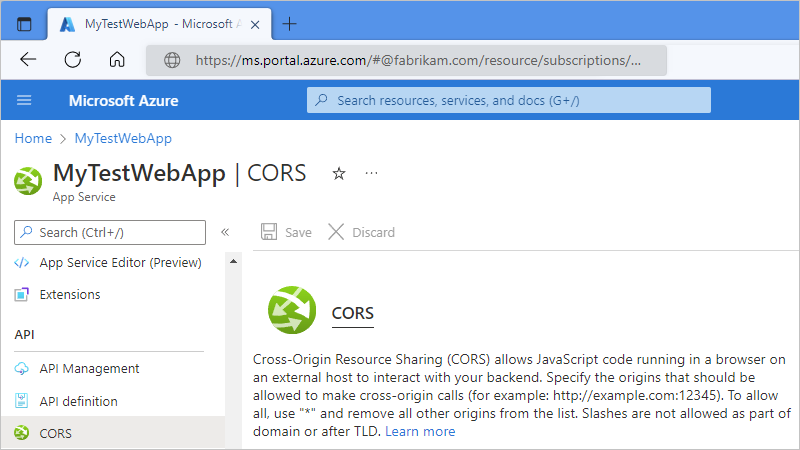
On the toolbar, select Save.
For more information, see Host a RESTful API with CORS in Azure App Service.
Call your API from your workflow
After you set up the API definition URL and CORS, your API operations appear in the connector gallery for you find and add to your workflow.
- To view websites that have OpenAPI URLs, you can browse your subscription websites in the workflow designer.
- To call any API, including APIs that don't have or expose a Swagger document, you can always create a request with the HTTP action.