Note
Access to this page requires authorization. You can try signing in or changing directories.
Access to this page requires authorization. You can try changing directories.
APPLIES TO:
 Azure CLI ml extension v2 (current)
Python SDK azure-ai-ml v2 (current)
Azure CLI ml extension v2 (current)
Python SDK azure-ai-ml v2 (current)
This article explains how to create and manage a compute cluster in your Azure Machine Learning workspace.
You can use Azure Machine Learning compute cluster to distribute a training or batch inference process across a cluster of CPU or GPU compute nodes in the cloud. For more information on the VM sizes that include GPUs, see GPU-optimized virtual machine sizes.
Learn how to:
- Create a compute cluster.
- Lower your compute cluster cost with low priority VMs.
- Set up a managed identity for the cluster.
Note
Instead of creating a compute cluster, use serverless compute to offload compute lifecycle management to Azure Machine Learning.
Prerequisites
- An Azure Machine Learning workspace. For more information, see Manage Azure Machine Learning workspaces.
Select the appropriate tab for the rest of the prerequisites based on your preferred method of creating the compute cluster.
If you're not running your code on a compute instance, install the Azure Machine Learning Python SDK. This SDK is already installed for you on a compute instance.
Attach to the workspace in your Python script:
Run this code to connect to your Azure Machine Learning workspace.
Replace your Subscription ID, Resource Group name, and Workspace name in the following code. To find these values:
- Sign in to Azure Machine Learning studio.
- Open the workspace you wish to use.
- Select your workspace name in the upper right Azure Machine Learning studio toolbar.
- Copy the value for workspace, resource group, and subscription ID into the code.
APPLIES TO:
Python SDK azure-ai-ml v2 (current)# Enter details of your AML workspace subscription_id = "<SUBSCRIPTION_ID>" resource_group = "<RESOURCE_GROUP>" workspace = "<AML_WORKSPACE_NAME>"# get a handle to the workspace from azure.ai.ml import MLClient from azure.identity import DefaultAzureCredential ml_client = MLClient( DefaultAzureCredential(), subscription_id, resource_group, workspace )ml_clientis a handler to the workspace that you use to manage other resources and jobs.
Note
When configuring a Virtual Network (VNet) located in a different resource group from your Azure Machine Learning workspace, be aware that resources such as Network Security Groups (NSGs), Public IPs, and Load Balancers will be created in the same resource group as the VNet. This behavior ensures proper network management and isolation.
What is a compute cluster?
Azure Machine Learning compute cluster is a managed-compute infrastructure that allows you to easily create a single or multi-node compute. The compute cluster is a resource that can be shared with other users in your workspace. The compute scales up automatically when a job is submitted, and can be put in an Azure Virtual Network. Compute cluster supports no public IP deployment as well in virtual network. The compute executes in a containerized environment and packages your model dependencies in a Docker container.
Compute clusters can run jobs securely in either a managed virtual network or an Azure virtual network, without requiring enterprises to open up SSH ports. The job executes in a containerized environment and packages your model dependencies in a Docker container.
Limitations
Compute clusters can be created in a different region than your workspace. This functionality is only available for compute clusters, not compute instances.
Warning
When using a compute cluster in a different region than your workspace or datastores, you might see increased network latency and data transfer costs. The latency and costs can occur when creating the cluster, and when running jobs on it.
Azure Machine Learning Compute has default limits, such as the number of cores that can be allocated. For more information, see Manage and request quotas for Azure resources.
Azure allows you to place locks on resources, so that they can't be deleted or are read only. Do not apply resource locks to the resource group that contains your workspace. Applying a lock to the resource group that contains your workspace prevents scaling operations for Azure Machine Learning compute clusters. For more information on locking resources, see Lock resources to prevent unexpected changes.
Caution
Applying resource locks, such as "Delete" or "Read-only", to the resource group that contains your Machine Learning workspace or to a separate resource group where you've configured a virtual network can prevent operations like creation, scaling, or deletion of these clusters. Ensure that resource locks are configured appropriately to avoid unintended disruptions.
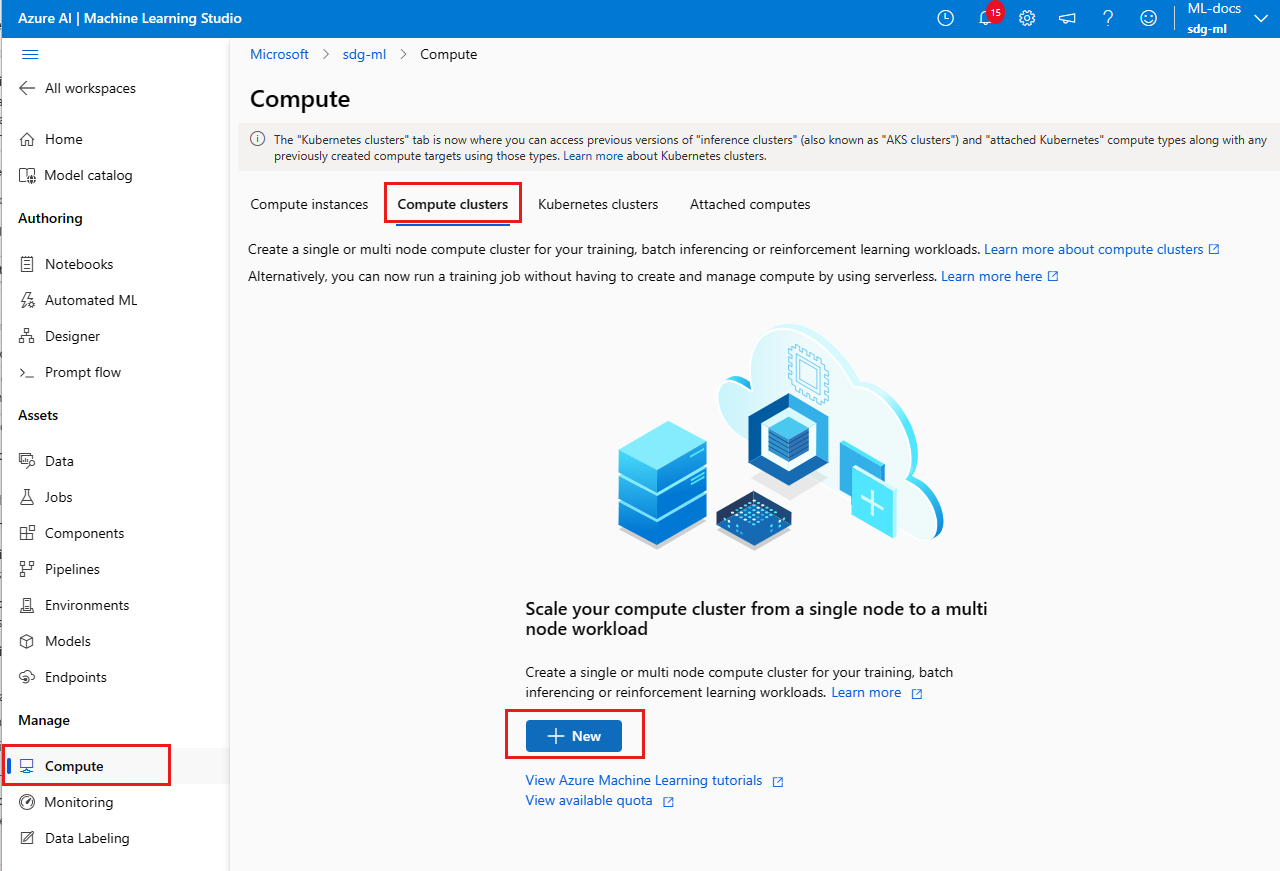
Create
Time estimate: Approximately five minutes.
Note
If you use serverless compute, you don't need to create a compute cluster.
Azure Machine Learning Compute can be reused across runs. The compute can be shared with other users in the workspace and is retained between runs, automatically scaling nodes up or down based on the number of runs submitted, and the max_nodes set on your cluster. The min_nodes setting controls the minimum nodes available.
The dedicated cores per region per VM family quota and total regional quota, which applies to compute cluster creation, is unified and shared with Azure Machine Learning training compute instance quota.
Important
To avoid charges when no jobs are running, set the minimum nodes to 0. This setting allows Azure Machine Learning to de-allocate the nodes when they aren't in use. Any value larger than 0 will keep that number of nodes running, even if they are not in use.
The compute autoscales down to zero nodes when it isn't used. Dedicated VMs are created to run your jobs as needed.
Use the following examples to create a compute cluster:
To create a persistent Azure Machine Learning Compute resource in Python, specify the size and max_instances properties. Azure Machine Learning then uses smart defaults for the other properties.
- size: The VM family of the nodes created by Azure Machine Learning Compute.
- max_instances: The maximum number of nodes to autoscale up to when you run a job on Azure Machine Learning Compute.
APPLIES TO:
Python SDK azure-ai-ml v2 (current)
from azure.ai.ml.entities import AmlCompute

cluster_basic = AmlCompute(
    name="basic-example",
    type="amlcompute",
    size="STANDARD_DS3_v2",
    location="chinaeast",
    min_instances=0,
    max_instances=2,
    idle_time_before_scale_down=120,
)
ml_client.begin_create_or_update(cluster_basic)
You can also configure several advanced properties when you create Azure Machine Learning Compute. The properties allow you to create a persistent cluster of fixed size, or within an existing Azure Virtual Network in your subscription. See the AmlCompute class for details.
Warning
When setting the location parameter, if it's a different region than your workspace or datastores, you might see increased network latency and data transfer costs. The latency and costs can occur when creating the cluster, and when running jobs on it.


Lower your compute cluster cost with low priority VMs
You can also choose to use low-priority VMs to run some or all of your workloads. These VMs don't have guaranteed availability and might be preempted while in use. You have to restart a preempted job.
Using Azure Low Priority Virtual Machines allows you to take advantage of Azure's unused capacity at a significant cost savings. At any point in time when Azure needs the capacity back, the Azure infrastructure evicts Azure Low Priority Virtual Machines. Therefore, Azure Low Priority Virtual Machine is great for workloads that can handle interruptions. The amount of available capacity can vary based on size, region, time of day, and more. When deploying Azure Low Priority Virtual Machines, Azure allocates the VMs if there's capacity available, but there's no SLA for these VMs. An Azure Low Priority Virtual Machine offers no high availability guarantees. At any point in time when Azure needs the capacity back, the Azure infrastructure evicts Azure Low Priority Virtual Machines.
Use any of these ways to specify a low-priority VM:
APPLIES TO:
Python SDK azure-ai-ml v2 (current)
from azure.ai.ml.entities import AmlCompute

cluster_low_pri = AmlCompute(
    name="low-pri-example",
    size="STANDARD_DS3_v2",
    min_instances=0,
    max_instances=2,
    idle_time_before_scale_down=120,
    tier="low_priority",
)
ml_client.begin_create_or_update(cluster_low_pri)
Delete
While your compute cluster scales down to zero nodes when not in use, unprovisioned nodes contribute to your quota usage. Deleting the compute cluster removes the compute target from your workspace, and releases the quota.
APPLIES TO:
Python SDK azure-ai-ml v2 (current)
This deletes the basic compute cluster, created from the create_basic object earlier in this article.
from azure.ai.ml.entities import AmlCompute

ml_client.compute.begin_delete(cluster_basic.name).wait()
Set up managed identity
For information on how to configure a managed identity with your compute cluster, see Set up authentication between Azure Machine Learning and other services.
Troubleshooting
There's a chance that some users who created their Azure Machine Learning workspace from the Azure portal before the GA release might not be able to create compute in that workspace. You can either raise a support request against the service or create a new workspace through the portal or the SDK to unblock yourself immediately.
Important
If your compute instance or compute clusters are based on any of these series, recreate with another VM size.
These series retired on August 31, 2024:
These series retired on September 30, 2025:
Stuck at resizing
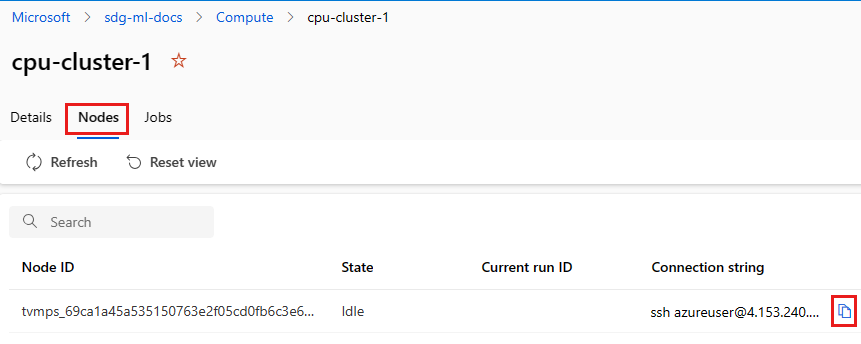
If your Azure Machine Learning compute cluster appears stuck at resizing (0 -> 0) for the node state, Azure resource locks might be the cause.
Azure allows you to place locks on resources, so that they cannot be deleted or are read only. Locking a resource can lead to unexpected results. Some operations that don't seem to modify the resource actually require actions that are blocked by the lock.
With Azure Machine Learning, applying a delete lock to the resource group for your workspace will prevent scaling operations for Azure ML compute clusters. To work around this problem we recommend removing the lock from resource group and instead applying it to individual items in the group.
Important
Do not apply the lock to the following resources:
| Resource name | Resource type |
|---|---|
<GUID>-azurebatch-cloudservicenetworksecurityggroup |
Network security group |
<GUID>-azurebatch-cloudservicepublicip |
Public IP address |
<GUID>-azurebatch-cloudserviceloadbalancer |
Load balancer |
These resources are used to communicate with, and perform operations such as scaling on, the compute cluster. Removing the resource lock from these resources should allow autoscaling for your compute clusters.
For more information on resource locking, see Lock resources to prevent unexpected changes.
Next step
Use your compute cluster to: