Note
Access to this page requires authorization. You can try signing in or changing directories.
Access to this page requires authorization. You can try changing directories.
This article describes how to turn on or off the zone redundant high availability configuration in Azure Database for MySQL.
The high availability feature provisions physically separate primary and standby replicas in different zones. For more information, see the high availability concepts documentation.
Important
You can enable zone redundant high availability only during Azure Database for MySQL Flexible Server instance creation.
This article provides guidelines to turn high availability on or off. This operation doesn't change your other settings, including virtual network configuration, firewall settings, and backup retention. Similarly, disabling high availability is an online operation that doesn't impact your application's connectivity or operations.
Enable high availability during server creation
This section provides details specifically for HA-related fields. You can follow these steps to deploy high availability while creating your Azure Database for MySQL Flexible Server instance.
In the Azure portal, choose flexible Server and select Create. For information about how to fill in details such as Subscription, Resource group, Server name, Region, and other fields, see the how-to documentation for Azure Database for MySQL Flexible Server instance creation.
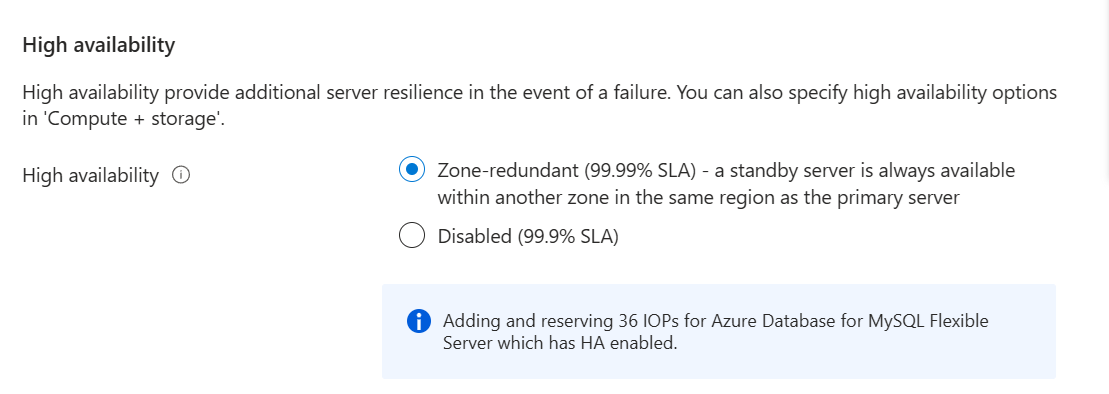
Select the radio button for Zone-redundant in the High availability option.
Select Configure server if you want to change the default compute and storage settings.
If you select the high availability option, you can't choose the burstable tier. You can choose either General purpose or Memory-Optimized compute tiers.
Important
We only support zone-redundant high availability for the General purpose and Memory-Optimized pricing tiers.
Select the Compute size for your choice from the dropdown list.
Select Storage size in GiB by using the sliding bar and select the Backup retention period between 7 days and 35 days.

Disable high availability
Follow these steps to disable high availability for your Azure Database for MySQL Flexible Server instance that is already configured with zone redundancy.
In the Azure portal, select your existing Azure Database for MySQL Flexible Server instance.
On the Azure Database for MySQL Flexible Server instance page, select High Availability from the front panel to open the high availability page.
Select the zone redundant high availability checkbox to disable the option and select Save to save the change.
When the confirmation dialog appears, confirm disabling high availability. Select Disable HA to disable high availability.
A notification states that the high availability decommissioning deployment is in progress.
Forced failover
Follow these steps to force failover from your primary to a standby Azure Database for MySQL Flexible Server instance.
In the Azure portal, select your existing Azure Database for MySQL Flexible Server instance that has the high availability feature enabled.
On the Azure Database for MySQL Flexible Server instance page, select High Availability from the front panel to open the high availability page.
Check the Primary availability zone and the Standby availability zone.
Select Forced Failover to initiate the manual failover procedure. A pop-up informs you of the expected failover time depending on the current workload on the primary and the recency of the last checkpoint. Read the message and select OK.
A notification states that failover is in progress. When failover to the standby server succeeds, a notification appears.
Check the new Primary availability zone and the Standby availability zone.
