Note
Access to this page requires authorization. You can try signing in or changing directories.
Access to this page requires authorization. You can try changing directories.
Important
Attention: All Microsoft Sentinel features will be officially retired in Azure in China regions on August 18, 2026 per the announcement posted by 21Vianet.
This article explains how to add advanced "Or" conditions to automation rules in Microsoft Sentinel, for more effective triage of incidents.
Add "Or" conditions in the form of condition groups in the Conditions section of your automation rule.
Condition groups can contain two levels of conditions:
Simple conditions: At least two conditions, each separated by an
ORoperator:- A
ORB - A
ORBORC (Example 1B: Add more OR conditions) - and so on.
- A
Compound conditions: More than two conditions, with at least two conditions on at least one side of an
ORoperator:- (A
andB)ORC - (A
andB)OR(CandD) - (A
andB)OR(CandDandE) - (A
andB)OR(CandD)OR(EandF) - and so on.
- (A
Using condition groups with OR logic affords you great power and flexibility in determining when rules will run. It can also greatly increase your efficiency by letting you combine many old automation rules into one new rule.
Add a condition group
Since condition groups offer a lot more power and flexibility in creating automation rules, the best way to explain how to add condition groups to automation rules is by presenting some examples.
Let's create a rule that will change the severity of an incoming incident from whatever it is to High, assuming it meets the conditions we'll set.
Go to the Azure portal, select the Configuration > Automation page.
From the Automation page, select Create > Automation rule from the button bar at the top.
See the general instructions for creating an automation rule for details.
Name the rule Triage: Change Severity to High.
Select the trigger When incident is created.
Under Conditions, if you see the Incident provider and Analytics rule name conditions, leave them as they are. We'll add more conditions later in this process.
Under Actions, select Change severity from the drop-down list.
Select High from the drop-down list that appears below Change severity.
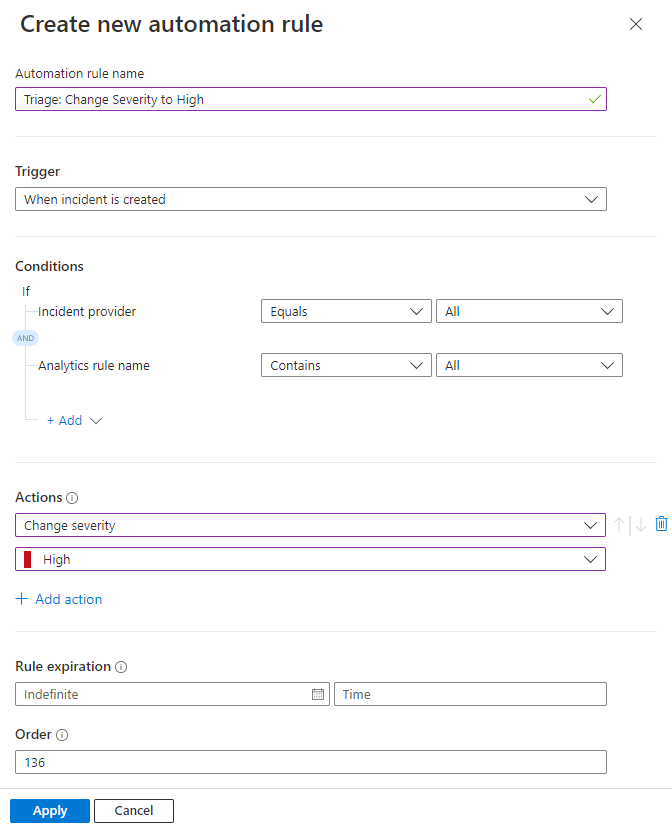
Example 1: simple conditions
In this first example, we'll create a simple condition group: If either condition A or condition B is true, the rule will run and the incident's severity will be set to High.
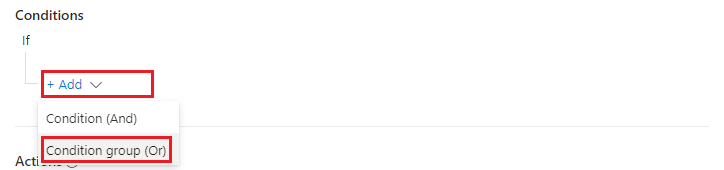
Select the + Add expander and choose Condition group (Or) from the drop-down list.
See that two sets of condition fields are displayed, separated by an
ORoperator. The two sets of condition fields are conditions A and B, representing the two sides of a simple OR condition group: If A or B is true, the rule will run.
(Don't be confused by all the different Add links-each one is explained in the following steps.)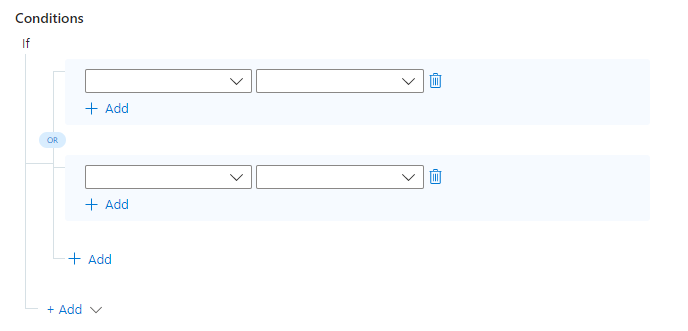
Decide what these conditions will be. That is, what two different conditions will cause the incident severity to be changed to High? We suggest the following:
If the incident's associated MITRE ATT&CK Tactics include any of the four we've selected from the drop-down (see the image below), the severity should be raised to High.
If the incident contains a Host name entity named "SUPER_SECURE_STATION", the severity should be raised to High.
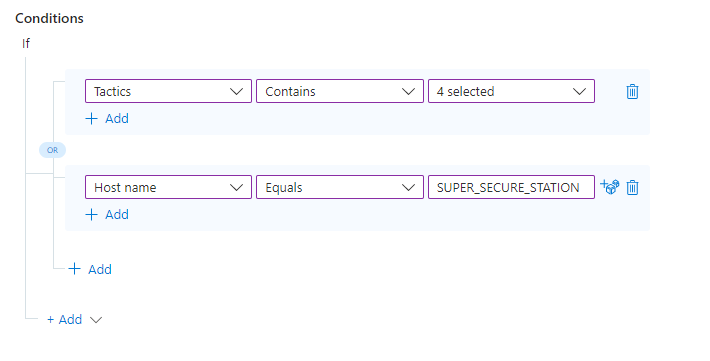
As long as at least ONE of these conditions is true, the actions we define in the rule will run, changing the severity of the incident to High.
Example 1A: Add an OR value within a single condition
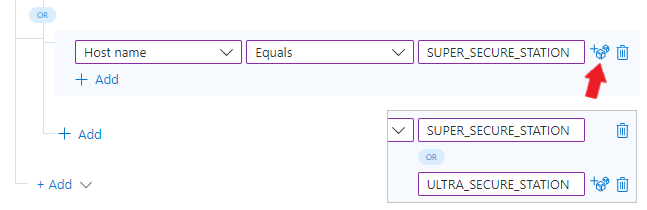
Let's say we have not one, but two super-sensitive workstations whose incidents we want to make high-severity. To add another value to an entity-property condition, select the dice icon to the right of the current condition value, and then enter an additional value below it.
Example 1B: Add more OR conditions
Let's say we want to have this rule run if one of THREE (or more) conditions is true. If A or B or C is true, the rule will run.
Remember all those Add links? To add another OR condition, select the + Add connected by a line to the
ORoperator.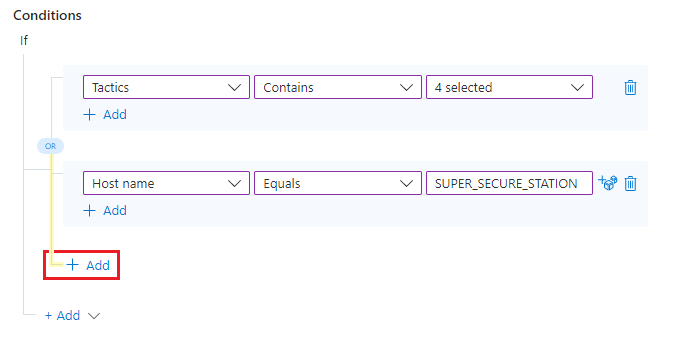
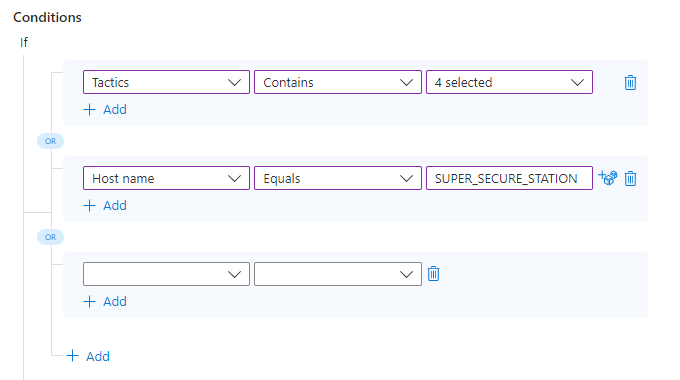
Now, select the field, operator, and value for the new condition by choosing a property from the drop-down list, selecting a comparison operator, and entering the target value.
Example 2: Add compound conditions
In this example, we add multiple conditions to each side of an OR condition group, creating compound logic. The goal is for the rule to run if A and B are true, OR if C and D are true.
To add a condition to one side of an OR condition group, select the + Add link immediately below the existing condition, on the same side of the
ORoperator (in the same blue-shaded area) to which you want to add the new condition.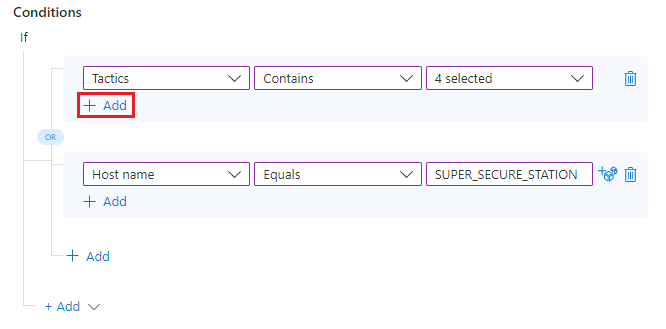
You'll see a new row added under the existing condition (in the same blue-shaded area), linked to it by an
ANDoperator.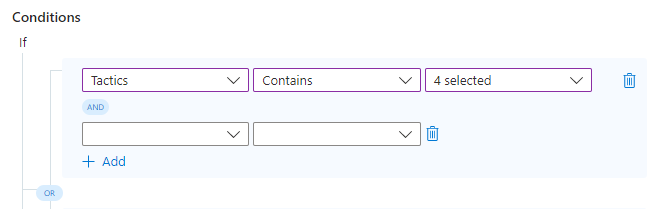
Fill in the parameters and values for the new condition row by selecting a property, operator, and value from the drop-down lists, using the same method you used for the earlier conditions in this condition group.
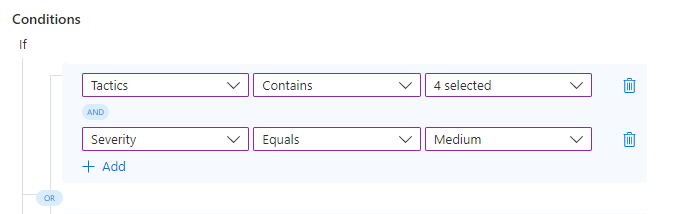
On either side of the OR condition group, select the + Add link below an existing condition to add a new row, and then enter the new condition's parameters and values.
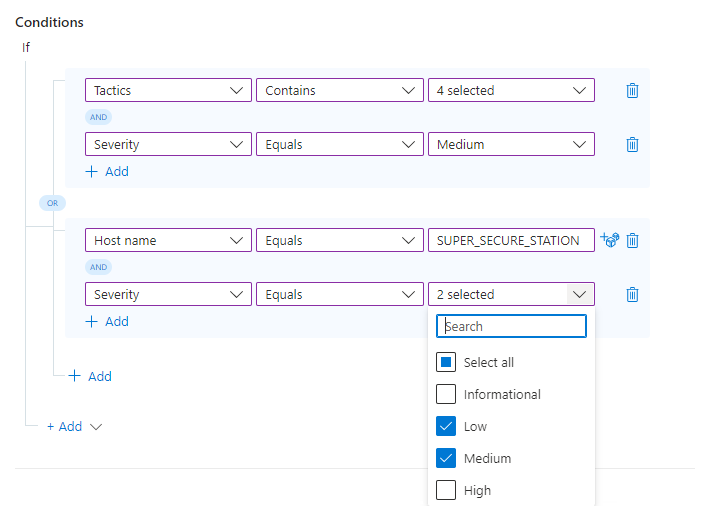
That's it! You can use what you've learned here to add more conditions and condition groups, using different combinations of AND and OR operators, to create powerful, flexible, and efficient automation rules to really help your SOC run smoothly and lower your response and resolution times.