Note
Access to this page requires authorization. You can try signing in or changing directories.
Access to this page requires authorization. You can try changing directories.
Important
Attention: All Microsoft Sentinel features will be officially retired in Azure in China regions on August 18, 2026 per the announcement posted by 21Vianet.
Use a search job to retrieve data stored in long-term retention, or to scan through large volumes of data, if the log query time-out of 10 minutes isn't sufficient. A search job scans through up to a year of data in a table for specific events. The search job sends its results to a new Analytics table in the same workspace as the source data.
This article explains how to run a search job in Microsoft Sentinel and how to work with the search job results.
Search jobs across certain data sets might incur extra charges. For more information, see Microsoft Sentinel pricing page.
Implementation considerations
See Search job considerations in the Azure Monitor documentation.
Start a search job
Go to Search in Microsoft Sentinel from the Azure portal to enter your search criteria. Depending on the size of the target dataset, search times vary. While most search jobs take a few minutes to complete, searches across massive data sets that run up to 24 hours are also supported.
Go to the Azure portal, under General, select Search.
Select the Table menu and choose a table for your search.
In the Search box, enter a search term.

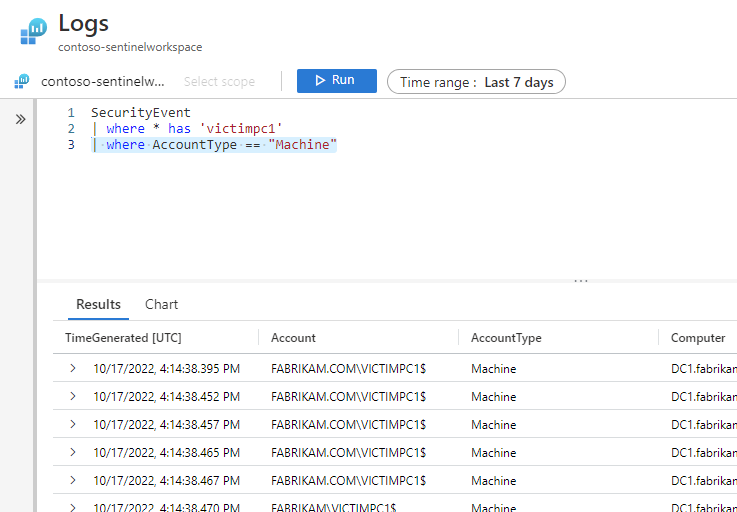
Select the Start to preview your results for a set time range in Simple Mode. If needed, go to the dropdown menu and switch from Simple mode to KQL mode to open the advanced Kusto Query Language (KQL) editor.
Change the KQL query as needed and select Run to get an updated preview of the search results. Resolve any KQL issues indicated by a squiggly red line in the editor.
When you're satisfied with the query and the search results preview, select the ellipses ... and toggle Search job mode on.
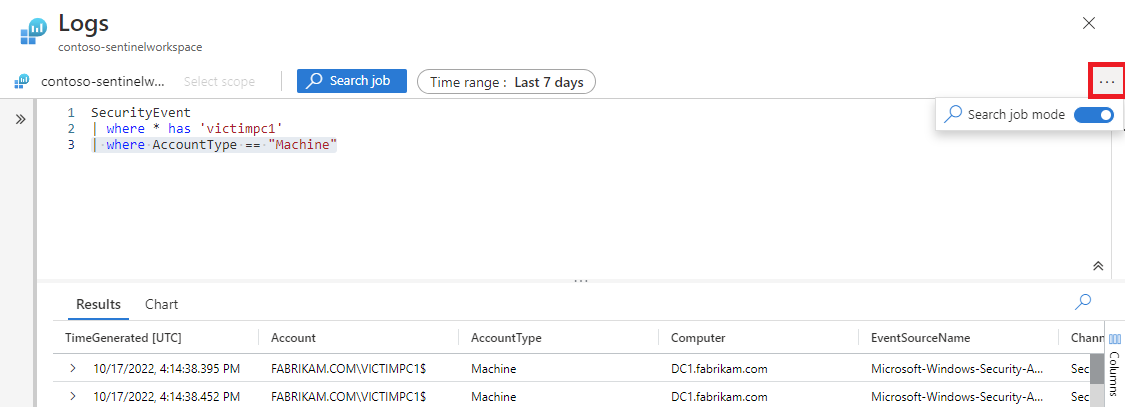
Specify the search job date range using the Time range selector. If your query also specifies a time range, Microsoft Sentinel runs the search job on the union of the time ranges.
Enter a new table name to store the search job results.
Select Run search job.
Wait for the notification Search job is done and select the button to go to the table and view the results.


View search job results
View the status and results of your search job by going to the Saved Searches tab.
In Microsoft Sentinel, select Search > Saved Searches.
On the search card, select View search results.
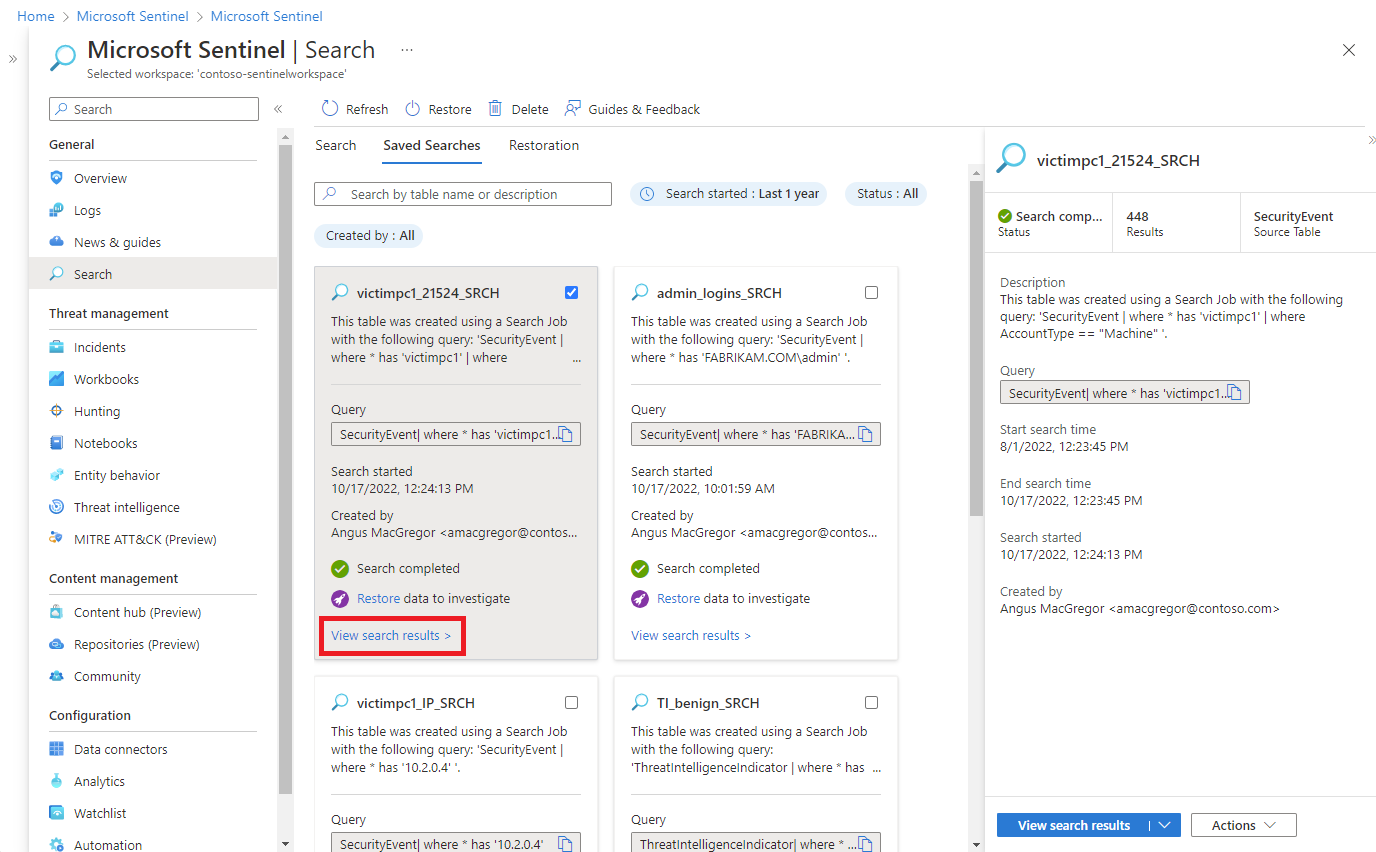
By default, you see all the results that match your original search criteria.
To refine the list of results returned from the search table, select Add filter.
As you're reviewing your search job results, select Add bookmark, or select the bookmark icon to preserve a row. Adding a bookmark allows you to tag events, add notes, and attach these events to an incident for later reference.
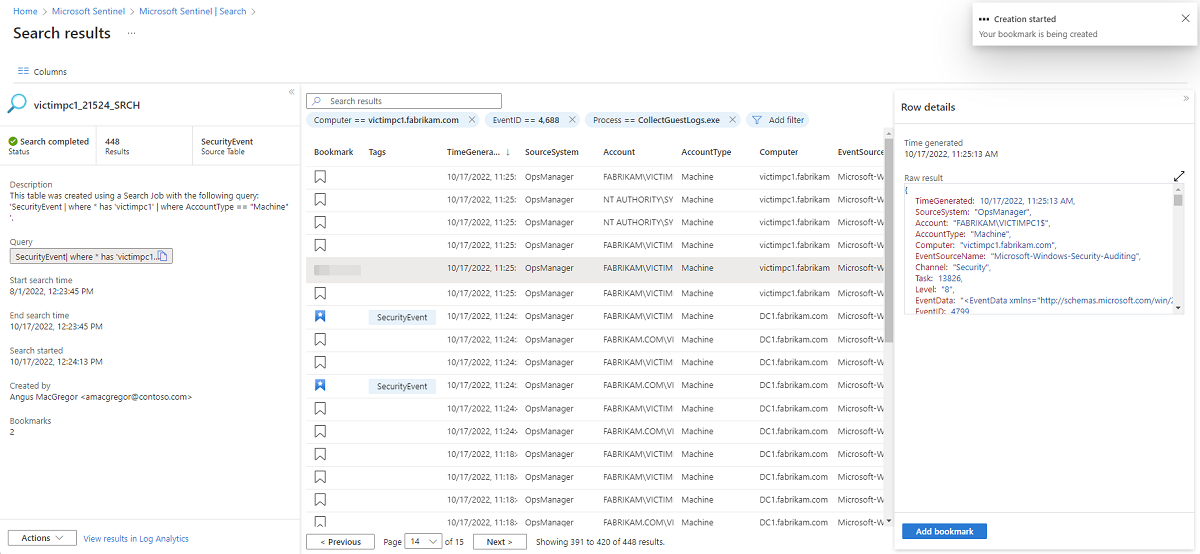
Select the Columns button and select the checkbox next to columns you'd like to add to the results view.
Add the Bookmarked filter to only show preserved entries.
Select View all bookmarks to go the Hunting page where you can add a bookmark to an existing incident.


Next steps
To learn more, see the following articles.