Note
Access to this page requires authorization. You can try signing in or changing directories.
Access to this page requires authorization. You can try changing directories.
Service Bus partitions enable queues and topics, or messaging entities, to be partitioned across multiple message brokers. Partitioning means that the overall throughput of a partitioned entity is no longer limited by the performance of a single message broker. Partitioned queues and topics can contain all advanced Service Bus features, such as support for transactions and sessions. For more information, see Partitioned queues and topics. This article shows you different ways to enable partitioning for a Service Bus Premium namespace. All entities in this namespace are partitioned.
Note
- JMS isn't currently supported on partitioned namespaces.
- You can enable partitioning during namespace creation in the Premium tier.
- You can't create non-partitioned entities in a partitioned namespace.
- You can't change the partitioning option on any existing namespace. You set the number of partitions during namespace creation.
- The number of assigned messaging units is always a multiplier of the number of partitions in a namespace, and is equally distributed across the partitions. For example, in a namespace with 16 MU and 4 partitions, each partition is assigned 4 MU.
- Using multiple partitions with lower messaging units (MU) gives you better performance over a single partition with higher MUs.
- This feature is currently available in all regions except West India, Qatar Central, and Austria East.
Important
Not supported with partitioned namespaces:
- Batching messages with distinct SessionId or PartitionKey
- Migration from a Standard tier namespace to a Premium tier partitioned namespace
- Pairing a partitioned namespace with a non-partitioned namespace when using Geo-disaster recovery
Use Azure portal
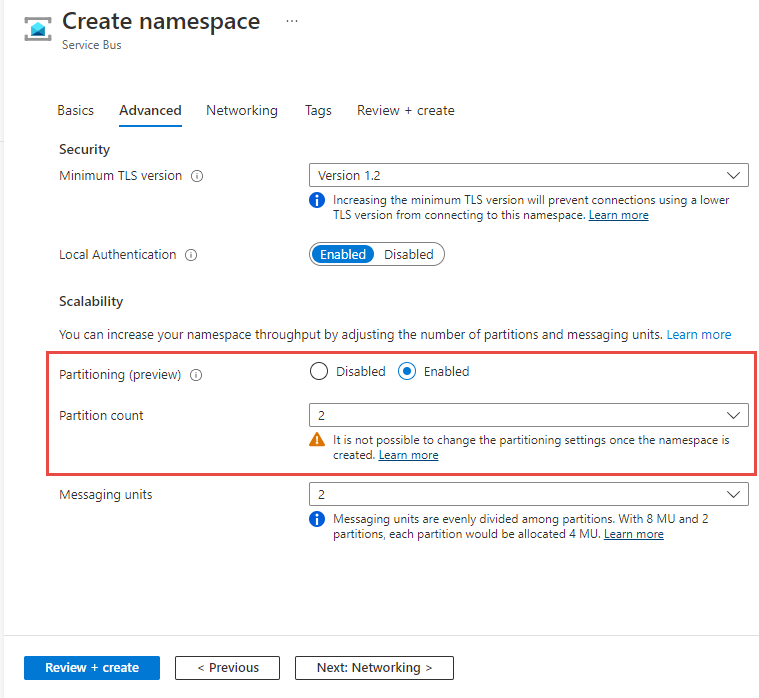
When creating a namespace in the Azure portal, set the Partitioning to Enabled and choose the number of partitions, as shown in the following image.
Use Azure CLI
To create a namespace with partitioning enabled, use the az servicebus namespace create command with --premium-messaging-partitions set to a number larger than 1.
az servicebus namespace create \
    --resource-group myresourcegroup \
    --name mynamespace \
    --location chinanorth3  \
    --sku Premium \
    --premium-messaging-partitions 4
Use Azure PowerShell
To create a namespace with partitioning enabled, use the New-AzServiceBusNamespace command with -PremiumMessagingPartition set to a number larger than 1.
New-AzServiceBusNamespace -ResourceGroupName myresourcegroup `
    -Name mynamespace `
    -Location chinanorth3 `
    -PremiumMessagingPartition 4
Use a template
To create a namespace with partitioning enabled, set premiumMessagingPartitions to a number larger than 1 in the namespace properties section. In the following example, a partitioned namespace is created with 4 partitions, and 1 messaging unit assigned to each partition. For more information, see Microsoft.ServiceBus namespaces template reference.
@description('Name of the Service Bus namespace')
param serviceBusNamespaceName string

@description('Location for all resources.')
param location string = resourceGroup().location

resource serviceBusNamespace 'Microsoft.ServiceBus/namespaces@2024-01-01' = {
  name: serviceBusNamespaceName
  location: location
  sku: {
    name: 'Premium'
    capacity: 4
  }
  properties: {
    premiumMessagingPartitions: 4
  }
}
Next steps
Explore Azure Service Bus features by using the samples in the language of your choice.