Note
Access to this page requires authorization. You can try signing in or changing directories.
Access to this page requires authorization. You can try changing directories.
In this guide, we're going to learn how to send messages from RabbitMQ to Service Bus.
Here's a few scenarios in which we can make use of these capabilities:
- Edge Setups: We have an edge setup where we're sending messages to RabbitMQ, but we want to forward those messages to Azure Service Bus for further processing, so we can use many of the Azure Big Data capabilities.
- Hybrid Cloud: Your company just acquired a third party that uses RabbitMQ for their messaging needs. They are on a different cloud. While they transition to Azure you can already start sharing data by bridging RabbitMQ with Azure Service Bus.
- Third-Party Integration: A third party uses RabbitMQ as a broker, and wants to send their data to us, but they are outside our organization. We can provide them with SAS Key giving them access to a limited set of Azure Service Bus queues where they can forward their messages to.
The list goes on, but we can solve most of these use cases by bridging RabbitMQ to Azure.
First you need to create a trial Azure account by signing up here
Once you're signed in to your account, go to the Azure portal and create a new Azure Service Bus namespace. Namespaces are the scoping containers where our messaging components will live, like queues and topics.
Adding a new Azure Service Bus Namespace
In Azure portal, click the large plus button to add a new resource
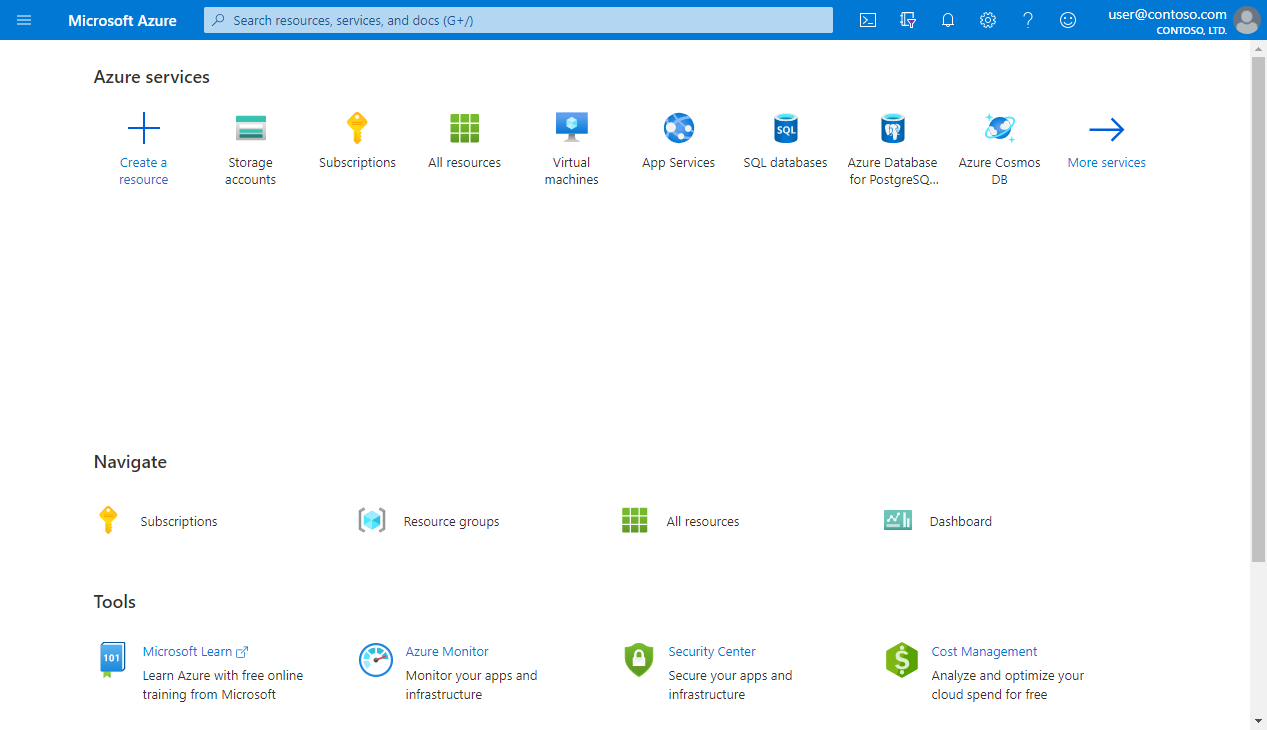
Then select Integration and click on Azure Service Bus to create a messaging namespace:

You'll be prompted to enter the namespace information. Select the Azure subscription you want to use. If you don't have a resource group, you can create a new one.
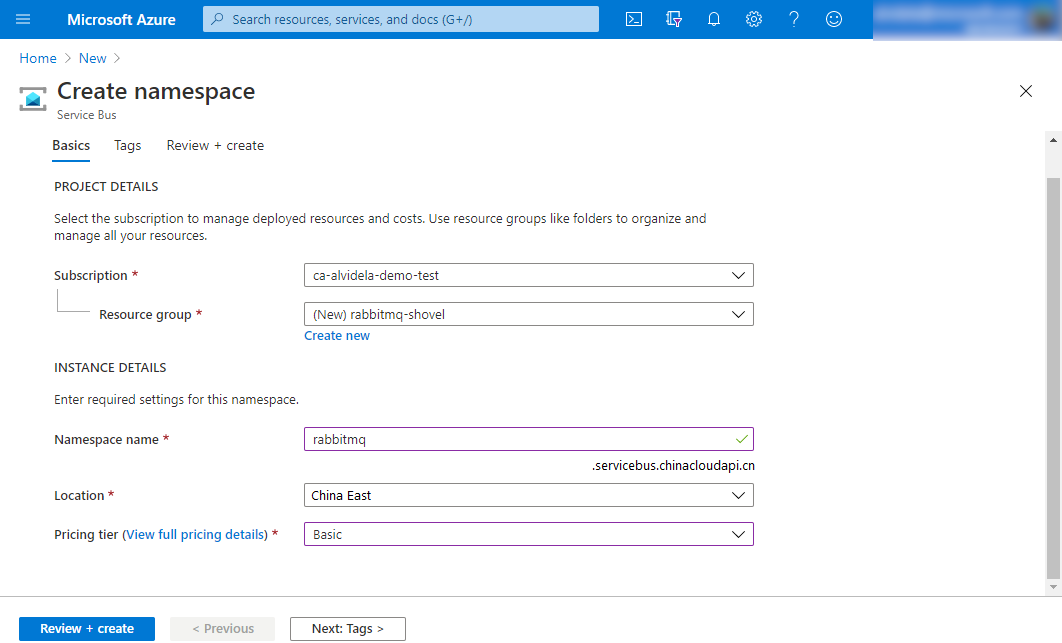
Use rabbitmq for Namespace name, but it could be anything you want. Then set China East for the location. Choose Basic as the price tier.
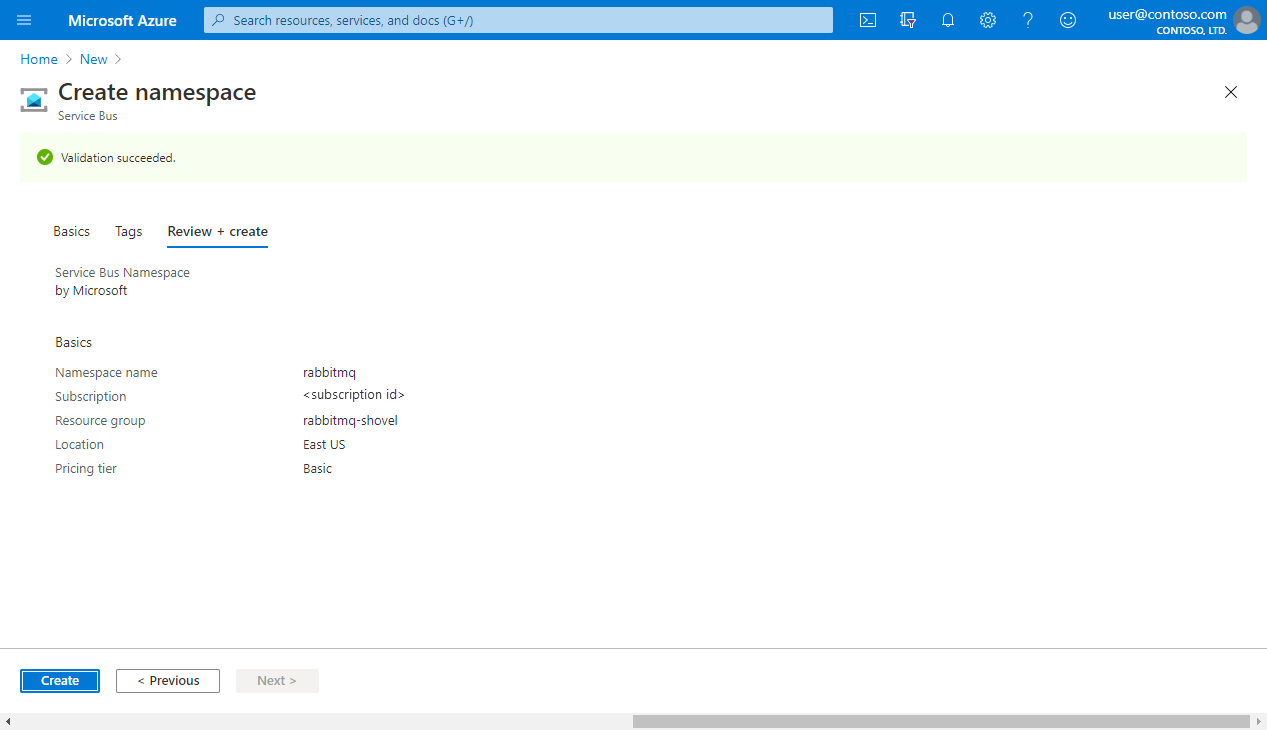
If all went well, you should see the following confirmation screen:
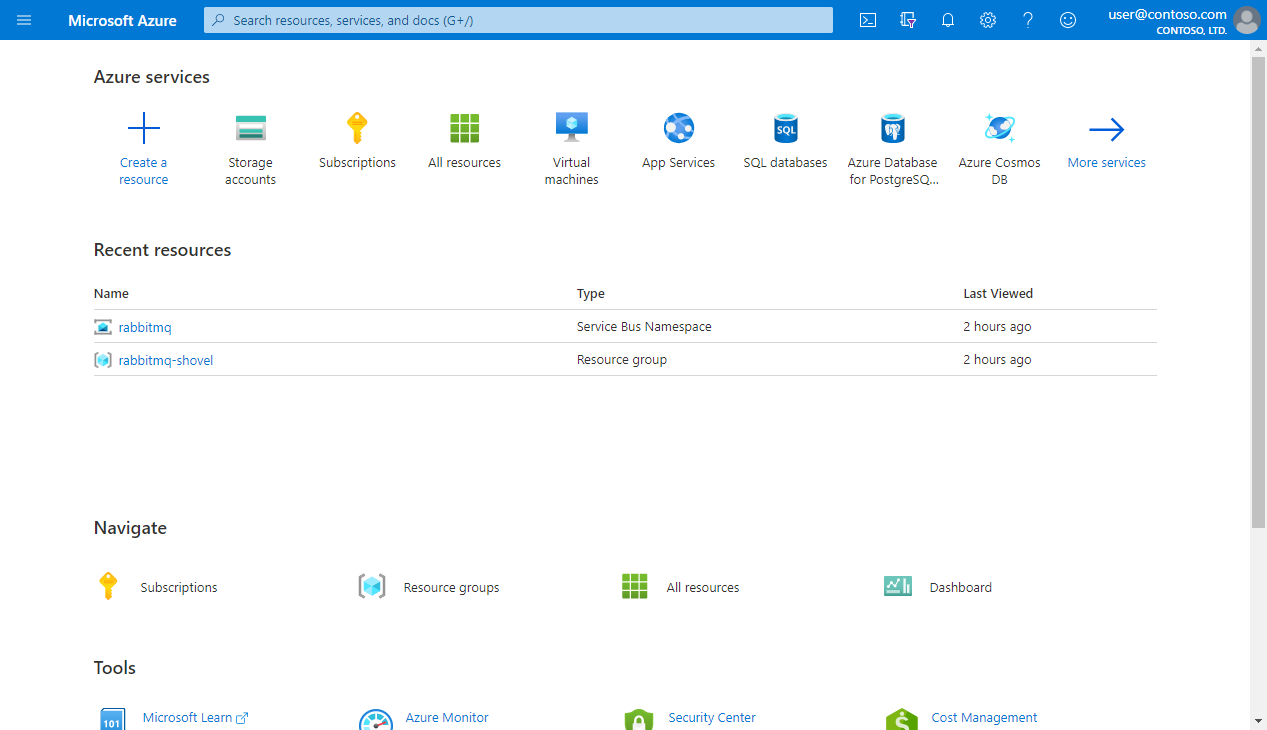
Then back at the Azure portal you'll see your new rabbitmq namespace listed there. Click on it to access the resource so you can add a queue to it.
Creating our Azure Service Bus Queue
Now that you have your Azure Service Bus namespace, click on the Queues button on the left, under Entities, so you can add a new queue:
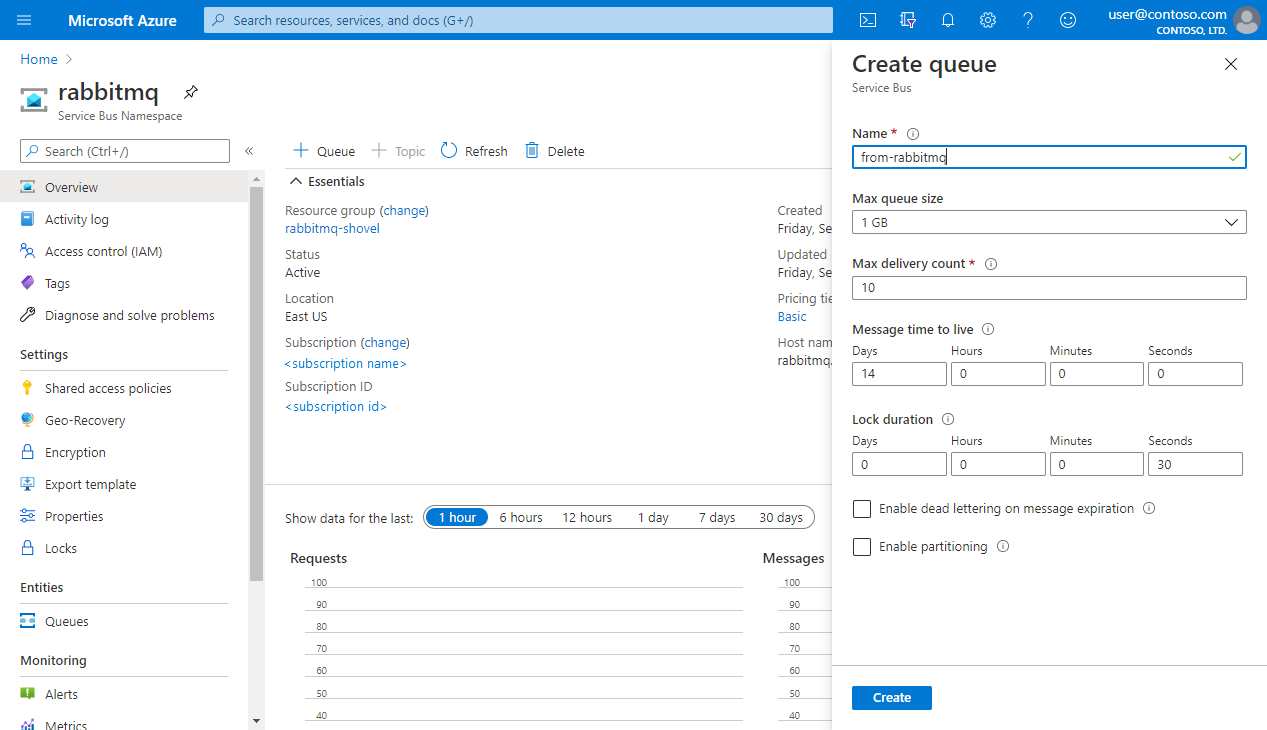
The name of the queue will be from-rabbitmq just as a reminder to where are the messages coming from. You can leave all the other options as defaults, but you can change them to fit the needs of your app.
Enabling the RabbitMQ Shovel Plugin
To ship messages from RabbitMQ to Azure Service Bus, we're going to use the Shovel Plugin that comes packaged with RabbitMQ. You can enable the plugin and its visual interface with this command:
rabbitmq-plugins enable rabbitmq_shovel_management
You might need to run that command as root.
Now is time to get the credentials required for connecting RabbitMQ to Azure.
Connecting RabbitMQ to Azure Service Bus
You'll need to create a Shared Access Policy (SAS) for your queue, so RabbitMQ can publish messages to it. A SAS Policy let's you specify what external party is allowed to do with your resource. The idea is that RabbitMQ is able to send messages, but not listen or manage the queue.
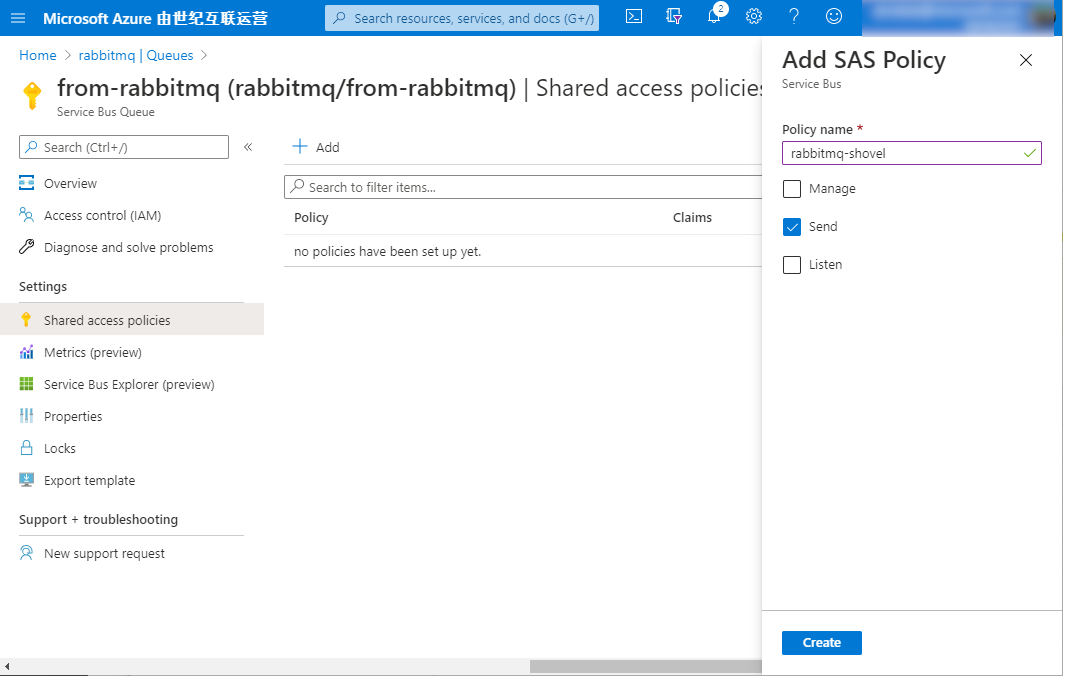
Tick the Send box and then click Create to have our SAS Policy in place.
Once the policy has been created click on it to see the Primary Connection String. We're going to use it to let RabbitMQ talk to Azure Service Bus:
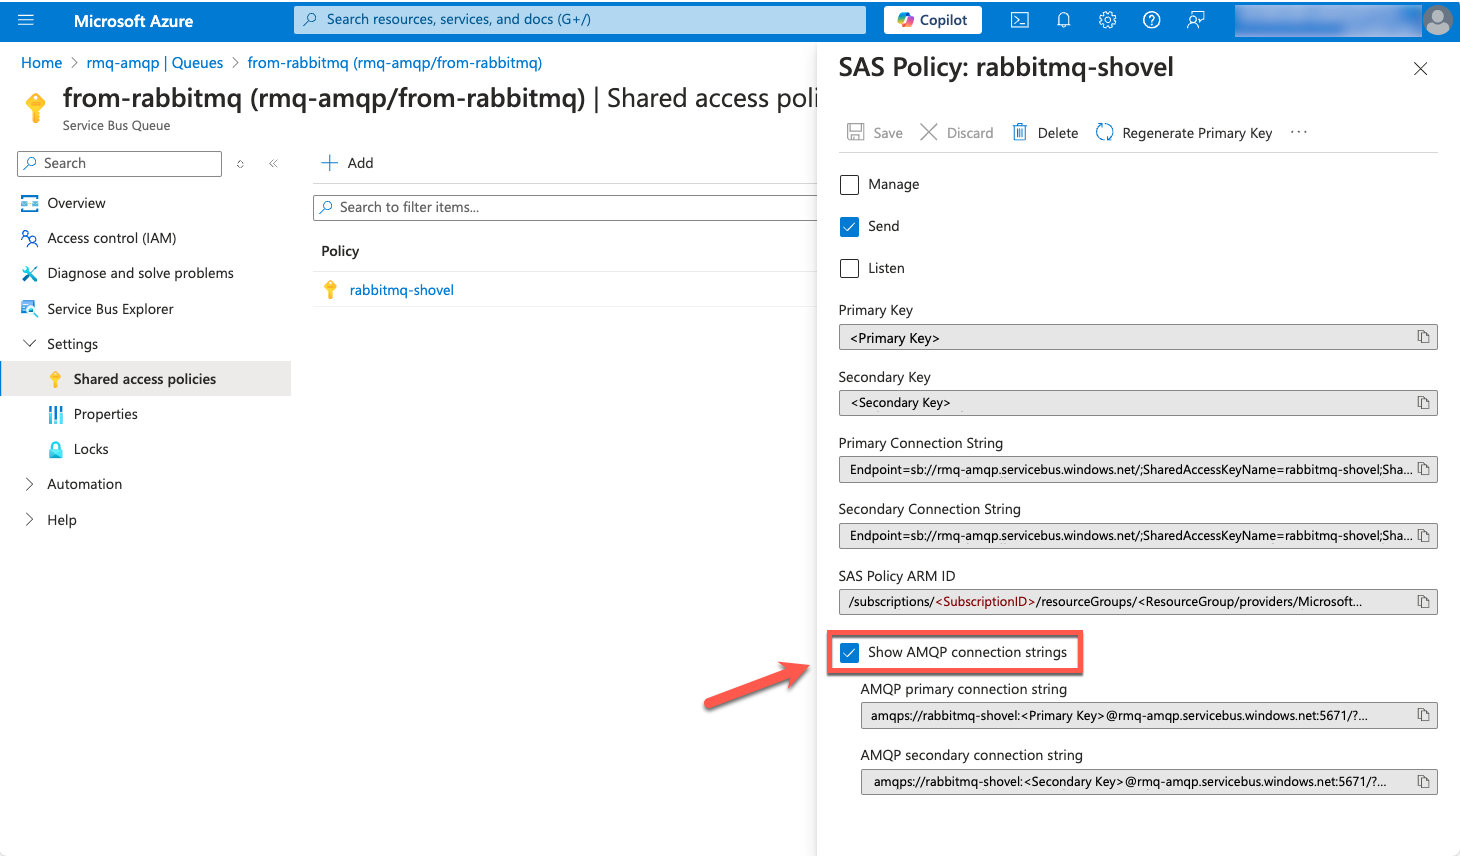
There select the checkbox "Show AMQP connection string" to get the connection string in the AMQP format expected by RabbitMQ Shovel. You'll use it in the next step.
Now open the RabbitMQ management plugin in our browsers http://localhost:15672/#/dynamic-shovels and go to Admin -> Shovel Management, where you can add your new shovel that will take care of sending messages from a RabbitMQ queue to your Azure Service Bus queue.
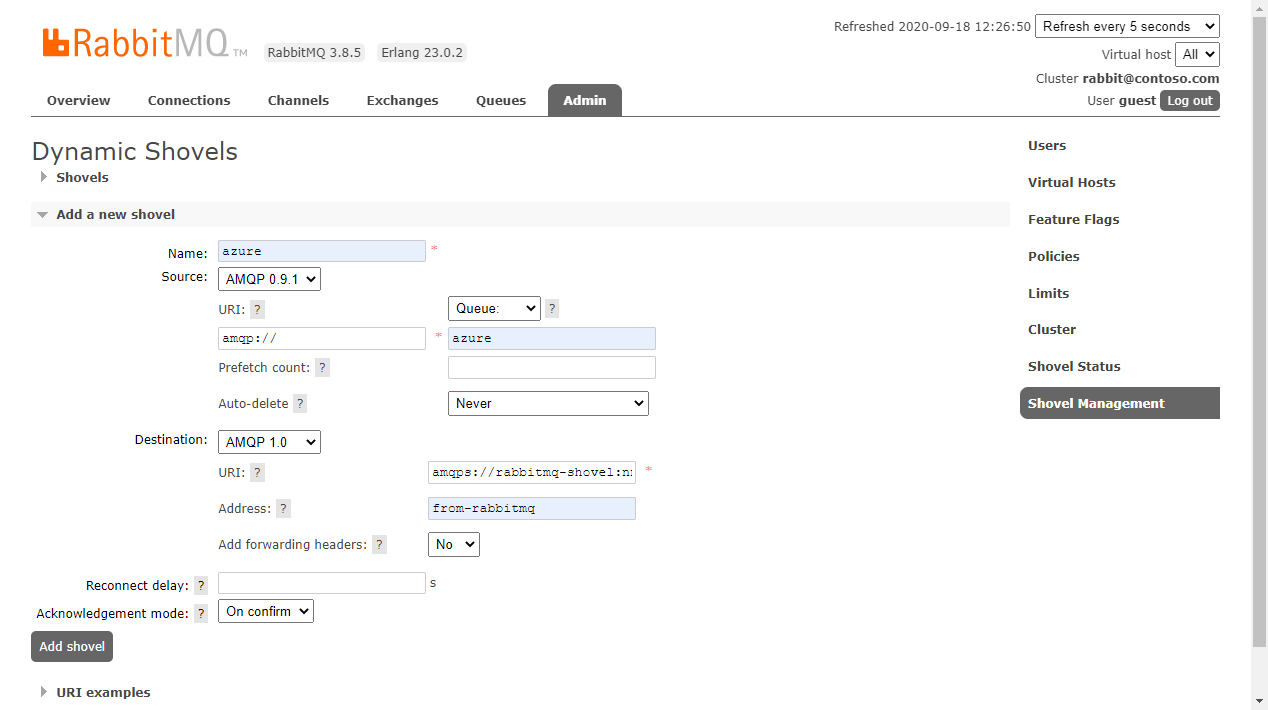
Here call your Shovel azure and choose AMQP 0.9.1 as the source protocol. In the screenshot, we have amqp://, which is the default URI that connects us to a local RabbitMQ server. Make sure to adapt that to your current deployment.
On the queue side of things, you can use azure as the name of your queue. If that queue doesn't exist, RabbitMQ will create it for you. You can also choose the name of a queue that exists already. You can leave the other options as default.
Then on the destination side of things, choose AMQP 1.0 as the protocol. In the URI field, enter the connecting string that you got from the previous step. It should look like this:
amqps://rabbitmq-shovel:StringOfRandomChars@rabbitmq.servicebus.chinacloudapi.cn:5671/?sasl=plain
In the Address field we'll enter the name of your Azure Service Bus Queue, in this case, it was called from-rabbitmq. Click Add Shovel, and your setup should be ready to start receiving messages.
Publishing Messages from RabbitMQ to Azure Service Bus
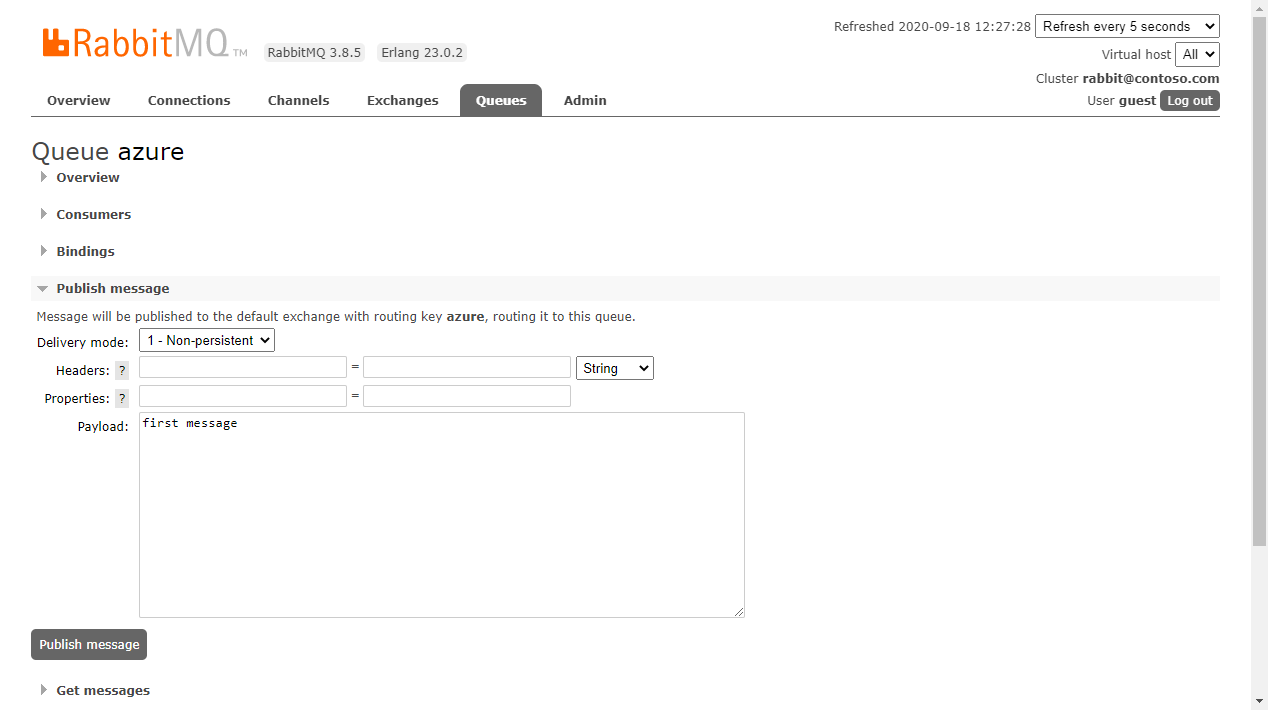
In the RabbitMQ Management interface we can go to Queues, select the azure queue, and search for the Publish message panel. There a form will appear that will let you publish messages directly to your queue. For our example we're just going to add first message as the Payload and hit Publish Message:
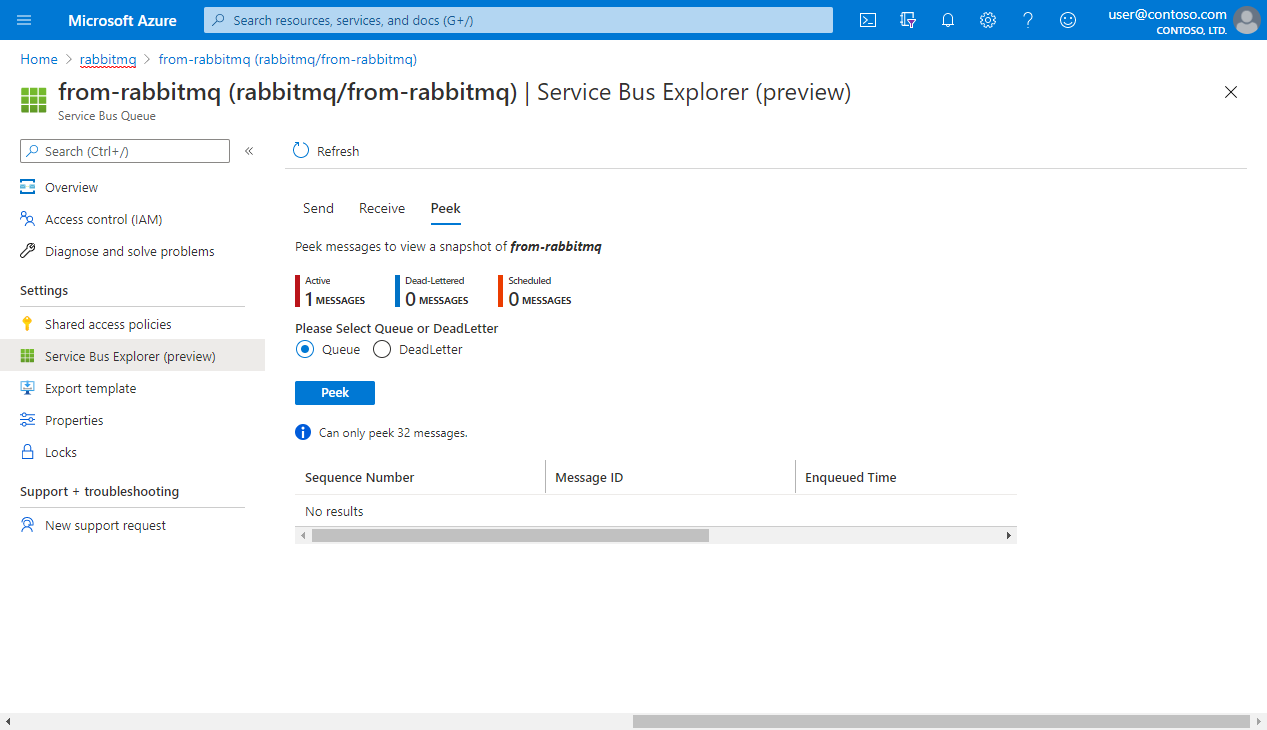
Go back to Azure and inspect your queue. Click Service Bus Explorer in the left panel, and then click the Peek button. If all went well, you'll see your queue now has one message. Yay, congrats!
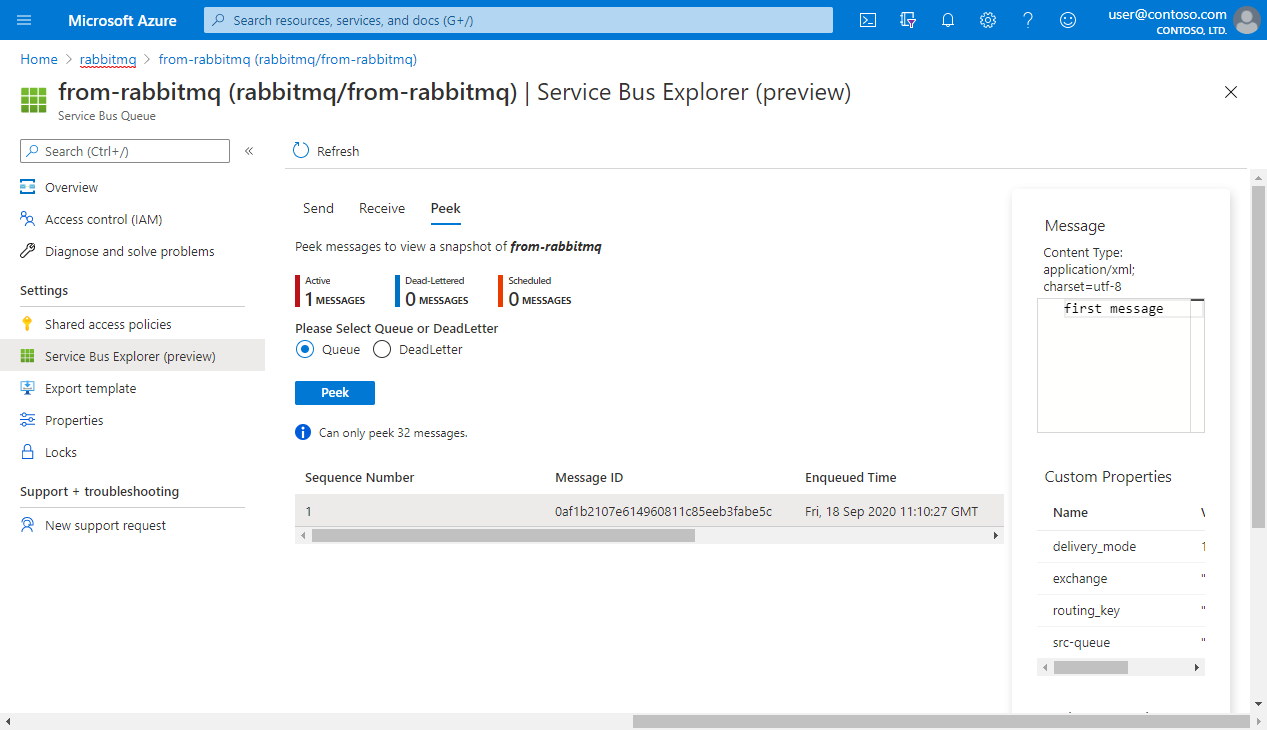
But let's make sure that message is the one you sent from RabbitMQ. Select the Peek tab and click the Peek button to retrieve the last messages in your queue. Click on the message to inspect its contents. You should see something like the image below where your first message is listed.
Let's Recap
Congrats! You achieved a lot! You managed to get your messages from RabbitMQ to Azure Service Bus, let's recap the steps:
- Create an Azure Service Bus Namespace
- Add a queue to the namespace
- Add a SAS Policy to your queue
- Get the queue connection string
- Enable the RabbitMQ shovel plugin & the management interface
- Obtain the Azure Service Bus connection string converted into RabbitMQ's AMQP format from Portal.
- Add a new Shovel to RabbitMQ & connect it to Azure Service Bus
- Publish messages
By following the previous steps, you integrated areas of your org that were outside Azure. The Shovel plugin allowed you to ship messages from RabbitMQ to Azure Service Bus. This has enormous advantages since you can now allow trusted third parties to connect their apps with your Azure deployment.
In the end, messaging is about enabling connections, and with this technique we just opened a new one.
Next steps
- Learn more about Azure Service Bus
- Learn more about AMQP 1.0 support in Service Bus