Note
Access to this page requires authorization. You can try signing in or changing directories.
Access to this page requires authorization. You can try changing directories.
The Azure Site Recovery service contributes to your business continuity and disaster recovery (BCDR) strategy by keeping your business applications online during planned and unplanned outages. Site Recovery manages and orchestrates disaster recovery of on-premises machines and Azure virtual machines (VM), including replication, failover, and recovery.
This quickstart describes how to set up disaster recovery for an Azure VM by replicating it to a secondary Azure region. In general, default settings are used to enable replication. Learn more.
Prerequisites
To complete this tutorial, you need an Azure subscription and a VM.
- If you don't have an Azure account with an active subscription, you can create a trial subscription.
- A VM with a minimum 1 GB of RAM is recommended. Learn more about how to create a VM.
Sign in to Azure
Sign in to the Azure portal.
Enable replication for the Azure VM
The following steps enable VM replication to a secondary location.
On the Azure portal, from Home > Virtual machines menu, select a VM to replicate.
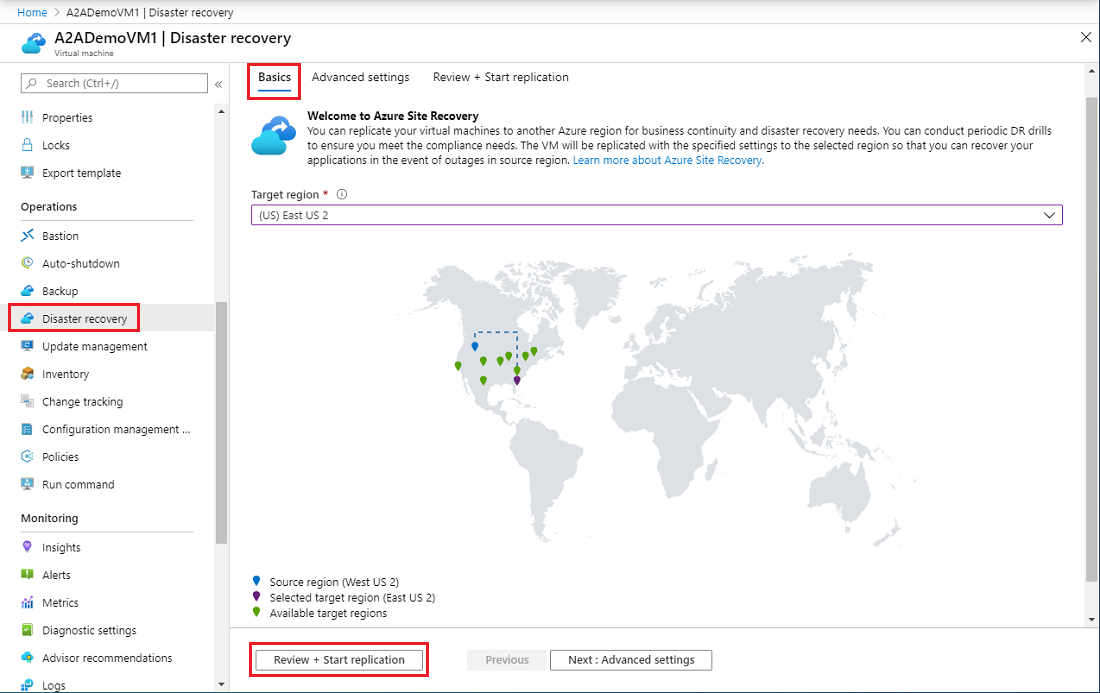
In Operations, select Disaster recovery.
From Basics > Target region, select the target region.
Note
When you replicate VMs using Premium SSD v2 or Ultra Disks, if the source region lacks availability zones but the target region supports them, a specific zone must be chosen for failover.
To view the replication settings, select Review + Start replication. If you need to change any defaults, select Advanced settings.
Note
Azure Site Recovery has a High Churn option that you can choose to protect VMs with high data change rate. With this, you can use a Premium Block Blob type of storage account. By default, the Normal Churn option is selected. For more information, see Azure VM Disaster Recovery - High Churn Support.
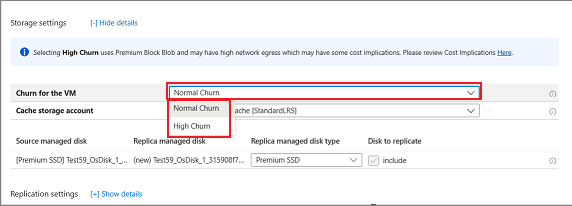
Azure Site Recovery for Premium SSD v2 and Ultra by default uses High Churn and a Premium Block Blob type.
To start the job that enables VM replication, select Start replication.
Verify settings
After the replication job is complete, you can check the replication status, modify replication settings, and test the deployment.
On the Azure portal menu, select Virtual machines and select the VM that you replicated.
In Operations, select Disaster recovery.
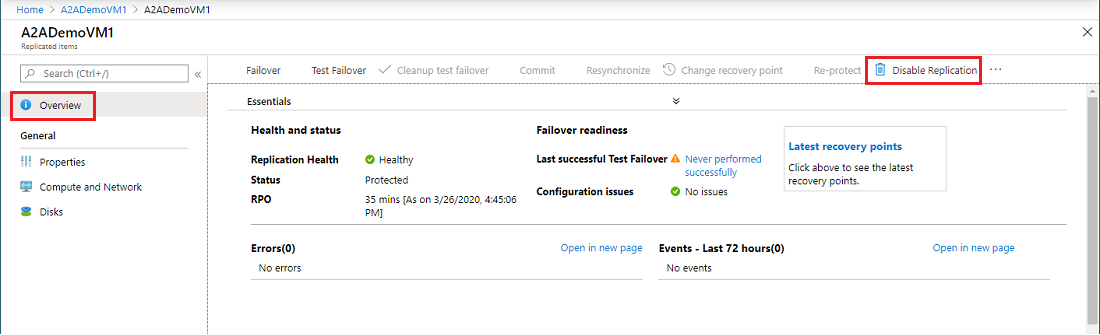
To view the replication details from the Overview select Essentials. More details are shown in the Health and status, Failover readiness, and the Infrastructure view map.

Clean up resources
To stop replication of the VM in the primary region, you must disable replication:
- The source replication settings are cleaned up automatically.
- The Site Recovery extension installed on the VM during replication isn't removed.
- Site Recovery billing for the VM stops.
To disable replication, perform these steps:
On the Azure portal menu, select Virtual machines and select the VM that you replicated.
In Operations, select Disaster recovery.
From Overview, select Disable Replication.
To uninstall the Site Recovery extension, go to the VM's Settings > Extensions.
Next steps
In this quickstart, you replicated a single VM to a secondary region. Next, set up replication for multiple Azure VMs.