Note
Access to this page requires authorization. You can try signing in or changing directories.
Access to this page requires authorization. You can try changing directories.
This article describes how to use an Azure Resource Manager template (ARM template) to create a nested, Multivalue profile with the min-child feature.
An Azure Resource Manager template is a JavaScript Object Notation (JSON) file that defines the infrastructure and configuration for your project. The template uses declarative syntax. You describe your intended deployment without writing the sequence of programming commands to create the deployment.
If your environment meets the prerequisites and you're familiar with using ARM templates, select the Deploy to Azure button. The template will open in the Azure portal.

Prerequisites
If you don't have an Azure subscription, create a trial subscription before you begin.
Two existing Azure Traffic Manager profiles. For more information on creating an Azure Traffic Manager profile, see Quickstart: Create a Traffic Manager profile using an ARM template.
Review the template
The template used in this quickstart is from Azure Quickstart Templates.
{
    "$schema": "https://schema.management.azure.com/schemas/2019-04-01/deploymentTemplate.json#",
    "contentVersion": "1.0.0.0",
    "parameters": {
        "TMProfileParent": {
            "type": "string",
            "metadata": {
            "description": "Name of the parent profile for the nested traffic manager endpoints"
            }
        },
        "existingTMProfileName1": {
            "type": "string",
            "metadata": {
            "description": "Name of the existing Traffic Manager endpoint profile 1"
            }
        },
        "TMProfileDNS1": {
            "type": "string",
            "metadata": {
            "description": "Name of the existing Traffic Manager DNS name 1"
            }
        },
         "existingTMProfileName2": {
            "type": "string",
            "metadata": {
            "description": "Name of the existing Traffic Manager endpoint profile 2"
            }
        },
        "TMProfileDNS2": {
            "type": "string",
            "metadata": {
            "description": "Name of the existing Traffic Manager DNS name 2"
            }
        }
    },
    "variables": {
       "targetid1":"[resourceid('Microsoft.Network/trafficManagerProfiles',parameters('existingTMProfileName1'))]",
       "targetid2":"[resourceid('Microsoft.Network/trafficManagerProfiles',parameters('existingTMProfileName2'))]"
    },
    "resources": [
        {
            "type": "Microsoft.Network/trafficManagerProfiles",
            "apiVersion": "2018-08-01",
            "name": "[parameters('TMProfileParent')]",
            "location": "global",
            "properties": {
                "profileStatus": "Enabled",
                "trafficRoutingMethod": "Priority",
                "dnsConfig": {
                    "relativeName": "[parameters('TMProfileParent')]",
                    "ttl": 90
                },
                "monitorConfig": {
                    "profileMonitorStatus": "Enabled",
                    "protocol": "HTTP",
                    "port": 80,
                    "path": "/",
                    "intervalInSeconds": 30,
                    "toleratedNumberOfFailures": 3,
                    "timeoutInSeconds": 10
                },
                "endpoints": [
                    {
                        "name": "multivalue",
                        "type": "Microsoft.Network/trafficManagerProfiles/nestedEndpoints",
                        "properties": {
                          "endpointStatus": "Enabled",
                          "endpointMonitorStatus": "Online",
                          "targetResourceId": "[variables('targetid1')]",
                          "target": "[parameters('TMProfileDNS1')]",
                          "weight": 100,
                          "priority": 1,
                          "minChildEndpoints": 1,
                          "minChildEndpointsIPv4": 3,
                          "minChildEndpointsIPv6": 2
                        }
                    },
                    {
                        "name": "weighted",
                        "type": "Microsoft.Network/trafficManagerProfiles/nestedEndpoints",
                        "properties": {
                            "endpointStatus": "Enabled",
                            "endpointMonitorStatus": "Online",
                            "targetResourceId": "[variables('targetid2')]",
                            "target": "[parameters('TMProfileDNS2')]",
                            "weight": 1,
                            "priority": 2,
                            "minChildEndpoints": 1
                        }
                    }
                ],
                "trafficViewEnrollmentStatus": "Disabled",
                "maxReturn": 0
            }
        }
    ]
}
Two Azure resources are defined in the template:
To find more templates that are related to Azure Traffic Manager, see Azure Quickstart Templates.
Deploy the template
Download Azure Quickstart Templates and save as
azuredeploy.jsonfile on your local machines. Update the template with the deployment value for each parameter.The template deployment adds two nested endpoints from two existing Azure Traffic Manager profiles.
The resource group name is the existing resource group that contains the existing profiles.
Note
existingTMProfileName1, existingTMProfileName2,TMProfileDNS1, and TMProfileDNS2 must match your existing Traffic Manager profiles in order for the template to deploy successfully. If deployment fails, start over with Step 1.
Open the Powershell console with administrator privilege and run the following cmdlet.
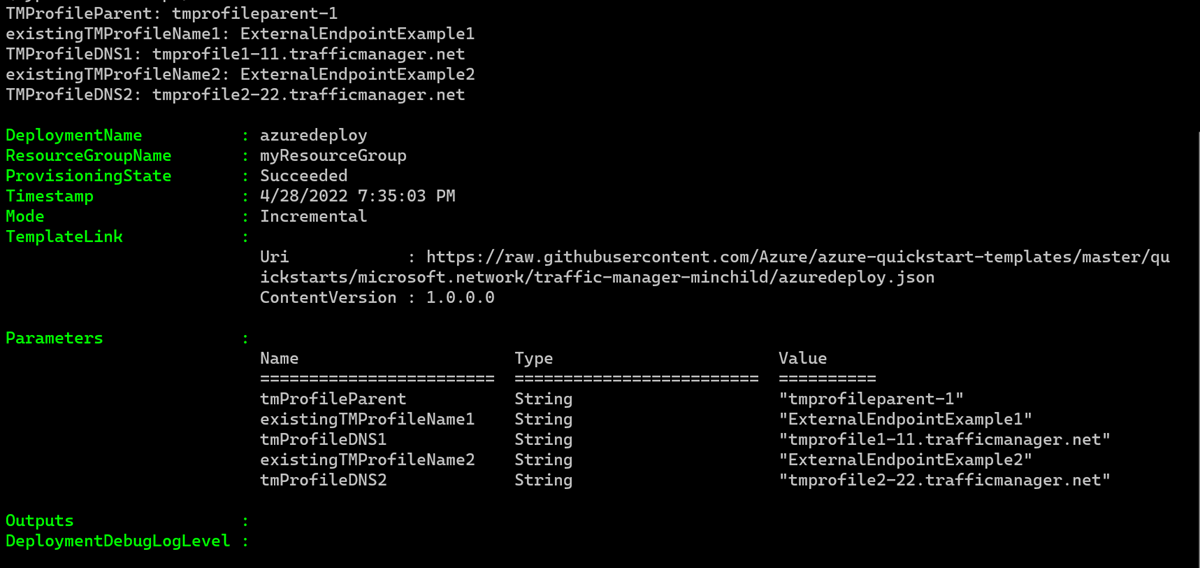
$resourceGroupName = Read-Host -Prompt "Enter name of resource group of the existing traffic manager profiles"
New-AzResourceGroupDeployment -ResourceGroupName $resourceGroupName -TemplateFile <azuredeploy.json>
It takes a few minutes to deploy the template. When completed, the output is similar to:
Azure PowerShell is used to deploy the template. In addition to Azure PowerShell, you can also use the Azure portal, Azure CLI, and REST API. To learn other deployment methods, see Deploy templates.
Validate the deployment
Use Get-AzTrafficManagerProfile to verify that the nested endpoints were added to the profile. For
-Name, enter the name of the parent Traffic Manager profile you entered when deploying the template.Get-AzTrafficManagerProfile -ResourceGroupName myResourceGroup -Name tmprofileparent-1 | Select EndpointsThe output is similar to:

Clean up resources
When you no longer need the Traffic Manager profile, delete the resource group. This command removes the Traffic Manager profile and all the related resources.
To delete the resource group, use the Remove-AzResourceGroup cmdlet:
Remove-AzResourceGroup -Name <your resource group name>
Next steps
In this quickstart, you added a Multivalue routing method with nested endpoints and the min-child feature.
To learn more about routing traffic, continue to the Traffic Manager tutorials.