Note
Access to this page requires authorization. You can try signing in or changing directories.
Access to this page requires authorization. You can try changing directories.
Tip
This article is shared for services and products that use the Remote Desktop Protocol (RDP) to provide remote access to Windows desktops and apps.
Select a product using the buttons at the top of this article to show the relevant content.
Multimedia redirection redirects video playback and calls in a remote session from Azure Virtual Desktop, a Windows 365 Cloud PC, or Microsoft Dev Box to your local device for faster processing and rendering. Specifically, these two functions work in the following ways:
Video playback redirection: optimizes video playback experience for web pages with embedded videos. The browser in the remote session fetches video content, but the bitstream of video data is sent to the local device where it decodes and renders the video in the correct place on the screen.
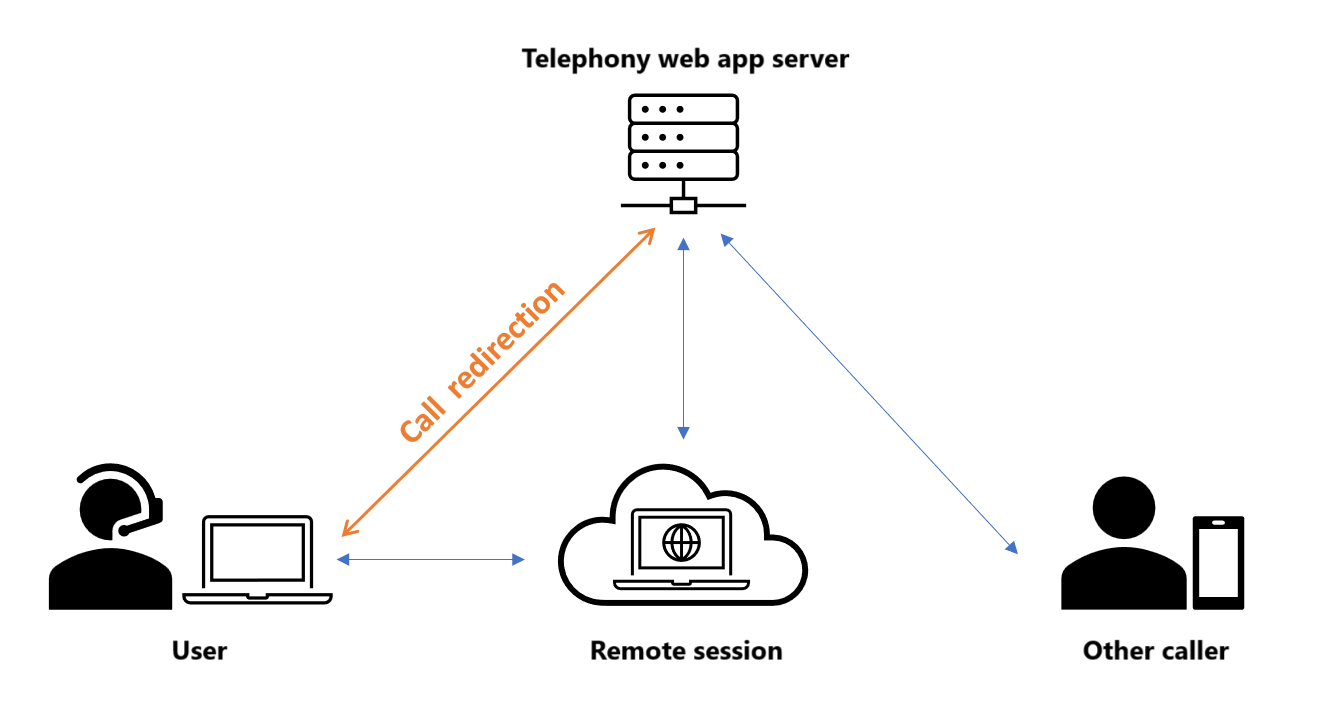
Call redirection: optimizes audio calls for WebRTC-based calling apps, reducing latency, and improving call quality. The connection happens between the local device and the telephony app server, where WebRTC calls are offloaded from a remote session to a local device, as shown in the following diagram. However, after the connection is established, call quality becomes dependent on the web page or app providers, just as it would with a non-redirected call.
There are two components you need to install for multimedia redirection:
- Remote Desktop Multimedia Redirection Service
- Browser extension for Microsoft Edge or Google Chrome browsers
This article shows you install and configure multimedia redirection in a remote session from Azure Virtual Desktop, a Windows 365 Cloud PC, or Microsoft Dev Box with Microsoft Edge or Google Chrome browsers, and manage settings for the browser extension using Microsoft Intune or Group Policy. Additionally, this article shows you how to manage settings for the browser extension in Microsoft Edge using the Microsoft Edge management service.
Later in the article you can find a list of websites that work with multimedia redirection for video playback and calls.
Prerequisites
Before you can use multimedia redirection, you need:
An existing host pool with session hosts.
Local administrator privilege on your session hosts to install and update the Remote Desktop Multimedia Redirection Service.
The latest version of Microsoft Edge or Google Chrome installed on your session hosts.
Microsoft Visual C++ Redistributable 2015-2022, version 14.32.31332.0 or later installed on your session hosts and local Windows devices. You can download the latest version from Microsoft Visual C++ Redistributable latest supported downloads.
An existing Cloud PC.
Local administrator privilege on your Cloud PC to install and update the Remote Desktop Multimedia Redirection Service.
The latest version of Microsoft Edge or Google Chrome installed on your Cloud PC.
Microsoft Visual C++ Redistributable 2015-2022, version 14.32.31332.0 or later installed on your Cloud PC and local Windows devices. You can download the latest version from Microsoft Visual C++ Redistributable latest supported downloads.
An existing dev box.
Local administrator privilege on your dev box to install and update the Remote Desktop Multimedia Redirection Service.
The latest version of Microsoft Edge or Google Chrome installed on your dev box.
Microsoft Visual C++ Redistributable 2015-2022, version 14.32.31332.0 or later installed on your dev box and local Windows devices. You can download the latest version from Microsoft Visual C++ Redistributable latest supported downloads.
To configure multimedia redirection using Microsoft Intune, you need:
- Microsoft Entra ID account that is assigned the Policy and Profile manager built-in RBAC role.
- A group containing the devices you want to configure.
To configure multimedia redirection using Group Policy, you need:
- A domain account that has permission to create or edit Group Policy objects.
- A security group or organizational unit (OU) containing the devices you want to configure.
You need to connect to a remote session from one of the following supported apps and platforms:
- Windows App on Windows, version 2.0.297.0 or later.
- Remote Desktop app on Windows, version 1.2.5709 or later.
Your local Windows device must meet the same hardware requirements for Teams on a Windows PC.
Note
Multimedia redirection isn't supported on Azure Virtual Desktop for Windows 365 for Microsoft 365 Government (GCC), GCC-High environments, and Microsoft 365 DoD.
Install multimedia redirection on session hosts
There are two components you need to install on your session hosts:
Install multimedia redirection on a Cloud PC
Important
Multimedia redirection is already installed on Microsoft gallery images for Windows 365. You only need to install multimedia redirection on your Cloud PC if you're using a custom image.
There are two components you need to install on your Cloud PC:
Install multimedia redirection on a dev box
There are two components you need to install on your dev box:
- Remote Desktop Multimedia Redirection Service
- Browser extension for Microsoft Edge or Google Chrome browsers
You install both the multimedia redirection service and browser extension from a single .msi file, which you can run manually, use Intune Win32 app management, or your enterprise deployment tool with msiexec. To install the .msi file:
Download the multimedia redirection installer.
Make sure Microsoft Edge or Google Chrome isn't running. Check in Task Manager that there are no instances of
msedge.exeorchrome.exelisted in the Details tab.Install the
.msifile using one of the following methods:To install it manually, open the file that you downloaded to run the setup wizard, then follow the prompts. After it's installed, select Finish.
Alternatively, use the following command with Intune or your enterprise deployment tool as an administrator from Command Prompt. This example specifies there's no UI or user interaction required during the installation process.
msiexec /i <path to the MSI file> /qn
After you install the multimedia redirection service and browser extension, next you need to enable the browser extension.
Important
The Remote Desktop Multimedia Redirection Service doesn't update automatically. You need to update the service manually when a new version is available. You can download the latest version from the same URL in this section and install using the same steps, which automatically replaces the previous version. For information about the latest version, see What's new in multimedia redirection.
The browser extension updates automatically when a new version is available.
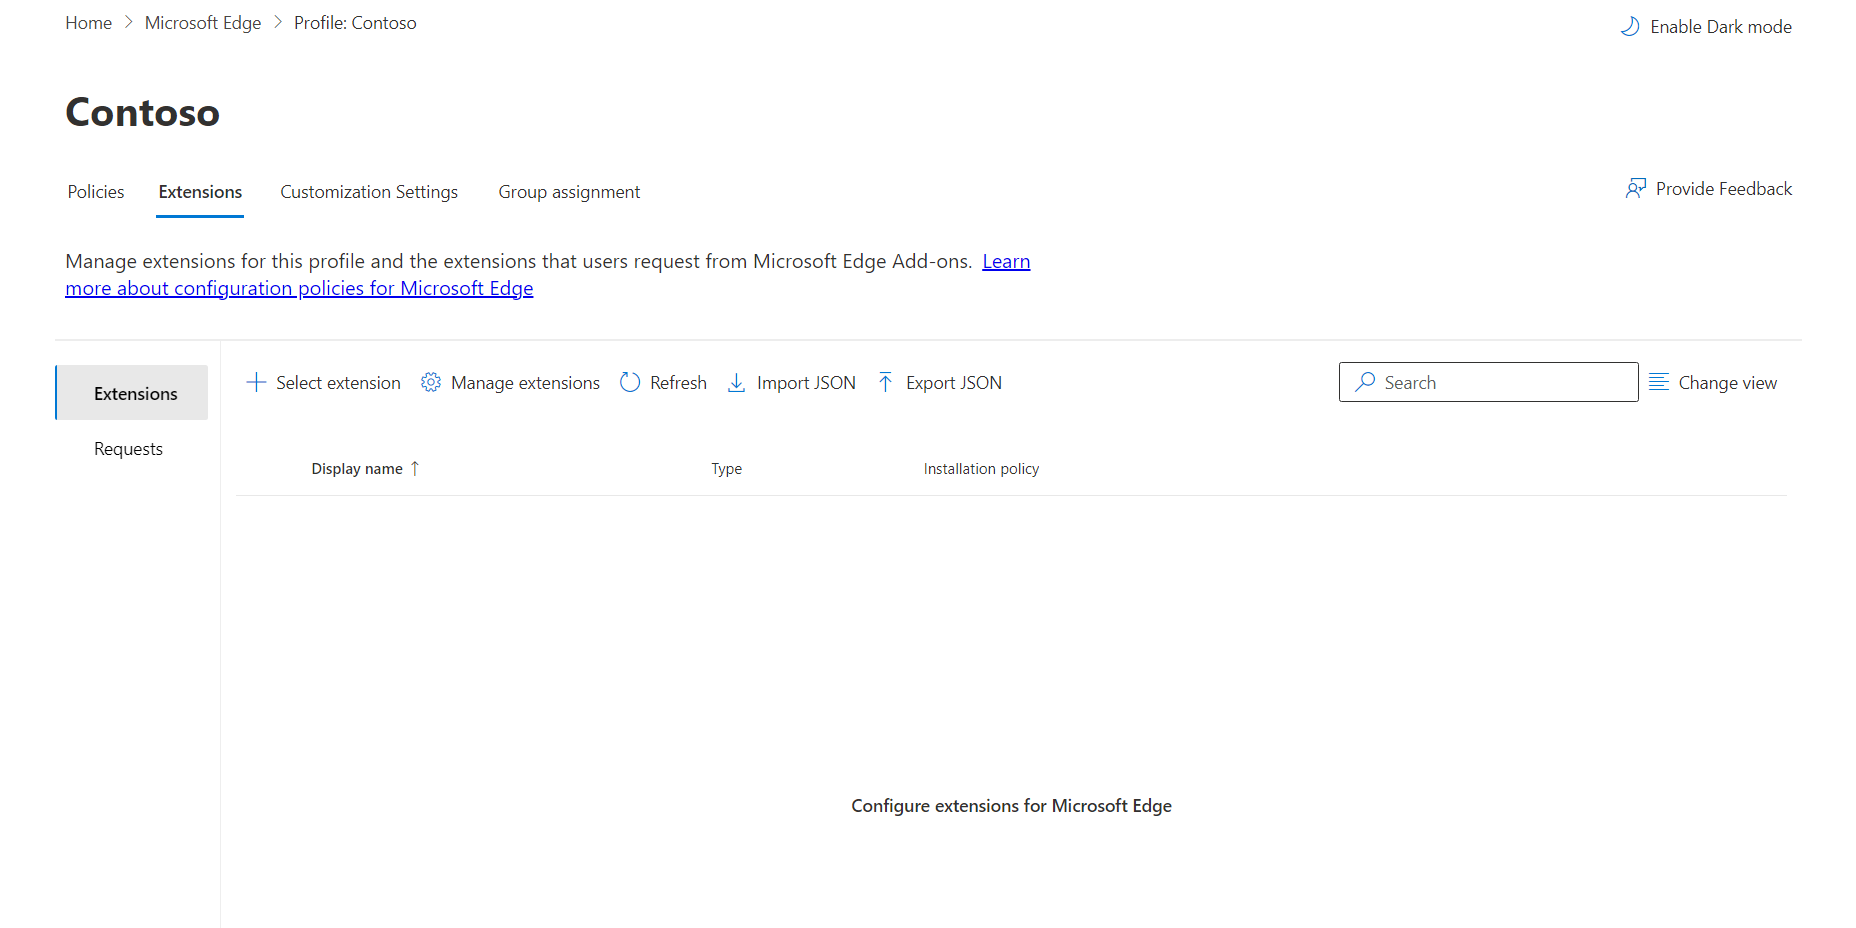
Enable and manage the browser extension centrally
Tip
By default, users are automatically prompted to enable the extension when they open their browser. This section is optional if you want to enable and manage the browser extension centrally.
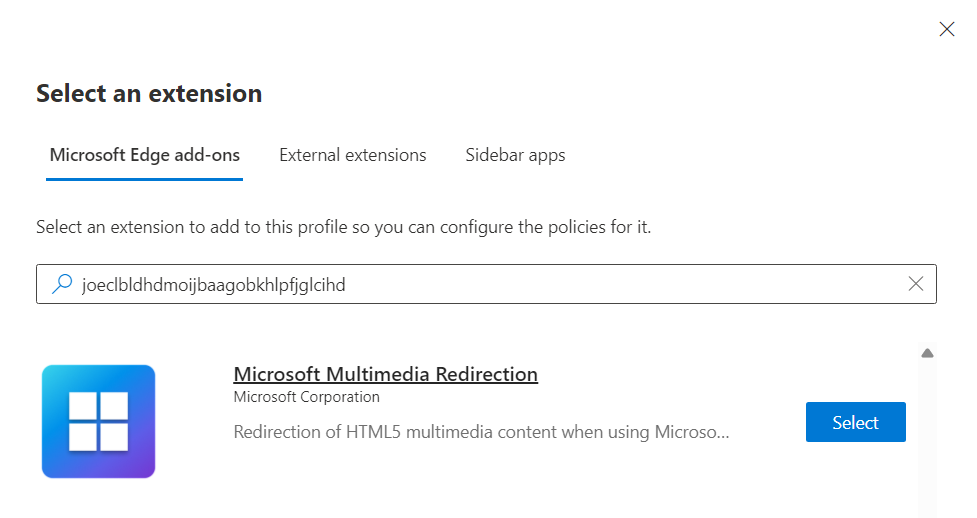
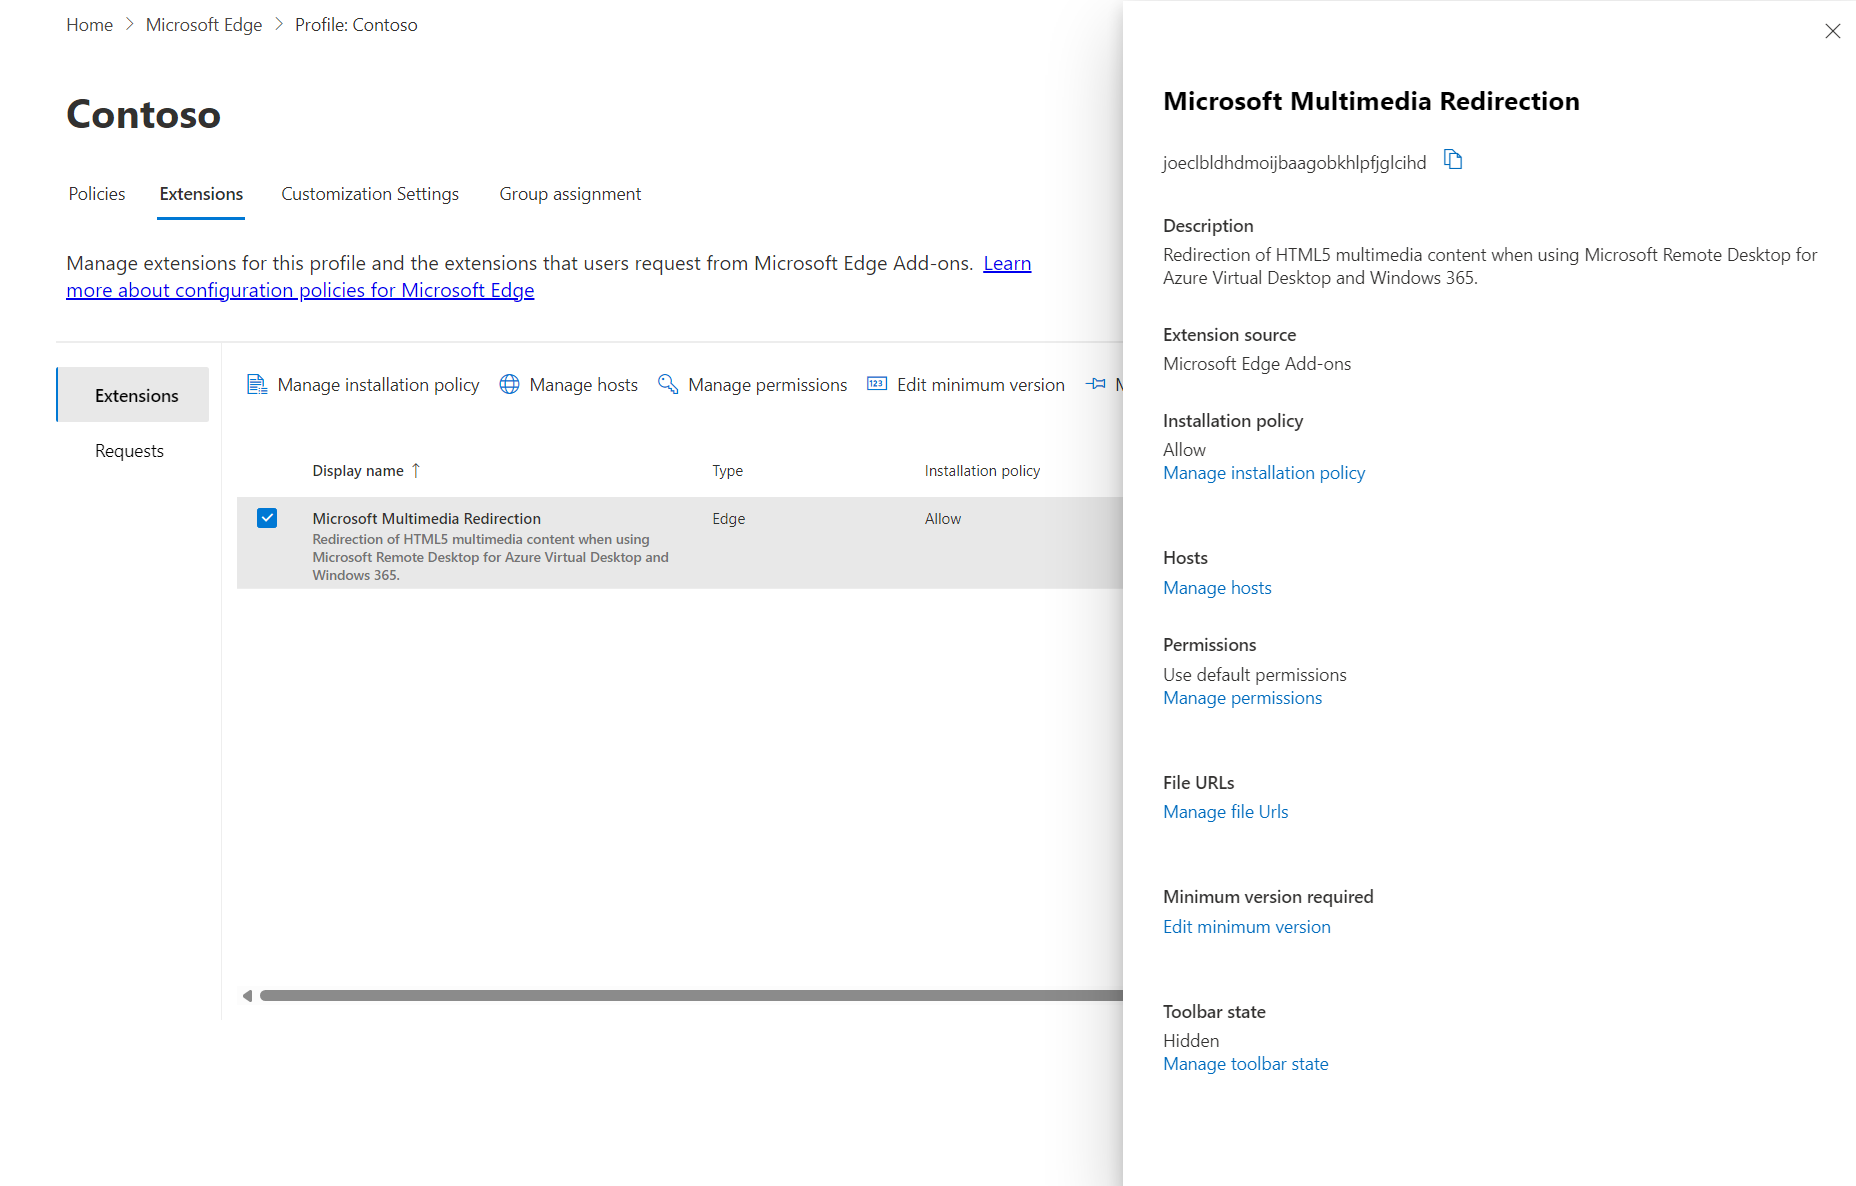
You can enable and manage the browser extension centrally from Microsoft Edge Add-ons or the Chrome Web Store for all users by using Microsoft Intune or Group Policy, or the Microsoft Edge management service (for Microsoft Edge only).
Managing the browser extension has the following benefits:
- Enable the browser extension silently and without user interaction.
- Restrict which web pages use multimedia redirection.
- Show or hide advanced settings for the browser extension.
- Pin the browser extension to the browser toolbar.
Select the relevant tab for your scenario.
For Windows 365, we recommend using Microsoft Intune to enable the multimedia redirection browser extension.
To enable the multimedia redirection browser extension using Microsoft Intune, expand one of the following sections, depending on which browser you're using:
For Microsoft Edge, expand this section.
Sign in to the Microsoft Intune admin center.
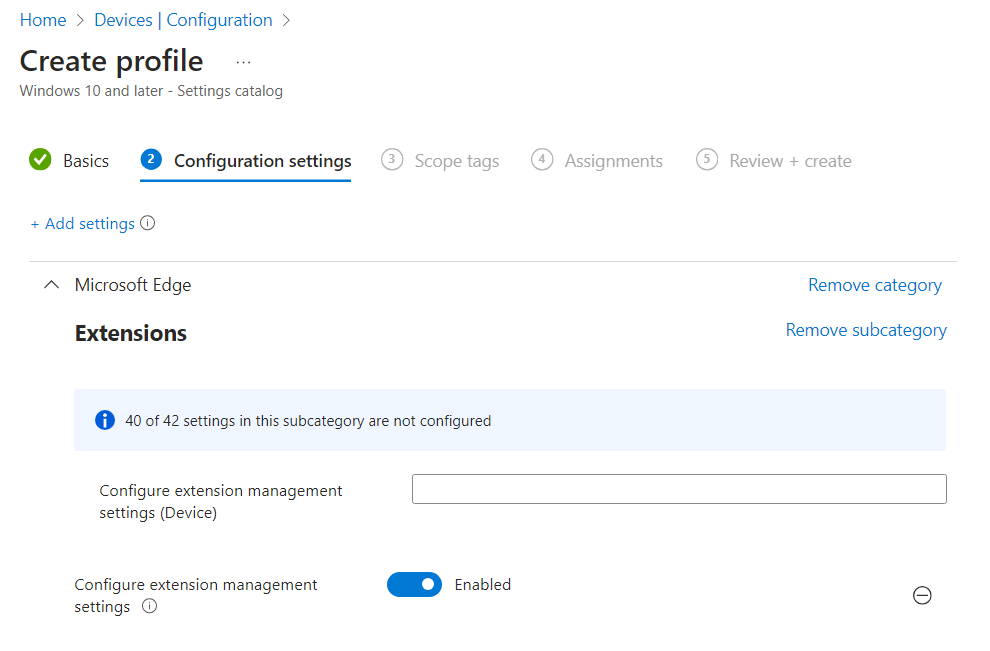
Create or edit a configuration profile for Windows 10 and later devices, with the Settings catalog profile type.
In the settings picker, browse to Microsoft Edge > Extensions.
Check the box for Configure extension management settings, then close the settings picker.
Expand the Microsoft Edge category, then toggle the switch for Configure extension management settings to Enabled
In the box that appears for Configure extension management settings (Device), enter the following JSON as a single line string. This example installs the extension with the required update URL:
{
  "joeclbldhdmoijbaagobkhlpfjglcihd": {
    "installation_mode": "force_installed",
    "update_url": "https://edge.microsoft.com/extensionwebstorebase/v1/crx"
  }
}
Note
You can specify additional parameters to allow or block specific sites for redirection and to show or hide advanced settings. For more information, see:
Select Next.
Optional: On the Scope tags tab, select a scope tag to filter the profile. For more information about scope tags, see Use role-based access control (RBAC) and scope tags for distributed IT.
On the Assignments tab, select the group containing the computers providing a remote session you want to configure, then select Next.
On the Review + create tab, review the settings, then select Create.
After the policy applies to the computers providing a remote session, restart them for the settings to take effect.
For Google Chrome, expand this section.
Download the administrative template for Google Chrome. Select the option Chrome ADM/ADMX templates to download the ZIP file.
Sign in to the Microsoft Intune admin center.
Follow the steps to Import custom ADMX and ADML administrative templates into Microsoft Intune. You need to import the
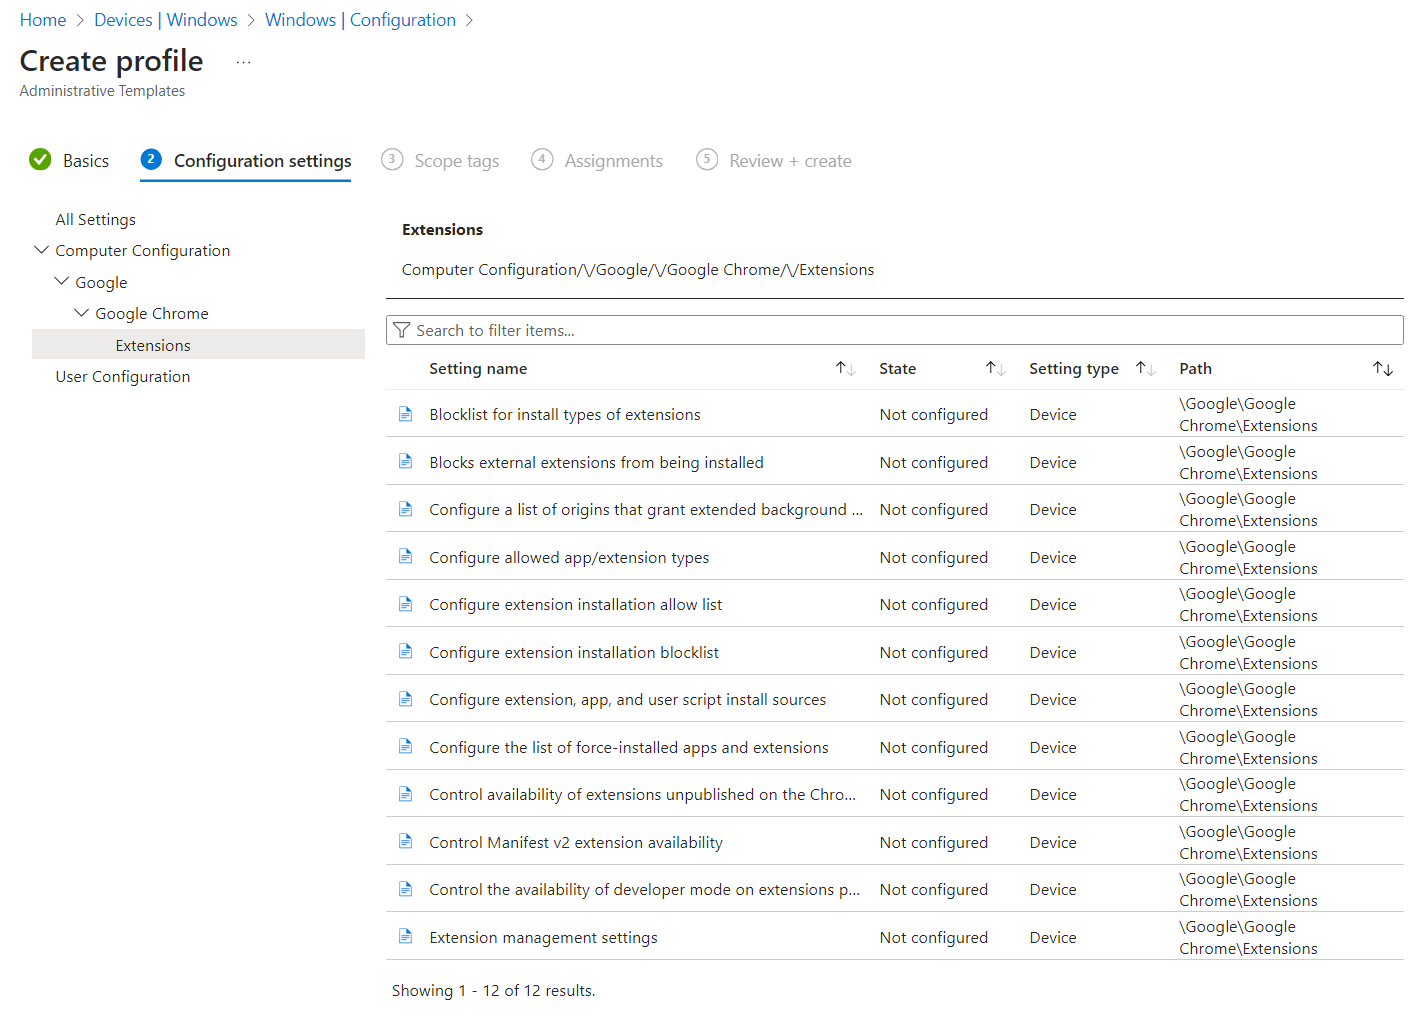
google.admxandgoogle.admlfirst, then importchrome.admxandchrome.adml.After you imported the Google Chrome administrative template, follow the steps to Create a profile using your imported files
In configuration settings, browse to Computer Configuration > Google > Google Chrome > Extensions.
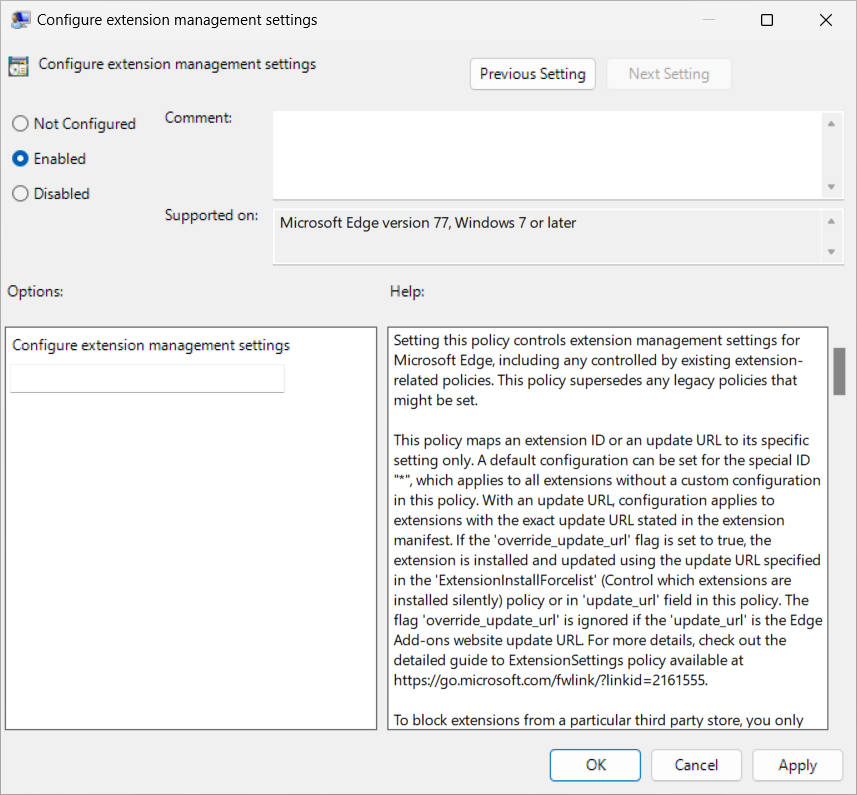
Select Extension management settings, which opens a new pane. Scroll to the end, then select Enabled.
In the box, enter the following JSON as a single line string. This example installs the extension with the required update URL:
{
  "lfmemoeeciijgkjkgbgikoonlkabmlno": {
    "installation_mode": "force_installed",
    "update_url": "https://clients2.google.com/service/update2/crx"
  }
}
Note
You can specify additional parameters to allow or block specific sites for redirection and to show or hide advanced settings. For more information, see:
Select OK, then select Next.
Optional: On the Scope tags tab, select a scope tag to filter the profile. For more information about scope tags, see Use role-based access control (RBAC) and scope tags for distributed IT.
On the Assignments tab, select the group containing the computers providing a remote session you want to configure, then select Next.
On the Review + create tab, review the settings, then select Create.
After the policy applies to the computers providing a remote session, restart them for the settings to take effect.
Common policy configuration parameters
The following sections show some examples of policy configuration parameters for the browser extension that are common for both video playback and call redirection. You can use these examples as part of the steps in Enable and manage the browser extension centrally. Combine these examples with the parameters you require for your users.
Note
The following examples are for Microsoft Edge. For Google Chrome:
- Change
joeclbldhdmoijbaagobkhlpfjglcihdtolfmemoeeciijgkjkgbgikoonlkabmlno. - Change the
update_urltohttps://clients2.google.com/service/update2/crx.
Show or hide the extension on the browser toolbar
You can show or hide the extension icon on the browser toolbar. By default, extension icons are hidden from the toolbar.
The following example installs the extension and shows the extension icon on the toolbar by default, but still allows users to hide it. Other values are force_shown and default_hidden. For more information about configuring extensions for Microsoft Edge, see A detailed guide to configuring extensions using the ExtensionSettings policy.
{
  "joeclbldhdmoijbaagobkhlpfjglcihd": {
    "installation_mode": "force_installed",
    "update_url": "https://edge.microsoft.com/extensionwebstorebase/v1/crx",
    "toolbar_state": "default_shown"
  }
}
Hide advanced settings button
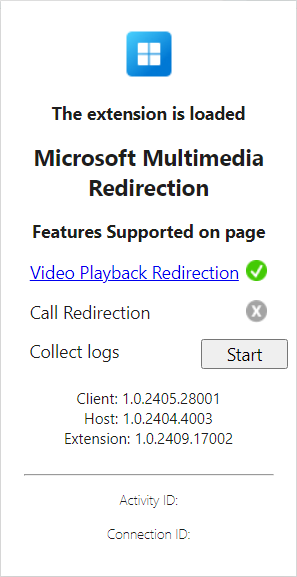
You can show or hide the advanced settings button to users in the extension. By default, the advanced settings button is shown and users have access to toggle each setting on or off. If you hide the advanced settings button, users can still collect logs.
Here's what the extension looks like when the advanced settings button is hidden:
To hide the advanced settings button, you need to set the following registry value on the computers providing a remote session, depending on the browser you're using:
For Microsoft Edge:
- Key:
HKLM\SOFTWARE\Policies\Microsoft\Edge\3rdparty\extensions\joeclbldhdmoijbaagobkhlpfjglcihd\policy - Name:
HideAdvancedSettings - Type:
REG_DWORD - Data:
1
- Key:
For Google Chrome:
- Key:
HKLM\SOFTWARE\Policies\Google\Chrome\3rdparty\extensions\lfmemoeeciijgkjkgbgikoonlkabmlno\policy - Name:
HideAdvancedSettings - Type:
REG_DWORD - Data:
1
- Key:
If you set Data to 0, the advanced settings button is shown.
You can configure the registry using an enterprise deployment tool such as Intune, Configuration Manager, or Group Policy. Alternatively, to set this registry value using PowerShell, open PowerShell as an administrator and run the following commands. This example uses the registry key for Microsoft Edge:
New-Item -Path "HKLM:\SOFTWARE\Policies\Microsoft\Edge\3rdparty\extensions\joeclbldhdmoijbaagobkhlpfjglcihd\policy" -Force
New-ItemProperty -Path "HKLM:\SOFTWARE\Policies\Microsoft\Edge\3rdparty\extensions\joeclbldhdmoijbaagobkhlpfjglcihd\policy" -Name HideAdvancedSettings -PropertyType DWORD -Value 1 -Force
Browser extension status
The extension icon changes based on whether multimedia redirection is available on the current web page and which features are supported. The following table shows the different states of the extension icon and their definitions:
| Icon State | Definition |
|---|---|
|
|
The multimedia redirection extension is loaded, indicating that the website can be redirected. |
|
|
The multimedia redirection extension isn't loaded, indicating that content on the web page isn't redirected. |
|
|
The multimedia redirection extension is currently redirecting video playback. |
|
|
The multimedia redirection extension is currently redirecting a call. |
|
|
The multimedia redirection extension failed to load correctly. You might need to uninstall and reinstall the extension or the Remote Desktop Multimedia Redirection Service, then try again. |
Video playback redirection
The following sections contain information about how to test video playback redirection and how you can configure advanced settings.
Websites for video playback redirection
The following websites are known to work with video playback redirection, and which work by default.
AWS TrainingBBCBig ThinkCNBCCourseraDaily MailFacebookFidelityFox Sports
Fox WeatherIMDBInfosec InstituteLinkedIn LearningMicrosoft LearnMicrosoft StreamPluralsightSkillshareThe Guardian
TwitchUdemy*UMUU.S. NewsVimeoYahooYammerYouTube(including sites with embeddedYouTubevideos).
Important
Video playback redirection doesn't support protected content. Protected content can be played without multimedia redirection using regular video playback.
Test video playback redirection
After you enable multimedia redirection, you can test it by visiting a web page with video playback from the list in Websites for video playback redirection and following these steps:
Open the web page in Microsoft Edge or Google Chrome on your remote session.
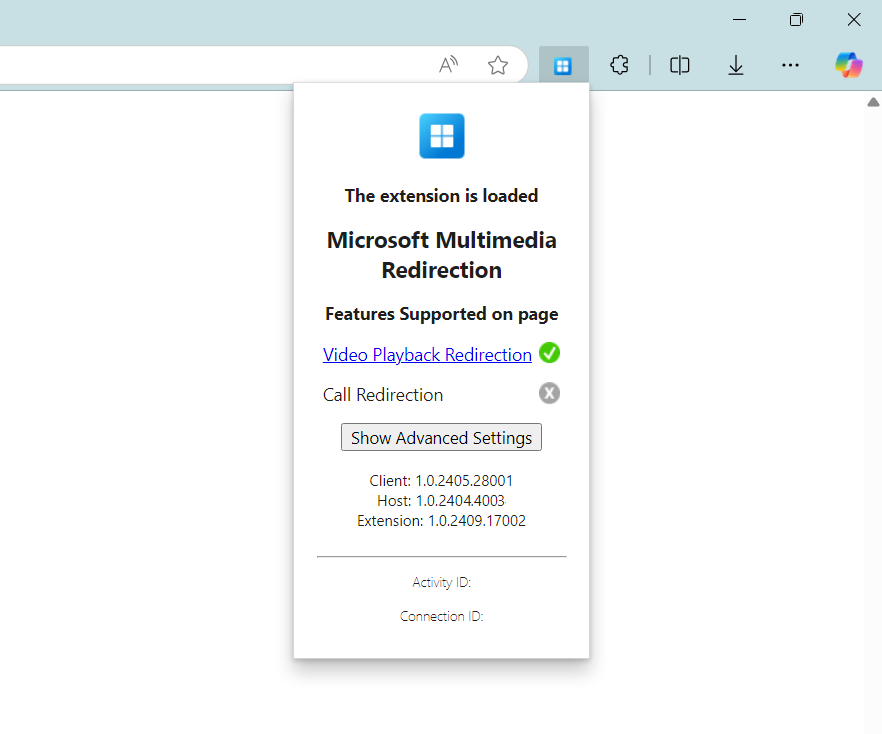
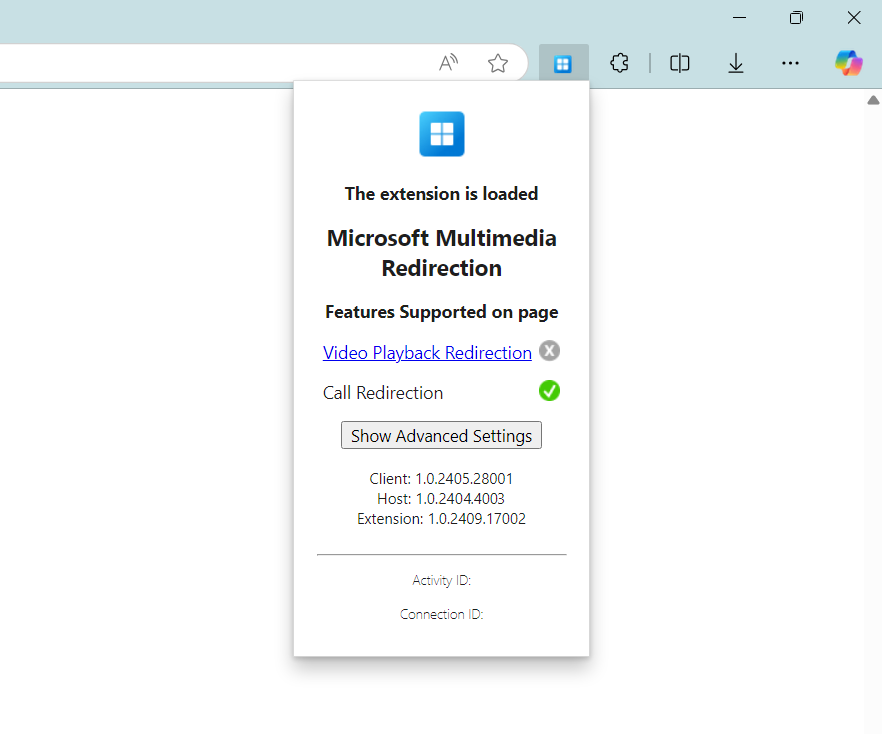
Select the Microsoft Multimedia Redirection extension icon in the extension bar on the top-right corner of your browser. If you're on a web page where multimedia redirection is available, the icon has a blue border (rather than grey), and shows the message The extension is loaded. For web pages that support video playback redirection, Video Playback Redirection has a green check mark.
On the web page, play a video. Check the status of the extension icon that multimedia redirection is active in your browser, which should look like the following image:

Advanced settings for video playback redirection
The following advanced settings are available for video playback redirection. You can also hide the advanced settings button from users; for more information, see Hide advanced settings button.
Enable video playback for all sites (beta): By default, video playback redirection is limited to the sites listed in Websites for video playback redirection. You can enable video playback redirection for all sites to test the feature with other web pages. This setting is experimental and might not work as expected.
Video status overlay: When enabled, a short message appears at the top of the video player that indicates the redirection status of the current video. The message disappears after five seconds.
Enable redirected video playback overlay: When enabled, a bright highlighted border appears around the video playback element that is being redirected.
To enable these advanced settings:
Select the extension icon in your browser.
Select Show Advanced Settings.
Toggle the settings you want to enable to on.
Allow or block video playback redirection for specific domains
If you configure multimedia redirection using Microsoft Intune or Group Policy, you can allow or block specific domains for video playback redirection.
Note
The following example is for Microsoft Edge. For Google Chrome:
- Change
joeclbldhdmoijbaagobkhlpfjglcihdtolfmemoeeciijgkjkgbgikoonlkabmlno. - Change the
update_urltohttps://clients2.google.com/service/update2/crx.
This example installs the extension and allows learn.microsoft.com and youtube.com, but blocks all other domains. You can use this example as part of the steps in Enable and manage the browser extension centrally.
{
  "joeclbldhdmoijbaagobkhlpfjglcihd": {
    "installation_mode": "force_installed",
    "runtime_allowed_hosts": [ "*://*.learn.microsoft.com";"*://*.youtube.com" ],
    "runtime_blocked_hosts": [ "*://*" ],
    "update_url": "https://edge.microsoft.com/extensionwebstorebase/v1/crx",
    "toolbar_state": "default_shown"
  }
}
Call redirection
The following sections contain information about how to test call redirection and how you can configure advanced settings.
Websites for call redirection
The following websites are known to work with call redirection, and which work by default.
Test call redirection
After you enable multimedia redirection, you can test it by visiting a web page with calling from the list in Websites for call redirection and following these steps:
Open the web page in Microsoft Edge or Google Chrome on your remote session.
Select the Microsoft Multimedia Redirection extension icon in the extension bar on the top-right corner of your browser. If you're on a web page where multimedia redirection is available, the icon has a blue border (rather than grey), and shows the message The extension is loaded. For web pages that support call redirection, Call Redirection has a green check mark.
On the web page, make a call. Check the status of the extension icon that multimedia redirection is active in your browser, which should look like the following image:

Enable call redirection for specific domains
If you configure multimedia redirection using Microsoft Intune or Group Policy, you can enable one or more domains for call redirection. This parameter enables you to specify extra sites in addition to the Websites for call redirection. The supported format is to specify the URL as the fully qualified domain name (FQDN) with up to one subdirectory. The following formats are supported:
contoso.comconferencing.contoso.comcontoso.com/conferencing
The following formats aren't supported:
www.contoso.comcontoso.com/conferencing/groupscontoso.com/
For multiple sites, separate each site with a semicolon ;, for example, contoso.com;conferencing.contoso.com;contoso.com/conferencing.
To add extra sites for call redirection, you need to set the following registry value on the computers providing a remote session, depending on the browser you're using. Replace <URLs> with the sites you want to enable.
For Microsoft Edge:
- Key:
HKLM\SOFTWARE\Policies\Microsoft\Edge\3rdparty\extensions\joeclbldhdmoijbaagobkhlpfjglcihd\policy - Name:
AllowedCallRedirectionSites - Type:
REG_SZ - Data:
<URLs>
- Key:
For Google Chrome:
- Key:
HKLM\SOFTWARE\Policies\Google\Chrome\3rdparty\extensions\lfmemoeeciijgkjkgbgikoonlkabmlno\policy - Name:
AllowedCallRedirectionSites - Type:
REG_SZ - Data:
<URLs>
- Key:
You can configure the registry using an enterprise deployment tool such as Intune, Configuration Manager, or Group Policy. Alternatively, to set this registry value using PowerShell, open PowerShell as an administrator and run the following commands. This example uses the registry key for Microsoft Edge. Replace <URLs> with the sites you want to enable.
New-Item -Path "HKLM:\SOFTWARE\Policies\Microsoft\Edge\3rdparty\extensions\joeclbldhdmoijbaagobkhlpfjglcihd\policy" -Force
New-ItemProperty -Path "HKLM:\SOFTWARE\Policies\Microsoft\Edge\3rdparty\extensions\joeclbldhdmoijbaagobkhlpfjglcihd\policy" -Name AllowedCallRedirectionSites -PropertyType String -Value "<URLs>" -Force
Enable call redirection for all sites for testing
You can enable call redirection for all sites to allow you to test web pages that aren't listed in Websites for call redirection. This setting is experimental and can be useful when developing integration of your website with call redirection.
To enable call redirection for all sites:
On a local Windows device, add the following registry key and value:
- Key:
HKEY_CURRENT_USER\Software\Microsoft\MMR - Type:
REG_DWORD - Value:
AllowCallRedirectionAllSites - Data:
1
- Key:
Connect to a remote session and load a web browser, then select the extension icon in your browser.
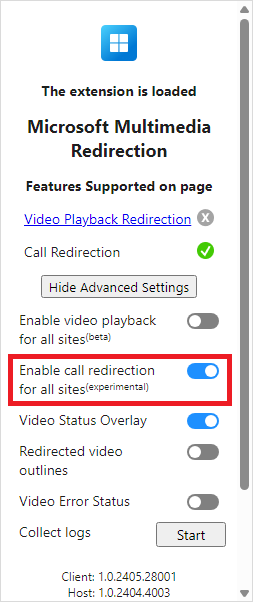
Select Show Advanced Settings.
Toggle Enable call redirection for all sites (experimental) to on.
Next step
To troubleshoot issues or view known issues, see our troubleshooting article.

