Nota:
El acceso a esta página requiere autorización. Puede intentar iniciar sesión o cambiar directorios.
El acceso a esta página requiere autorización. Puede intentar cambiar los directorios.
重要
此功能在 Beta 版中。 工作区管理员可以从 预览 页控制对此功能的访问。 请参阅 管理 Azure Databricks 预览版。
本页介绍如何使用 MLflow Python SDK 在 MLflow 提示注册表中创建新提示和管理其版本。 其中包括有关使用 MLflow Python SDK 和 Databricks MLflow UI 的说明。 本页上的所有代码都包含在 示例笔记本中。
先决条件
安装 MLflow 和所需包
pip install --upgrade "mlflow[databricks]>=3.1.0" openai按照 设置环境快速入门指南创建 MLflow 实验。
创建或标识用于存储提示的 Unity 目录架构。 必须具有 Unity Catalog 架构的
CREATE FUNCTION、EXECUTE和MANAGE权限。
步骤 1. 创建新提示
可以在 Databricks MLflow UI 中创建提示,也可以使用 MLflow Python SDK 以编程方式创建提示。
使用 Databricks MLflow UI
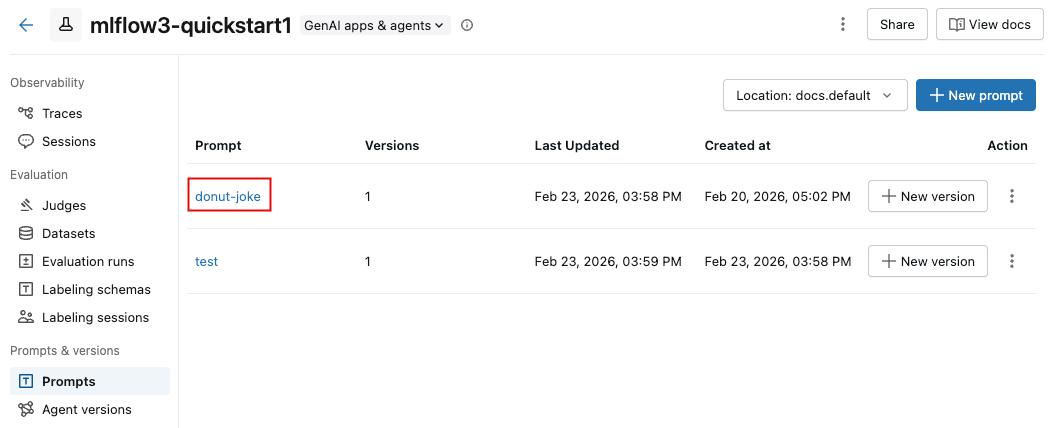
若要在 UI 中创建提示,请执行以下作:
进入您的 MLflow 实验。
单击“Prompts”选项卡。
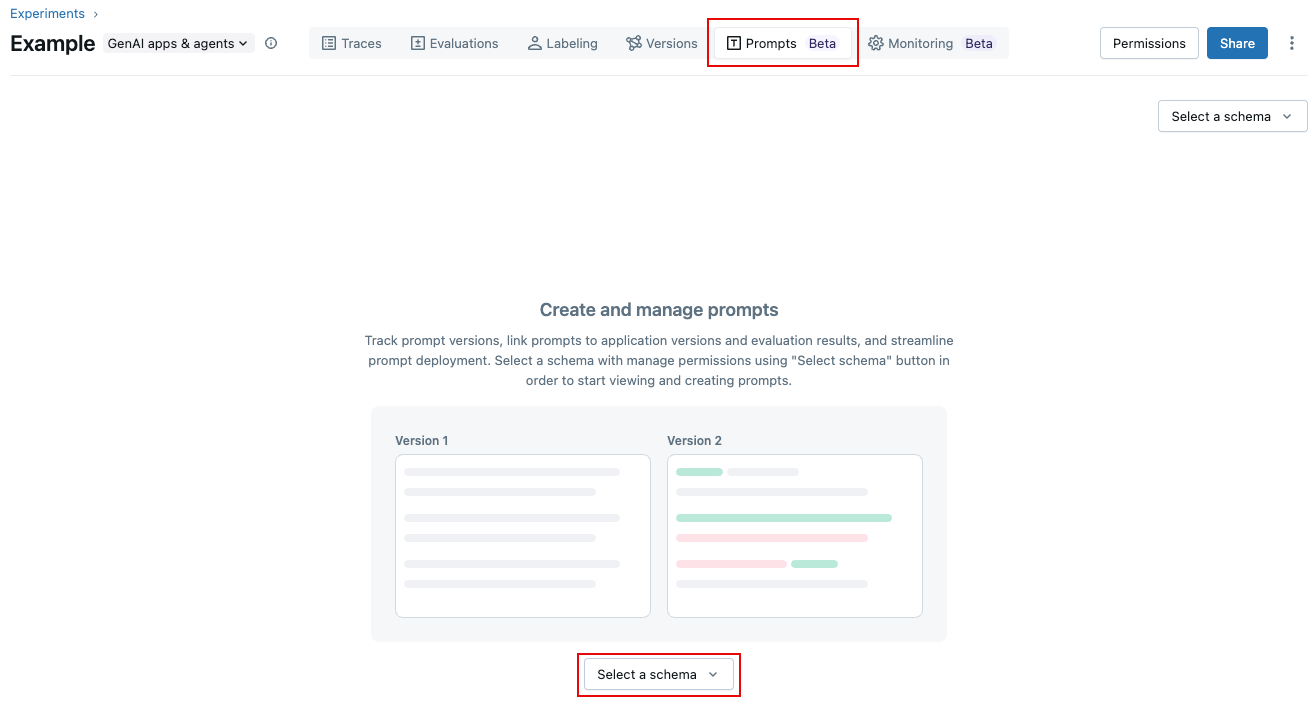
单击
 。 此时将显示一个对话框。
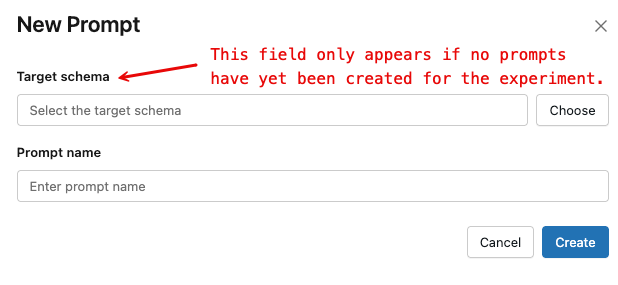
如果尚未为此试验创建任何提示,则必须指定要使用的 Unity 目录架构。
- 单击“ 选择 ”或键入搜索框。 在您在搜索框中输入时,将会显示匹配的 Unity Catalog 资产。
- 选择所需的架构,然后单击“ 确认”。 必须对架构具有以下权限:
CREATE FUNCTION、EXECUTE和MANAGE。
键入提示的名称,然后单击“ 创建”。
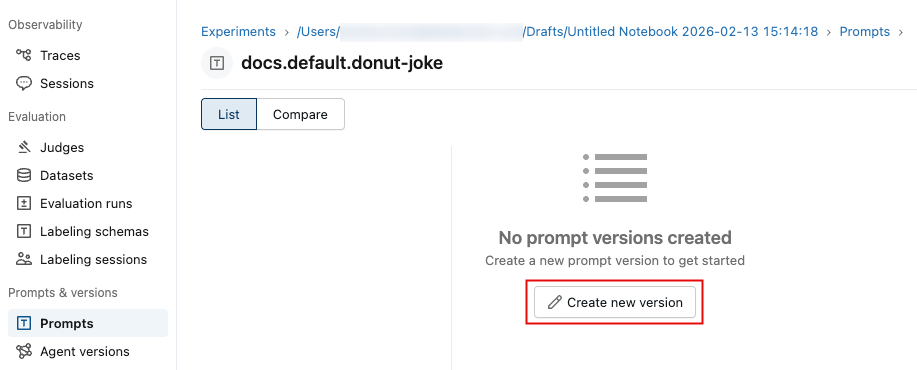
单击“ 创建新版本”。
键入提示,然后单击“ 保存”。 可以在提示文本中使用变量,通过使用
{{variable_name}}语法实现。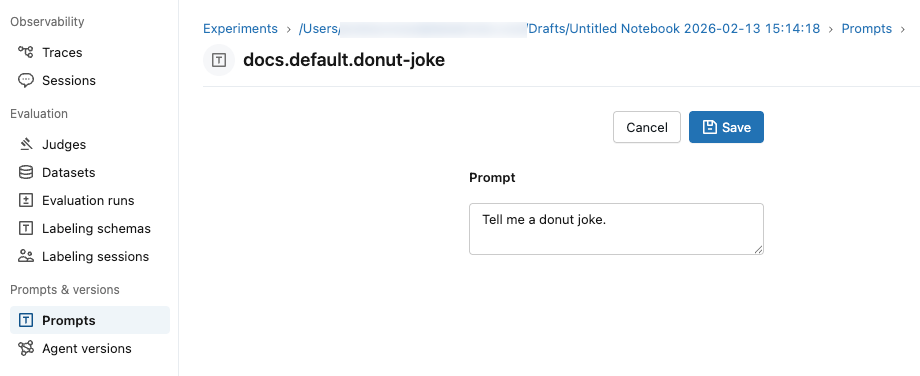
提示显示在 UI 中:
使用 Python SDK
通过设置试验标记
mlflow.set_experiment_tags,将 MLflow 试验链接到默认的提示注册表位置。 这样,SDK 和工具就可以自动推断 Unity 目录提示架构。将
mlflow.promptRegistryLocation标记与值catalog.schema一起使用:import mlflow # Link the current MLflow experiment to a UC schema for prompts mlflow.set_experiment_tags({ "mlflow.promptRegistryLocation": "main.default" })使用
mlflow.genai.register_prompt(). 创建提示。 提示对模板变量使用双大括号语法 ({{variable}})。# Replace with a Unity Catalog schema where you have CREATE FUNCTION, EXECUTE, and MANAGE privileges uc_schema = "main.default" # This table is created in the UC schema specified in the previous line prompt_name = "summarization_prompt" # Define the prompt template with variables initial_template = """\ Summarize content you are provided with in {{num_sentences}} sentences. Content: {{content}} """ # Register a new prompt prompt = mlflow.genai.register_prompt( name=f"{uc_schema}.{prompt_name}", template=initial_template, # all following parameters are optional commit_message="Initial version of summarization prompt", tags={ "author": "data-science-team@company.com", "use_case": "document_summarization", "task": "summarization", "language": "en", "model_compatibility": "gpt-4" } ) print(f"Created prompt '{prompt.name}' (version {prompt.version})")
步骤 2:在应用程序中使用提示
以下步骤创建一个简单的应用程序,该应用程序通过使用 Python SDK 来应用提示模板。
从注册表加载提示
# Load a specific version using URI syntax
prompt = mlflow.genai.load_prompt(name_or_uri=f"prompts:/{uc_schema}.{prompt_name}/1")

# Alternative syntax without URI
prompt = mlflow.genai.load_prompt(name_or_uri=f"{uc_schema}.{prompt_name}", version="1")
在应用程序中使用提示
初始化 OpenAI 客户端以连接到 OpenAI 托管的 LLM。
OpenAI 托管的 LLM
使用本地 OpenAI SDK 连接到由 OpenAI 托管的模型。 从 可用的 OpenAI 模型中选择一个模型。
import mlflow
import os
import openai

# Ensure your OPENAI_API_KEY is set in your environment
# os.environ["OPENAI_API_KEY"] = "<YOUR_API_KEY>" # Uncomment and set if not globally configured

# Enable auto-tracing for OpenAI
mlflow.openai.autolog()

# Set up MLflow tracking to Databricks
mlflow.set_tracking_uri("databricks")
mlflow.set_experiment("/Shared/docs-demo")

# Create an OpenAI client connected to OpenAI SDKs
client = openai.OpenAI()

# Select an LLM
model_name = "gpt-4o-mini"
定义应用程序:
# Use the trace decorator to capture the application's entry point
@mlflow.trace
def my_app(content: str, num_sentences: int):
    # Format with variables
    formatted_prompt = prompt.format(
        content=content,
        num_sentences=num_sentences
    )

    response = client.chat.completions.create(
        model=model_name,  # This example uses a Databricks hosted LLM. You can replace this with any AI Gateway or Model Serving endpoint, or with a valid OpenAI model like gpt-4o.
        messages=[
            {
                "role": "system",
                "content": "You are a helpful assistant.",
            },
            {
                "role": "user",
                "content": formatted_prompt,
            },
        ],
    )
    return response.choices[0].message.content

result = my_app(content="This guide shows you how to integrate prompts from the MLflow Prompt Registry into your GenAI applications. You'll learn to load prompts, format them with dynamic data, and ensure complete lineage by linking prompt versions to your MLflow Models.", num_sentences=1)
print(result)
步骤 3. 编辑提示
创建完成提示版本后,它们是不可变的。 若要编辑提示,必须创建新版本。 类似于 Git 的版本控制系统保留了完整的历史记录,并支持回滚功能。
使用 Databricks MLflow UI
若要创建新版本::
在“ 提示 ”选项卡上,单击“
 在要编辑的提示旁边。
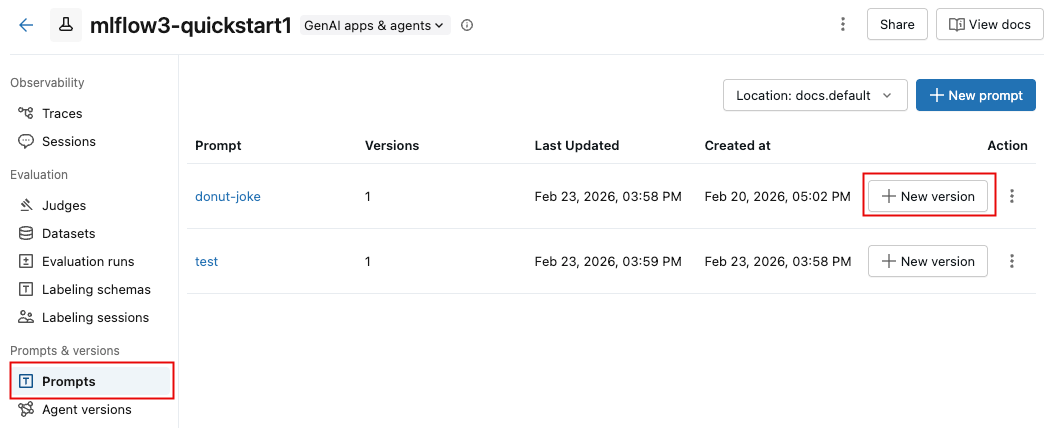
键入提示,然后单击“ 保存”。
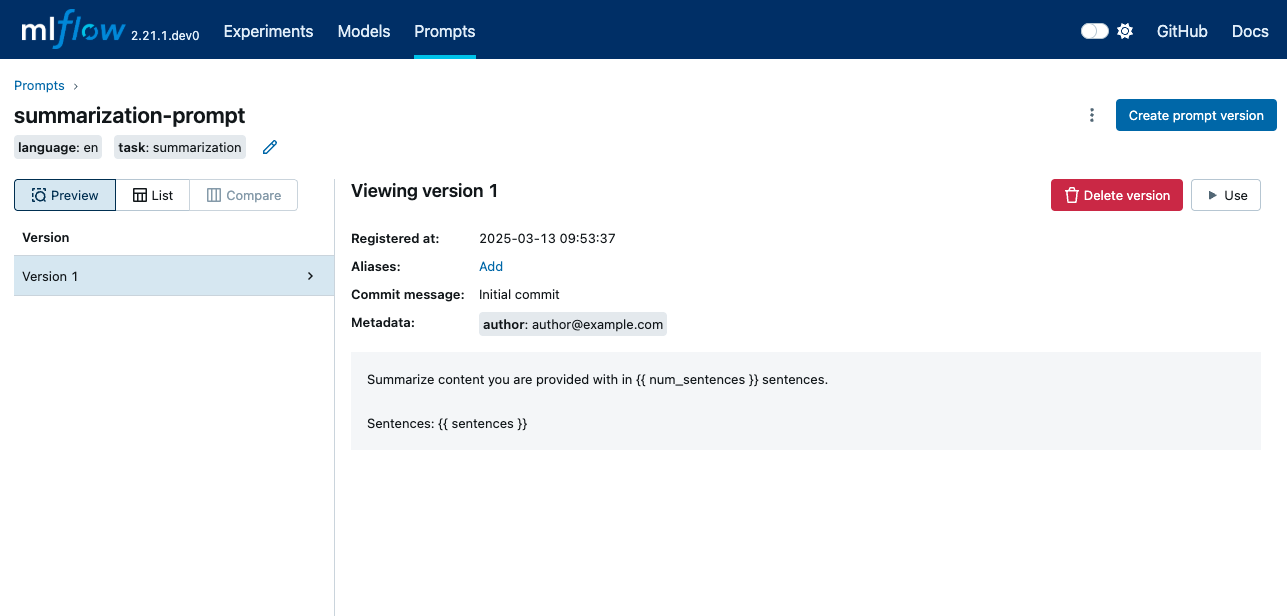
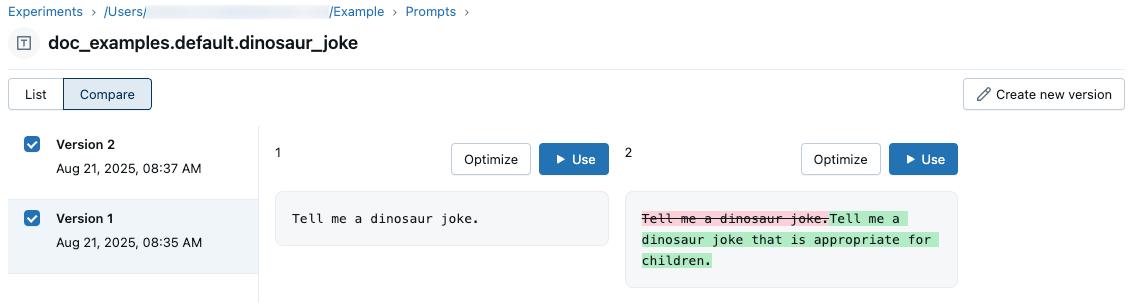
比较提示版本
若要比较不同的提示版本,
在 “提示 ”选项卡上,单击提示的名称。
在左上角,单击“ 比较 ”并选择要比较的版本。
使用 Python SDK
使用现有提示名称调用 mlflow.genai.register_prompt() 创建新版本:
import mlflow

# Define the improved template
new_template = """\
You are an expert summarizer. Condense the following content into exactly {{ num_sentences }} clear and informative sentences that capture the key points.

Content: {{content}}

Your summary should:
- Contain exactly {{num_sentences}} sentences
- Include only the most important information
- Be written in a neutral, objective tone
- Maintain the same level of formality as the original text
"""

# Register a new version
updated_prompt = mlflow.genai.register_prompt(
    name=f"{uc_schema}.{prompt_name}",
    template=new_template,
    commit_message="Added detailed instructions for better output quality",
    tags={
        "author": "data-science-team@company.com",
        "improvement": "Added specific guidelines for summary quality"
    }
)

print(f"Created version {updated_prompt.version} of '{updated_prompt.name}'")
步骤 4. 使用新提示
以下代码演示如何使用提示。
# Load a specific version using URI syntax
prompt = mlflow.genai.load_prompt(name_or_uri=f"prompts:/{uc_schema}.{prompt_name}/2")

# Or load from specific version
prompt = mlflow.genai.load_prompt(name_or_uri=f"{uc_schema}.{prompt_name}", version="2")
步骤 5. 搜索和发现提示
若要在 Unity Catalog 架构中查找提示,请执行以下操作:
# REQUIRED format for Unity Catalog - specify catalog and schema
results = mlflow.genai.search_prompts("catalog = 'main' AND schema = 'default'")

# Using variables for your schema
catalog_name = uc_schema.split('.')[0]  # 'main'
schema_name = uc_schema.split('.')[1]   # 'default'
results = mlflow.genai.search_prompts(f"catalog = '{catalog_name}' AND schema = '{schema_name}'")

# Limit results
results = mlflow.genai.search_prompts(
    filter_string=f"catalog = '{catalog_name}' AND schema = '{schema_name}'",
    max_results=50
)
示例笔记本
创建和编辑提示语示例笔记本
后续步骤
- 评估提示版本 - 比较不同的提示版本以识别性能最佳的版本。
- 跟踪应用程序版本提示 - 将提示版本关联到您的应用程序版本。
- 在已部署的应用程序中使用提示 - 将提示与别名一起部署到生产环境。