在 GenAI 的 MLflow 评估中, 基于代码的评分器 允许为 AI 代理或应用程序定义灵活的评估指标。
开发记分器时,您会经常需要快速迭代。 使用此开发人员工作流更新评分器,而无需每次重新运行整个应用:
- 定义评估数据
- 生成应用程序的跟踪记录
- 查询和存储生成的跟踪
- 在迭代优化您的评分器时,使用存储的记录进行评估。
示例笔记本包含本教程中的所有代码。
先决条件:设置 MLflow 并定义应用程序
更新 mlflow[databricks] 到最新版本以获得最佳 GenAI 体验,并安装 openai ,因为以下示例应用使用 OpenAI 客户端。
%pip install -q --upgrade "mlflow[databricks]>=3.1" openai
dbutils.library.restartPython()
下面的 mlflow.openai.autolog() 调用会自动使用 MLflow 跟踪来检测应用程序。 记录的跟踪将作为评分器在评估期间的输入。
import mlflow

mlflow.openai.autolog()

# If running outside of Databricks, set up MLflow tracking to Databricks.
# mlflow.set_tracking_uri("databricks")

# In Databricks notebooks, the experiment defaults to the notebook experiment.
# mlflow.set_experiment("/Shared/docs-demo")
使用 databricks-openai 包以获取 OpenAI 客户端,该客户端可连接到 Databricks 托管的 LLM。
from databricks_openai import DatabricksOpenAI

# Create an OpenAI client that is connected to Databricks-hosted LLMs
client = DatabricksOpenAI()

# Select an LLM
model_name = "databricks-claude-sonnet-4"
为本教程创建简单的问答助手应用:
@mlflow.trace
def sample_app(messages: list[dict[str, str]]):
    # 1. Prepare messages for the LLM
    messages_for_llm = [
        {"role": "system", "content": "You are a helpful assistant."},
        *messages,
    ]

    # 2. Call LLM to generate a response
    response = client.chat.completions.create(
        model= model_name,
        messages=messages_for_llm,
    )
    return response.choices[0].message.content

sample_app([{"role": "user", "content": "What is the capital of France?"}])
步骤 1:定义评估数据
下面的评估数据是 LLM 要回答的请求列表。 对于此应用,请求可以是简单的问题,也可以是与多个消息的对话。
eval_dataset = [
    {
        "inputs": {
            "messages": [
                {"role": "user", "content": "How much does a microwave cost?"},
            ]
        },
    },
    {
        "inputs": {
            "messages": [
                {
                    "role": "user",
                    "content": "Can I return the microwave I bought 2 months ago?",
                },
            ]
        },
    },
    {
        "inputs": {
            "messages": [
                {
                    "role": "user",
                    "content": "I'm having trouble with my account.  I can't log in.",
                },
                {
                    "role": "assistant",
                    "content": "I'm sorry to hear that you're having trouble with your account.  Are you using our website or mobile app?",
                },
                {"role": "user", "content": "Website"},
            ]
        },
    },
]
步骤 2:从您的应用生成跟踪记录
请使用 mlflow.genai.evaluate() 从应用程序生成跟踪。 由于 evaluate() 至少需要一个记分器,因此为此初始跟踪生成定义占位符记分器:
from mlflow.genai.scorers import scorer

@scorer
def placeholder_metric() -> int:
    # placeholder return value
    return 1
使用占位符评分工具进行评估。
eval_results = mlflow.genai.evaluate(
    data=eval_dataset,
    predict_fn=sample_app,
    scorers=[placeholder_metric]
)
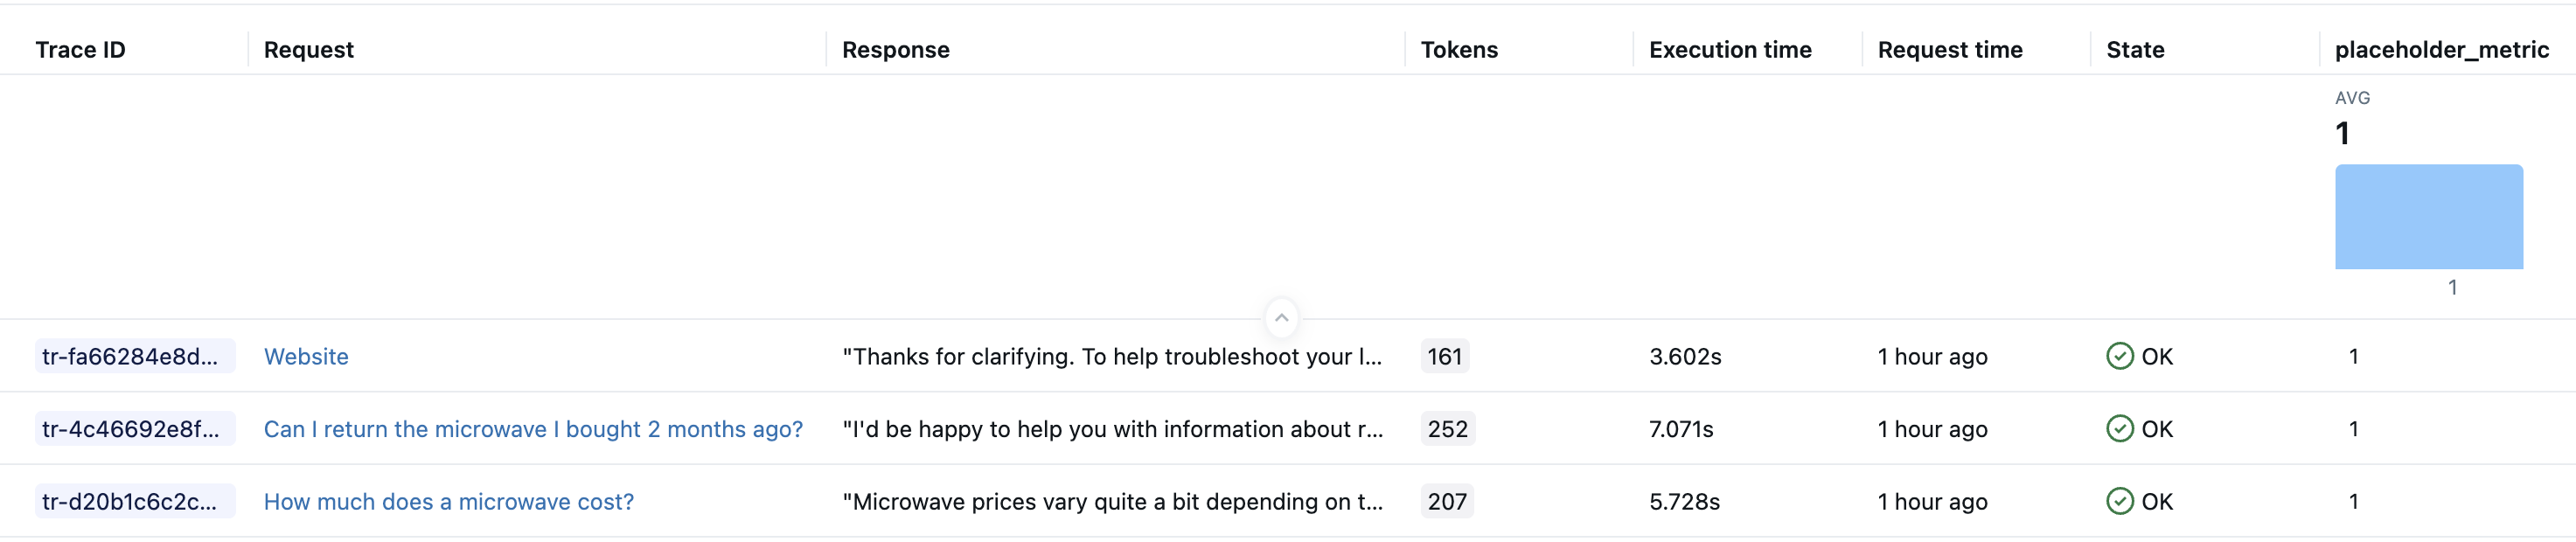
运行上述代码后,你的实验中应该有一个针对评估数据集每一行的跟踪。 Databricks Notebooks 还会在单元格结果中显示跟踪可视化效果。 在评估期间由 sample_app 生成的 LLM 响应显示在笔记本 Trace UI 界面的 “输出” 字段和 MLflow 试验 UI 界面的 “响应” 列中。
步骤 3:查询和存储生成的跟踪
将生成的跟踪存储在局部变量中。 该 mlflow.search_traces() 函数返回一个包含跟踪的 Pandas DataFrame。
generated_traces = mlflow.search_traces(run_id=eval_results.run_id)
generated_traces
步骤 4:循环访问记分器时,使用存储的跟踪进行调用evaluate()
将 Pandas 数据帧中的跟踪直接作为输入数据集传递给 evaluate()。 这样你可以快速调整你的指标,而无需重新启动应用程序。 在预计算的 generated_traces 上运行新的记分器的代码如下。
from mlflow.genai.scorers import scorer

@scorer
def response_length(outputs: str) -> int:
    # Example metric.
    # Implement your actual metric logic here.
    return len(outputs)

# Note the lack of a predict_fn parameter.
mlflow.genai.evaluate(
    data=generated_traces,
    scorers=[response_length],
)
示例笔记本
以下笔记本包括此页上的所有代码。
用于 MLflow 评估的基于代码的评分器的开发人员工作流
后续步骤
- 自定义 LLM 评分器 - 了解使用 LLM 即判断指标进行语义评估,这比基于代码的评分器更容易定义。
- 在生产环境中运行记分器 - 部署记分器进行持续监视。
- 生成评估数据集 - 为评分者创建测试数据。