使用专用访问连接方法连接 Azure Database for MySQL 灵活服务器
适用于: Azure Database for MySQL - 灵活服务器
Azure Database for MySQL 灵活服务器是一种托管服务,可在云中运行、管理和缩放具有高可用性的 MySQL 服务器。 此快速入门介绍了如何使用 Azure 门户在虚拟网络中创建 Azure Database for MySQL 灵活服务器实例。
如果没有 Azure 订阅,可在开始前创建一个 Azure 试用帐户。
登录到 Azure 门户
登录 Azure 门户。 输入登录到门户所需的凭据。 默认视图是服务仪表板。
创建 Azure Database for MySQL 灵活服务器实例
你将使用所定义的一组计算和存储资源创建 Azure Database for MySQL 灵活服务器实例。 请在 Azure 资源组中创建该服务器。
完成以下步骤以创建 Azure Database for MySQL 灵活服务器实例:
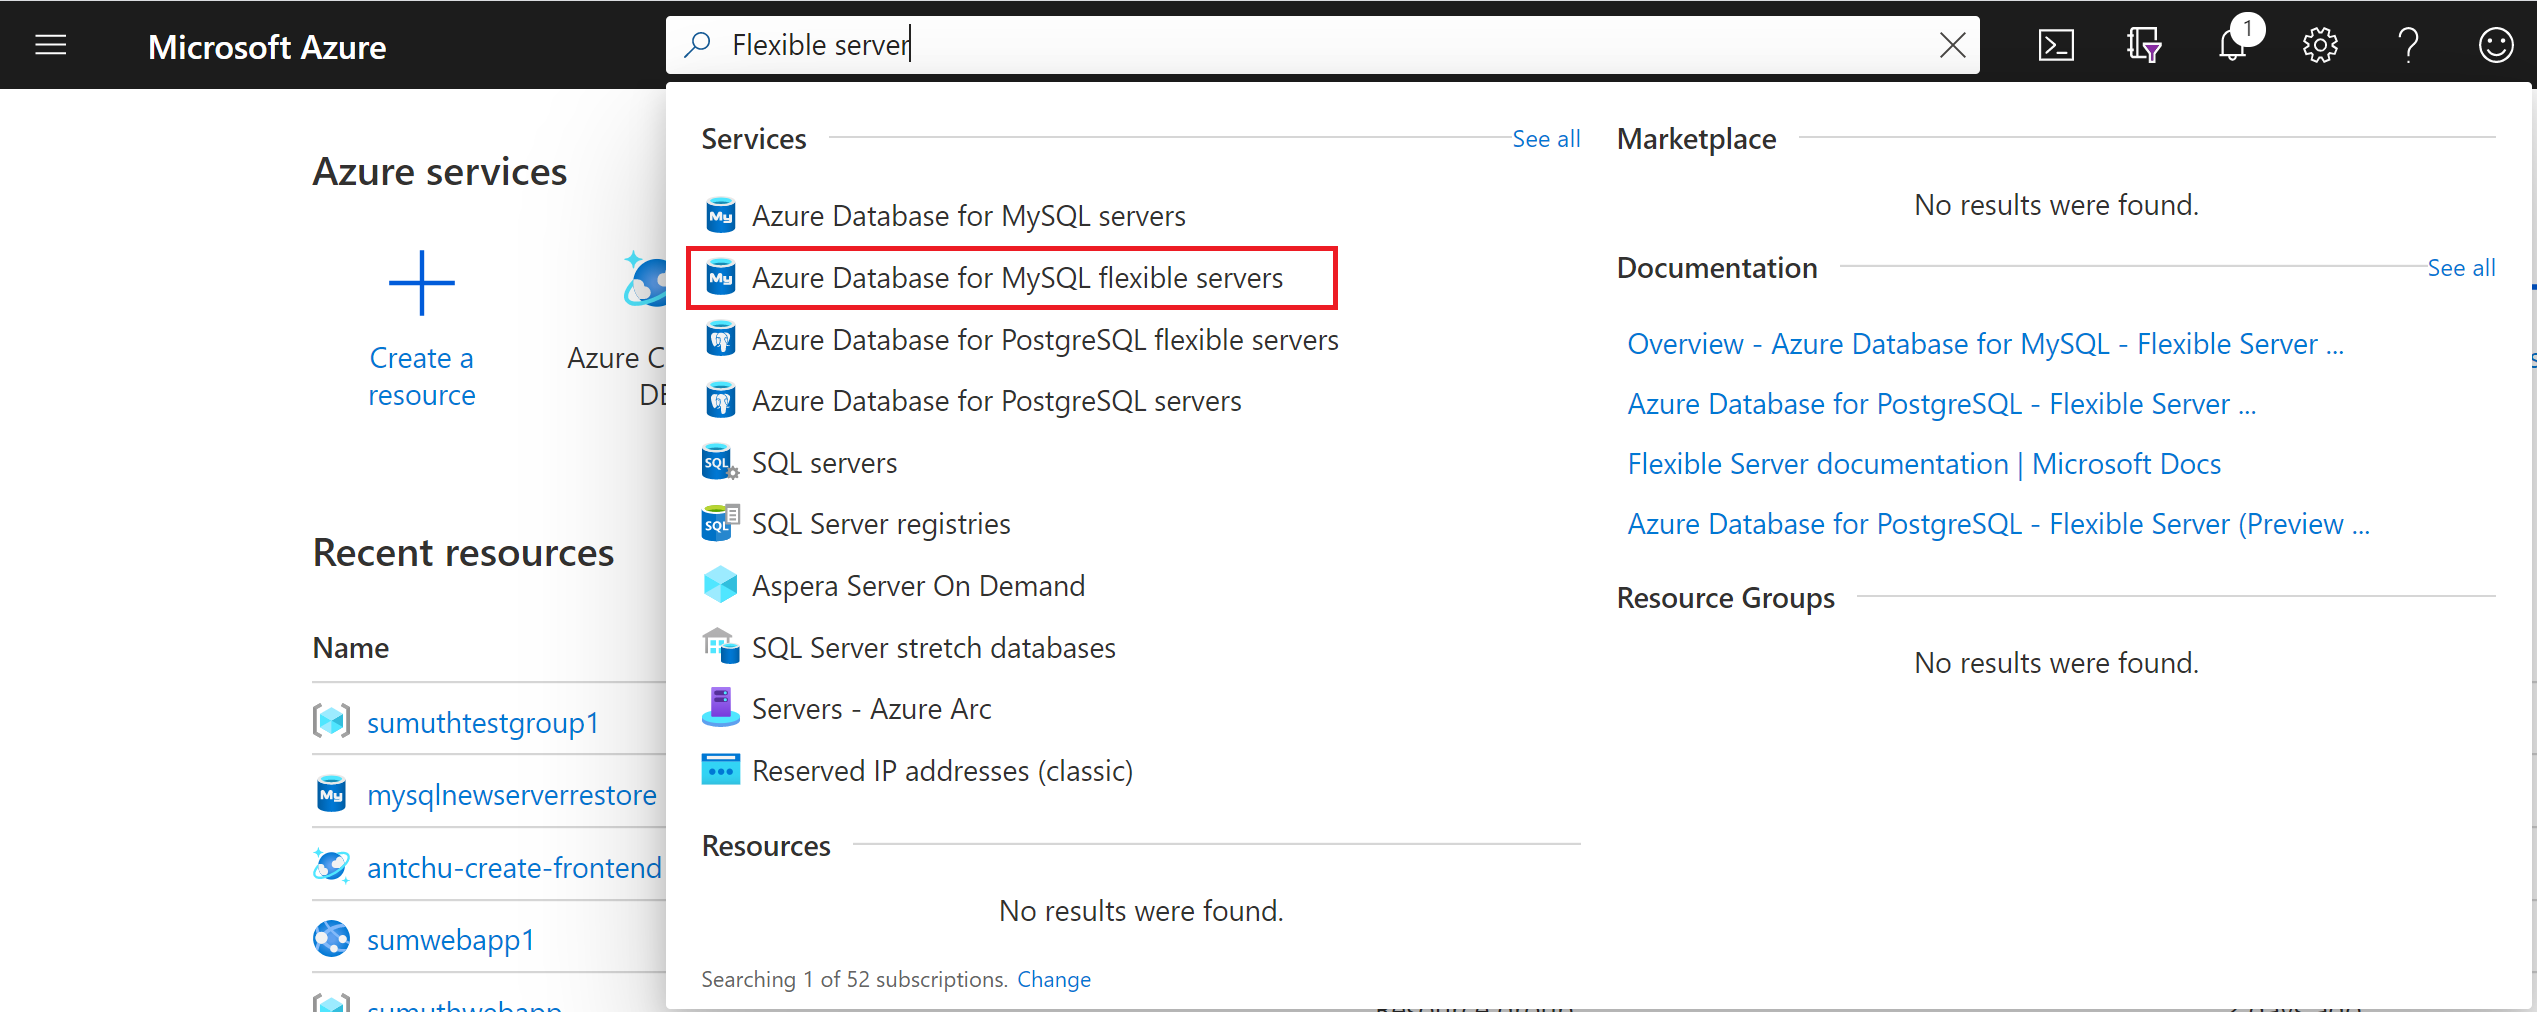
在门户中搜索并选择“Azure Database for MySQL 服务器”:
选择添加。
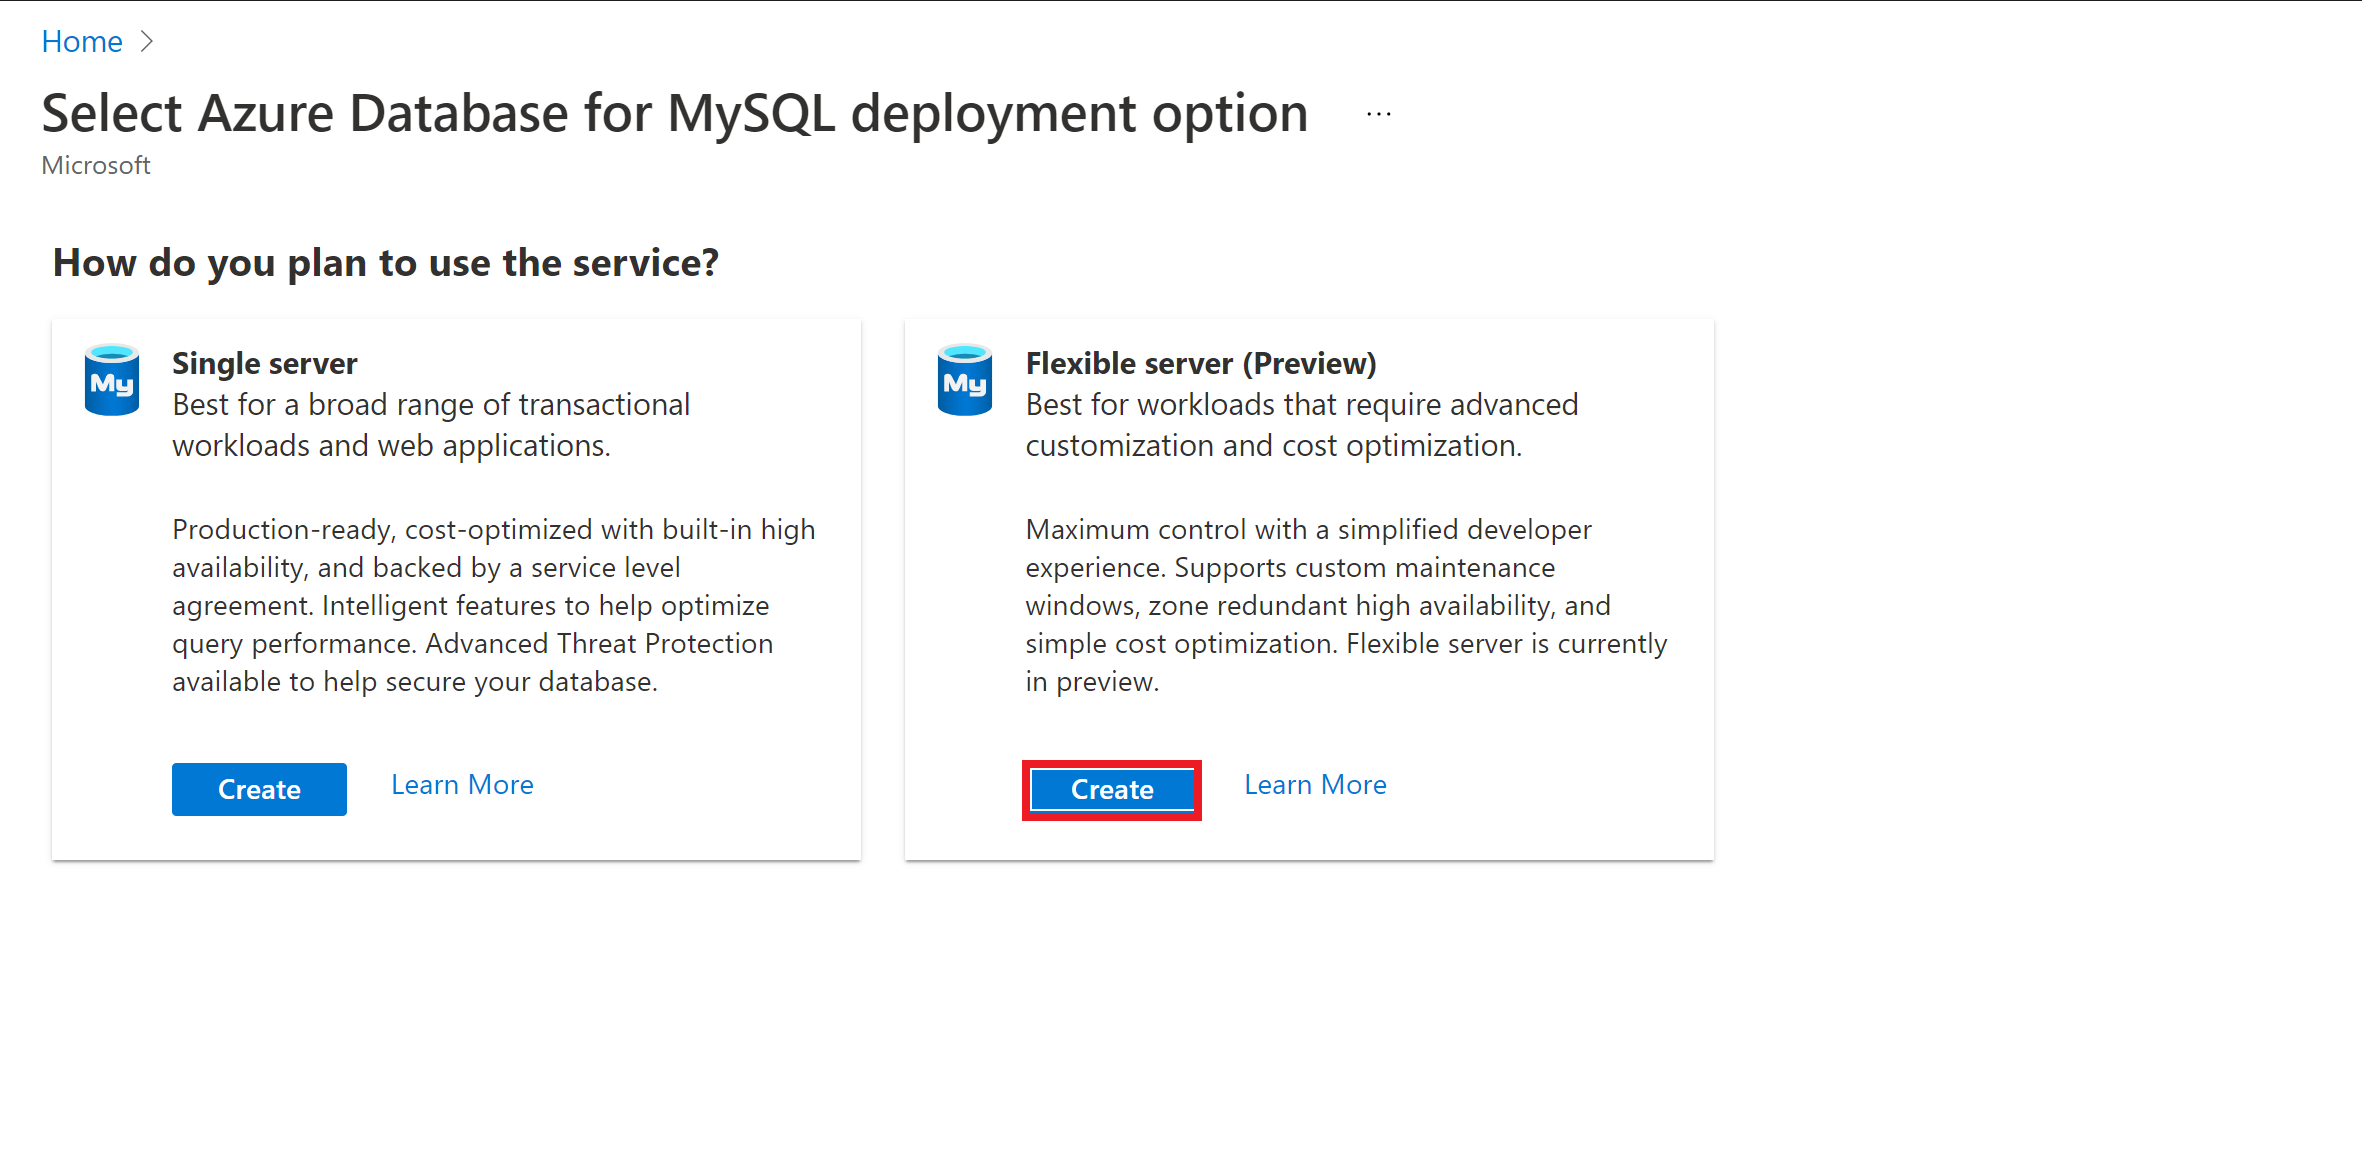
在“选择 Azure Database for MySQL 部署选项”页面上,选择“灵活服务器”作为部署选项 :
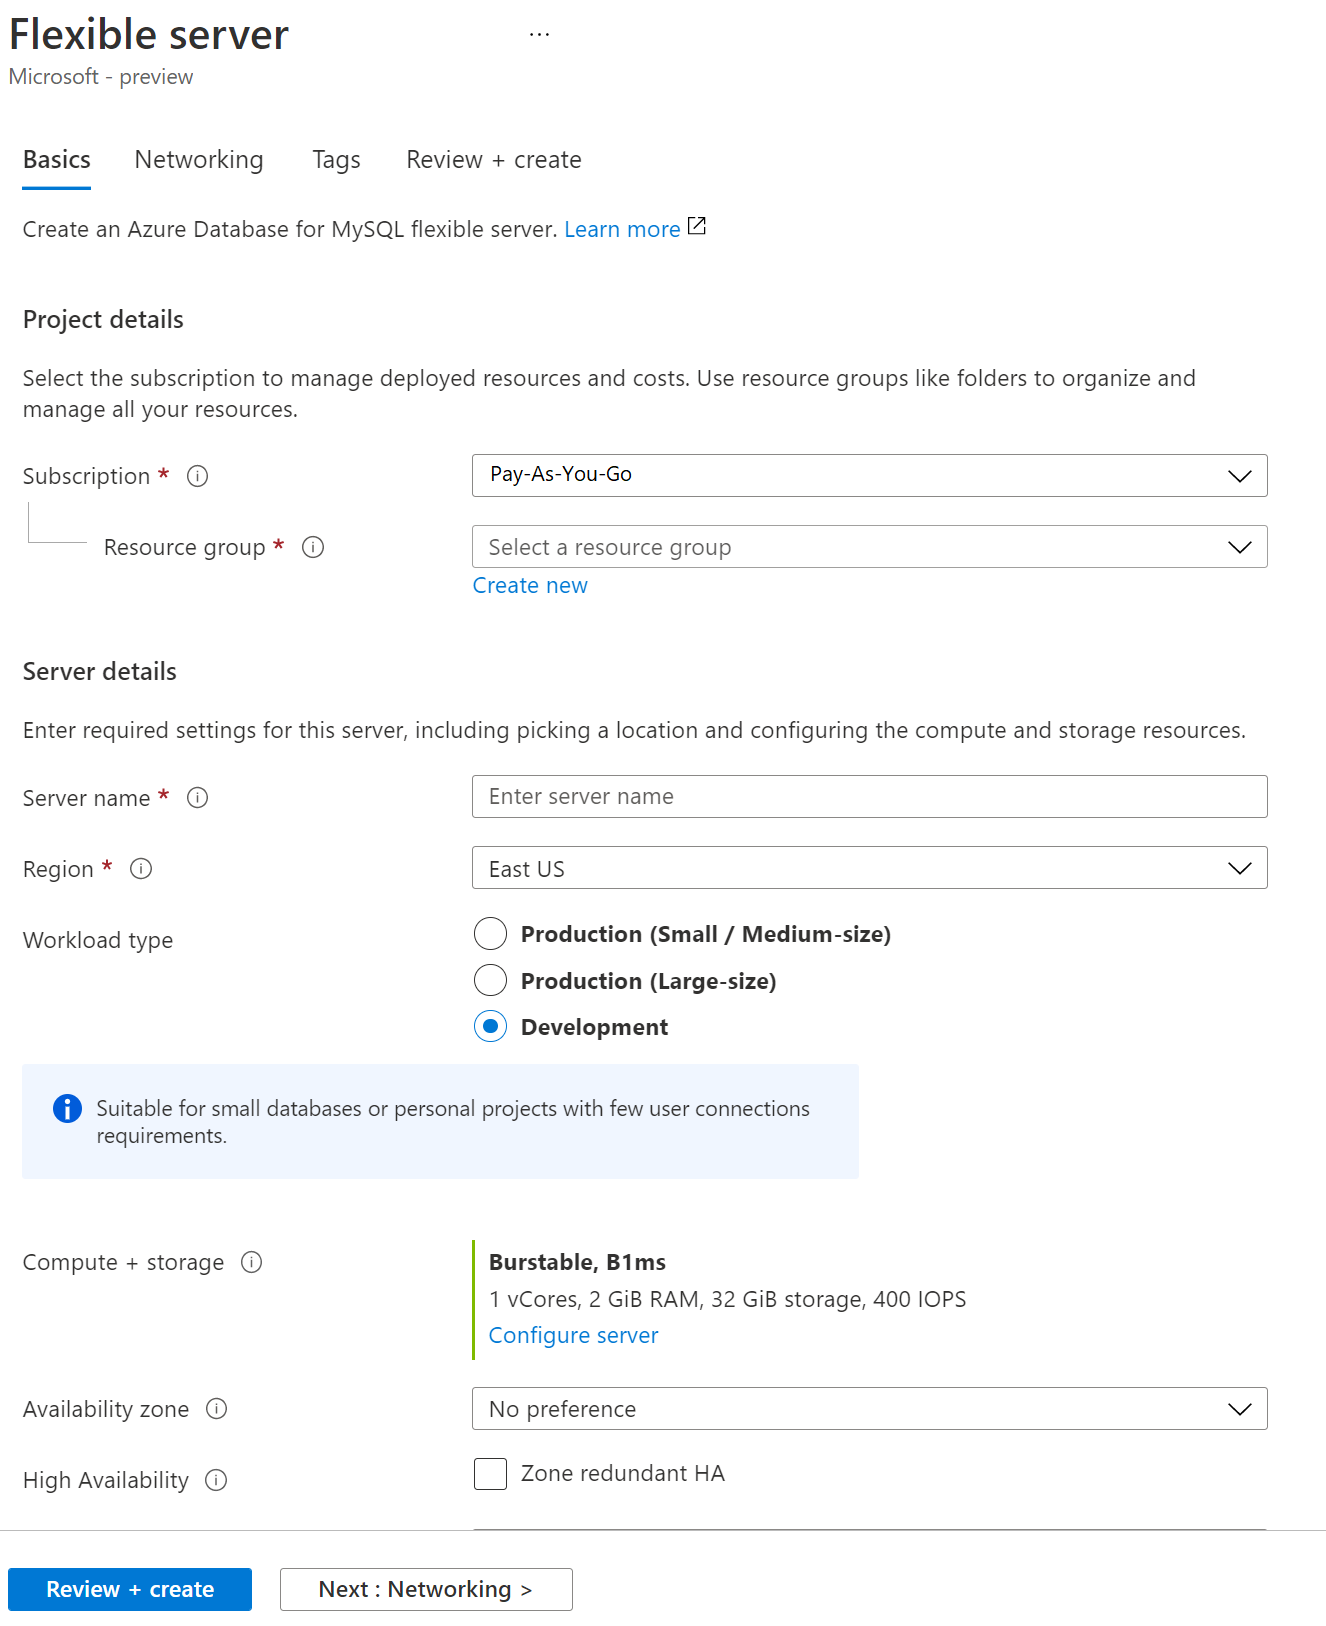
在“基本”选项卡上,输入“订阅”、“资源组”、“区域”、“管理员用户名”和“管理员密码” 。 使用默认值时,这会向版本 5.7 的 Azure Database for MySQL 灵活服务器实例预配使用 1 个 vCore、2 GiB 内存和 32 GiB 存储的可突发 SKU。 备份保留期为七天。 可以更改配置。
提示
为了在迁移过程中更快地加载数据,建议将 IOPS 增加到通过计算大小获得的最大大小,然后再将其调整回原来的大小,以节省成本。
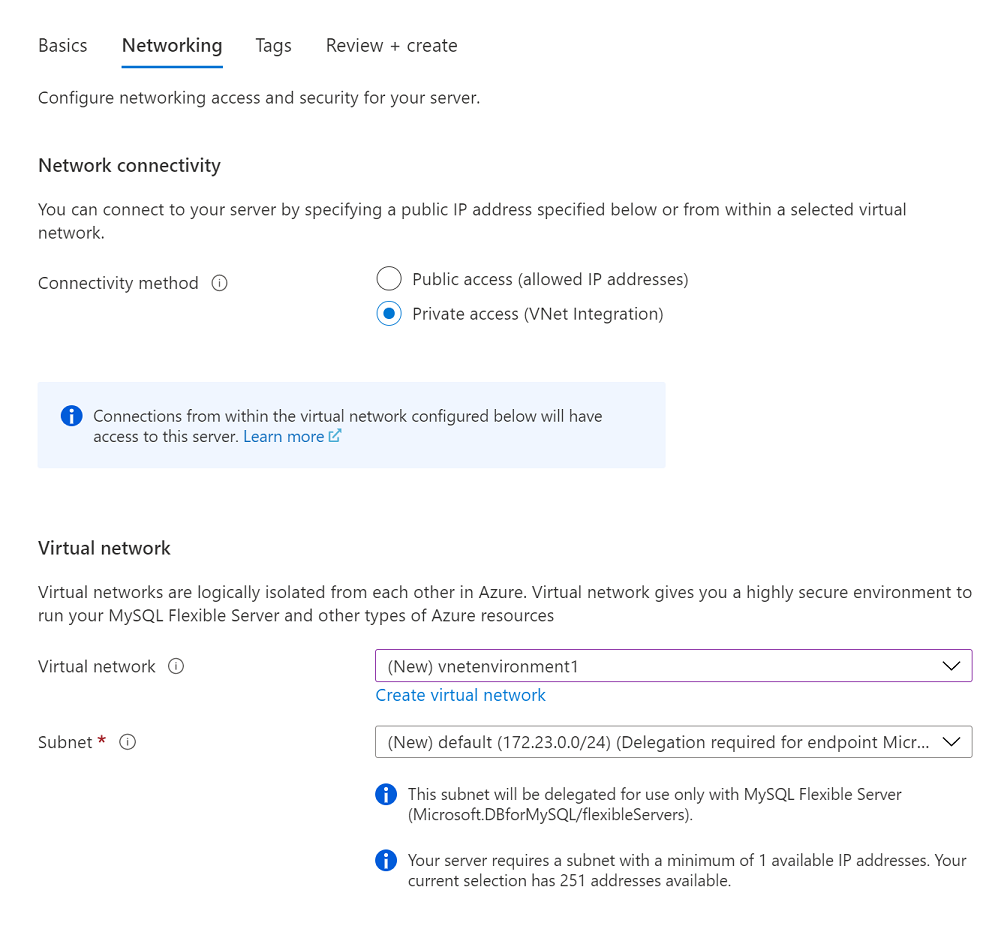
转到“网络”选项卡,选择“专用访问” 。创建服务器后,无法更改连接方法。 选择“创建虚拟网络”以创建新的虚拟网络 vnetenvironment1。
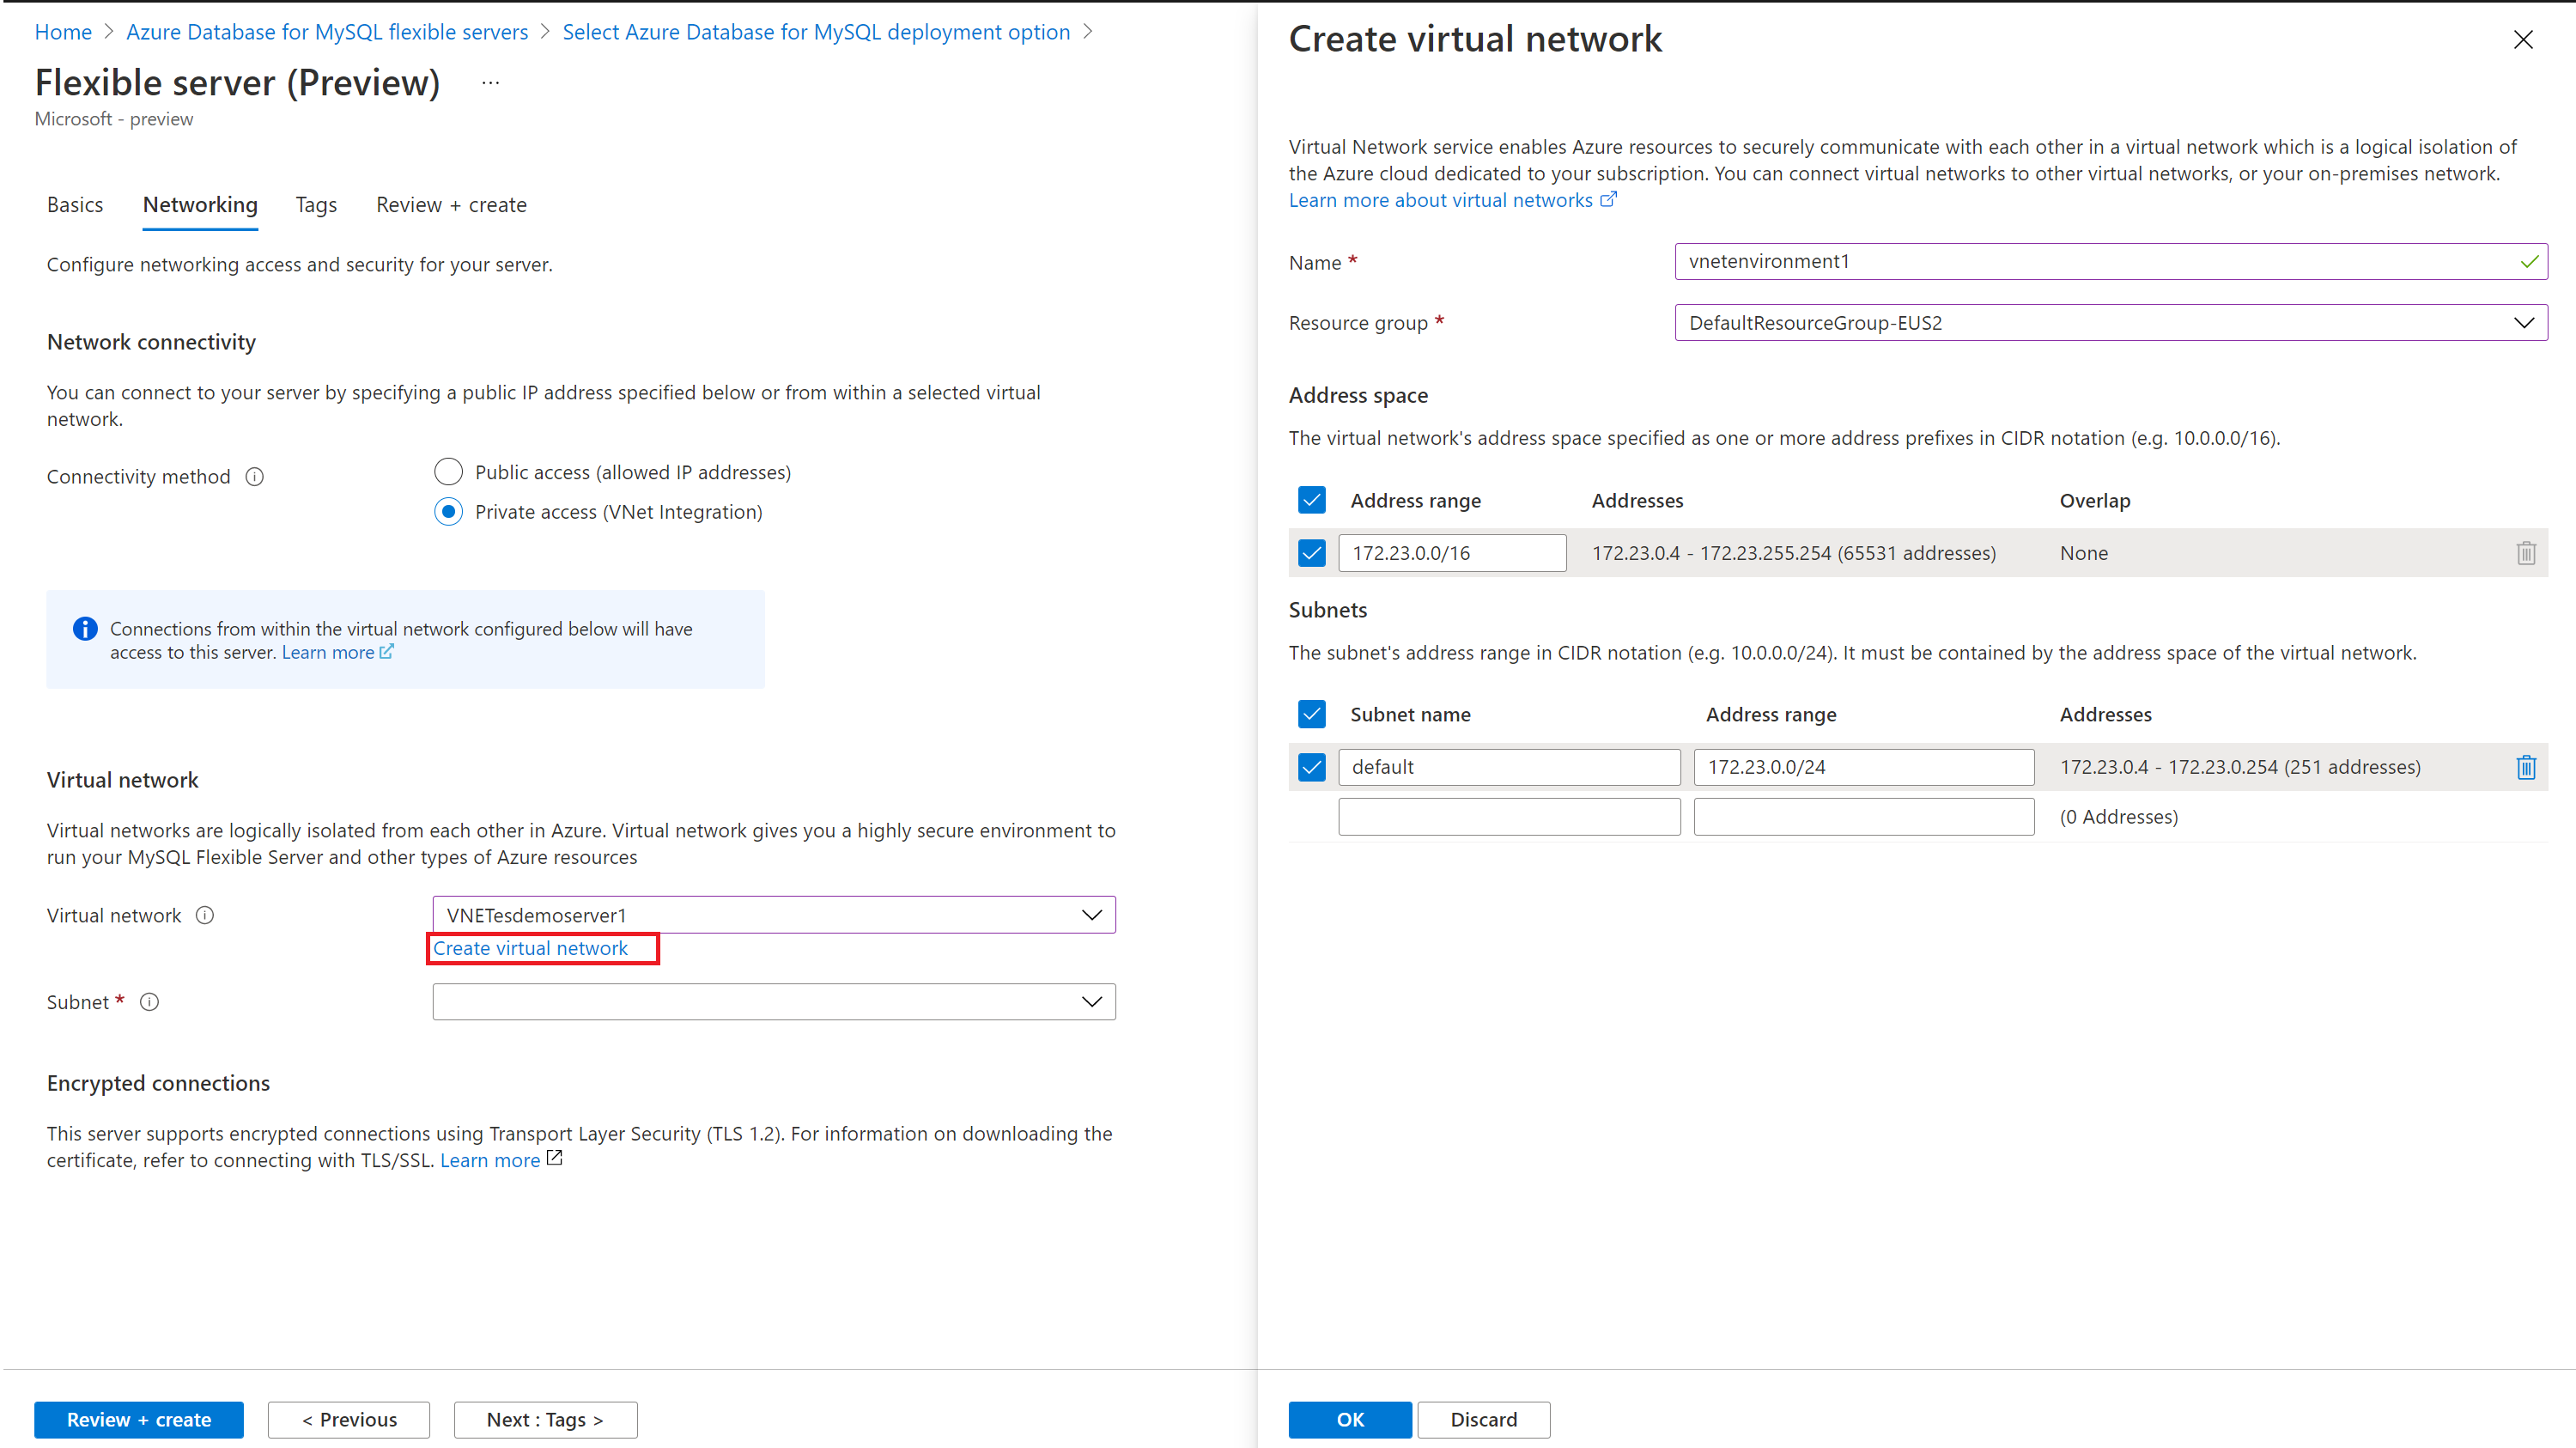
提供虚拟网络名称和子网信息后,选择“确定”。
选择“查看 + 创建”,查看你的 Azure Database for MySQL 灵活服务器配置。
选择“创建”以预配服务器。 预配可能需要几分钟时间。
等待部署完成并成功。
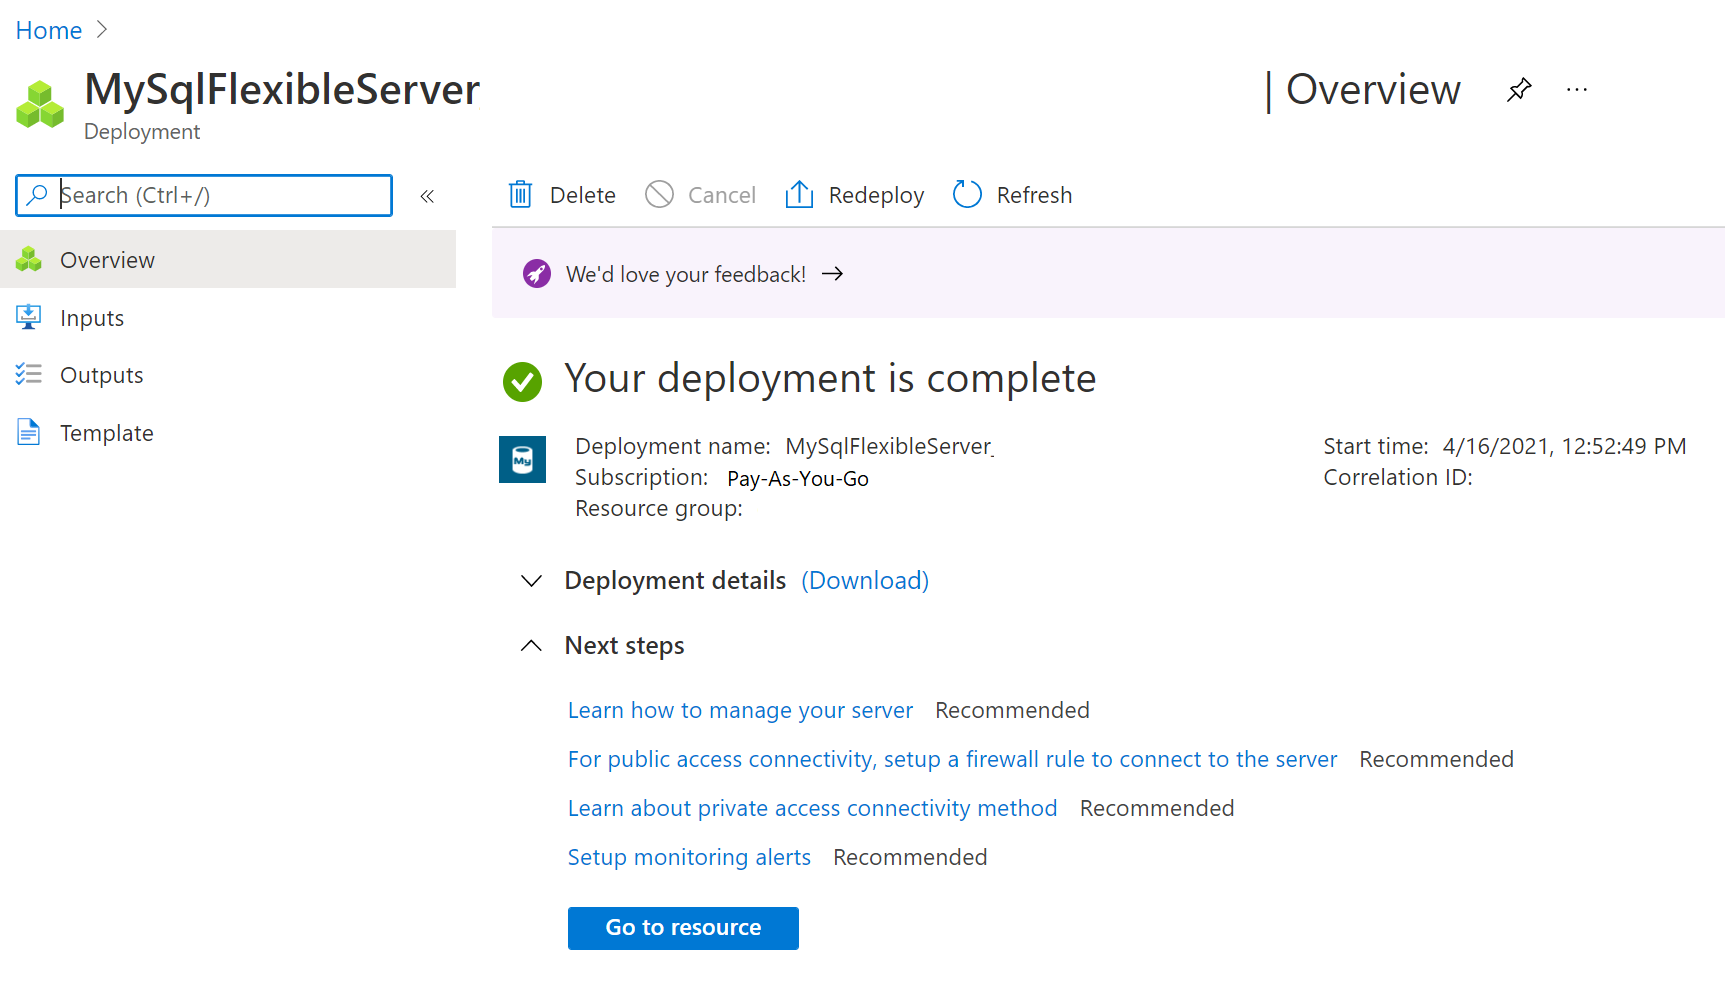
选择“转到资源”,查看打开的服务器的“概述”页面 。


创建 Azure Linux 虚拟机
由于服务器位于虚拟网络中,因此只能从与服务器位于同一虚拟网络中的其他 Azure 服务连接到服务器。 若要连接和管理服务器,请创建一个 Linux 虚拟机。 虚拟机必须在相同的区域和相同的订阅中创建 。 Linux 虚拟机可充当用于管理数据库服务器的 SSH 隧道。
转到创建服务器所在的资源组。 选择 添加 。
选择“Ubuntu Server 18.04 LTS”
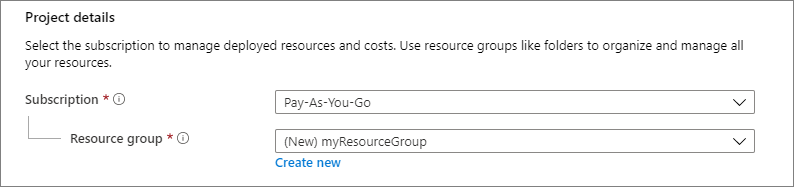
在“基本信息”标签页中的“项目详细信息”下,确保选择了正确的订阅,然后选择“新建资源组”。 对于名称,请键入 myResourceGroup。
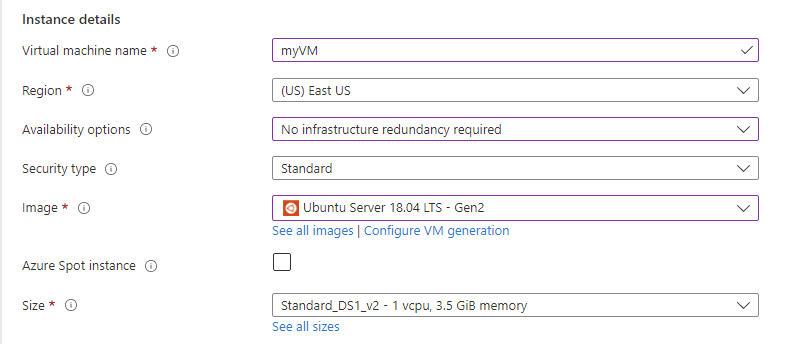
在“实例详细信息”下,为“虚拟机名称”键入“myVM”,选择与数据库服务器相同的“区域” 。
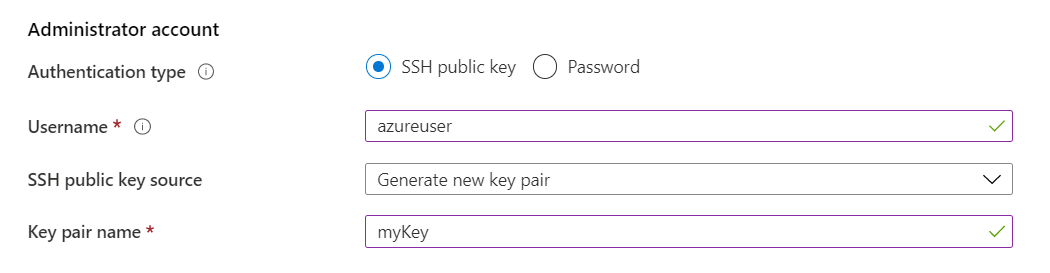
在“管理员帐户”下,选择“SSH 公钥” 。
在“用户名”处键入 azureuser。
对于“SSH 公钥源”,请保留默认的“生成新密钥对”,然后为“密钥对名称”键入 myKey 。
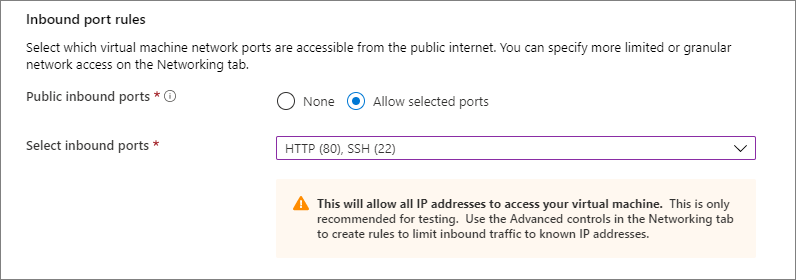
在“入站端口规则”“公共入站端口”下,选择“允许所选端口”,然后从下拉列表中选择“SSH (22)”和“HTTP (80)”。
选择“网络”页面以配置虚拟网络。 对于虚拟网络,请选择为 Azure Database for MySQL 灵活服务器实例创建的 vnetenvironment1。

选择“管理子网配置”,为服务器创建新子网。

为虚拟机添加新的子网。
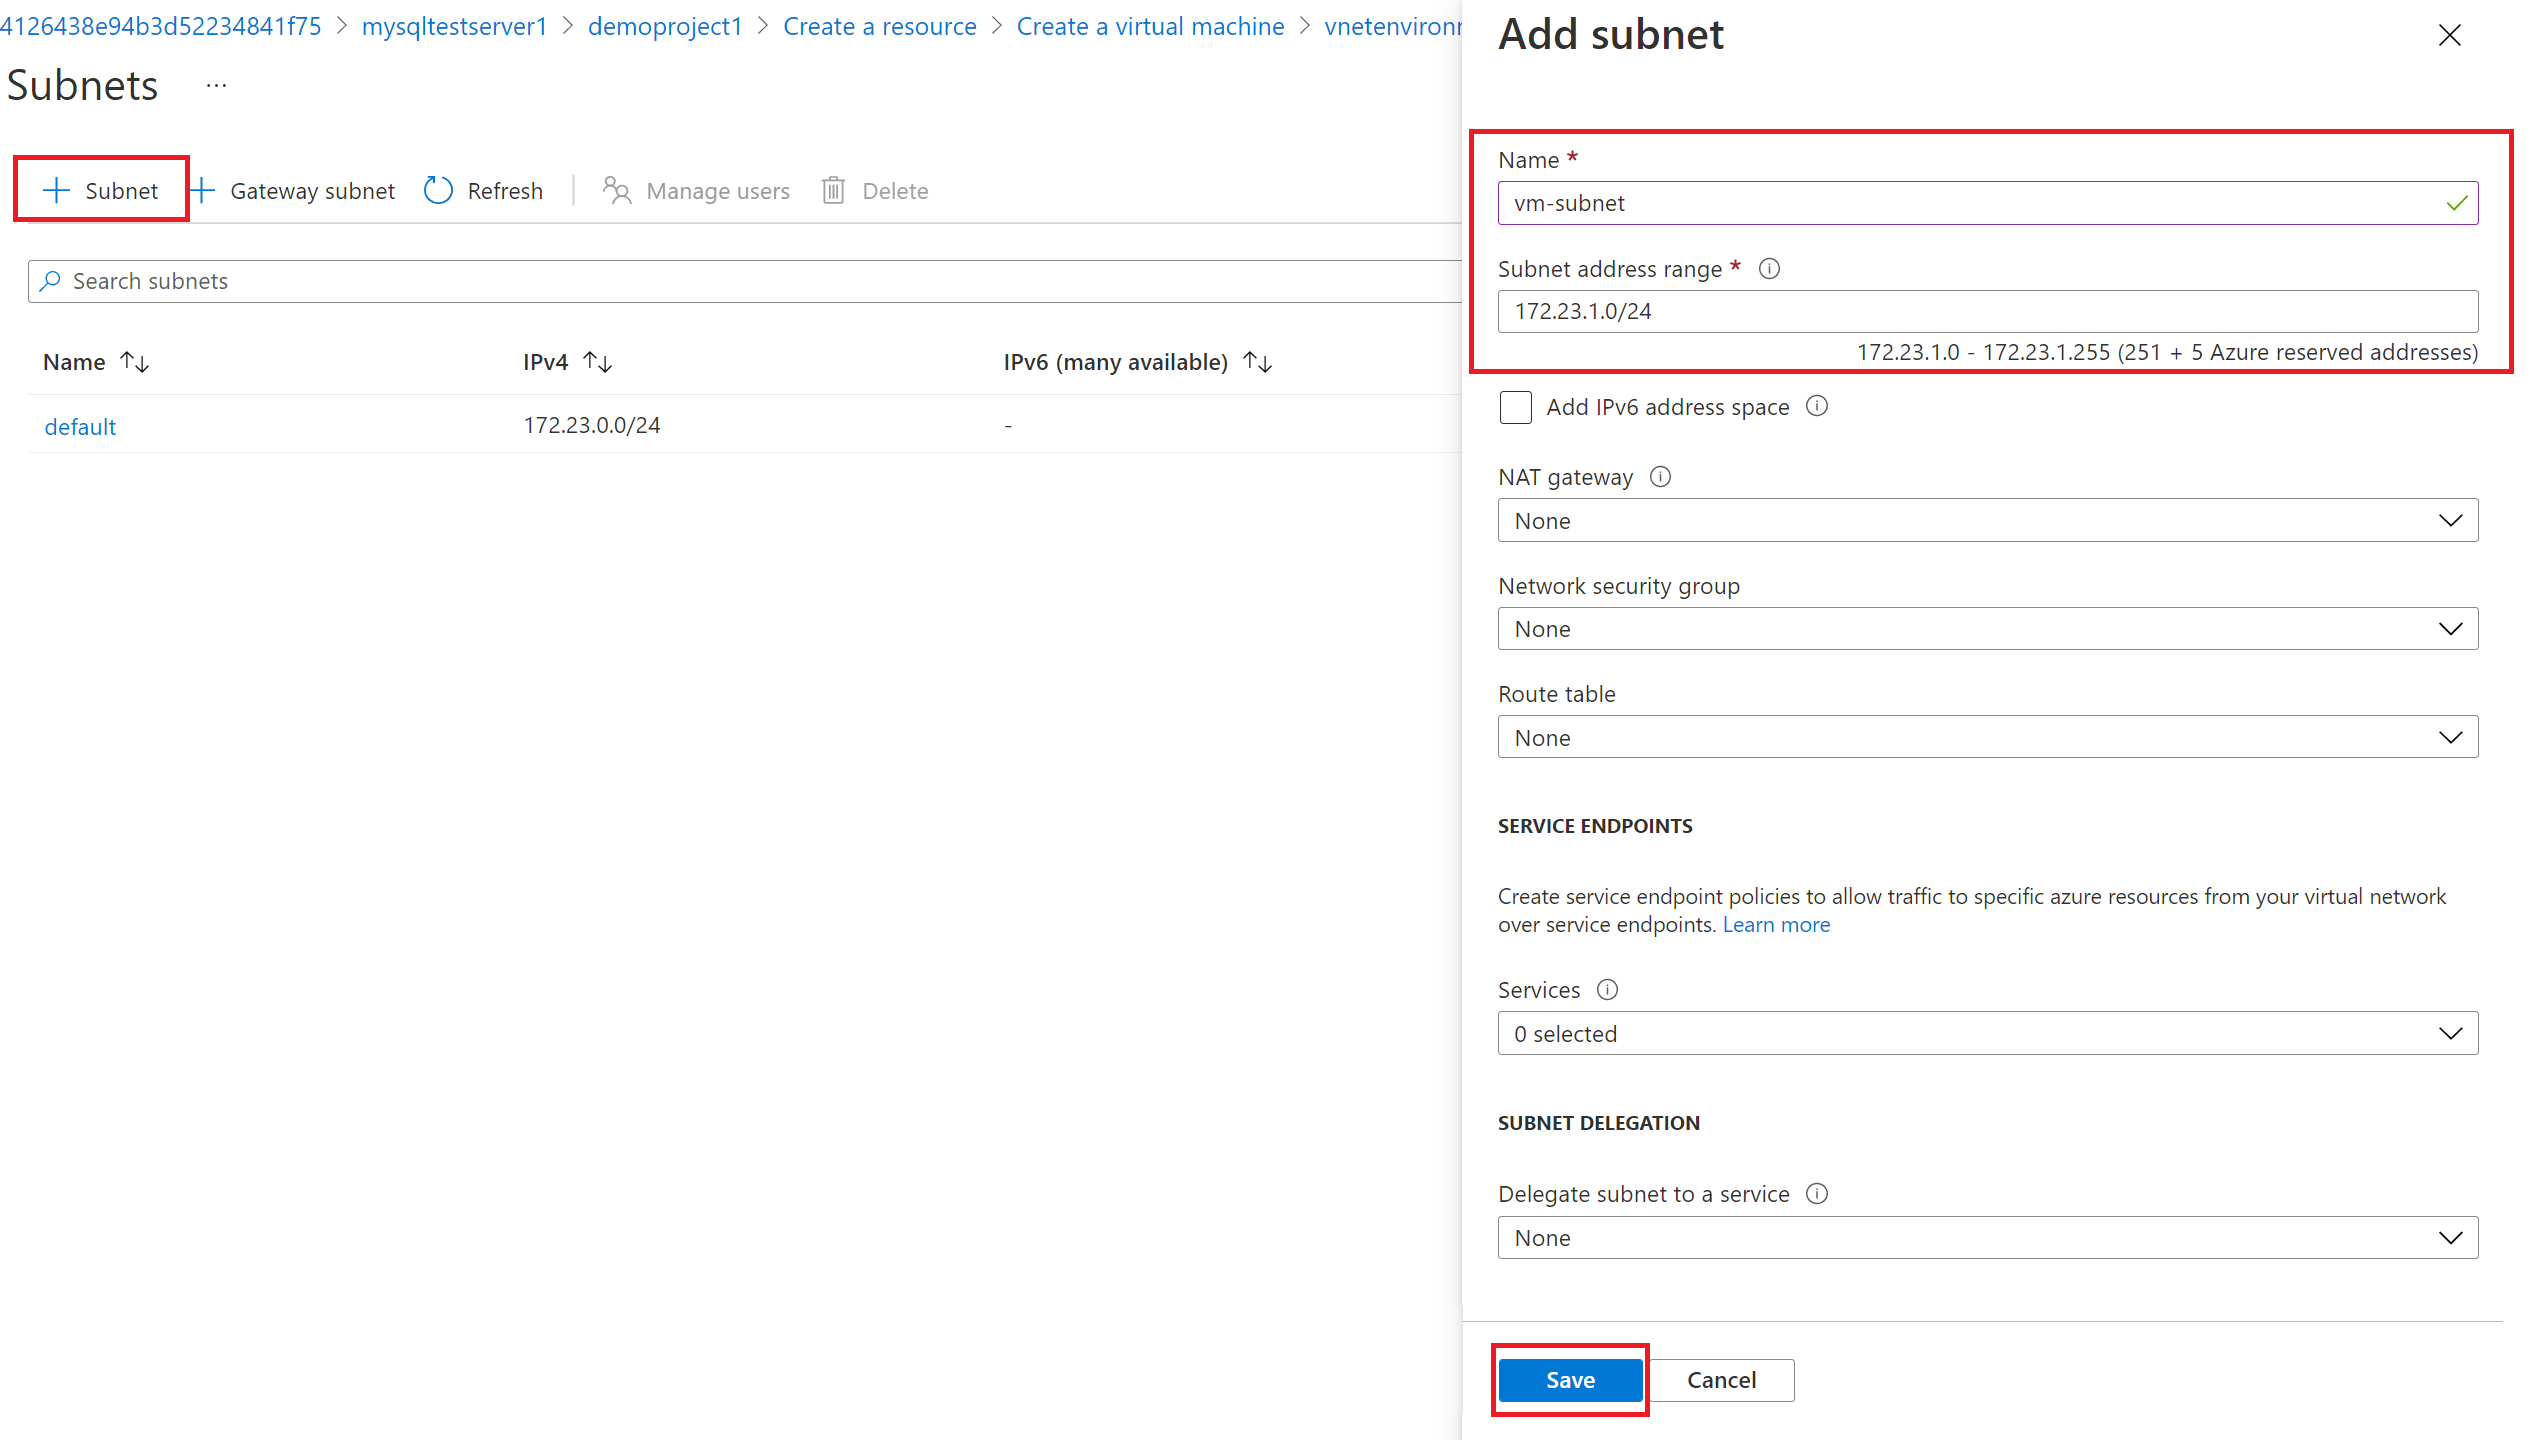
子网创建成功后,请关闭页面。

选择“查看 + 创建” 。
选择“创建”。 “生成新密钥对”窗口打开时,选择“下载私钥并创建资源” 。 下载的密钥文件名为 myKey.pem。
重要
请确保知道
.pem文件的下载位置,下一步需要用到该文件的路径。部署完成后,选择“转到资源”。
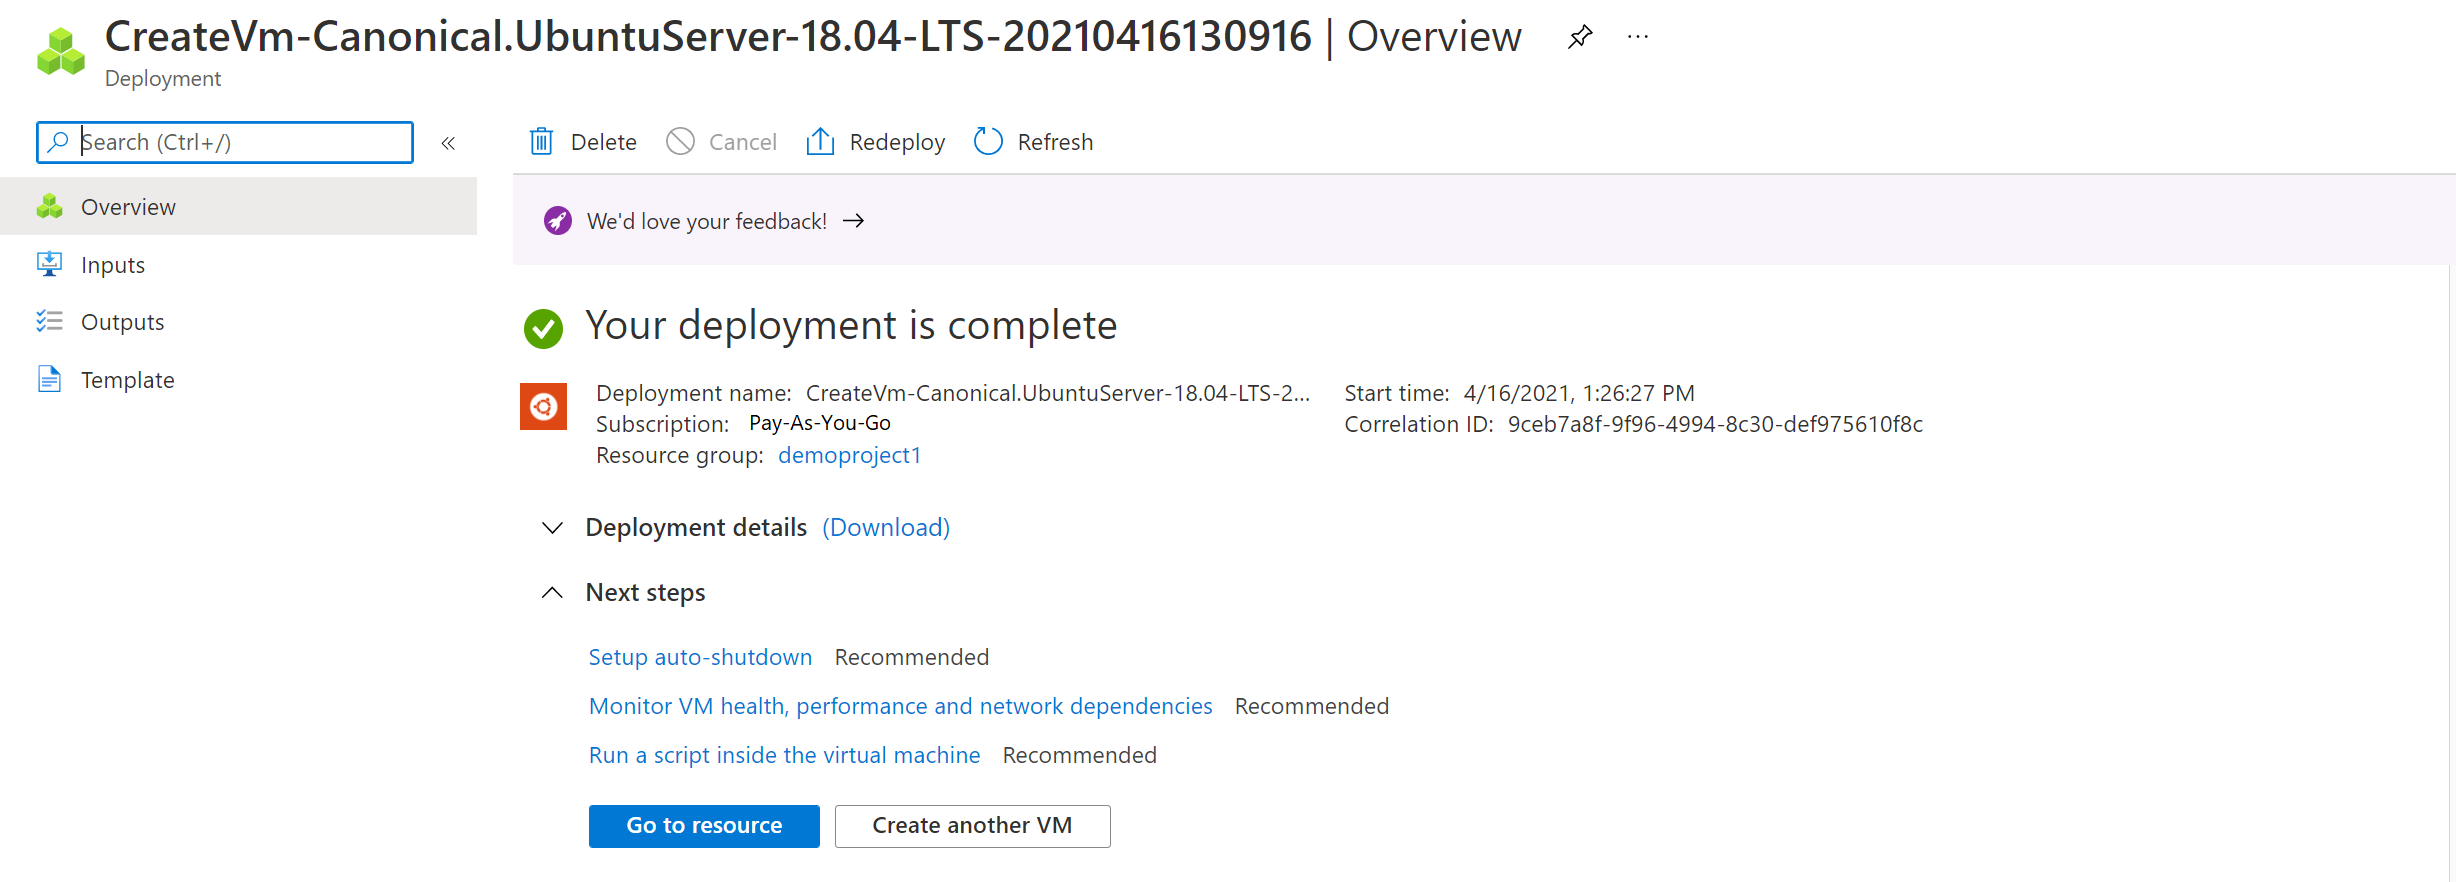
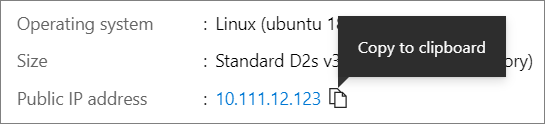
在新 VM 的页面上,选择公共 IP 地址并将其复制到剪贴板。


安装 MySQL 客户端工具
使用 Bash 或 PowerShell 创建与 VM 的 SSH 连接。 根据提示符,打开与虚拟机的 SSH 连接。 将 IP 地址替换为 VM 中的 IP 地址,并将 .pem 的路径替换为密钥文件的下载路径。
ssh -i .\Downloads\myKey1.pem azureuser@10.111.12.123
提示
下次在 Azure 中创建 VM 时,可以使用此次创建的 SSH 密钥。 下次创建 VM 时,为“SSH 公钥源”选择“使用存储在 Azure 中的密钥”。 你的计算机上已有私钥,因此无需下载任何内容。
需要安装 mysql-client 工具才能连接到服务器。
sudo apt-get update
sudo apt-get install mysql-client
由于通过 SSL 强制执行与数据库的连接,因此需要下载公共 SSL 证书。
wget --no-check-certificate https://dl.cacerts.digicert.com/DigiCertGlobalRootCA.crt.pem
从 Azure Linux 虚拟机连接到服务器
安装 mysql.exe 客户端工具后,即可从本地环境连接到服务器。
mysql -h mydemoserver.mysql.database.chinacloudapi.cn -u mydemouser -p --ssl-mode=REQUIRED --ssl-ca=DigiCertGlobalRootCA.crt.pem
清理资源
现在已在资源组中创建 Azure Database for MySQL 灵活服务器实例。 如果预计将来不需要这些资源,可以通过删除资源组或 Azure Database for MySQL 灵活服务器实例来删除这些资源。 若要删除资源组,请完成以下步骤:
- 在 Azure 门户中,搜索并选择“资源组”。
- 在资源组列表中,选择资源组的名称。
- 在资源组的“概述”页中,选择“删除资源组” 。
- 在确认对话框中,键入资源组的名称,然后选择“删除”。