Consul 是一个开源服务网格,可在 Kubernetes 群集中的微服务中提供一组关键功能。 这些功能包括服务发现、运行状况检查、服务分段和可观测性。 有关 Consul 的详细信息,请参阅官方 什么是 Consul? 文档。
本文介绍如何安装 Consul。 Consul 组件安装在 AKS 上的 Kubernetes 群集中。
注释
这些说明引用 Consul 版本 1.6.0,并至少使用 Helm 版本 2.14.2。
Consul 1.6.x 版本可以在 Kubernetes 版本 1.13+ 上运行。 可以在 GitHub - Consul 版本 找到其他 Consul 版本,以及在 Consul 发行说明 中查看每个版本的详细信息。
在这篇文章中,你将学会如何:
- 在 AKS 上安装 Consul 组件
- 验证 Consul 安装
- 从 AKS 卸载 Consul
在您开始之前
本文中详述的步骤假定你已创建 AKS 群集(Kubernetes 1.13 及更高版本,已启用 Kubernetes RBAC),并已与群集建立 kubectl 连接。 如果需要有关其中任何项的帮助,请参阅 AKS 快速入门。 确保群集在 Linux 节点池中至少有 3 个节点。
你需要 Helm 才能按照这些说明进行 Consul 的安装。 建议在群集中正确安装和配置最新的稳定版本。 如果需要有关安装 Helm 的帮助,请参阅 AKS Helm 安装指南。 还必须安排所有 Consul Pod 在 Linux 节点上运行。
本文将 Consul 安装指南分为几个离散步骤。 最终结果的结构与官方 Consul 安装 指南相同。
在 AKS 上安装 Consul 组件
首先下载 Consul Helm 图表的版本 v0.10.0 。 该图表的此版本包含 Consul 版本 1.6.0。
在 Linux、适用于 Linux 的 Windows 子系统或 MacOS 上的基于 bash 的 shell 中,使用 curl 下载 Consul Helm 图表版本,如下所示:
# Specify the Consul Helm chart version that will be leveraged throughout these instructions
CONSUL_HELM_VERSION=0.10.0

curl -sL "https://github.com/hashicorp/consul-helm/archive/v$CONSUL_HELM_VERSION.tar.gz" | tar xz
mv consul-helm-$CONSUL_HELM_VERSION consul-helm
在 Linux 或 MacOS 上的基于 bash 的 shell,或在 Windows Subsystem for Linux 中,使用 curl 下载 Consul Helm chart 版本,如下所示:
# Specify the Consul Helm chart version that will be leveraged throughout these instructions
CONSUL_HELM_VERSION=0.10.0

curl -sL "https://github.com/hashicorp/consul-helm/archive/v$CONSUL_HELM_VERSION.tar.gz" | tar xz
mv consul-helm-$CONSUL_HELM_VERSION consul-helm
在基于 PowerShell 的 Windows shell 中,用于 Invoke-WebRequest 下载 Consul Helm 图表版本,然后按 Expand-Archive 如下所示进行提取:
# Specify the Consul Helm chart version that will be leveraged throughout these instructions
$CONSUL_HELM_VERSION="0.10.0"

# Enforce TLS 1.2
[Net.ServicePointManager]::SecurityProtocol = "tls12"
$ProgressPreference = 'SilentlyContinue'; Invoke-WebRequest -URI "https://github.com/hashicorp/consul-helm/archive/v$CONSUL_HELM_VERSION.zip" -OutFile "consul-helm-$CONSUL_HELM_VERSION.zip"
Expand-Archive -Path "consul-helm-$CONSUL_HELM_VERSION.zip" -DestinationPath .
Move-Item -Path consul-helm-$CONSUL_HELM_VERSION -Destination consul-helm
使用 Helm 和下载的 consul-helm 图表将 Consul 组件安装到 consul AKS 群集中的命名空间中。
注释
安装选项
我们将使用以下选项作为安装的一部分:
-
connectInject.enabled=true- 允许将代理注入 Pods -
client.enabled=true- 使 Consul 客户端能够在每个节点上运行 -
client.grpc=true- 为 connectInject 启用 gRPC 侦听器 -
syncCatalog.enabled=true- 同步 Kubernetes 和 Consul 服务
节点选择器
Consul 当前必须安排在 Linux 节点上运行。 如果群集中有 Windows Server 节点,则必须确保 Consul Pod 仅计划在 Linux 节点上运行。 我们将使用节点选择器来确保 Pod 被调度到正确的节点。
helm install -f consul-helm/values.yaml --name consul --namespace consul ./consul-helm \
  --set connectInject.enabled=true --set connectInject.nodeSelector="beta.kubernetes.io/os: linux" \
  --set client.enabled=true --set client.grpc=true --set client.nodeSelector="beta.kubernetes.io/os: linux" \
  --set server.nodeSelector="beta.kubernetes.io/os: linux" \
  --set syncCatalog.enabled=true --set syncCatalog.nodeSelector="beta.kubernetes.io/os: linux"
helm install -f consul-helm/values.yaml --name consul --namespace consul ./consul-helm `
  --set connectInject.enabled=true --set connectInject.nodeSelector="beta.kubernetes.io/os: linux" `
  --set client.enabled=true --set client.grpc=true --set client.nodeSelector="beta.kubernetes.io/os: linux" `
  --set server.nodeSelector="beta.kubernetes.io/os: linux" `
  --set syncCatalog.enabled=true --set syncCatalog.nodeSelector="beta.kubernetes.io/os: linux"
Consul Helm 图表部署多个对象。 可以从上述命令的 helm install 输出中查看列表。 根据群集环境,Consul 组件的部署可能需要大约 3 分钟才能完成。
此时,已将 Consul 部署到 AKS 集群。 为了确保我们成功部署 Consul,让我们转到下一部分来验证 Consul 安装。
验证 Consul 安装
确认已成功创建资源。 使用 kubectl get svc 和 kubectl get pod 命令查询 consul 命名空间,其中 Consul 组件由 helm install 命令安装:
kubectl get svc --namespace consul --output wide
kubectl get pod --namespace consul --output wide
以下示例输出显示了应在 Linux 节点上运行的服务和 Pod:
NAME                                 TYPE           CLUSTER-IP    EXTERNAL-IP             PORT(S)                                                                   AGE     SELECTOR
consul                               ExternalName   <none>        consul.service.consul   <none>                                                                    38s     <none>
consul-consul-connect-injector-svc   ClusterIP      10.0.98.102   <none>                  443/TCP                                                                   3m26s   app=consul,component=connect-injector,release=consul
consul-consul-dns                    ClusterIP      10.0.46.194   <none>                  53/TCP,53/UDP                                                             3m26s   app=consul,hasDNS=true,release=consul
consul-consul-server                 ClusterIP      None          <none>                  8500/TCP,8301/TCP,8301/UDP,8302/TCP,8302/UDP,8300/TCP,8600/TCP,8600/UDP   3m26s   app=consul,component=server,release=consul
consul-consul-ui                     ClusterIP      10.0.50.188   <none>                  80/TCP                                                                    3m26s   app=consul,component=server,release=consul

NAME                                                              READY   STATUS    RESTARTS   AGE    IP            NODE                            NOMINATED NODE   READINESS GATES
consul-consul-connect-injector-webhook-deployment-99f74fdbcr5zj   1/1     Running   0          3m9s   10.240.0.68   aks-linux-92468653-vmss000002   <none>           <none>
consul-consul-jbksc                                               1/1     Running   0          3m9s   10.240.0.44   aks-linux-92468653-vmss000001   <none>           <none>
consul-consul-jkwtq                                               1/1     Running   0          3m9s   10.240.0.70   aks-linux-92468653-vmss000002   <none>           <none>
consul-consul-server-0                                            1/1     Running   0          3m9s   10.240.0.91   aks-linux-92468653-vmss000002   <none>           <none>
consul-consul-server-1                                            1/1     Running   0          3m9s   10.240.0.38   aks-linux-92468653-vmss000001   <none>           <none>
consul-consul-server-2                                            1/1     Running   0          3m9s   10.240.0.10   aks-linux-92468653-vmss000000   <none>           <none>
consul-consul-sync-catalog-d846b79c-8ssr8                         1/1     Running   2          3m9s   10.240.0.94   aks-linux-92468653-vmss000002   <none>           <none>
consul-consul-tz2t5                                               1/1     Running   0          3m9s   10.240.0.12   aks-linux-92468653-vmss000000   <none>           <none>
所有 Pod 都应显示状态 Running。 如果 Pod 尚未处于这些状态,请等待一两分钟,直到它们具备这些状态。 如果任何 Pod 报告问题,请使用 kubectl 描述 Pod 命令查看其输出和状态。
访问 Consul UI
Consul UI 安装在上述设置中,并为 Consul 提供基于 UI 的配置。 Consul 的 UI 不会通过外部 IP 地址公开。 若要访问 Consul 用户界面,请使用 kubectl 端口转发 命令。 此命令在客户端计算机与 AKS 群集中的相关 Pod 之间建立安全连接。
kubectl port-forward -n consul svc/consul-consul-ui 8080:80
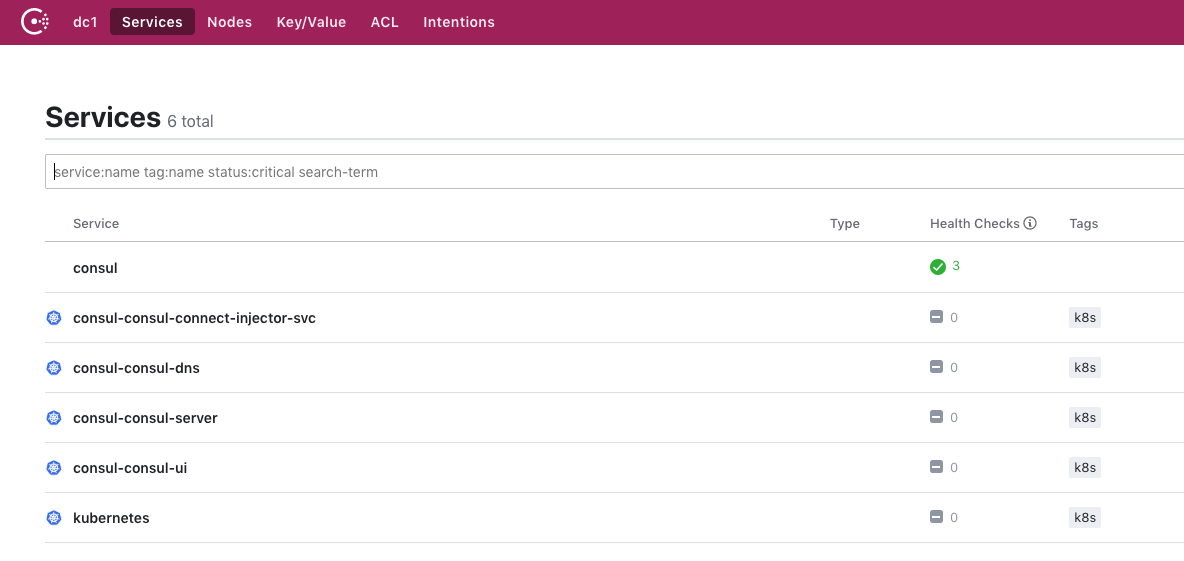
现在可以打开浏览器并输入 http://localhost:8080/ui 来打开 Consul UI。 打开 UI 时,应会看到以下内容:
从 AKS 卸载 Consul
警告
从正在运行的系统中删除 Consul 可能会导致服务之间的流量相关问题。 在继续之前,请确保您已为系统在没有 Consul 的情况下仍能正常运行做好准备。
删除 Consul 组件和命名空间
若要从 AKS 群集中删除 Consul,请使用以下命令。 命令 helm delete 将删除 consul 图表,命令 kubectl delete namespace 将删除 consul 命名空间。
helm delete --purge consul
kubectl delete namespace consul
后续步骤
若要了解 Consul 的更多安装和配置选项,请参阅以下官方 Consul 文章:
您还可以通过以下方式遵循其他场景: