本快速入门引导你完成使用 Visual Studio 创建 Bicep 文件的步骤。 你将创建一个存储帐户和一个虚拟网络。 你还将了解 Bicep 扩展如何通过提供类型安全性、语法验证和自动完成来简化开发。
Visual Studio Code 也支持类似的创作体验。 请参阅快速入门:使用 Visual Studio Code 创建 Bicep 文件。
先决条件
- Azure 订阅。 如果没有 Azure 订阅,可在开始前创建一个试用帐户。
- Visual Studio 版本 17.3.0 预览版 3 或更高版本。 请参阅 Visual Studio Preview。
- Visual Studio Bicep 扩展。 请参阅 Visual Studio Marketplace。
- Bicep 文件部署需要最新的 Azure CLI 或最新的 Azure PowerShell 模块。
添加资源代码片段
启动 Visual Studio 并创建名为 main.bicep 的新文件。
使用 Bicep 扩展的 Visual Studio 通过提供预定义的代码片段简化了开发。 在本快速入门中,你将添加用于创建虚拟网络的代码片段。
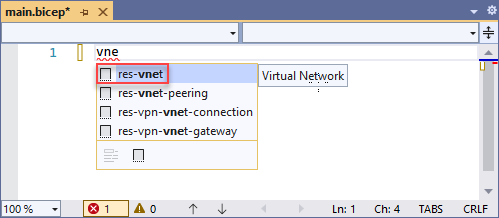
在 main.bicep 中,键入 vnet。 从列表中选择“res-vnet”,然后按 [TAB] 或 [ENTER]。
提示
如果未在 Visual Studio 中看到这些 Intellisense 选项,请确保已按照先决条件中的规定安装了 Bicep 扩展。 如果已安装该扩展,请在打开 Bicep 文件后给 Bicep 语言服务一些时间来启动。 它通常很快启动,但在启动之前,你不会有 Intellisense 选项。
Bicep 文件现在包含以下代码:
resource virtualNetwork 'Microsoft.Network/virtualNetworks@2025-01-01' = {
  name: 'name'
  location: location
  properties: {
    addressSpace: {
      addressPrefixes: [
        '10.0.0.0/16'
      ]
    }
    subnets: [
      {
        name: 'Subnet-1'
        properties: {
          addressPrefix: '10.0.0.0/24'
        }
      }
      {
        name: 'Subnet-2'
        properties: {
          addressPrefix: '10.0.1.0/24'
        }
      }
    ]
  }
}
此代码片段包含用于定义虚拟网络的所有值。 不过,你可以根据自己的需求修改此代码。 例如,name 并不是很适合用作虚拟网络的名称。 将 name 属性更改为 exampleVnet。
name: 'exampleVnet'
请注意,location 具有红色的大括号下划线。 这表明有问题。 将光标悬停在 location 上。 错误消息为:当前上下文中不存在名称“location”。我们将在下一部分中创建位置参数。
添加参数
现在,我们为存储帐户名称和位置添加两个参数。 在文件顶部,添加:
param storageName
在 storageName 后面添加空格时,可以发现 Intellisense 提供了该参数可用的数据类型。 选择“string”。
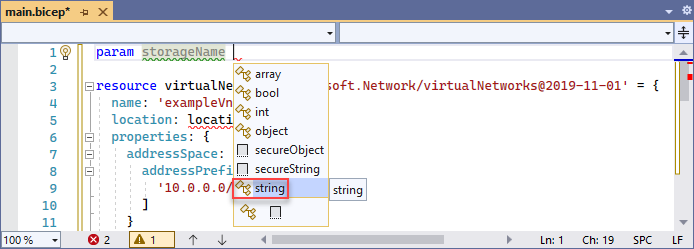
你的参数如下:
param storageName string
此参数可以正常工作,但存储帐户对名称的长度施加了限制。 该名称必须至少有三个字符,且不超过 24 个字符。 可以通过为参数添加修饰器来指定这些要求。
在参数上方添加一行,然后键入 @。 你将看到可用的修饰器。 可以看到,minLength 和 maxLength 都有修饰器 。
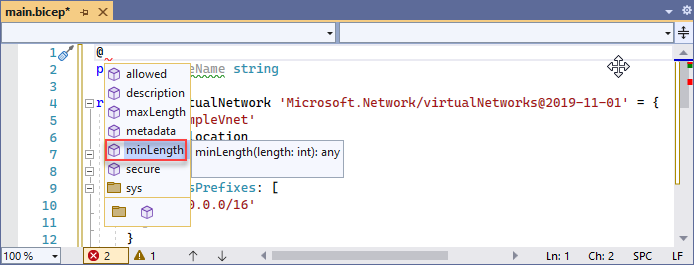
如下所示添加这两个修饰器并指定字符限制:
@minLength(3)
@maxLength(24)
param storageName string
还可以添加参数的说明。 请包含相应的信息,帮助部署 Bicep 文件的人员了解要提供哪个值。
@minLength(3)
@maxLength(24)
@description('Provide a name for the storage account. Use only lower case letters and numbers. The name must be unique across Azure.')
param storageName string
存储帐户名称参数可供使用。
添加另一个位置参数:
param location string = resourceGroup().location
添加资源
我们使用 Intellisense 来设置值,而不是使用代码片段来定义存储帐户。 Intellisense 使此步骤比手动键入值更容易。
若要定义资源,请使用关键字 resource。 在虚拟网络下方,键入 resource exampleStorage:
resource exampleStorage
exampleStorage 是要部署的资源的符号名称。 可以使用此名称引用 Bicep 文件其他部分中的资源。
在该符号名称的后面添加空格时,会显示资源类型的列表。 不断键入 storage,直到可以从可用选项中选择它。
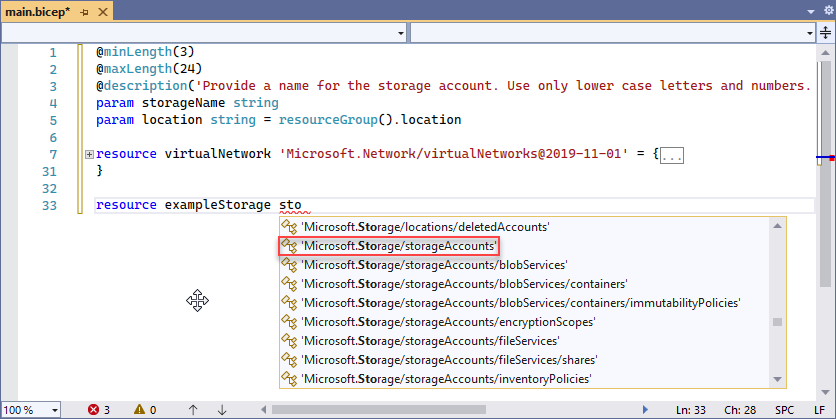
选择“Microsoft.Storage/storageAccounts”后,你将看到可用的 API 版本。 选择“2021-09-01”或最新的 API 版本。 建议使用最新 API 版本。
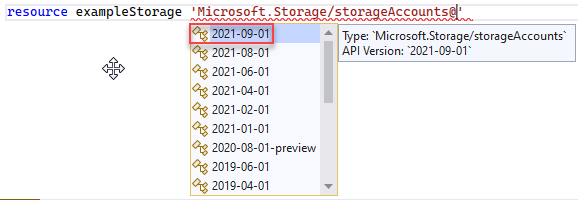
在资源类型的单引号后面,添加 = 和一个空格。 你将看到用于为资源添加属性的选项。 选择“required-properties”。

此选项用于添加在部署时所需的所有资源类型属性。 选择此选项后,存储帐户具有以下属性:
resource exampleStorage 'Microsoft.Storage/storageAccounts@2025-06-01' = {
	name: 1
	location: 2
	sku: {
		name: 3
	}
	kind: 4
}
代码中有四个占位符。 使用 [TAB] 进行浏览并输入值。 同样,Intellisense 可为你提供帮助。 将 name 设置为 storageName,这是包含存储帐户名称的参数。 对于 location,请将其设置为 location。 添加 SKU 名称和类型时,Intellisense 会显示有效选项。
完成后,你的 Bicep 文件将如下所示:
@minLength(3)
@maxLength(24)
@description('Provide a name for the storage account. Use only lower case letters and numbers. The name must be unique across Azure.')
param storageName string
param location string = resourceGroup().location

resource virtualNetwork 'Microsoft.Network/virtualNetworks@2025-01-01' = {
  name: storageName
  location: location
  properties: {
    addressSpace: {
      addressPrefixes: [
        '10.0.0.0/16'
      ]
    }
    subnets: [
      {
        name: 'Subnet-1'
        properties: {
          addressPrefix: '10.0.0.0/24'
        }
      }
      {
        name: 'Subnet-2'
        properties: {
          addressPrefix: '10.0.1.0/24'
        }
      }
    ]
  }
}

resource exampleStorage 'Microsoft.Storage/storageAccounts@2025-06-01' = {
  name: storageName
  location: location
  sku: {
    name: 'Standard_LRS'
  }
  kind: 'StorageV2'
}
有关 Bicep 语法的详细信息,请参阅 Bicep 结构。
部署 Bicep 文件
尚无法通过 Visual Studio 完成 Bicep 文件部署。 可以使用 Azure CLI 或 Azure PowerShell 部署 Bicep 文件:
az group create --name exampleRG --location chinanorth

az deployment group create --resource-group exampleRG --template-file main.bicep --parameters storageName=uniquename
部署完成后,应会看到一条指出部署成功的消息。
清理资源
如果不再需要本文中创建的 Azure 资源,请使用 Azure CLI 或 Azure PowerShell 模块删除快速入门资源组。
az group delete --name exampleRG