本文介绍如何与 Azure Stack Hub 建立 VPN 连接。 VPN 网关是一种虚拟网络网关,可在 Azure Stack Hub 中的虚拟网络与远程 VPN 网关之间发送加密流量。 以下过程在资源组中部署一个具有 FortiGate NVA(网络虚拟设备)的 VNET。 此外,还提供在 FortiGate NVA 上设置 IPSec VPN 的步骤。
先决条件
有权访问可提供足够容量用于部署此解决方案所需的计算、网络和资源的 Azure Stack Hub 集成系统。
注意
由于 ASDK 的网络限制,本文中的说明不适用于 Azure Stack 开发工具包 (ASDK)。 有关详细信息,请参阅 ASDK 的要求和注意事项。
有权访问本地网络中的托管 Azure Stack Hub 集成系统的 VPN 设备。 该设备需要根据部署参数中所述的参数创建 IPSec 隧道。
Azure Stack Hub 市场中已提供网络虚拟设备 (NVA) 解决方案。 NVA 控制从外围网络到其他网络或子网的网络流量。 此过程使用 Fortinet FortiGate 下一代防火墙单一 VM 解决方案。
注意
如果 Azure Stack Hub 市场中没有适用于 Azure BYOL 的 Fortinet FortiGate-VM 和 FortiGate NGFW - 单一 VM 部署 (BYOL) ,请联系云操作员。
若要激活 FortiGate NVA,至少需要一个可用的 FortiGate 许可证文件。 有关如何获取这些许可证的信息,请参阅 Fortinet 文档库文章注册和下载许可证。
此过程使用单一 FortiGate-VM 部署。 其中提供了在本地网络中将 FortiGate NVA 连接到 Azure Stack Hub VNET 的步骤。
有关如何在主动-被动 (HA) 设置中部署 FortiGate 解决方案的详细信息,请参阅 Fortinet 文档库文章 Azure 上的 FortiGate-VM 的 HA 中的详细信息。
部署参数
下表汇总了在这些部署中使用的参数供用户参考。
| 参数 | Value |
|---|---|
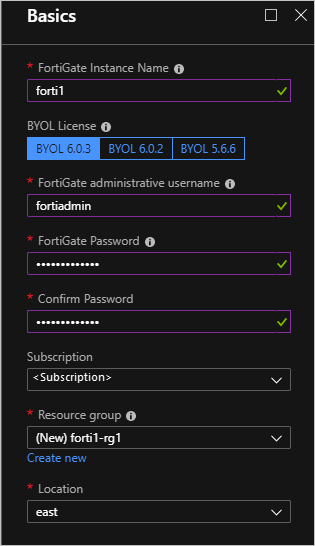
| FortiGate 实例名称 | forti1 |
| BYOL 许可证/版本 | 6.0.3 |
| FortiGate 管理用户名 | fortiadmin |
| 资源组名称 | forti1-rg1 |
| 虚拟网络名称 | forti1vnet1 |
| VNET 地址空间 | 172.16.0.0/16* |
| 公共 VNET 子网名称 | forti1-PublicFacingSubnet |
| 公共 VNET 地址前缀 | 172.16.0.0/24* |
| 内部 VNET 子网名称 | forti1-InsideSubnet |
| 内部 VNET 子网前缀 | 172.16.1.0/24* |
| FortiGate NVA 的 VM 大小 | 标准 F2s_v2 |
| 公共 IP 地址名称 | forti1-publicip1 |
| 公共 IP 地址类型 | 静态 |
注意
* 如果 172.16.0.0/16 与本地网络或 Azure Stack Hub VIP 池重叠,请选择不同的地址空间和子网前缀。
部署 FortiGate NGFW 市场项
打开 Azure Stack Hub 用户门户。
选择“创建资源”,然后搜索
FortiGate。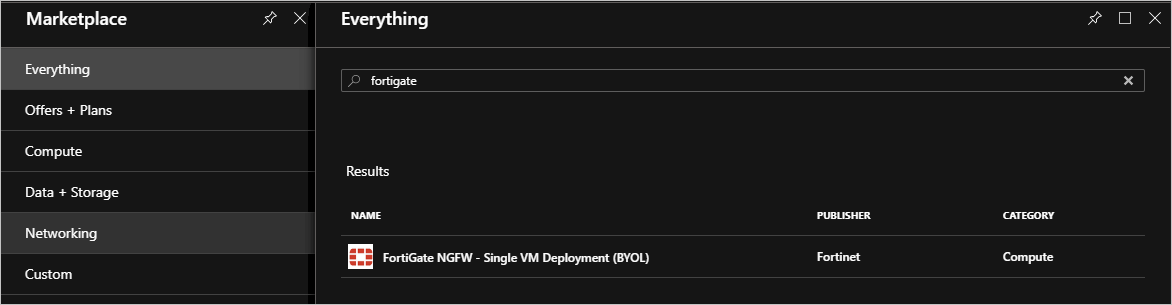
依次选择“FortiGate NGFW”、“创建”。
使用部署参数表格中的参数填写“基本信息”。
选择“确定”。
使用部署参数表格提供“虚拟网络”、“子网”和“VM 大小”详细信息。
警告
如果本地网络与 IP 范围
172.16.0.0/16重叠,则必须选择并设置不同的网络范围和子网。 若要使用与部署参数表格中不同的名称和范围,请使用不与本地网络冲突的参数。 在 VNET 中设置 VNET IP 范围和子网范围时,请多加留意。 范围不应与本地网络中存在的 IP 范围重叠。选择“确定” 。
为 FortiGate NVA 配置公共 IP:
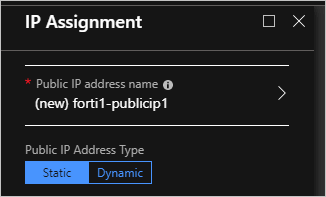
选择“确定”。 再选择“确定”。
选择“创建” 。
完成部署大约需要 10 分钟。
为 VNET 配置路由 (UDR)
打开 Azure Stack Hub 用户门户。
选择资源组。 在筛选器中键入
forti1-rg1,然后双击“forti1-rg1”资源组。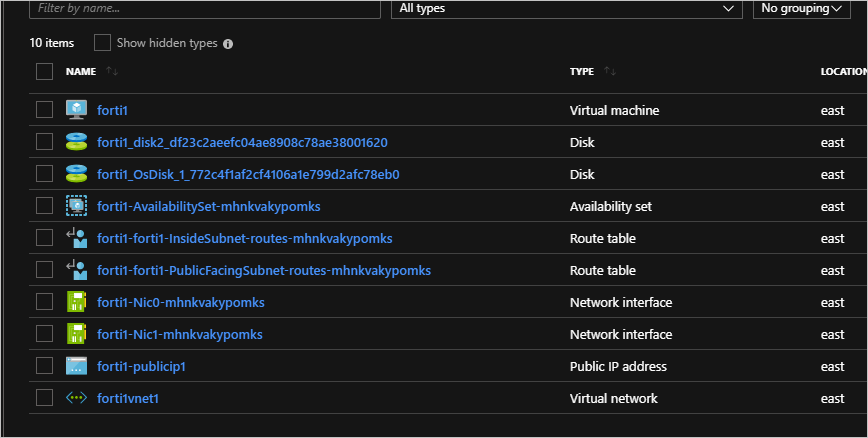
选择“forti1-forti1-InsideSubnet-routes-xxxx”资源。
在“设置”下选择“路由”。
删除“to-Internet”路由。

请选择“是”。
选择“添加”以添加新路由。
将路由命名为
to-onprem。输入 IP 网络范围,用于定义 VPN 所要连接到的本地网络的网络范围。
对于“下一跃点类型”,请选择“虚拟设备”;选择
172.16.1.4。 如果你的 IP 范围与此不同,请使用自己的 IP 范围。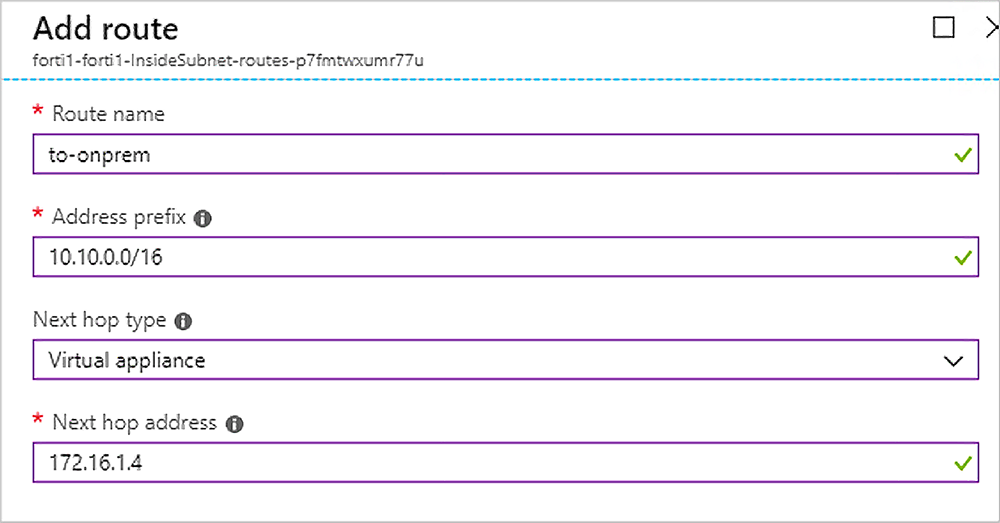
选择“保存”。
激活 FortiGate NVA
激活 FortiGate NVA,并在每个 NVA 上设置 IPSec VPN 连接。
若要激活每个 FortiGate NVA,需要 Fortinet 提供的有效许可证文件。 在激活每个 NVA 之前,NVA 无法正常运行。 有关如何获取许可证文件和 NVA 激活步骤的详细信息,请参阅 Fortinet 文档库文章注册和下载许可证。
激活 NVA 之后,在 NVA 上创建 IPSec VPN 隧道。
打开 Azure Stack Hub 用户门户。
选择资源组。 在筛选器中输入
forti1,然后双击“forti1”资源组。在资源组边栏选项卡上的资源类型列表中,双击“forti1”虚拟机。
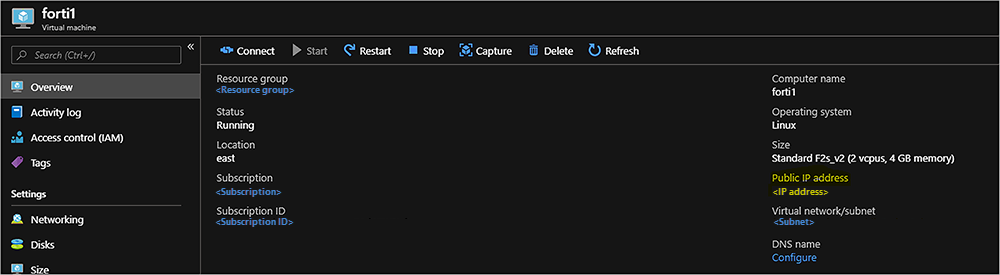
复制分配的 IP 地址,打开浏览器,然后将该 IP 地址粘贴到地址栏中。 站点可能会触发一条警告,指出安全证书不受信任。 请继续操作。
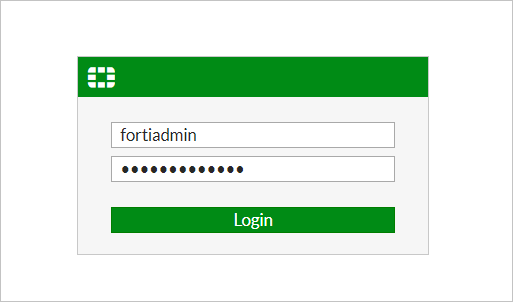
输入在部署期间提供的 FortiGate 管理用户名和密码。
选择“系统”>“固件”。
选中显示最新固件的框,例如
FortiOS v6.2.0 build0866。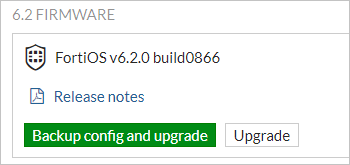
选择“备份配置并升级”>“继续”。
NVA 会将其固件更新到最新内部版本,然后重新启动。 此过程大约需要五分钟时间。 重新登录到 FortiGate Web 控制台。
单击“VPN”>“IPSec 向导”。
在“VPN 创建向导”中输入 VPN 的名称,例如
conn1。选择“此站点位于 NAT 后”。
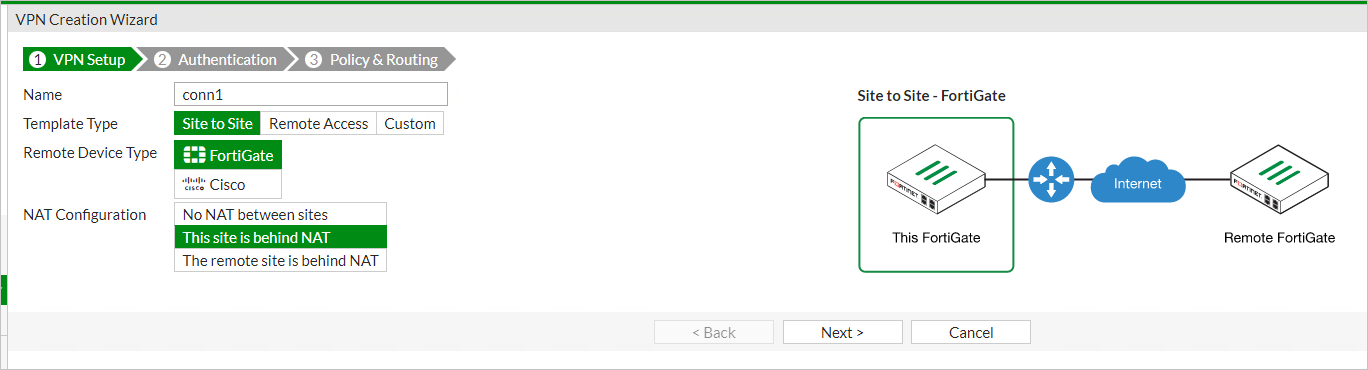
选择下一步。
输入要连接到的本地 VPN 设备的远程 IP 地址。
选择“port1”作为“传出接口”。
选择“预共享密钥”,输入(并记下)一个预共享密钥。
注意
稍后需要使用此密钥来设置本地 VPN 设备上的连接,即,密钥必须完全匹配。
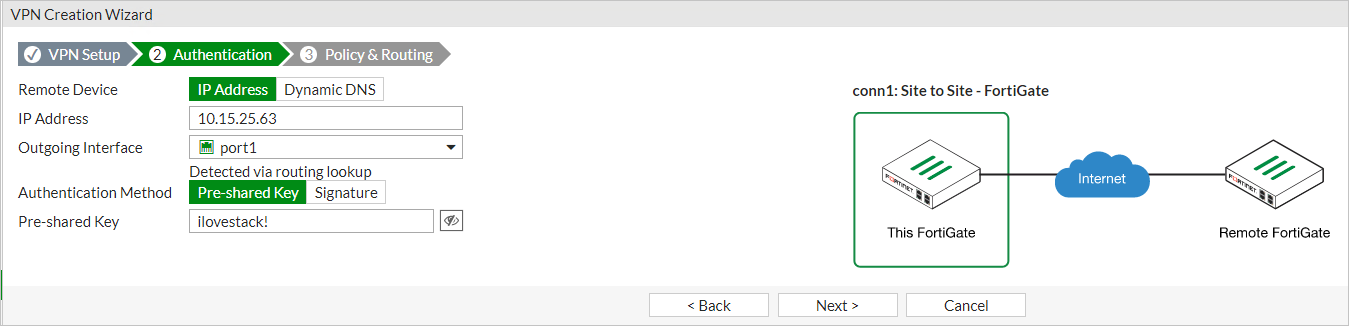
选择下一步。
对于“本地接口”,请选择“port2”。
输入本地子网范围:
- forti1:172.16.0.0/16
- forti2:172.17.0.0/16
如果你的 IP 范围与此不同,请使用自己的 IP 范围。
输入代表本地网络的相应远程子网,你将通过本地 VPN 设备连接到此网络。
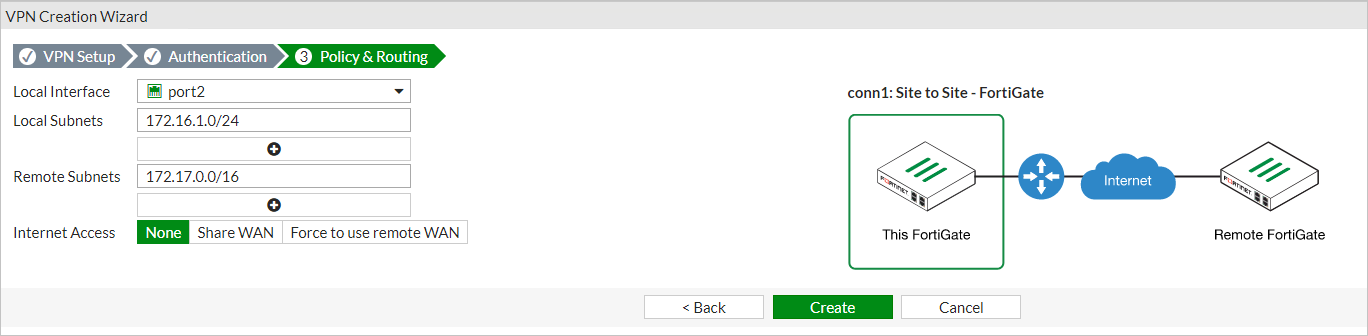
选择“创建”
选择“网络”>“接口”。
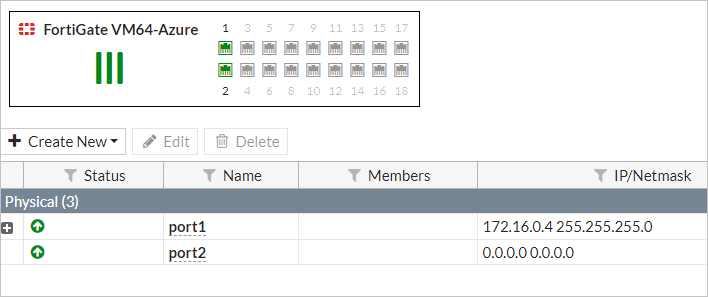
双击“port2”。
在“角色”列表中选择“LAN”,选择“DHCP”作为寻址模式。
选择“确定” 。
配置本地 VPN
必须设置本地 VPN 设备以创建 IPSec VPN 隧道。 下表提供了在设置本地 VPN 设备时所需的参数。 有关如何配置本地 VPN 设备的信息,请参阅设备的文档。
| 参数 | 值 |
|---|---|
| 远程网关 IP | 分配给 forti1 的公共 IP 地址 - 请参阅激活 FortiGate NVA。 |
| 远程 IP 网络 | 172.16.0.0/16(如果使用这些说明中为 VNET 提供的 IP 范围)。 |
| 身份验证方法 = 预共享密钥 (PSK) | 来自步骤 16。 |
| SDK 版本 | 1 |
| IKE 模式 | 主要(ID 保护) |
| 阶段 1 提议算法 | AES128-SHA256、AES256-SHA256、AES128-SHA1、AES256-SHA1 |
| Diffie-Hellman 组 | 14、5 |
创建 VPN 隧道
正确配置本地 VPN 设备后,可以建立 VPN 隧道。
在 FortiGate NVA 中:
在 forti1 FortiGate Web 控制台上,转到“监视”>“IPsec 监视器”。

突出显示“conn1”,选择“启动”>“所有的阶段 2 选择器”。

测试并验证连接
可以通过本地 VPN 设备在 VNET 网络与本地网络之间进行路由。
若要验证连接:
在 Azure Stack Hub VNET 和本地网络上的系统中创建 VM。 可根据以下文章中的说明创建 VM:快速入门:使用 Azure Stack Hub 门户创建 Windows 服务器 VM。
创建 Azure Stack Hub VM 和准备本地系统时,请检查:
Azure Stack Hub VM 放置在 VNET 的 InsideSubnet 上。
本地系统放置在 IPSec 配置中定义的 IP 范围内的本地网络上。 此外,请确保本地 VPN 设备的本地接口 IP 地址(例如
172.16.0.0/16)已提供给本地系统,作为可访问 Azure Stack Hub VNET 网络的路由。创建时,请不要将任何 NSG 应用到 Azure Stack Hub VM。 如果从门户创建 VM,可能需要删除默认添加的 NSG。
确保本地系统 OS 和 Azure Stack Hub VM OS 中没有任何 OS 防火墙规则禁止用于测试连接的通信。 出于测试目的,建议在两个系统的操作系统中完全禁用防火墙。
后续步骤
Azure Stack Hub 网络的差异和注意事项
使用 Fortinet FortiGate 在 Azure Stack Hub 中提供网络解决方案