使用 Azure 市场中的“Service Fabric 群集”项在 Azure Stack Hub 中部署受保护的 Service Fabric 群集。
有关使用 Service Fabric 的详细信息,请参阅 Azure 文档中的 Azure Service Fabric 概述和 Service Fabric 群集安全方案。
Azure Stack Hub 中的 Service Fabric 群集不使用资源提供程序 Microsoft.ServiceFabric。 相反,在 Azure Stack Hub 中,Service Fabric 群集是一个虚拟机规模集,具有使用 Desired State Configuration (DSC) 的预安装软件。
先决条件
若要部署 Service Fabric 群集,必须做好以下准备:
群集证书
这是在部署 Service Fabric 时添加到 Key Vault 的 X.509 服务器证书。此证书中的 CN 必须与创建的 Service Fabric 群集的完全限定域名 (FQDN) 匹配。
证书格式必须是 PFX,因为需要公钥和私钥。 请参阅创建此服务器端证书所要满足的要求。
注意
可以使用自签名的证书取代 X.509 服务器证书进行测试。 自签名的证书不需要与群集的 FQDN 匹配。
管理员客户端证书
这是客户端用于在 Service Fabric 群集中进行身份验证的证书,可以是自签名的证书。 请参阅创建此客户端证书所要满足的要求。必须在 Azure Stack Hub 市场中提供以下各项:
- Windows Server 2016 - 模板使用 Windows Server 2016 映像来创建群集。
- 自定义脚本扩展 - Microsoft 提供的虚拟机扩展。
- PowerShell Desired Stage Configuration - Microsoft 提供的虚拟机扩展。
向 Key Vault 添加机密
若要部署 Service Fabric 群集,必须指定正确的 Key Vault 机密标识符,或 Service Fabric 群集的 URL。 Azure 资源管理器模板接受一个 Key Vault 作为输入。 然后,该模板在安装 Service Fabric 群集时检索群集证书。
重要
必须使用 PowerShell 在 Key Vault 中添加一个要用于 Service Fabric 的机密。 不要使用门户。
使用以下脚本创建 Key Vault 并在其中添加群集证书。 (请参阅先决条件。)在运行该脚本之前,请查看示例脚本并更新指示的参数,使之与环境匹配。 此脚本还会输出需要向 Azure 资源管理器模板提供的值。
提示
要成功运行该脚本,必须有某个公共产品/服务包含计算、网络、存储和 Key Vault 的服务。
   function Get-ThumbprintFromPfx($PfxFilePath, $Password)
      {
         return New-Object System.Security.Cryptography.X509Certificates.X509Certificate2($PfxFilePath, $Password)
      }

   function Publish-SecretToKeyVault ($PfxFilePath, $Password, $KeyVaultName)
      {
         $keyVaultSecretName = "ClusterCertificate"
         $certContentInBytes = [io.file]::ReadAllBytes($PfxFilePath)
         $pfxAsBase64EncodedString = [System.Convert]::ToBase64String($certContentInBytes)

         $jsonObject = ConvertTo-Json -Depth 10 ([pscustomobject]@{
               data     = $pfxAsBase64EncodedString
               dataType = 'pfx'
               password = $Password
         })

         $jsonObjectBytes = [System.Text.Encoding]::UTF8.GetBytes($jsonObject)
         $jsonEncoded = [System.Convert]::ToBase64String($jsonObjectBytes)
         $secret = ConvertTo-SecureString -String $jsonEncoded -AsPlainText -Force
         $keyVaultSecret = Set-AzureKeyVaultSecret -VaultName $KeyVaultName -Name $keyVaultSecretName -SecretValue $secret

         $pfxCertObject = Get-ThumbprintFromPfx -PfxFilePath $PfxFilePath -Password $Password

         Write-Host "KeyVault id: " -ForegroundColor Green
         (Get-AzKeyVault -VaultName $KeyVaultName).ResourceId

         Write-Host "Secret Id: " -ForegroundColor Green
         (Get-AzureKeyVaultSecret -VaultName $KeyVaultName -Name $keyVaultSecretName).id

         Write-Host "Cluster Certificate Thumbprint: " -ForegroundColor Green
         $pfxCertObject.Thumbprint
      }

   #========================== CHANGE THESE VALUES ===============================
   $armEndpoint = "https://management.local.azurestack.external"
   $tenantId = "your_tenant_ID"
   $location = "local"
   $clusterCertPfxPath = "Your_path_to_ClusterCert.pfx"
   $clusterCertPfxPassword = "Your_password_for_ClusterCert.pfx"
   #==============================================================================

   Add-AzEnvironment -Name AzureStack -ARMEndpoint $armEndpoint
   Connect-AzAccount -Environment AzureStack -TenantId $tenantId

   $rgName = "sfvaultrg"
   Write-Host "Creating Resource Group..." -ForegroundColor Yellow
   New-AzResourceGroup -Name $rgName -Location $location

   Write-Host "Creating Key Vault..." -ForegroundColor Yellow
   $Vault = New-AzKeyVault -VaultName sfvault -ResourceGroupName $rgName -Location $location -EnabledForTemplateDeployment -EnabledForDeployment -EnabledForDiskEncryption

   Write-Host "Publishing certificate to Vault..." -ForegroundColor Yellow
   Publish-SecretToKeyVault -PfxFilePath $clusterCertPfxPath -Password $clusterCertPfxPassword -KeyVaultName $vault.VaultName
有关详细信息,请参阅使用 PowerShell 管理 Azure Stack Hub 上的 Key Vault。
部署市场项
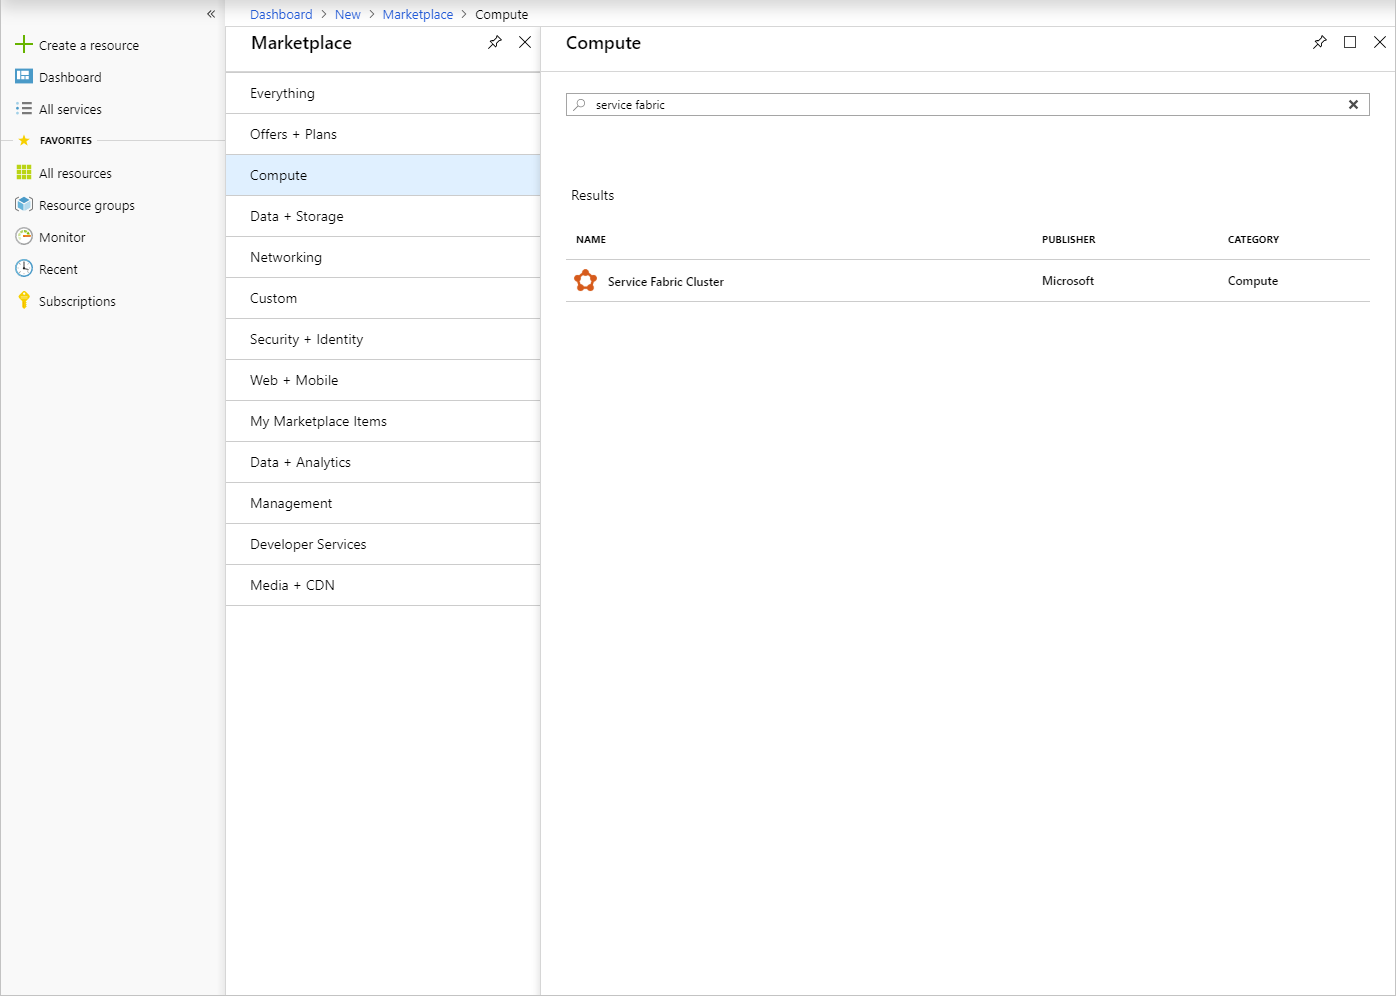
在用户门户中,转到“+ 创建资源”>“计算”>“Service Fabric 群集”。
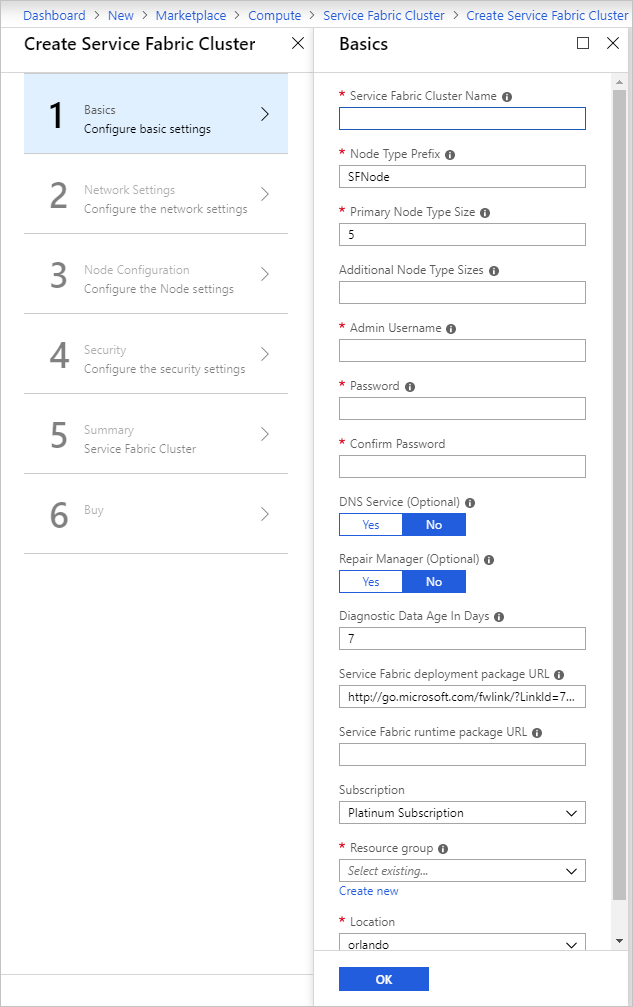
填写每个页(例如“基本信息”)中的部署窗体。 如果不确定要指定哪个值,请使用默认值。
若要部署到断开连接的 Azure Stack Hub 或部署另一个版本的 Service Fabric,请下载 Service Fabric 部署包及其相应的运行时包,并将其托管在 Azure Stack Hub blob 上。 向“Service Fabric 部署包 URL”和“Service Fabric 运行时包 URL”字段提供这些值。
注意
最新版本的 Service Fabric 及其相应的 SDK 之间存在兼容性问题。 在解决该问题之前,请向部署包 URL 和运行时包 URL 提供以下参数。 否则,部署将失败。
- Service Fabric 部署包 URL:https://download.microsoft.com/download/8/3/6/836E3E99-A300-4714-8278-96BC3E8B5528/6.5.641.9590/Microsoft.Azure.ServiceFabric.WindowsServer.6.5.641.9590.zip
- Service Fabric 运行时包 URL:https://download.microsoft.com/download/B/0/B/B0BCCAC5-65AA-4BE3-AB13-D5FF5890F4B5/6.5.641.9590/MicrosoftAzureServiceFabric.6.5.641.9590.cab
对于断开连接的部署,请从指定位置下载这些包并将其托管在本地 Azure Stack Hub Blob 上。
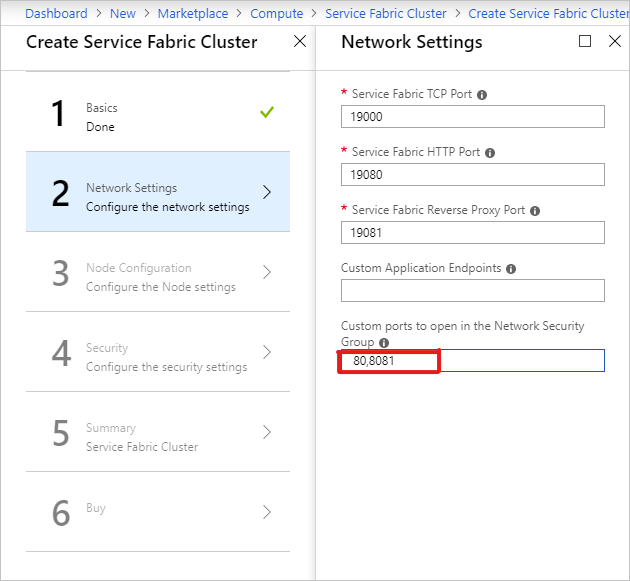
在“网络设置”页上,可以指定要对应用程序打开的特定端口:
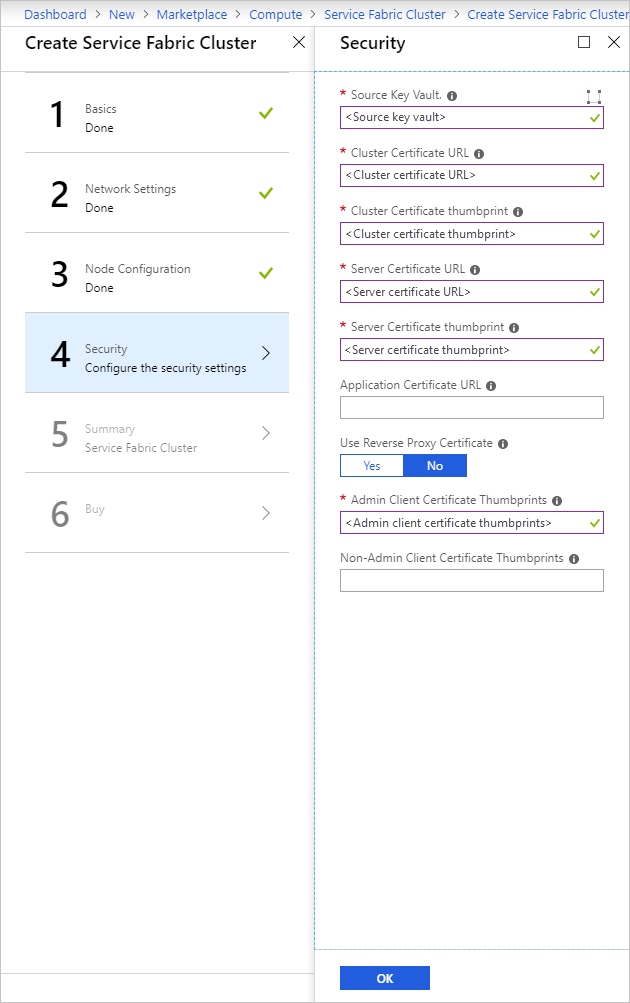
在“安全性”页上,添加在创建 Azure Key Vault 中获取的值并上传机密。
对于“管理客户端证书指纹”,请输入管理客户端证书的指纹。 (请参阅先决条件。)
- 源 Key Vault:指定脚本结果中的完整
keyVault id字符串。 - 群集证书 URL:指定脚本结果中的
Secret Id中的完整 URL。 - 群集证书指纹:指定脚本结果中的 Cluster Certificate Thumbprint(群集证书指纹)。
- 服务器证书 URL:如果要使用群集证书中的单独证书,请将证书上传到密钥保管库,并提供机密的完整 URL。
- 服务器证书指纹:指定服务器证书的指纹
- 管理客户端证书指纹:指定在先决条件中创建的管理客户端证书指纹。

- 源 Key Vault:指定脚本结果中的完整
完成向导,然后选择“创建”以部署 Service Fabric 群集。
访问 Service Fabric 群集
可以使用 Service Fabric Explorer 或 Service Fabric PowerShell 访问 Service Fabric 群集。
使用 Service Fabric Explorer
确保浏览器是否能够访问你的管理客户端证书,以及是否可在 Service Fabric 群集中进行身份验证。
a. 打开 Internet Explorer 并转到“Internet 选项”>“内容”>“证书”。
b. 在“证书”中,选择“导入”启动“证书导入向导”,然后单击“下一步”。 在“要导入的文件”页上单击“浏览”,然后选择提供给 Azure 资源管理器模板的管理客户端证书。
注意
此证书不是先前已添加到 Key Vault 的群集证书。
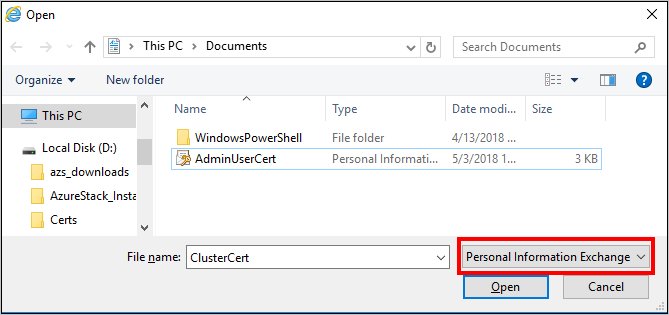
c. 确保在“文件资源管理器”窗口的扩展下拉列表中选择“个人信息交换”。
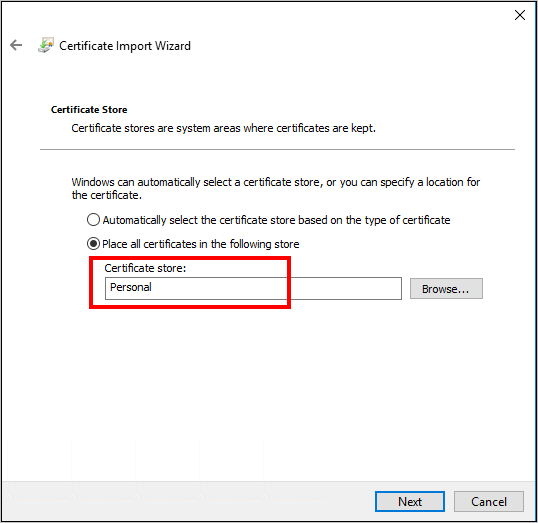
d. 在“证书存储”页上选择“个人”,然后完成向导。
若要查找 Service Fabric 群集的 FQDN:
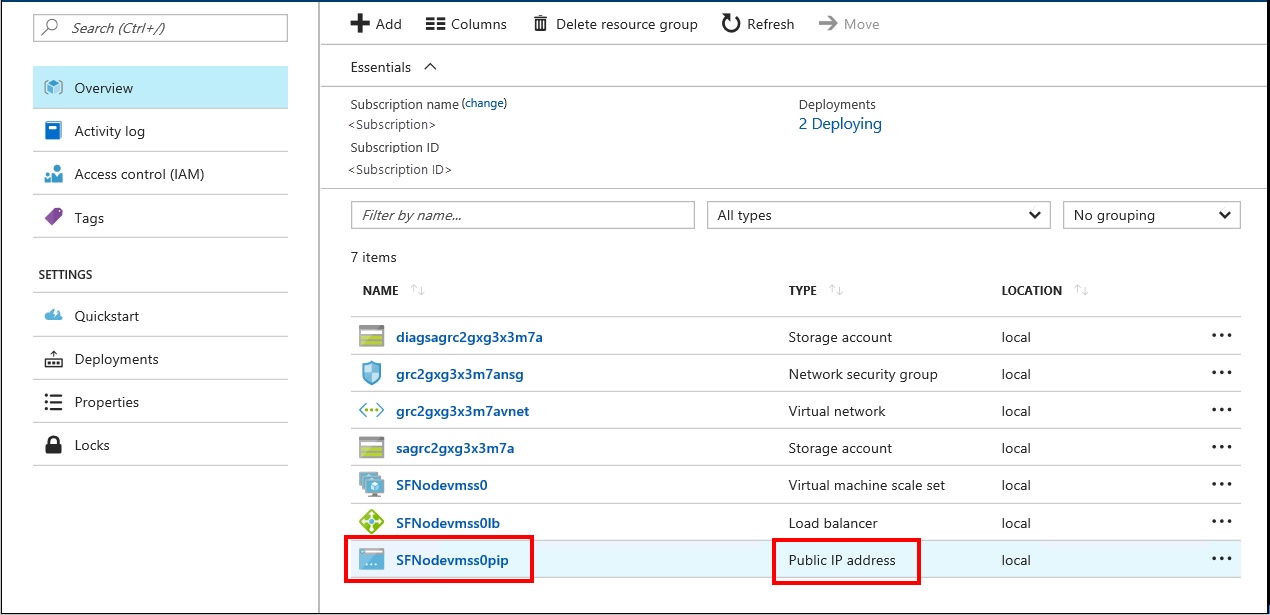
a. 转到与 Service Fabric 群集关联的资源组,并找到“公共 IP 地址”资源。 选择与“公共 IP 地址”关联的对象,打开“公共 IP 地址”边栏选项卡。
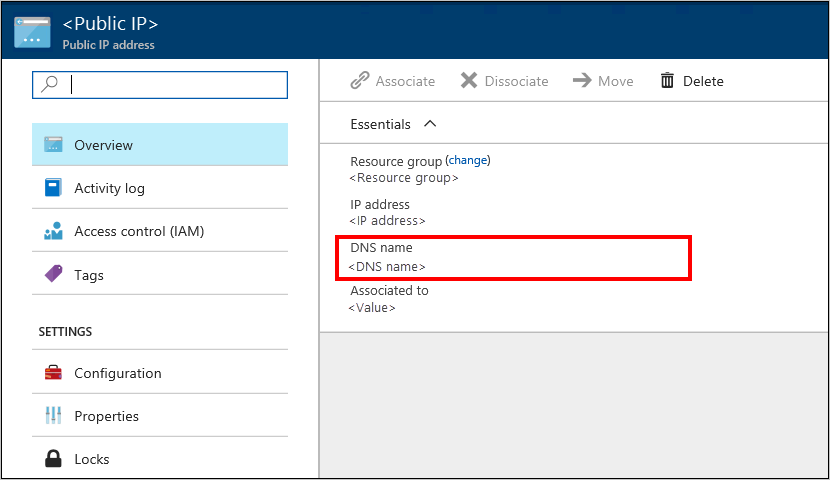
b. 在“公共 IP 地址”边栏选项卡上,FQDN 显示为“DNS 名称”。
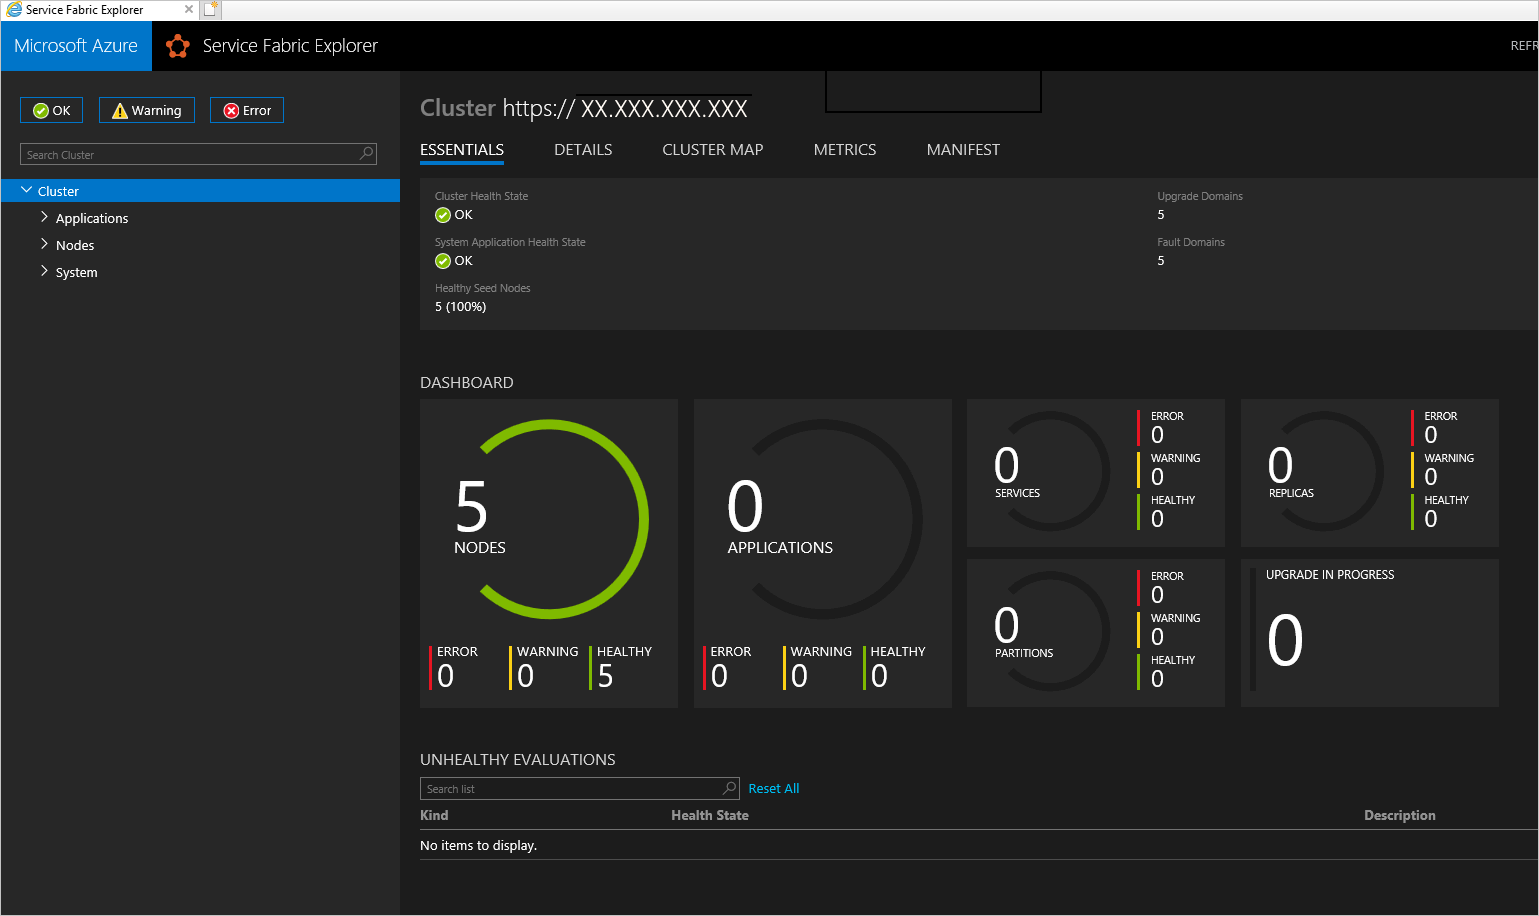
若要查找 Service Fabric Explorer 的 URL 和客户端连接终结点,请查看模板部署的结果。
在浏览器中转到
https://*FQDN*:19080。 将 FQDN 替换为在步骤 2 中获取的 Service Fabric 群集 FQDN。
如果使用了自签名证书,屏幕上会显示一条警告,指出连接不安全。 若要继续访问网站,请依次选择“更多信息”、“继续访问网页”。若要在站点中进行身份验证,必须选择要使用的证书。 选择“更多选项”,选择适当的证书,然后单击“确定”连接到 Service Fabric Explorer。
使用 Service Fabric PowerShell
根据 Azure Service Fabric 文档中的在 Windows 上准备开发环境安装 Azure Service Fabric SDK。
安装完成后,配置系统环境变量,确保可从 PowerShell 访问 Service Fabric cmdlet。
a. 转到“控制面板”>“系统和安全”>“系统”并选择“高级系统设置”。

b. 在“系统属性”的“高级”选项卡上,选择“环境变量”。
c. 对于“系统变量”,请编辑“路径”,并确保 C:\Program Files\Microsoft Service Fabric\bin\Fabric\Fabric.Code 位于环境变量列表的最前面。
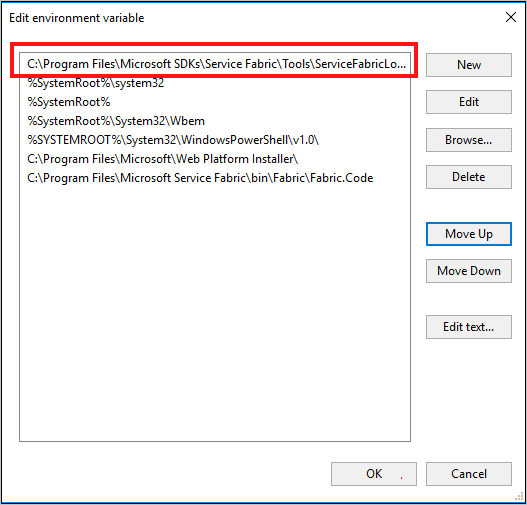
更改环境变量的顺序后,重启 PowerShell,然后运行以下 PowerShell 脚本获取 Service Fabric 群集的访问权限:
 Connect-ServiceFabricCluster -ConnectionEndpoint "\[Service Fabric
 CLUSTER FQDN\]:19000" \`

 -X509Credential -ServerCertThumbprint
 761A0D17B030723A37AA2E08225CD7EA8BE9F86A \`

 -FindType FindByThumbprint -FindValue
 0272251171BA32CEC7938A65B8A6A553AA2D3283 \`

 -StoreLocation CurrentUser -StoreName My -Verbose
注意
脚本中群集名称的前面没有 https://。 必须指定端口 19000。