在“快速入门”的前三篇文章中,我们学习了两种有用的通信模式,它们使用 Web PubSub 进行大规模实时消息传递(百万+)。
- 在客户端之间发布/订阅,使应用程序服务器摆脱管理持久连接的复杂性
- 新数据可用后,立即从应用程序服务器推送消息到客户端
在本快速入门指南中,我们会了解 Web PubSub 的事件系统,以便应用程序服务器可以响应事件,例如当
- 客户端为
connected - 客户端发送
message,需要进一步处理
重要
本文中出现的原始连接字符串仅用于演示目的。
连接字符串包括应用程序访问 Azure Web PubSub 服务所需的授权信息。 连接字符串中的访问密钥类似于服务的根密码。 在生产环境中,请始终保护访问密钥。 使用 Azure Key Vault 安全地管理和轮换密钥,并使用 WebPubSubServiceClient 对连接进行保护。
避免将访问密钥分发给其他用户、对其进行硬编码或将其以纯文本形式保存在其他人可以访问的任何位置。 如果你认为访问密钥可能已泄露,请轮换密钥。
先决条件
- Web PubSub 资源。 如果尚未创建,可以按照以下指导操作:创建 Web PubSub 资源
- 代码编辑器,如 Visual Studio Code
- 安装计划使用的语言的依赖项
创建应用程序
Web PubSub 是应用程序服务器的独立服务。 你的应用程序保留其作为传统 HTTP 服务器的角色,而 Web PubSub 负责处理应用程序服务器和客户端之间的实时消息传递。 首先创建客户端程序,然后创建服务器程序。
创建客户端
1. 为客户端应用创建目录
mkdir eventHandlerDemo
cd eventHandlerDemo

# The SDK is available as an NPM module.
npm install @azure/web-pubsub-client
2. 连接到 Web PubSub
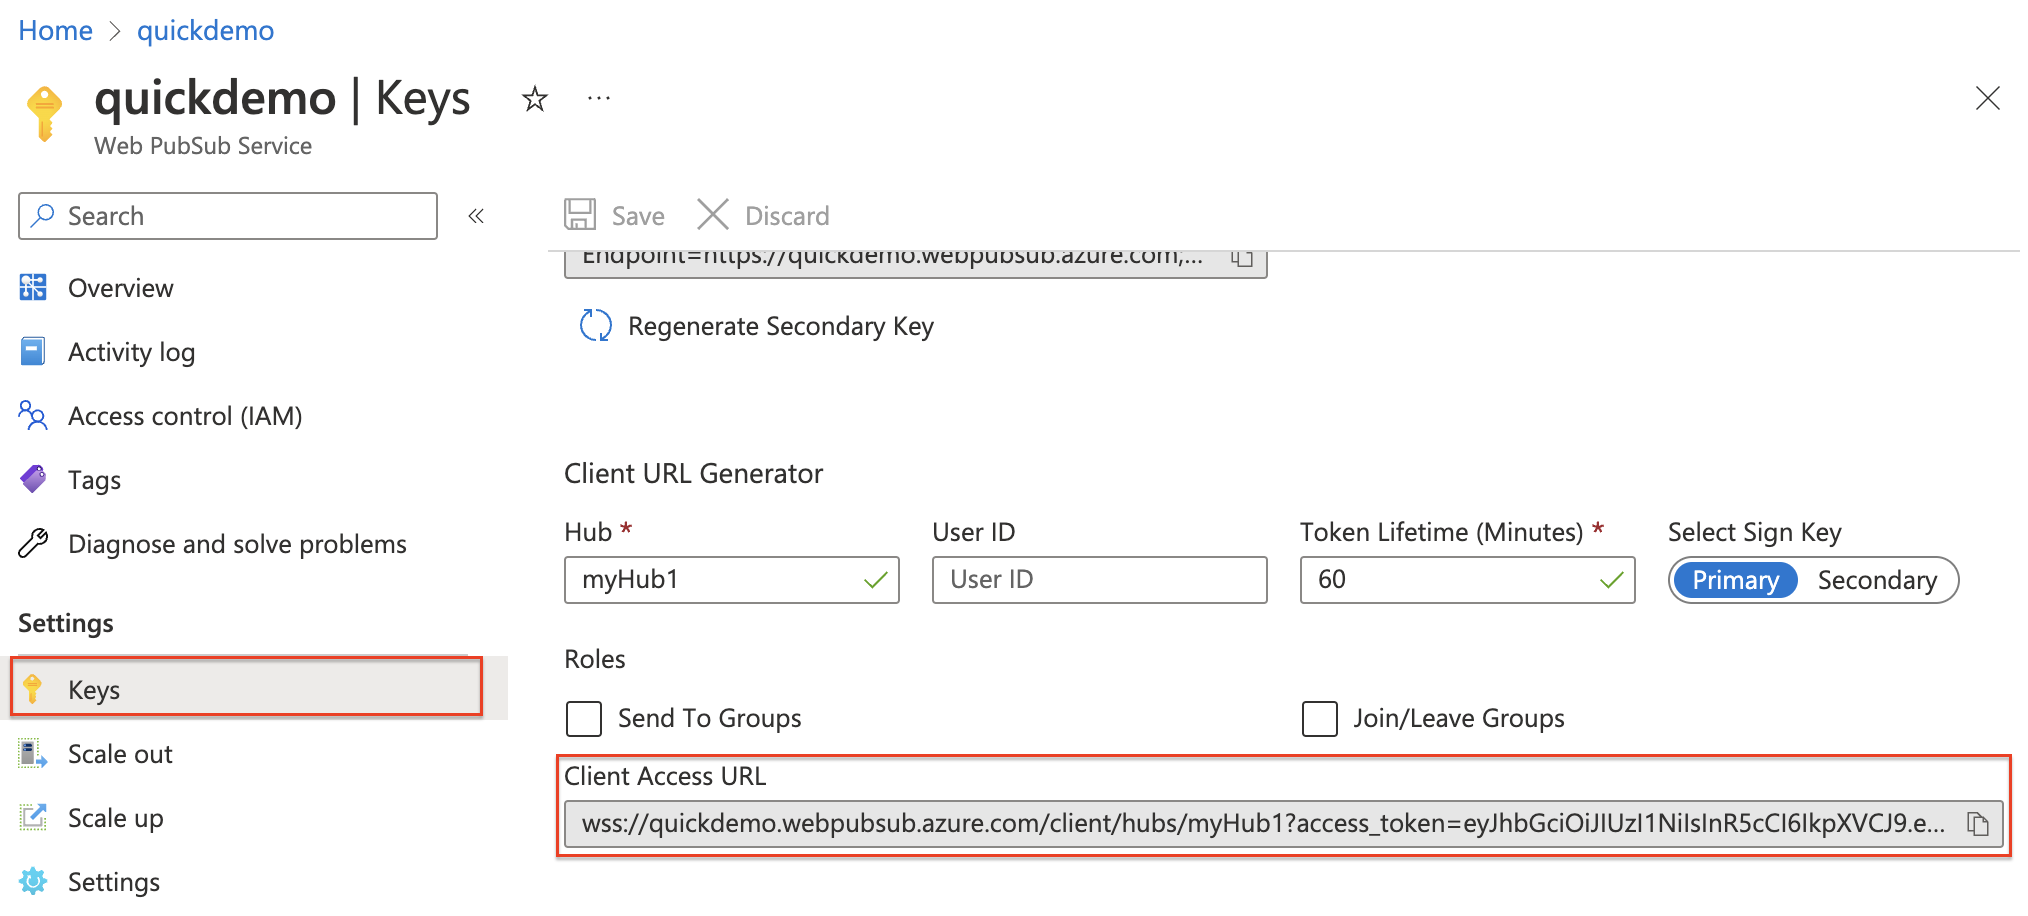
客户端(无论是浏览器、移动应用还是 IoT 设备)使用客户端访问 URL 来连接资源并对其进行身份验证。
此 URL 遵循 wss://<service_name>.webpubsub.azure.com/client/hubs/<hub_name>?access_token=<token> 的模式。
客户端可以通过几种方式获取客户端访问 URL。 对于本快速入门,可以从 Azure 门户复制并粘贴 URL,如下图所示。 最佳做法是不要在代码中对客户端访问 URL 进行硬编码。 在生产环境中,我们通常设置应用服务器按需返回此 URL。 生成客户端访问 URL 详细介绍了相关操作。
创建名为 client.js 的文件并添加以下代码
const { WebPubSubClient } = require("@azure/web-pubsub-client");
// Instantiates the client object
// <client-access-url> is copied from Azure portal mentioned above.
const client = new WebPubSubClient("<client-access-url>");

// Registers a handler to the "connected" event
client.on("connected", (e) => {
  console.log(`Connection ${e.connectionId} is connected.`);
});

// You must invoke start() on the client object
// to establish connection with your Web PubSub resource
client.start();
创建应用程序服务器
1. 安装 express.js 和 Web PubSub 服务器 SDK
npm init -y
npm install --save express

# Installs the middleware from Web PubSub. This middleware will set up an endpoint for you.
npm install --save @azure/web-pubsub-express
2. 创建名为“server.js”的新文件,用于设置空的快速应用
const express = require("express");

const app = express();

app.listen(8080, () => console.log('Server started, listening on port 8080'));
3. 处理事件
使用 Web PubSub 时,当客户端发生某些活动时(例如,当客户端与你的 Web PubSub 资源 connected 或 disconnected 时),你的应用程序服务器可以设置处理程序来应对这些事件。
下面是两个值得注意的用例:
- 客户端连接后,可以将此状态广播到所有连接的客户端
- 当客户端向 Web PubSub 资源发送消息时,可以将消息保存在所选的数据库中
const express = require("express");
const { WebPubSubEventHandler } = require("@azure/web-pubsub-express");

const app = express();

const HUB_NAME = "myHub1";

let handler = new WebPubSubEventHandler(HUB_NAME, {
  path: '/eventhandler', // Exposes an endpoint
  onConnected: async (req) => {
    console.log(`${req.context.userId} connected`);
  },
});

// Registers the middleware with the express app
app.use(handler.getMiddleware());

app.listen(8080, () => console.log('Server started, listening on port 8080'));
如上面的代码中配置的那样,当客户端连接到 Web PubSub 资源时,Web PubSub 会调用你的应用程序服务器在路径 /eventhandler 处提供的 Webhook。 在这里,我们只需在用户连接时将 userId 输出到控制台。
公开 localhost
运行程序,它应在端口 8080 上,在 localhost 上运行。 就我们的目的而言,这意味着无法在 Internet 上访问你的本地快速应用。 因此,Web PubSub 无法调用在路径 /eventhandler 处提供的 Webhook。
有两种方法可以将流量路由到 localhost,一种方法是使用 ngrok 和 TunnelRelay 等工具公开 localhost,从而可以在 Internet 上访问。 另一种方法(也是推荐的方法)是使用 awps-tunnel 通过工具将流量从 Web PubSub 服务隧道传输到本地服务器。
1.下载并安装 awps-tunnel
该工具在 Node.js 16 或更高版本上运行。
npm install -g @azure/web-pubsub-tunnel-tool
2.使用服务连接字符串并运行
本文中出现的原始连接字符串仅用于演示目的。 在生产环境中,请始终保护访问密钥。 使用 Azure Key Vault 安全地管理和轮换密钥,并使用 WebPubSubServiceClient 对连接进行保护。
export WebPubSubConnectionString="<your connection string>"
awps-tunnel run --hub myHub1 --upstream http://localhost:8080
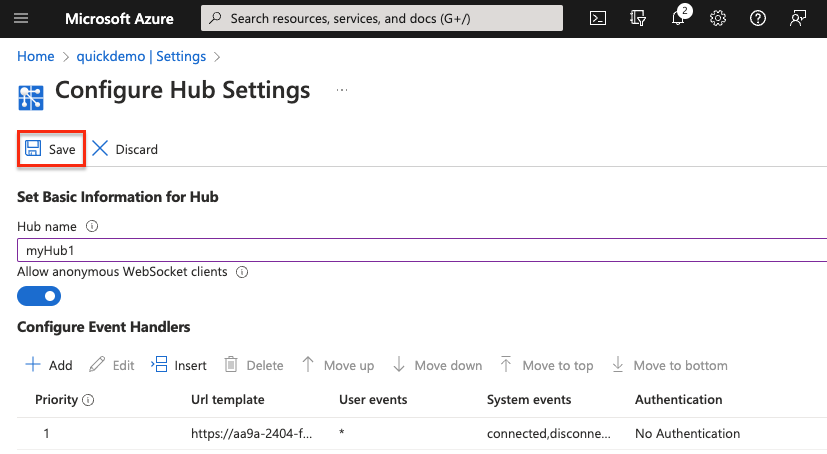
在 Web PubSub 资源上设置事件处理程序
现在,我们需要让 Web PubSub 资源了解此 Webhook URL。 可以通过 Azure 门户或 Azure CLI 设置事件处理程序。
从菜单选择“设置”,然后选择“添加”
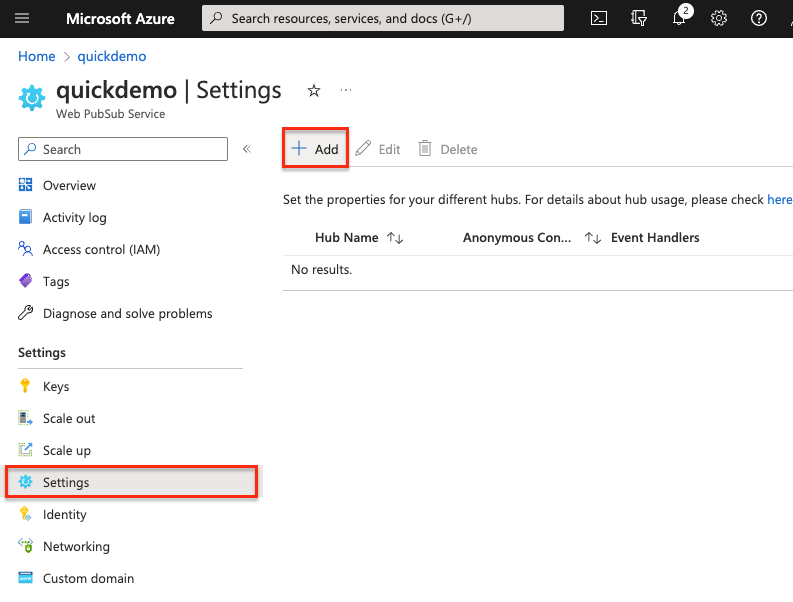
输入中心名称。 为达到我们的目的,请输入“myHub1”,然后选择“添加”
在事件处理程序页中,配置以下字段,使用
awps-tunnel工具时,URL 模板使用tunnel方案后跟以下路径:tunnel:///eventhandler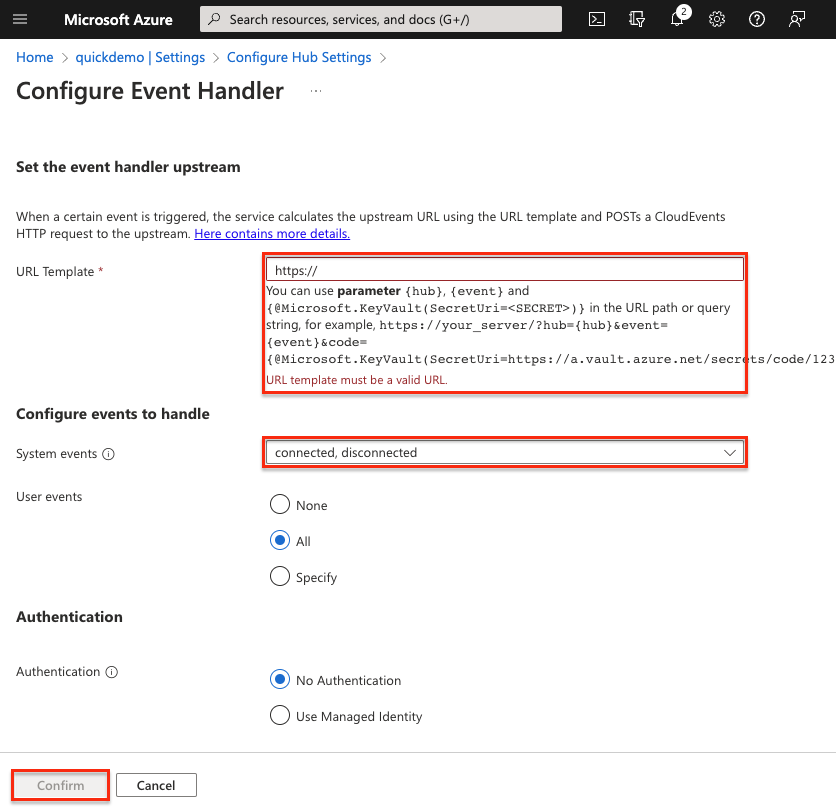
保存配置
运行程序
启动应用程序服务器
node server.js
启动客户端程序
node client.js
观察结果
应该会看到 userId 输出到控制台。
处理 message 事件
除了 connect、connected、disconnected 等系统事件外,客户端还可以发送自定义事件。
修改客户端程序
停止客户端程序,并将以下代码添加到 client.js
// ...code from before

client.start();

// The name of the event is message and the content is in text format.
client.sendEvent("message", "sending custom event!", "text");
修改服务器程序
停止客户端程序,并将以下代码添加到 server.js
// ... code from before

let handler = new WebPubSubEventHandler(HUB_NAME, {
  path: "/eventhandler",
  onConnected: async (req) => {
    console.log(`"${req.context.userId}" is connected.`);
  },
  // This handler function will handle user system
  handleUserEvent: async (req, res) => {
    if (req.context.eventName === "message") {
      console.log(`Received message: ${req.data}`);
      // Additional logic to process the data,
      // e.g save message content to database
      // or broadcast the message to selected clients.
    }
  },
});

//... code from before
再次启动客户端程序和服务器程序
你应会看到 userId 和 Received message: sending custom event! 都输出到控制台。
摘要
本教程大致介绍了事件系统在 Web PubSub 中的工作原理。 在现实中的应用程序中,事件系统可以帮助你实现更多逻辑来处理系统和用户生成的事件。