适用对象: MongoDB
本教程包含多个部分,演示了如何通过 Express 和 Angular 创建以 Node.js 编写的新应用,然后将其连接到使用 Azure Cosmos DB 的 API for MongoDB 配置的 Azure Cosmos DB 帐户。 本教程的第 6 部分基于第 5 部分,涵盖以下任务:
- 为 hero 服务创建 Post、Put 和 Delete 函数
- 运行应用
先决条件
开始教程的此部分之前,请确保已完成教程第 5 部分的步骤。
提示
本教程介绍生成应用程序的各个步骤。 若要下载完成的项目,可从 GitHub 上的 angular-cosmosdb 存储库获取完成的应用程序。
向 hero 服务添加 Post 函数
在 Visual Studio Code 中按“拆分编辑器”按钮
 并排打开 routes.js 和 hero.service.js。
可以看到,routes.js 第 7 行调用的是 hero.service.js 中第 5 行的
getHeroes函数。 需为 post、put 和 delete 函数进行与此相同的配对。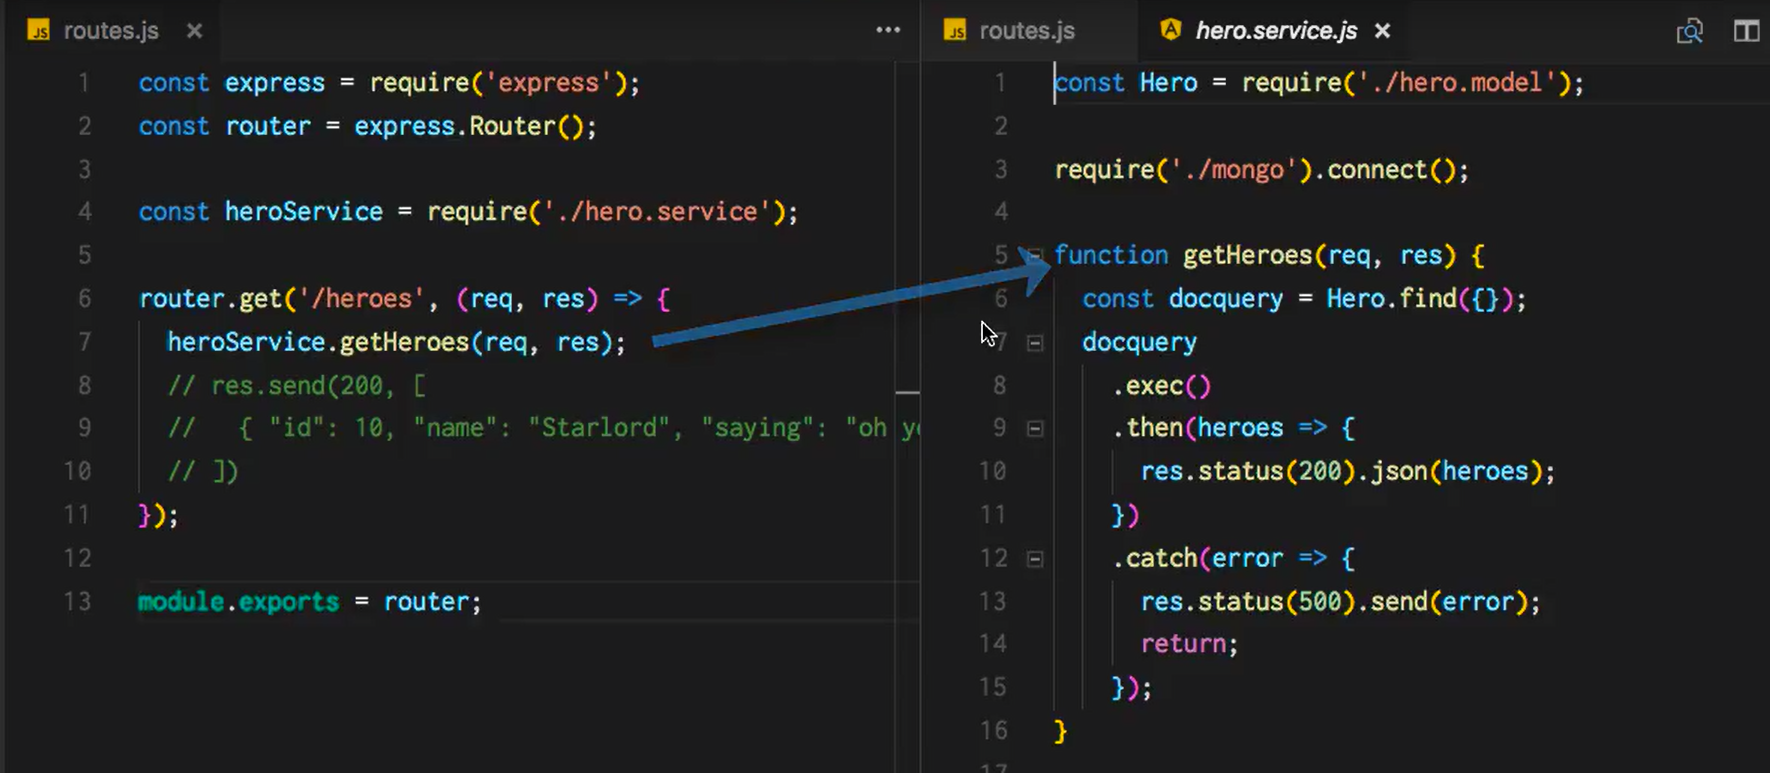
首先,请对 hero 服务进行编码。
将以下代码复制到 hero.service.js 中
module.exports函数之前getHeroes函数之后的位置。 此代码:- 使用 hero 模型发布新的 hero。
- 查看响应,了解是否存在错误,然后返回状态值 500。
function postHero(req, res) {
  const originalHero = { uid: req.body.uid, name: req.body.name, saying: req.body.saying };
  const hero = new Hero(originalHero);
  hero.save(error => {
    if (checkServerError(res, error)) return;
    res.status(201).json(hero);
    console.log('Hero created successfully!');
  });
}

function checkServerError(res, error) {
  if (error) {
    res.status(500).send(error);
    return error;
  }
}
在 hero.service.js 中更新
module.exports,使之包括新的postHero函数。module.exports = { getHeroes, postHero };在 routes.js 中的
get路由器之后为post函数添加一个路由器。 此路由器一次发布一个 hero。 以这种方式安排路由器文件的结构可以清楚地显示所有可用的 API 终结点,将真正的工作留给 hero.service.js 文件。router.post('/hero', (req, res) => { heroService.postHero(req, res); });运行应用,看是否一切正常。 在 Visual Studio Code 中,保存所有更改,选择左侧的“调试”按钮
 ,然后选择“启动调试”按钮
  。
。现在请返回到 Internet 浏览器,打开开发人员工具的“网络”选项卡(在大多数计算机上按 F12 即可)。 导航到
http://localhost:3000,观察通过网络进行的调用。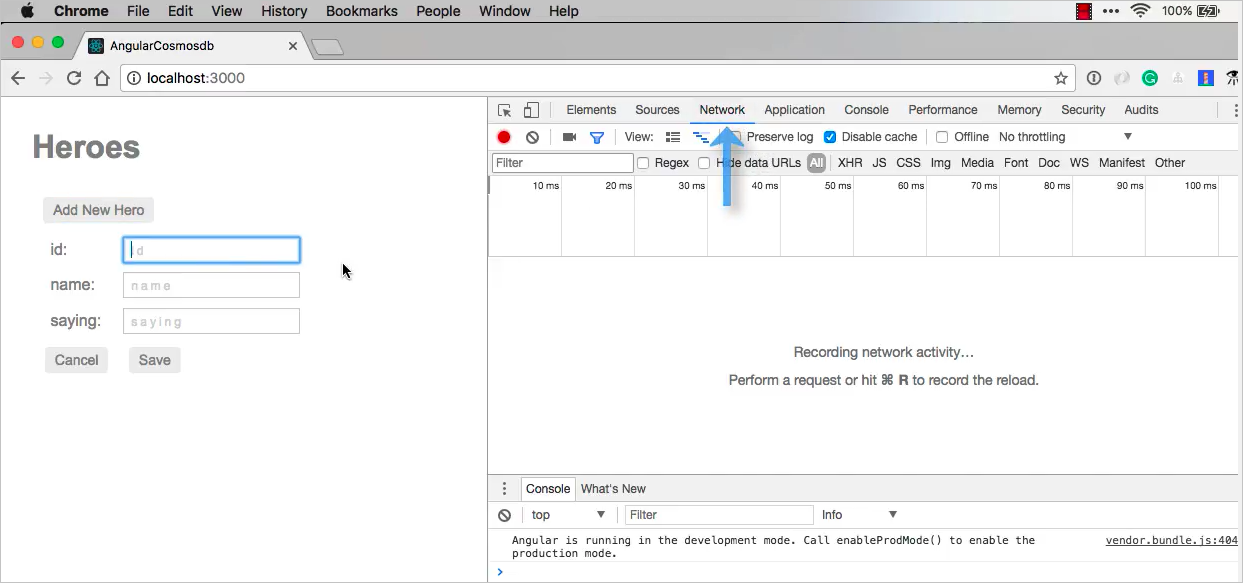
通过选择“添加新 Hero”按钮添加新的 hero。 输入“999”作为 ID,“Fred”作为 name,“Hello”作为 saying,然后选择“保存”。 此时会在“网络”选项卡中看到为新的 hero 发送了 POST 请求。
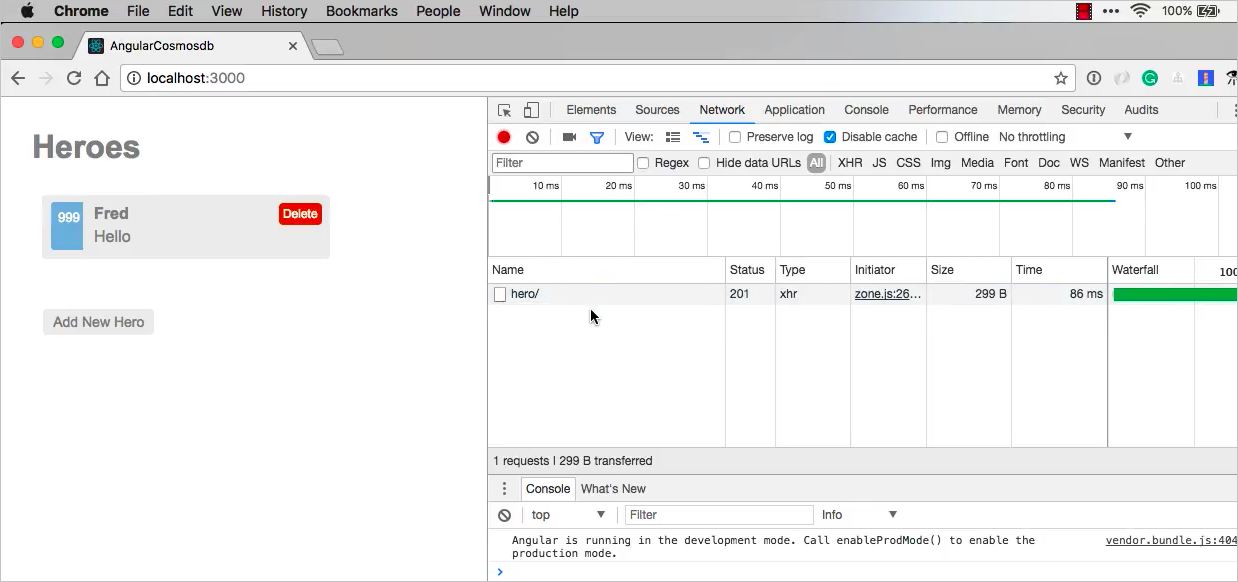
现在,让我们回过头来向应用添加 Put 和 Delete 函数。
添加 Put 和 Delete 函数
在 routes.js 中的 post 路由器后添加
put和delete路由器。router.put('/hero/:uid', (req, res) => { heroService.putHero(req, res); }); router.delete('/hero/:uid', (req, res) => { heroService.deleteHero(req, res); });将以下代码复制到 hero.service.js 中
checkServerError函数之后的位置。 此代码:- 创建
put和delete函数 - 查看是否已找到 hero
- 进行错误处理
function putHero(req, res) { const originalHero = { uid: parseInt(req.params.uid, 10), name: req.body.name, saying: req.body.saying }; Hero.findOne({ uid: originalHero.uid }, (error, hero) => { if (checkServerError(res, error)) return; if (!checkFound(res, hero)) return; hero.name = originalHero.name; hero.saying = originalHero.saying; hero.save(error => { if (checkServerError(res, error)) return; res.status(200).json(hero); console.log('Hero updated successfully!'); }); }); } function deleteHero(req, res) { const uid = parseInt(req.params.uid, 10); Hero.findOneAndRemove({ uid: uid }) .then(hero => { if (!checkFound(res, hero)) return; res.status(200).json(hero); console.log('Hero deleted successfully!'); }) .catch(error => { if (checkServerError(res, error)) return; }); } function checkFound(res, hero) { if (!hero) { res.status(404).send('Hero not found.'); return; } return hero; }- 创建
在 hero.service.js 中导出新模块:
module.exports = {
  getHeroes,
  postHero,
  putHero,
  deleteHero
};
更新了代码后,选择 Visual Studio Code 中的“重启”按钮
 。
。刷新 Internet 浏览器中的页面,选择“添加新 Hero”按钮。 添加 ID 为“9”、name 为“Starlord”、saying 为“Hi”的新 hero。 选择“保存”按钮保存新 hero。
现在请选择 Starlord hero,将 saying 从“Hi”更改为“Bye”,然后选择“保存”按钮。
现在可以在“网络”选项卡中选择 ID 来显示有效负载了。 可以在有效负载中看到,saying 现在已设置为“Bye”。
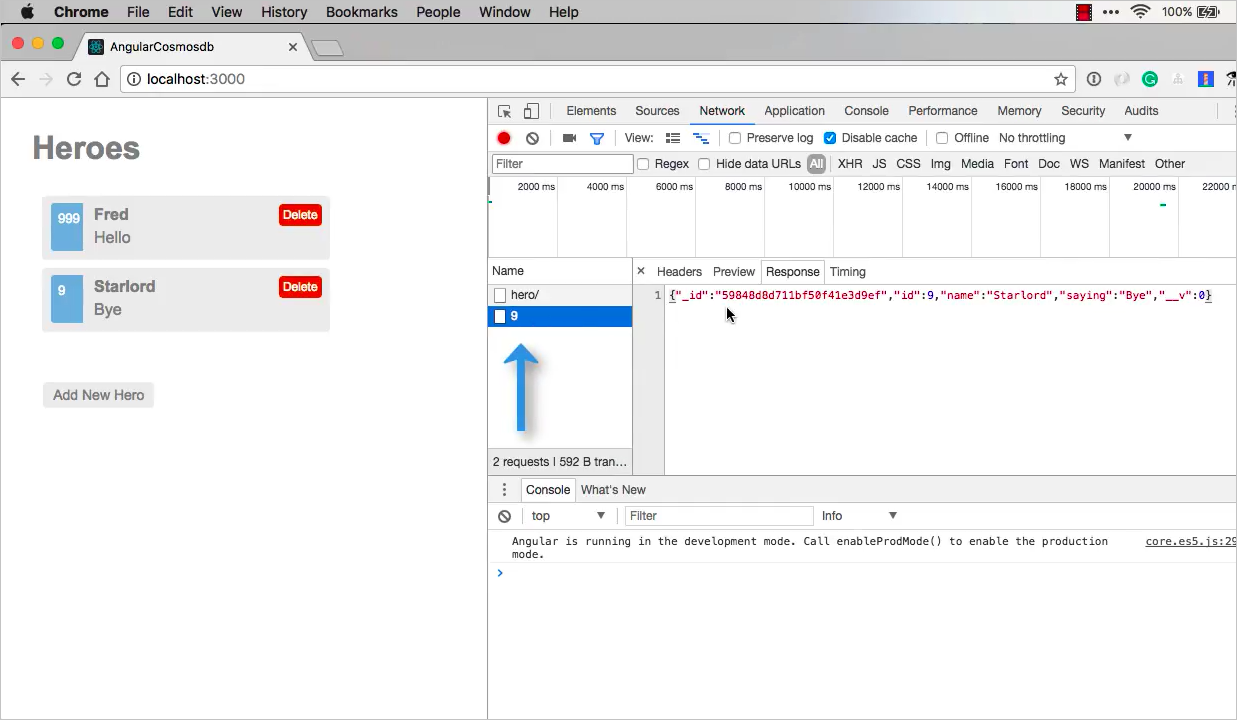
还可以在 UI 中删除某个 hero,看完成删除操作需要多少时间。 尝试时,可针对名为“Fred”的 hero 选择“删除”按钮。
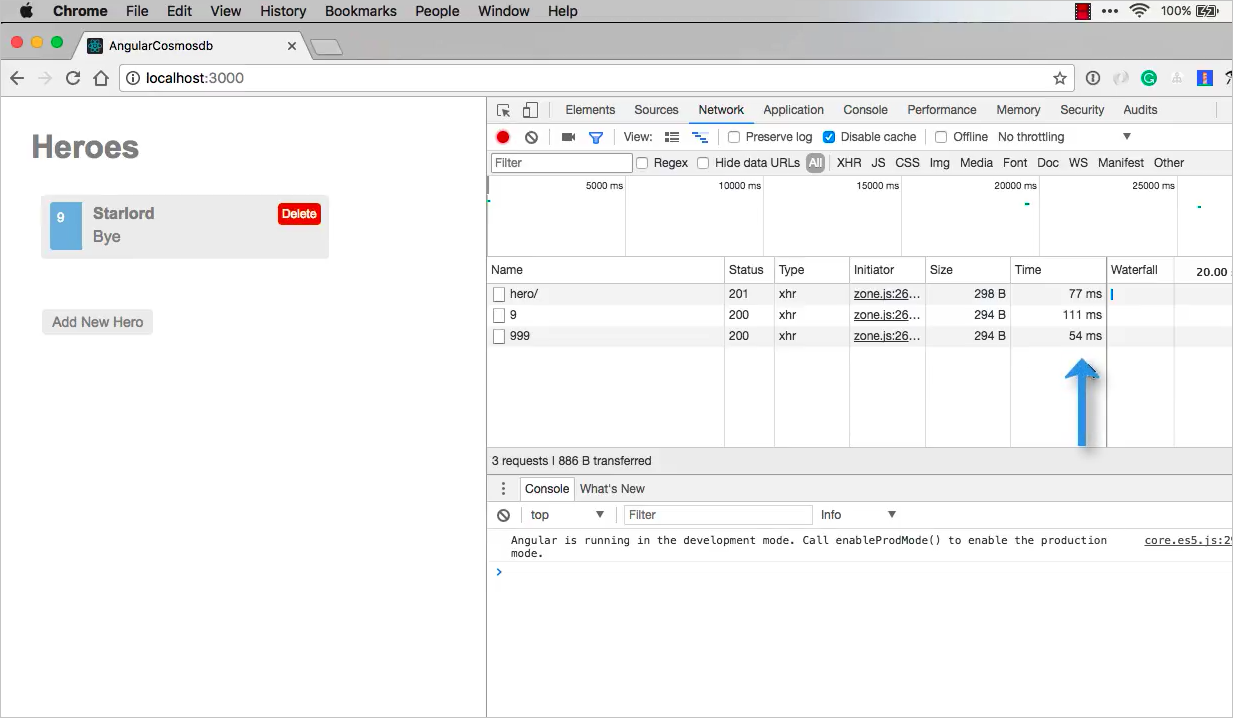
如果刷新页面,“网络”选项卡会显示获取 hero 的时间。 虽然这里显示的时间很短,但很多情况下,具体时间取决于数据在中国所处的位置,以及能否在靠近用户的区域进行异地复制。 可以在即将推出的下一教程中详细了解异地复制。
后续步骤
在本教程的此部分,你已完成以下操作:
- 向应用添加 Post、Put 和 Delete 函数
本教程系列会添加更多的视频,请稍后回来观看。
尝试为迁移到 Azure Cosmos DB 进行容量规划? 可以使用有关现有数据库群集的信息进行容量规划。
- 如果只知道现有数据库群集中的 vCore 和服务器数量,请阅读使用 vCore 或 vCPU 估算请求单位
- 若知道当前数据库工作负载的典型请求速率,请阅读使用 Azure Cosmos DB 容量计划工具估算请求单位