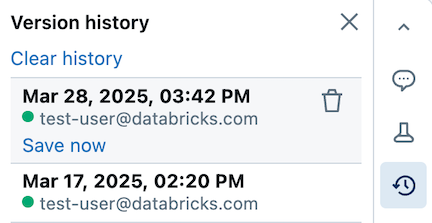
Azure Databricks 笔记本维护笔记本版本的历史记录,使你能够查看和还原笔记本以前的快照。 可以对版本执行以下作:添加说明、还原和删除版本以及清除版本历史记录。
还可以将 Databricks 中的工作与远程 Git 存储库同步。
查看版本历史记录
若要访问笔记本版本,请单击右侧栏中
添加说明
若要向最新版本添加说明,请按照以下步骤操作:
单击版本。
单击“立即保存”。
在 “保存版本 ”对话框中,输入版本说明。
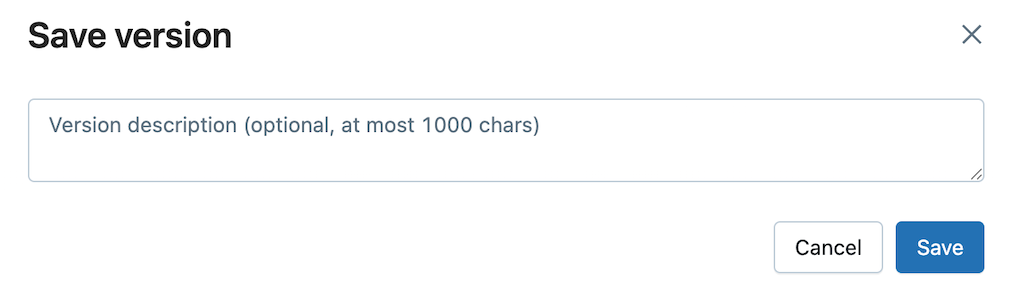
单击“ 保存”。 笔记本版本随输入的说明一起保存。
还原版本
还原某个版本:
单击版本。
单击 还原此版本。
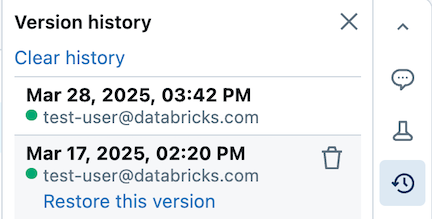
单击“确认”。 所选版本将成为笔记本的最新版本。
删除版本
要删除版本条目,请执行以下操作:
单击版本。
单击回收站图标
 。
。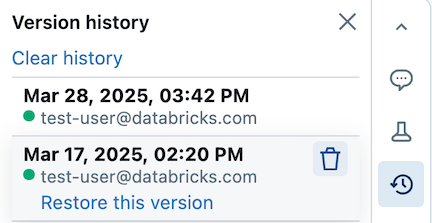
单击 “是”,清除。 所选版本将从历史记录中删除。
清除版本历史记录
清除版本历史记录后无法恢复。
若要清除笔记本的版本历史记录,请执行以下操作:
在 “版本历史记录”下,单击“ 清除历史记录”。
单击“是,清除”。 此时会清除笔记本版本历史记录。
版本历史记录中的差异并排显示
显示以前的笔记本版本时,编辑器会用彩色并排突出显示差异。
