重要
公共 MEC 的 Azure Site Recovery 功能目前为预览版。
本文介绍如何将 Azure 公共 MEC 上运行的 Azure 虚拟机 (VM) 复制、故障转移和故障回复到 Azure 公共 MEC 是其中的扩展的父 Azure 区域。
Azure 公共 MEC 中的灾难恢复
Site Recovery 会不断地将工作负荷从主要位置复制到次要位置,让工作负荷在中断期间保持运行状态,从而确保业务连续性。 MEC 的 ASR 功能处于预览状态。
这里的主要位置是一个 Azure 公共 MEC,次要位置是 Azure 公共 MEC 连接到的父区域。
使用 PowerShell 为 Azure 公共 MEC 中的 VM 设置灾难恢复
先决条件
确保安装了 Azure Az PowerShell 模块。 若要了解如何进行安装,请参阅安装 Azure Az PowerShell 模块。
最低 Azure Az PowerShell 版本必须为 4.1.0。 请使用以下命令查看当前版本:
Get-InstalledModule -Name Az确保 Azure Site Recovery 支持 Linux 发行版和内核。 有关详细信息,请参阅支持矩阵。
将 Azure 公共 MEC 中运行的虚拟机复制到 Azure 区域
若要将 Azure 公共 MEC 中运行的 VM 复制到 Azure 区域,请执行以下步骤:
注意
对于此示例,主要位置是 Azure 公共 MEC,次要/恢复位置是 Azure 公共 MEC 所在的区域。
登录到你的 Azure 帐户。
Connect-AzAccount -Environment AzureChinaCloud选择正确的订阅。
$subscription = Get-AzSubscription -SubscriptionName "<SubscriptionName>"
Set-AzContext $subscription.Id
获取你计划复制的虚拟机的详细信息。
$VM = Get-AzVM -ResourceGroupName "<ResourceGroupName>" -Name "<VMName>"

Write-Output $VM
为次要 Azure 区域中的恢复服务保管库创建资源组。
New-AzResourceGroup -Name "edgezonerecoveryrg" -Location "<EdgeZoneRegion>"在次要区域中创建新的恢复服务保管库。
$vault = New-AzRecoveryServicesVault -Name "EdgeZoneRecoveryVault" -
ResourceGroupName "edgezonerecovery" -Location "\<EdgeZoneRegion\>"
Write-Output $vault
设置保管库上下文。
Set-AzRecoveryServicesAsrVaultContext -Vault $vault创建主要 Site Recovery 结构。
$TempASRJob = New-AzRecoveryServicesAsrFabric -Azure -Location “<EdgeZoneRegion>” -
Name "EdgeZoneFabric"
跟踪作业状态以检查完成情况。
while (($TempASRJob.State -eq "InProgress") -or ($TempASRJob.State -eq "NotStarted")){如果作业尚未完成,请休眠 10 秒,然后再次检查作业状态。
sleep 10;
$TempASRJob = Get-AzRecoveryServicesAsrJob -Job $TempASRJob
}
成功完成后,作业状态必须为“成功”。
Write-Output $TempASRJob.State
$PrimaryFabric = Get-AzRecoveryServicesAsrFabric -Name "EdgeZoneFabric"
使用主要结构创建主要和恢复保护容器。
$TempASRJob = New-AzRecoveryServicesAsrProtectionContainer -InputObject
$PrimaryFabric -Name "EdgeZoneProtectionContainer"
跟踪作业状态以检查完成情况。
while (($TempASRJob.State -eq "InProgress") -or ($TempASRJob.State -eq
"NotStarted")){
 sleep 10;
 $TempASRJob = Get-AzRecoveryServicesAsrJob -Job $TempASRJob
}
Write-Output $TempASRJob.State
主要和恢复保护容器都是在主要区域(主要结构中)创建的。
$PrimaryProtectionContainer = Get-AzRecoveryServicesAsrProtectionContainer -Fabric
$primaryFabric -Name "EdgeZoneProtectionContainer"
$RecoveryProtectionContainer = Get-AzRecoveryServicesAsrProtectionContainer -Fabric
$primaryFabric -Name "EdgeZoneProtectionContainer-t"
创建复制策略。
$TempASRJob = New-AzRecoveryServicesAsrPolicy -AzureToAzure -Name
"ReplicationPolicy" -RecoveryPointRetentionInHours 24 -
ApplicationConsistentSnapshotFrequencyInHours 4
跟踪作业状态以检查完成情况。
while (($TempASRJob.State -eq "InProgress") -or ($TempASRJob.State -eq
"NotStarted")){
 sleep 10;
 $TempASRJob = Get-AzRecoveryServicesAsrJob -Job $TempASRJob
}
成功完成后,作业状态必须为“成功”。
Write-Output $TempASRJob.State

$ReplicationPolicy = Get-AzRecoveryServicesAsrPolicy -Name "ReplicationPolicy"
使用复制策略在主要保护容器与恢复保护容器之间创建保护容器映射。
$TempASRJob = New-AzRecoveryServicesAsrProtectionContainerMapping -Name
"PrimaryToRecovery" -Policy $ReplicationPolicy -PrimaryProtectionContainer
$PrimaryProtectionContainer -RecoveryProtectionContainer
$RecoveryProtectionContainer
跟踪作业状态以检查完成情况。
while (($TempASRJob.State -eq "InProgress") -or ($TempASRJob.State -eq
"NotStarted")){
 sleep 10;
 $TempASRJob = Get-AzRecoveryServicesAsrJob -Job $TempASRJob
}
成功完成后,作业状态必须为“成功”。
Write-Output $TempASRJob.State

$EdgeZoneToAzurePCMapping = Get-AzRecoveryServicesAsrProtectionContainerMapping -
ProtectionContainer $PrimaryProtectionContainer -Name "PrimaryToRecovery"
使用复制策略在恢复保护容器与主要保护容器之间创建用于故障回复的保护容器映射。
$TempASRJob = New-AzRecoveryServicesAsrProtectionContainerMapping -Name
"RecoveryToPrimary" -Policy $ReplicationPolicy -PrimaryProtectionContainer
$RecoveryProtectionContainer -RecoveryProtectionContainer
$PrimaryProtectionContainer
跟踪作业状态以检查完成情况。
while (($TempASRJob.State -eq "InProgress") -or ($TempASRJob.State -eq
"NotStarted")){
 sleep 10;
 $TempASRJob = Get-AzRecoveryServicesAsrJob -Job $TempASRJob
}
成功完成后,作业状态必须为“成功”。
Write-Output $TempASRJob.State
$AzureToEdgeZonePCMapping = Get-AzRecoveryServicesAsrProtectionContainerMapping -
ProtectionContainer $RecoveryProtectionContainer -Name "RecoveryToPrimary"
为主要区域中的复制日志创建缓存存储帐户。 在主要区域中创建缓存存储帐户。
$CacheStorageAccount = New-AzStorageAccount -Name "cachestorage" -ResourceGroupName
"<primary ResourceGroupName>" -Location '<EdgeZoneRegion>' -SkuName Standard_LRS -
Kind Storage
确保在目标位置创建虚拟网络。 在恢复区域中创建恢复网络。
$recoveryVnet = New-AzVirtualNetwork -Name "recoveryvnet" -ResourceGroupName
"recoveryrg" -Location '<EdgeZoneRegion>' -AddressPrefix "10.0.0.0/16"
Add-AzVirtualNetworkSubnetConfig -Name "defaultsubnetconf" -VirtualNetwork
$recoveryVnet -AddressPrefix "10.0.0.0/24" | Set-AzVirtualNetwork
$recoveryNetwork = $recoveryVnet.Id
使用以下 PowerShell cmdlet 复制包含托管磁盘的 Azure 公共 MEC Azure 虚拟机。 此步骤可能需要大约 20 分钟才能完成。
获取故障转移时必须在其中创建虚拟机的资源组。
$RecoveryRG = Get-AzResourceGroup -Name "edgezonerecoveryrg" -Location "
<EdgeZoneRegion>"
获取 VM 并显示内容。
$vm = Get-AzVM -Name $vmName -ResourceGroupName $primaryResourceGroupName为必须复制的 VM 的每个磁盘指定复制属性(创建磁盘复制配置)。
#OsDisk
$OSdiskId = $vm.StorageProfile.OsDisk.ManagedDisk.Id
$RecoveryOSDiskAccountType = $vm.StorageProfile.OsDisk.ManagedDisk.StorageAccountType
$RecoveryReplicaDiskAccountType =
$vm.StorageProfile.OsDisk.ManagedDisk.StorageAccountType
$OSDiskReplicationConfig = New-AzRecoveryServicesAsrAzureToAzureDiskReplicationConfig -
ManagedDisk -LogStorageAccountId $CacheStorageAccount.Id `
 -DiskId $OSdiskId -RecoveryResourceGroupId $RecoveryRG.ResourceId -
RecoveryReplicaDiskAccountType $RecoveryReplicaDiskAccountType `
 -RecoveryTargetDiskAccountType $RecoveryOSDiskAccountType
数据磁盘
如果 VM 包含数据磁盘,请使用以下命令创建磁盘配置。 如何不包含,则你可以跳过本部分。 从
$datadiskId到$DataDisk1ReplicationConfig $datadiskId = $vm.StorageProfile.OSDisk.ManagedDisk.Id。或者,
$RecoveryReplicaDiskAccountType = "Premium_LRS"
$RecoveryTargetDiskAccountType = "Premium_LRS"
$RecoveryRGId = $RecoveryRG.ResourceId
$DataDisk1ReplicationConfig = New-AzRecoveryServicesAsrAzureToAzureDiskReplicationConfig
-ManagedDisk -LogStorageAccountId $CacheStorageAccount.Id `
 -DiskId $OSdiskId -RecoveryResourceGroupId $RecoveryRGId -
RecoveryReplicaDiskAccountType $RecoveryReplicaDiskAccountType `
 -RecoveryTargetDiskAccountType $RecoveryTargetDiskAccountType
创建复制保护项以开始复制。 使用 GUID 作为复制保护项的名称,以确保名称的唯一性。 如果不恢复到可用性区域,请不要提供
-RecoveryAvailabilityZone参数。$TempASRJob = New-AzRecoveryServicesAsrReplicationProtectedItem -AzureToAzure -AzureVmId $VM.Id -Name $vm.Name -ProtectionContainerMapping $EdgeZoneToAzurePCMapping - AzureToAzureDiskReplicationConfiguration $DataDisk1ReplicationConfig - RecoveryResourceGroupId $RecoveryRGId -RecoveryAvailabilityZone “1” - RecoveryAzureNetworkId $recoveryVnet.Id -RecoveryAzureSubnetName “defaultsubnetconf”跟踪作业状态以检查完成情况。
while (($TempASRJob.State -eq "InProgress") -or ($TempASRJob.State -eq "NotStarted")){
sleep 10;
$TempASRJob = Get-AzRecoveryServicesAsrJob -Job $TempASRJob
}
检查作业是否已成功完成。 成功完成的作业的已更新作业状态必须为“成功”。
Write-Output $TempASRJob.State启动复制操作成功后,虚拟机数据将复制到恢复区域。
最初,当复制过程开始时,它会在恢复区域中创建虚拟机复制磁盘的副本。 此阶段中称为初始复制阶段。 此步骤需要约 20 分钟的时间。 在“保管库”边栏选项卡中的“复制的项”下查看复制状态。

复制完成后,保管库复制项将如下所示:
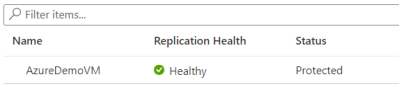
现在,虚拟机受到保护,你可以执行测试故障转移操作。 初始复制完成后,表示虚拟机的复制项的复制状态将转换为“受保护”状态。
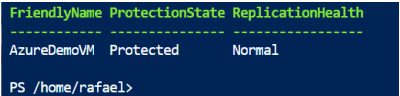
获取虚拟机对应的复制保护项的详细信息,监视该虚拟机的复制状态和复制运行状况:
$PE = Get-AzRecoveryServicesAsrReplicationProtectedItem
 -ProtectionContainer $PrimaryProtectionContainer
| Select FriendlyName, ProtectionState, ReplicationHealth
$PE
如果在“ProtectionState”中看到“Protected”,则表示已准备好继续执行测试故障转移。
执行、验证和清理测试故障转移。 可以跳过测试故障转移。 但是,我们建议执行测试故障转移,以确保次要区域按预期恢复正常。
为测试故障转移创建单独的网络(未连接到 DR 网络)。
$TFOVnet = New-AzVirtualNetwork -Name "TFOvnet" -ResourceGroupName "edgezonerecoveryrg"
-Location '<EdgeZoneRegion>' -AddressPrefix "10.3.0.0/26"

Add-AzVirtualNetworkSubnetConfig -Name "default" -VirtualNetwork $TFOVnet -AddressPrefix
"10.3.0.0/26" | Set-AzVirtualNetwork

$TFONetwork= $TFOVnet.Id
执行测试故障转移。
$ReplicationProtectedItem = Get-AzRecoveryServicesAsrReplicationProtectedItem -
FriendlyName "<VMName>" -ProtectionContainer $PrimaryProtectionContainer

$TFOJob = Start-AzRecoveryServicesAsrTestFailoverJob -ReplicationProtectedItem
$ReplicationProtectedItem -AzureVMNetworkId $TFONetwork -Direction PrimaryToRecovery
等待作业完成。
while (($TFOJob.State -eq "InProgress") -or ($TFOJob.State -eq
"NotStarted")){
 sleep 10;
 $TFOJob = Get-AzRecoveryServicesAsrJob -Job $TFOJob
}
等待测试故障转移完成。
Get-AzRecoveryServicesAsrJob -Job $TFOJob
注意
还可以转到门户,选择保管库,然后选择 Site Recovery 作业,以检查作业进度。
测试故障转移作业成功完成后,可以连接到测试故障转移虚拟机,并验证测试故障转移。 对测试故障转移虚拟机完成测试后,通过启动清理测试故障转移操作来清理测试副本。 此操作会删除测试故障转移创建的虚拟机测试副本。 验证测试故障转移 VM 中的所有目标设置是否都正确,包括位置、网络设置、没有数据损坏以及目标 VM 中没有数据丢失。 现在可以删除测试故障转移并开始故障转移。
$Job_TFOCleanup = Start-AzRecoveryServicesAsrTestFailoverCleanupJob -
ReplicationProtectedItem $ReplicationProtectedItem
Get-AzRecoveryServicesAsrJob -Job $Job_TFOCleanup | Select State
下一步是故障转移虚拟机。 此步骤将使用恢复区域中复制的磁盘来创建 VM。
$ReplicationProtectedItem = Get-AzRecoveryServicesAsrReplicationProtectedItem -
FriendlyName "<VMName>" -ProtectionContainer $PrimaryProtectionContainer
$RecoveryPoints = Get-AzRecoveryServicesAsrRecoveryPoint -ReplicationProtectedItem
$ReplicationProtectedItem
返回的恢复点列表可能未按时间顺序排序。 需要先对这些恢复点进行排序,以查找虚拟机的最早或最新恢复点。
 "{0} {1}" -f $RecoveryPoints[0].RecoveryPointType, $RecoveryPoints[-
1].RecoveryPointTime
启动故障转移作业。
$Job_Failover = Start-AzRecoveryServicesAsrUnplannedFailoverJob -
ReplicationProtectedItem $ReplicationProtectedItem -Direction PrimaryToRecovery -
RecoveryPoint $RecoveryPoints[-1]
do {
$Job_Failover = Get-AzRecoveryServicesAsrJob -Job $Job_Failover;
sleep 30;
} while (($Job_Failover.State -eq "InProgress") -or ($JobFailover.State -eq
"NotStarted"))
$Job_Failover.State
当故障转移作业成功时,你可以提交故障转移。
 $CommitFailoverJob = Start-AzRecoveryServicesAsrCommitFailoverJob -
ReplicationProtectedItem $ReplicationProtectedItem
等待提交故障转移作业完成。
while (($CommitFailoverJob.State -eq "InProgress") -or ($CommitFailoverJob.State
-eq "NotStarted")){
 sleep 10;
 $CommitFailoverJob = Get-AzRecoveryServicesAsrJob -Job $CommitFailoverJob
}
 Get-AzRecoveryServicesAsrJob -Job $CommitFailoverJOb
故障转移后,准备好恢复到原始区域时,使用
Update-AzRecoveryServicesAsrProtectionDirectioncmdlet 对复制保护的项启动反向复制。为恢复区域中的复制日志创建缓存存储帐户。
$EdgeZoneCacheStorageAccount = New-AzStorageAccount -Name "cachestorageedgezone" -
ResourceGroupName "<ResourceGroupName>" -Location '<EdgeZoneRegion>' -SkuName
Standard_LRS -Kind Storage
使用恢复保护容器、Azure 公共 MEC 区域中的新缓存存储帐户和源区域 VM 资源组。
$ReplicationProtectedItem = Get-AzRecoveryServicesAsrReplicationProtectedItem -
FriendlyName $vm.name -ProtectionContainer $PrimaryProtectionContainer
 $sourceVMResourcegroupId = $(Get-AzResourceGroup -Name $vm.ResourceGroupName).
ResourceId
Update-ASRProtectionDirection -ReplicationProtectedItem $ReplicationProtectedItem `
 -AzureToAzure `
 -ProtectionContainerMapping $AzureToEdgeZonePCMapping `
 -LogStorageAccountId $EdgeZoneCacheStorageAccount.Id `
 -RecoveryResourceGroupID $sourceVMResourcegroupId
此步骤大约需要 20 分钟,状态将从“正在进行”变为“成功”。

禁用复制。
Remove-AzRecoveryServicesAsrReplicationProtectedItem -ReplicationProtectedItem
$ReplicationProtectedItem
清理环境。 此步骤是可选的,可用于删除资源组。
Remove-AzResourceGroup -Name $Name -Force
