How to set up endpoints on a Linux classic virtual machine in Azure
Important
Classic VMs will be retired on March 1, 2023.
If you use IaaS resources from ASM, please complete your migration by March 1, 2023. We encourage you to make the switch sooner to take advantage of the many feature enhancements in Azure Resource Manager.
For more information, see Migrate your IaaS resources to Azure Resource Manager by March 1, 2023.
All Linux virtual machines that you create in Azure using the classic deployment model can automatically communicate over a private network channel with other virtual machines in the same cloud service or virtual network. However, computers on the Internet or other virtual networks require endpoints to direct the inbound network traffic to a virtual machine. This article is also available for Windows virtual machines.
Note
Azure has two different deployment models for creating and working with resources: Resource Manager and Classic. This article covers using the Classic deployment model. Microsoft recommends that most new deployments use the Resource Manager model.
Starting November 15, 2017, virtual machines will be available only in the Azure portal.
In the Resource Manager deployment model, endpoints are configured using Network Security Groups (NSGs). For more information, see Opening ports and endpoints.
When you create a Linux virtual machine in the Azure portal, an endpoint for Secure Shell (SSH) is typically created for you automatically. You can configure additional endpoints while creating the virtual machine or afterwards as needed.
Each endpoint has a public port and a private port:
- The public port is used by the Azure load balancer to listen for incoming traffic to the virtual machine from the internet.
- The private port is used by the virtual machine to listen for incoming traffic, typically destined to an application or service running on the virtual machine.
Default values for the IP protocol and TCP or UDP ports for well-known network protocols are provided when you create endpoints with the Azure portal. For custom endpoints, specify the correct IP protocol (TCP or UDP) and the public and private ports. To distribute incoming traffic randomly across multiple virtual machines, create a load-balanced set consisting of multiple endpoints.
After you create an endpoint, you can use an access control list (ACL) to define rules that permit or deny the incoming traffic to the public port of the endpoint based on its source IP address. However, if the virtual machine is in an Azure virtual network, use network security groups instead. For more information, see About network security groups.
Note
Firewall configuration for Azure virtual machines is done automatically for ports associated with remote connectivity endpoints that Azure sets up automatically. For ports specified for all other endpoints, no configuration is done automatically to the firewall of the virtual machine. When you create an endpoint for the virtual machine, ensure that the firewall of the virtual machine also allows the traffic for the protocol and private port corresponding to the endpoint configuration. To configure the firewall, see the documentation or on-line help for the operating system running on the virtual machine.
Create an endpoint
Sign in to the Azure portal.
Select Virtual machines, and then select the virtual machine that you want to configure.
Select Endpoints in the Settings group. The Endpoints page appears, which lists all the current endpoints for the virtual machine. (This example is for a Windows VM. A Linux VM will by default show an endpoint for SSH.)
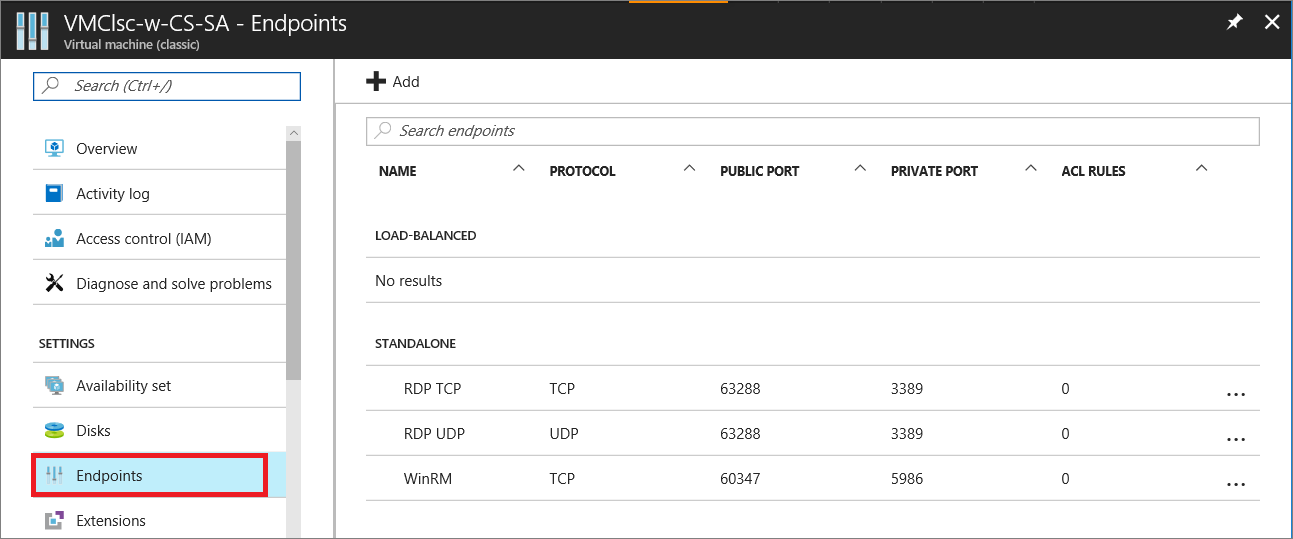
In the command bar above the endpoint entries, select Add. The Add endpoint page appears.
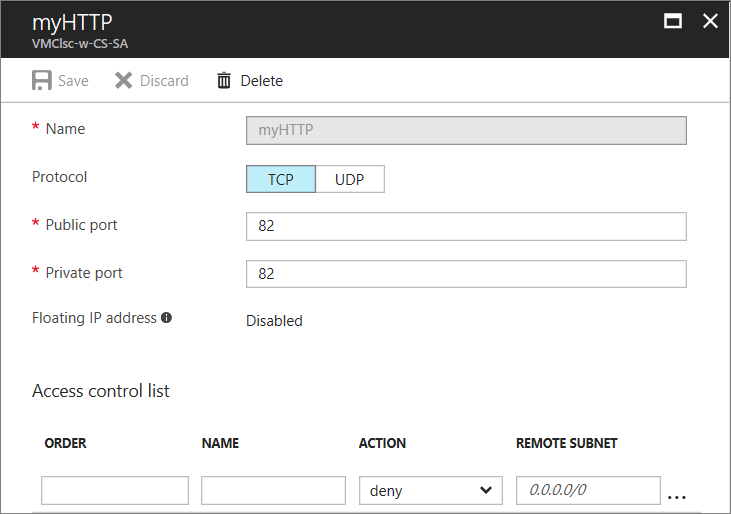
For Name, enter a name for the endpoint.
For Protocol, choose either TCP or UDP.
For Public port, enter the port number for the incoming traffic from the internet.
For Private port, enter the port number on which the virtual machine is listening. The public and private port numbers can be different. Ensure that the firewall on the virtual machine has been configured to allow the traffic corresponding to the protocol and private port.
Select OK.
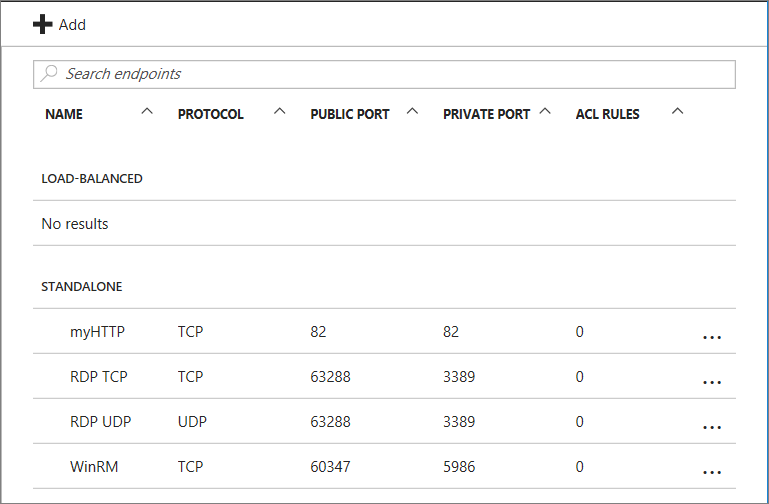
The new endpoint is listed on the Endpoints page.
Manage the ACL on an endpoint
To define the set of computers that can send traffic, the ACL on an endpoint can restrict traffic based upon source IP address. Follow these steps to add, modify, or remove an ACL on an endpoint.
Note
If the endpoint is part of a load-balanced set, any changes you make to the ACL on an endpoint are applied to all endpoints in the set.
If the virtual machine is in an Azure virtual network, use network security groups instead of ACLs. For more information, see About network security groups.
Sign in to the Azure portal.
Select Virtual machines, and then select the name of the virtual machine that you want to configure.
Select Endpoints. From the endpoints list, select the appropriate endpoint. The ACL list is at the bottom of the page.
Use rows in the list to add, delete, or edit rules for an ACL and change their order. The REMOTE SUBNET value is an IP address range for incoming traffic from the internet that the Azure load balancer uses to permit or deny the traffic based on its source IP address. Be sure to specify the IP address range in classless inter-domain routing (CIDR) format, also known as address prefix format. For example,
10.1.0.0/8.
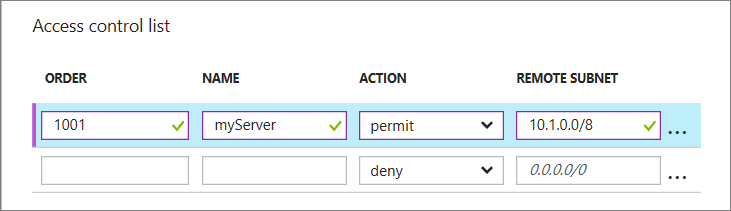
You can use rules to allow only traffic from specific computers corresponding to your computers on the internet or to deny traffic from specific, known address ranges.
The rules are evaluated in order starting with the first rule and ending with the last rule. Therefore, rules should be ordered from least restrictive to most restrictive. For more information, see What is a Network Access Control List.
Next steps
- You can also create a VM endpoint by using the Azure Command-Line Interface. Run the azure vm endpoint create command.
- If you created a virtual machine in the Resource Manager deployment model, you can use the Azure CLI in Resource Manager mode to create network security groups to control traffic to the VM.