Azure VM is unresponsive while applying Security Policy to the system
This article provides steps to resolve issues where the OS hangs and becomes unresponsive while it is applying a security policy in an Azure VM.
Symptoms
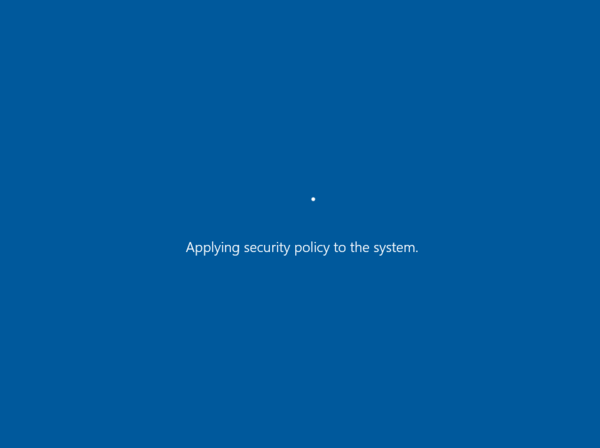
When you use Boot diagnostics to view the screenshot of the VM, you will see that the screenshot displays the OS stuck while booting with the message:
'Applying security policy to the system'.

Cause
There is a plethora of potential causes of this issue. You will not be able to know the source until after a memory dump analysis is performed.
Resolution
Process Overview
Tip
If you have a recent backup of the VM, you may try restoring the VM from the backup to fix the boot problem.
- Create and Access a Repair VM
- Enable Serial Console and Memory Dump Collection
- Rebuild the VM
- Collect the Memory Dump File
Create and Access a Repair VM
- Use steps 1-3 of the VM Repair Commands to prepare a Repair VM.
- Use Remote Desktop Connection connect to the Repair VM.
Enable Serial Console and Memory Dump Collection
To enable memory dump collection and Serial Console, run this script:
Open an elevated command prompt session (Run as administrator).
List the BCD store data and determine the boot loader identifier, which you will use in the next step.
For a Generation 1 VM, enter the following command and note the identifier listed:
bcdedit /store <BOOT PARTITON>:\boot\bcd /enumIn the command, replace <BOOT PARTITON> with the letter of the partition in the attached disk that contains the boot folder.

For a Generation 2 VM, enter the following command and note the identifier listed:
bcdedit /store <LETTER OF THE EFI SYSTEM PARTITION>:EFI\Microsoft\boot\bcd /enum- In the command, replace <LETTER OF THE EFI SYSTEM PARTITION> with the letter of the EFI System Partition.
- It may be helpful to launch the Disk Management console to identify the appropriate system partition labeled as "EFI System Partition".
- The identifier may be a unique GUID or it could be the default "bootmgr".
Run the following commands to enable Serial Console:
bcdedit /store <VOLUME LETTER WHERE THE BCD FOLDER IS>:\boot\bcd /ems {<BOOT LOADER IDENTIFIER>} ONbcdedit /store <VOLUME LETTER WHERE THE BCD FOLDER IS>:\boot\bcd /emssettings EMSPORT:1 EMSBAUDRATE:115200- In the command, replace <VOLUME LETTER WHERE THE BCD FOLDER IS> with the letter of the BCD folder.
- In the command, replace <BOOT LOADER IDENTIFIER> with the identifier you found in the previous step.
Verify that the free space on the OS disk is greater than the memory size (RAM) on the VM.
If there's not enough space on the OS disk, you should change the location where the memory dump file will be created. Rather than creating the file on the OS disk, you can refer it to any other data disk attached to the VM that has enough free space. To change the location, replace "%SystemRoot%" with the drive letter (for example "F:") of the data disk in the commands listed below.
Enter the commands below (suggested dump configuration):
Load Broken OS Disk:
REG LOAD HKLM\BROKENSYSTEM <VOLUME LETTER OF BROKEN OS DISK>:\windows\system32\config\SYSTEMEnable on ControlSet001:
REG ADD "HKLM\BROKENSYSTEM\ControlSet001\Control\CrashControl" /v CrashDumpEnabled /t REG_DWORD /d 1 /f
REG ADD "HKLM\BROKENSYSTEM\ControlSet001\Control\CrashControl" /v DumpFile /t REG_EXPAND_SZ /d "%SystemRoot%\MEMORY.DMP" /f
REG ADD "HKLM\BROKENSYSTEM\ControlSet001\Control\CrashControl" /v NMICrashDump /t REG_DWORD /d 1 /f
Enable on ControlSet002:
REG ADD "HKLM\BROKENSYSTEM\ControlSet002\Control\CrashControl" /v CrashDumpEnabled /t REG_DWORD /d 1 /f
REG ADD "HKLM\BROKENSYSTEM\ControlSet002\Control\CrashControl" /v DumpFile /t REG_EXPAND_SZ /d "%SystemRoot%\MEMORY.DMP" /f
REG ADD "HKLM\BROKENSYSTEM\ControlSet002\Control\CrashControl" /v NMICrashDump /t REG_DWORD /d 1 /f
Unload Broken OS Disk:
REG UNLOAD HKLM\BROKENSYSTEM
Rebuild the VM
Use step 5 of the VM Repair Commands to reassemble the VM.
Collect the Memory Dump File
To resolve this problem, you would need first to gather the memory dump file for the crash and contact support with the memory dump file. To collect the dump file, follow these steps:
Attach the OS disk to a new Repair VM:
- Use steps 1-3 of the VM Repair Commands to prepare a new Repair VM.
- Use Remote Desktop Connection connect to the Repair VM.
Locate the dump file and submit a support ticket:
- On the repair VM, go to windows folder in the attached OS disk. If the driver letter that is assigned to the attached OS disk is
F, you need to go toF:\Windows. - Locate the memory.dmp file, and then submit a support ticket with the memory dump file.
- If you are having trouble locating the memory.dmp file, you may wish to use non-maskable interrupt (NMI) calls in serial console instead. You can follow the guide to generate a crash dump file using NMI calls.
- On the repair VM, go to windows folder in the attached OS disk. If the driver letter that is assigned to the attached OS disk is
Next steps
If you have issues when you apply Local Users and Groups policy see VM is unresponsive when applying Group Policy Local Users and Groups policy.
Contact us for help
If you have questions or need help, create a support request, or ask Azure community support. You can also submit product feedback to Azure feedback community.
Feedback
Coming soon: Throughout 2024 we will be phasing out GitHub Issues as the feedback mechanism for content and replacing it with a new feedback system. For more information see: https://aka.ms/ContentUserFeedback.
Submit and view feedback for