Windows 10 VPN 客户端中已引入 Always On 功能。 借助 Always On 功能,可保持 VPN 连接。 有了 Always On,有效的 VPN 配置文件就能根据触发因素(例如用户登录、网络状态更改或设备屏幕活动状态)自动建立连接并保持连接。
- 网络转换 - 在 Wi-Fi 网络之间切换或从 Wi-Fi 移动到手机网络热点可能会导致 VPN 隧道以无提示方式下降。
- 临时网络中断 - 短暂的网络中断(例如信号丢失或路由器重启),终止 VPN 连接,需要手动重新连接。
- 空闲会话超时 - 如果一段时间内没有流量通过隧道,VPN 网关可能会终止该空闲会话。
- 设备重启和用户注销 - 重启 或注销后,除非用户手动重新连接,否则不会还原 VPN 连接。
这些差距使设备不受保护,并且无法访问公司资源。 启用 AlwaysOn 可确保 VPN 客户端在发生任何中断后自动重新连接,维护持久且安全的隧道,而无需用户干预。
可将网关与 Always On 配合使用,以便建立通往 Azure 的持久性用户隧道和设备隧道。
Always On VPN 连接包括下述两种隧道类型之一:
设备隧道:在用户登录设备之前连接到指定的 VPN 服务器。 预登录连接方案和设备管理使用设备隧道。
用户隧道:只会在用户登录到设备后进行连接。 可以使用用户隧道通过 VPN 服务器访问组织资源。
设备隧道和用户隧道的运行独立于其 VPN 配置文件。 它们可以同时连接,在适当的情况下可以使用不同的身份验证方法和其他 VPN 配置设置。
先决条件
必须创建点到站点配置并编辑虚拟中心分配。 有关说明,请参阅以下部分:
配置设备隧道
必须满足以下要求才能成功建立设备隧道:
- 该设备必须是已加入域且运行 Windows 10 企业版或教育版 1809 或更高版本的计算机。
- 只可针对 Windows 内置 VPN 解决方案配置该隧道;结合计算机证书身份验证使用 IKEv2 建立该隧道。
- 对于每台设备,只能配置一个设备隧道。
- 按照点到站点 VPN 客户端一文中所述,在 Windows 10 或更高版本客户端上安装客户端证书。 证书需位于本地计算机存储中。
- 按照这些说明创建 VPN 配置文件,并在 LOCAL SYSTEM 帐户的上下文中配置设备隧道。
设备隧道的配置示例
配置虚拟网络网关并在 Windows 10 或更高版本客户端的本地计算机存储中安装客户端证书后,使用以下示例配置客户端设备隧道:
复制以下文本,并将其另存为 devicecert.ps1。
Param( [string]$xmlFilePath, [string]$ProfileName ) $a = Test-Path $xmlFilePath echo $a $ProfileXML = Get-Content $xmlFilePath echo $XML $ProfileNameEscaped = $ProfileName -replace ' ', '%20' $Version = 201606090004 $ProfileXML = $ProfileXML -replace '<', '<' $ProfileXML = $ProfileXML -replace '>', '>' $ProfileXML = $ProfileXML -replace '"', '"' $nodeCSPURI = './Vendor/MSFT/VPNv2' $namespaceName = "root\cimv2\mdm\dmmap" $className = "MDM_VPNv2_01" $session = New-CimSession try { $newInstance = New-Object Microsoft.Management.Infrastructure.CimInstance $className, $namespaceName $property = [Microsoft.Management.Infrastructure.CimProperty]::Create("ParentID", "$nodeCSPURI", 'String', 'Key') $newInstance.CimInstanceProperties.Add($property) $property = [Microsoft.Management.Infrastructure.CimProperty]::Create("InstanceID", "$ProfileNameEscaped", 'String', 'Key') $newInstance.CimInstanceProperties.Add($property) $property = [Microsoft.Management.Infrastructure.CimProperty]::Create("ProfileXML", "$ProfileXML", 'String', 'Property') $newInstance.CimInstanceProperties.Add($property) $session.CreateInstance($namespaceName, $newInstance) $Message = "Created $ProfileName profile." Write-Host "$Message" } catch [Exception] { $Message = "Unable to create $ProfileName profile: $_" Write-Host "$Message" exit } $Message = "Complete." Write-Host "$Message"复制以下文本,并在 devicecert.ps1 所在的文件夹中将其另存为 VPNProfile.xml。 编辑以下文本,使之与你的环境相匹配。
<Servers>azuregateway-1234-56-78dc.chinacloudapp.cn</Servers> <= Can be found in the VpnSettings.xml in the downloaded profile zip file<Address>192.168.3.5</Address> <= IP of resource in the vnet or the vnet address space<Address>192.168.3.4</Address> <= IP of resource in the vnet or the vnet address space
<VPNProfile>
  <NativeProfile>
<Servers>azuregateway-1234-56-78dc.chinacloudapp.cn</Servers>
<NativeProtocolType>IKEv2</NativeProtocolType>
<Authentication>
  <MachineMethod>Certificate</MachineMethod>
</Authentication>
<RoutingPolicyType>SplitTunnel</RoutingPolicyType>
 <!-- disable the addition of a class based route for the assigned IP address on the VPN interface -->
<DisableClassBasedDefaultRoute>true</DisableClassBasedDefaultRoute>
  </NativeProfile>
  <!-- use host routes(/32) to prevent routing conflicts -->
  <Route>
<Address>192.168.3.5</Address>
<PrefixSize>32</PrefixSize>
  </Route>
  <Route>
<Address>192.168.3.4</Address>
<PrefixSize>32</PrefixSize>
  </Route>
<!-- need to specify always on = true -->
  <AlwaysOn>true</AlwaysOn>
<!-- new node to specify that this is a device tunnel -->
 <DeviceTunnel>true</DeviceTunnel>
<!--new node to register client IP address in DNS to enable manage out -->
<RegisterDNS>true</RegisterDNS>
</VPNProfile>
从 Sysinternals 下载 PsExec,并将文件解压缩到 C:\PSTools。
在管理员命令提示符下,运行以下命令启动 PowerShell:
对于 32 位 Windows:
PsExec.exe -s -i powershell对于 64 位 Windows:
PsExec64.exe -s -i powershell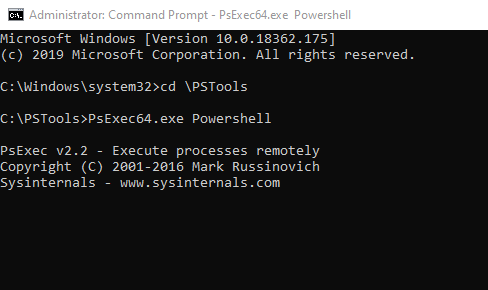
在 PowerShell 中,切换到 devicecert.ps1 和 VPNProfile.xml 所在的文件夹,然后运行以下命令:
.\devicecert.ps1 .\VPNProfile.xml MachineCertTest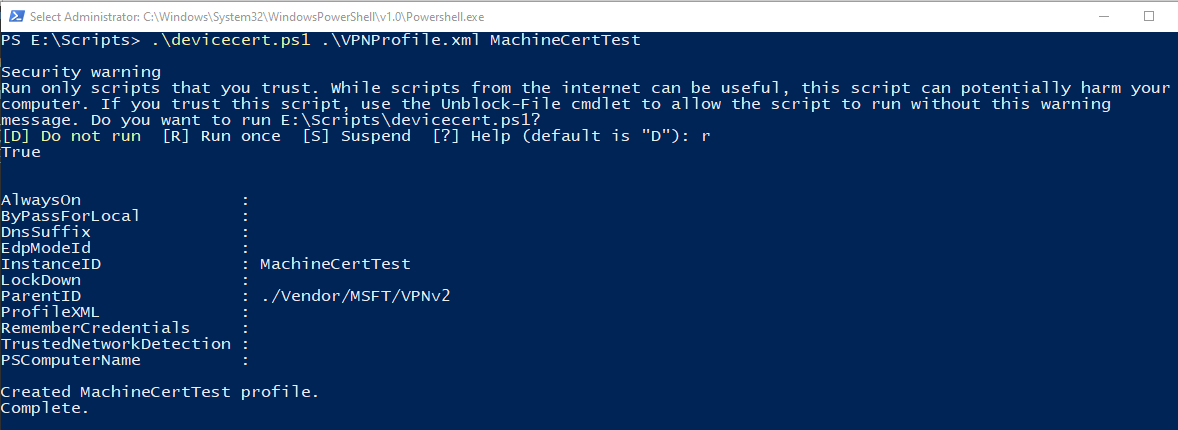
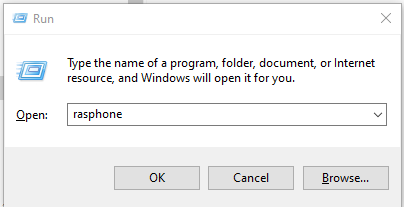
运行 rasphone。
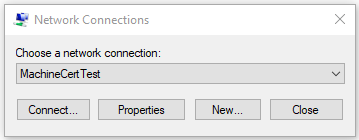
找到 MachineCertTest 条目并单击“连接”。
如果连接成功,请重新启动计算机。 隧道将自动连接。
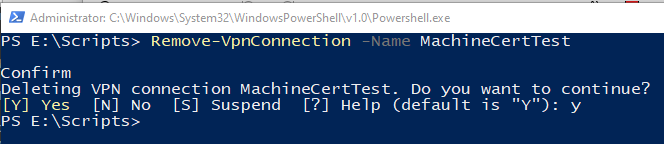
移除配置文件
若要删除配置文件,请运行以下命令:
后续步骤
有关虚拟 WAN 的详细信息,请参阅常见问题解答。