为虚拟 WAN 配置 Always On VPN 用户隧道
Windows 10 VPN 客户端中引入了 Always On 功能。 通过 Always On 功能可保持 VPN 连接。 有了 Always On,有效的 VPN 配置文件就能根据触发因素(例如用户登录、网络状态更改或设备屏幕活动状态)自动建立连接并保持连接。
可将网关与 Always On 配合使用,以便建立通往 Azure 的持久用户隧道和设备隧道。
Always On VPN 连接包括下述两种隧道类型之一:
设备隧道:在用户登录到设备之前连接到指定的 VPN 服务器。 预登录连接方案和设备管理使用设备隧道。
用户隧道:只会在用户登录到设备后进行连接。 可以使用用户隧道通过 VPN 服务器访问组织资源。
设备隧道和用户隧道的运行独立于其 VPN 配置文件。 它们可以同时连接,在适当的情况下可以使用不同的身份验证方法和其他 VPN 配置设置。
先决条件
必须创建点到站点配置并编辑虚拟中心分配。 有关说明,请参阅以下部分:
配置用户隧道
按照此点到站点 VPN 客户端文章中所述,在 Windows 客户端上安装客户端证书。 该证书必须位于当前用户存储中。
按照配置 Windows 10 或以上版本客户端 Always On VPN 连接中的说明操作,可以通过 PowerShell、Configuration Manager 或 Intune 配置 Always On VPN 客户端。
用户隧道的示例配置
配置虚拟网关并在 Windows 客户端的本地计算机存储中安装客户端证书后,请根据以下示例配置客户端设备隧道。 请注意,这些示例已在 Windows 10 上得到验证。
复制以下文本,将其另存为 usercert.ps1:
Param( [string]$xmlFilePath, [string]$ProfileName ) $a = Test-Path $xmlFilePath echo $a $ProfileXML = Get-Content $xmlFilePath echo $XML $ProfileNameEscaped = $ProfileName -replace ' ', '%20' $Version = 201606090004 $ProfileXML = $ProfileXML -replace '<', '<' $ProfileXML = $ProfileXML -replace '>', '>' $ProfileXML = $ProfileXML -replace '"', '"' $nodeCSPURI = './Vendor/MSFT/VPNv2' $namespaceName = "root\cimv2\mdm\dmmap" $className = "MDM_VPNv2_01" $session = New-CimSession try { $newInstance = New-Object Microsoft.Management.Infrastructure.CimInstance $className, $namespaceName $property = [Microsoft.Management.Infrastructure.CimProperty]::Create("ParentID", "$nodeCSPURI", 'String', 'Key') $newInstance.CimInstanceProperties.Add($property) $property = [Microsoft.Management.Infrastructure.CimProperty]::Create("InstanceID", "$ProfileNameEscaped", 'String', 'Key') $newInstance.CimInstanceProperties.Add($property) $property = [Microsoft.Management.Infrastructure.CimProperty]::Create("ProfileXML", "$ProfileXML", 'String', 'Property') $newInstance.CimInstanceProperties.Add($property) $session.CreateInstance($namespaceName, $newInstance) $Message = "Created $ProfileName profile." Write-Host "$Message" } catch [Exception] { $Message = "Unable to create $ProfileName profile: $_" Write-Host "$Message" exit } $Message = "Complete." Write-Host "$Message"复制以下文本,在 usercert.ps1 所在的文件夹中将其另存为 VPNProfile.xml。 编辑以下文本,使之与环境匹配:
<Servers>azuregateway-1234-56-78dc.chinacloudapp.cn</Servers> <= Can be found in the VpnSettings.xml in the downloaded profile zip file<Address>192.168.3.5</Address> <= IP of resource in the vnet or the vnet address space<Address>192.168.3.4</Address> <= IP of resource in the vnet or the vnet address space<PrefixSize>32</PrefixSize> <= Subnet mask
 <VPNProfile>
   <NativeProfile>
 <Servers>azuregateway-b115055e-0882-49bc-a9b9-7de45cba12c0-8e6946892333.vpn.chinacloudapi.cn</Servers>
 <NativeProtocolType>IKEv2</NativeProtocolType>
 <Authentication>
 <UserMethod>Eap</UserMethod>
 <Eap>
 <Configuration>
 <EapHostConfig xmlns="http://www.microsoft.com/provisioning/EapHostConfig"><EapMethod><Type xmlns="http://www.microsoft.com/provisioning/EapCommon">13</Type><VendorId xmlns="http://www.microsoft.com/provisioning/EapCommon">0</VendorId><VendorType xmlns="http://www.microsoft.com/provisioning/EapCommon">0</VendorType><AuthorId xmlns="http://www.microsoft.com/provisioning/EapCommon">0</AuthorId></EapMethod><Config xmlns="http://www.microsoft.com/provisioning/EapHostConfig"><Eap xmlns="http://www.microsoft.com/provisioning/BaseEapConnectionPropertiesV1"><Type>13</Type><EapType xmlns="http://www.microsoft.com/provisioning/EapTlsConnectionPropertiesV1"><CredentialsSource><CertificateStore><SimpleCertSelection>true</SimpleCertSelection></CertificateStore></CredentialsSource><ServerValidation><DisableUserPromptForServerValidation>false</DisableUserPromptForServerValidation><ServerNames></ServerNames></ServerValidation><DifferentUsername>false</DifferentUsername><PerformServerValidation xmlns="http://www.microsoft.com/provisioning/EapTlsConnectionPropertiesV2">false</PerformServerValidation><AcceptServerName xmlns="http://www.microsoft.com/provisioning/EapTlsConnectionPropertiesV2">false</AcceptServerName></EapType></Eap></Config></EapHostConfig>
 </Configuration>
 </Eap>
 </Authentication>
 <RoutingPolicyType>SplitTunnel</RoutingPolicyType>
  <!-- disable the addition of a class based route for the assigned IP address on the VPN interface -->
 <DisableClassBasedDefaultRoute>true</DisableClassBasedDefaultRoute>
   </NativeProfile>
   <!-- use host routes(/32) to prevent routing conflicts -->
   <Route>
 <Address>192.168.3.5</Address>
 <PrefixSize>32</PrefixSize>
   </Route>
   <Route>
 <Address>192.168.3.4</Address>
 <PrefixSize>32</PrefixSize>
   </Route>
 <!-- traffic filters for the routes specified above so that only this traffic can go over the device tunnel -->
   <TrafficFilter>
 <RemoteAddressRanges>192.168.3.4, 192.168.3.5</RemoteAddressRanges>
   </TrafficFilter>
 <!-- need to specify always on = true -->
 <AlwaysOn>true</AlwaysOn>
 <RememberCredentials>true</RememberCredentials>
 <!--new node to register client IP address in DNS to enable manage out -->
 <RegisterDNS>true</RegisterDNS>
 </VPNProfile>
以管理员身份运行 PowerShell。
在 PowerShell 中切换到 usercert.ps1 和 VPNProfile.xml 所在的文件夹,然后运行以下命令:
C:\> .\usercert.ps1 .\VPNProfile.xml UserTest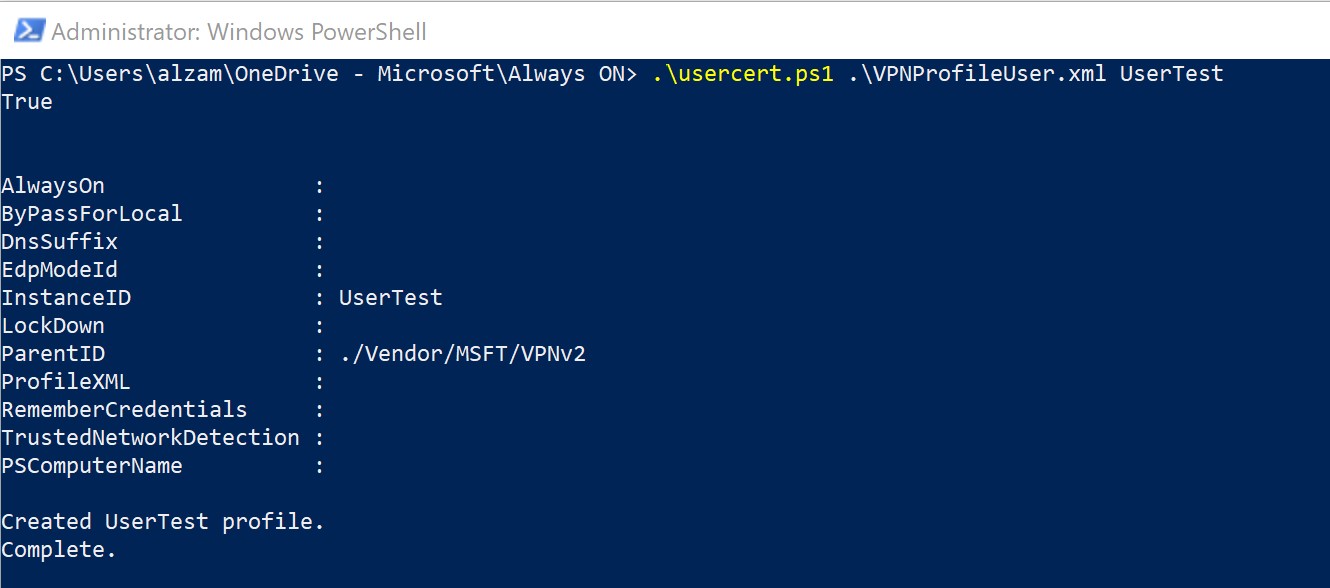
在“VPN 设置”下查找“UserTest”条目,然后选择“连接”。
如果连接成功,则表明已成功配置 Always On 用户隧道。
删除配置文件
若要删除配置文件,请执行以下步骤:
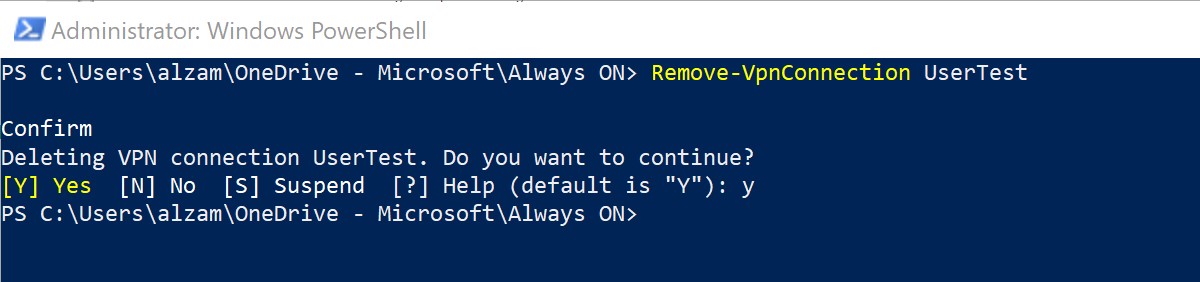
运行以下命令:
C:\> Remove-VpnConnection UserTest断开连接,清除“自动连接”复选框。
后续步骤
有关虚拟 WAN 的详细信息,请参阅常见问题解答。