Note
Access to this page requires authorization. You can try signing in or changing directories.
Access to this page requires authorization. You can try changing directories.
In Azure Active Directory B2C (Azure AD B2C), a tenant represents your directory of consumer users. Each Azure AD B2C tenant is distinct and separate from any other Azure AD B2C tenant. An Azure AD B2C tenant is different than an Azure Active Directory (Azure AD) tenant, which you may already have. In this article, you learn how to manage your Azure AD B2C tenant.
- If you haven't already created your own Azure AD B2C Tenant, create one now. You can use an existing Azure AD B2C tenant.
- Understand user accounts in Azure AD B2C.
- Understand user roles to control resource access.
To create a new administrative account, follow these steps:
Sign in to the Azure portal with Global Administrator or Privileged Role Administrator permissions.
Make sure you're using the directory that contains your Azure AD B2C tenant. Select the Directories + subscriptions icon in the portal toolbar.
On the Portal settings | Directories + subscriptions page, find your Azure AD B2C directory in the Directory name list, and then select Switch.
Under Azure services, select Azure AD B2C. Or use the search box to find and select Azure AD B2C.
Under Manage, select Users.
Select New user.
Select Create user (you can create many users at once by selecting I want to create users in bulk).
On the User page, enter information for this user:
- User name. Required. The user name of the new user. For example,
mary@contoso.com. The domain part of the user name must use the initial default domain name, <tenant name>.partner.onmschina.cn. - Name. Required. The first and last name of the new user. For example, Mary Parker.
- Groups. Optional. You can add the user to one or more existing groups. You can also add the user to groups at a later time.
- Directory role: If you require Azure AD administrative permissions for the user, you can add them to an Azure AD role. You can assign the user to be a Global administrator or one or more of the limited administrator roles in Azure AD. For more information about assigning roles, see Use roles to control resource access.
- Job info: You can add more information about the user here, or do it later.
- User name. Required. The user name of the new user. For example,
Copy the autogenerated password provided in the Password box. You'll need to give this password to the user to sign in for the first time.
Select Create.
The user is created and added to your Azure AD B2C tenant. It's preferable to have at least one work account native to your Azure AD B2C tenant assigned the Global Administrator role. This account can be considered a break-glass account or emergency access accounts.
It's important that you prevent being accidentally locked out of your Azure Active Directory B2C (Azure AD B2C) organization because you can't sign in or activate another user's account as an administrator. You can mitigate the impact of accidental lack of administrative access by creating two or more emergency access accounts in your organization.
When configuring these accounts, the following requirements need to be met:
The emergency access accounts shouldn't be associated with any individual user in the organization. Make sure that your accounts aren't connected with any employee-supplied mobile phones, hardware tokens that travel with individual employees, or other employee-specific credentials. This precaution covers instances where an individual employee is unreachable when the credential is needed. It's important to ensure that any registered devices are kept in a known, secure location that has multiple means of communicating with Azure AD B2C.
Use strong authentication for your emergency access accounts and make sure it doesn’t use the same authentication methods as your other administrative accounts. For example, if your normal administrator account uses the Microsoft Authenticator app for strong authentication, use a FIDO2 security key for your emergency accounts.
The device or credential must not expire or be in scope of automated cleanup due to lack of use.
Create two or more emergency access accounts. These accounts should be cloud-only accounts that use the *.partner.onmschina.cn domain and that aren't federated or synchronized from an on-premises environment.
Use the following steps to create an emergency access account:
Sign in to the Azure portal as an existing Global Administrator. If you use your Azure AD account, make sure you're using the directory that contains your Azure AD B2C tenant:
Select the Directories + subscriptions icon in the portal toolbar.
On the Portal settings | Directories + subscriptions page, find your Azure AD B2C directory in the Directory name list, and then select Switch.
Under Azure services, select Azure AD B2C. Or in the Azure portal, search for and select Azure AD B2C.
In the left menu, under Manage, select Users.
Select + New user.
Select Create user.
Under Identity:
For User name, enter a unique user name such as emergency account.
For Name, enter a name such as Emergency Account
Under Groups and roles
Select User.
In the pane that shows up, search for and select Global administrator, and then select Select button.
Under Settings, select the appropriate Usage location.
Select Create.
Once you create your emergency accounts, you need to do the following:
Make sure you exclude at least one account from phone-based multi-factor authentication
If you use Conditional Access, at least one emergency access account needs to be excluded from all Conditional Access policies.
You can also invite a new guest user to manage your tenant. The guest account is the preferred option when your organization also has Azure AD because the lifecycle of this identity can be managed externally.
To invite a user, follow these steps:
Sign in to the Azure portal with Global Administrator or Privileged Role Administrator permissions.
Make sure you're using the directory that contains your Azure AD B2C tenant. Select the Directories + subscriptions icon in the portal toolbar.
On the Portal settings | Directories + subscriptions page, find your Azure AD B2C directory in the Directory name list, and then select Switch.
Under Azure services, select Azure AD B2C. Or use the search box to find and select Azure AD B2C.
Under Manage, select Users.
Select New guest account.
On the User page, enter information for this user:
- Name. Required. The first and last name of the new user. For example, Mary Parker.
- Email address. Required. The email address of the user you would like to invite, which must be a Microsoft account. For example,
mary@contoso.com. - Personal message: You add a personal message that will be included in the invite email.
- Groups. Optional. You can add the user to one or more existing groups. You can also add the user to groups at a later time.
- Directory role: If you require Azure AD administrative permissions for the user, you can add them to an Azure AD role. You can assign the user to be a Global administrator or one or more of the limited administrator roles in Azure AD. For more information about assigning roles, see Use roles to control resource access.
- Job info: You can add more information about the user here, or do it later.
Select Create.
An invitation email is sent to the user. The user needs to accept the invitation to be able to sign in.
If the guest didn't receive the invitation email, or the invitation expired, you can resend the invite. As an alternative to the invitation email, you can give a guest a direct link to accept the invitation. To resend the invitation and get the direct link:
Sign in to the Azure portal.
Make sure you're using the directory that contains your Azure AD B2C tenant. Select the Directories + subscriptions icon in the portal toolbar.
On the Portal settings | Directories + subscriptions page, find your Azure AD B2C directory in the Directory name list, and then select Switch.
Under Azure services, select Azure AD B2C. Or use the search box to find and select Azure AD B2C.
Under Manage, select Users.
Search for and select the user you want to resend the invite to.
In the User | Profile page, under Identity, select (Manage).
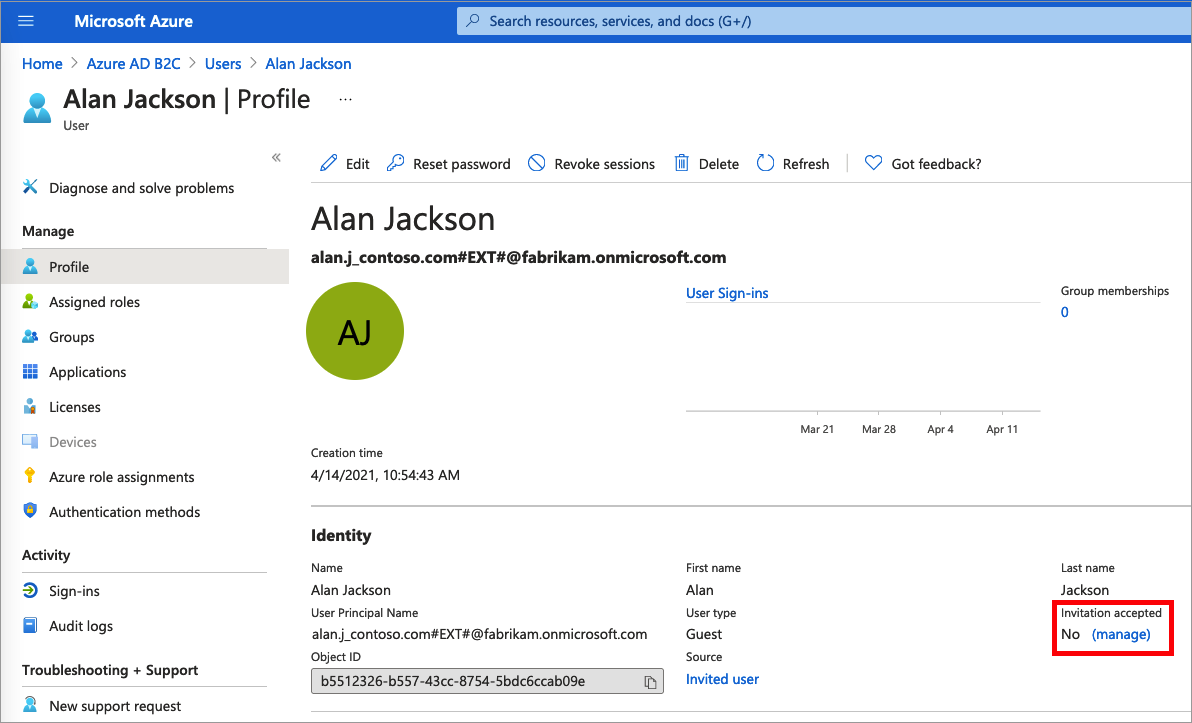
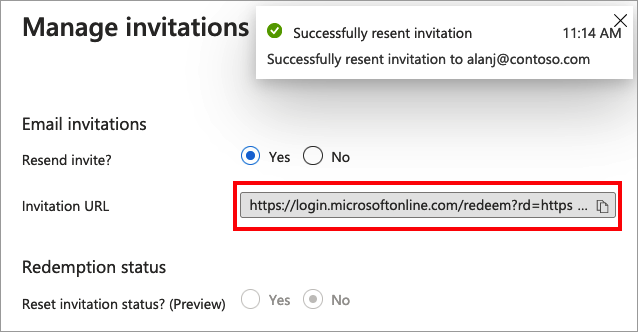
For Resend invite?, select Yes. When Are you sure you want to resend an invitation? appears, select Yes.
Azure AD B2C sends the invitation. You can also copy the invitation URL and provide it directly to the guest.
You can assign a role when you create a user or invite a guest user. You can add a role, change the role, or remove a role for a user:
- Sign in to the Azure portal with Global Administrator or Privileged Role Administrator permissions.
- Make sure you're using the directory that contains your Azure AD B2C tenant. Select the Directories + subscriptions icon in the portal toolbar.
- On the Portal settings | Directories + subscriptions page, find your Azure AD B2C directory in the Directory name list, and then select Switch.
- Under Azure services, select Azure AD B2C. Or use the search box to find and select Azure AD B2C.
- Under Manage, select Users.
- Select the user you want to change the roles for. Then select Assigned roles.
- Select Add assignments, select the role to assign (for example, Application administrator), and then choose Add.
If you need to remove a role assignment from a user, follow these steps:
- Select Azure AD B2C, select Users, and then search for and select the user.
- Select Assigned roles. Select the role you want to remove, for example Application administrator, and then select Remove assignment.
As part of an auditing process, you typically review which users are assigned to specific roles in the Azure AD B2C directory. Use the following steps to audit which users are currently assigned privileged roles.
- Sign in to the Azure portal with Global Administrator or Privileged Role Administrator permissions.
- Make sure you're using the directory that contains your Azure AD B2C tenant. Select the Directories + subscriptions icon in the portal toolbar.
- On the Portal settings | Directories + subscriptions page, find your Azure AD B2C directory in the Directory name list, and then select Switch.
- Under Azure services, select Azure AD B2C. Or use the search box to find and select Azure AD B2C.
- Under Manage, select Roles and administrators.
- Select a role, such as Global administrator. The Role | Assignments page lists the users with that role.
To delete an existing user, you must have a Global administrator role assignment. Global admins can delete any user, including other admins. User administrators can delete any non-admin user.
- In your Azure AD B2C directory, select Users, and then select the user you want to delete.
- Select Delete, and then Yes to confirm the deletion.
The user is deleted and no longer appears on the Users - All users page. The user can be seen on the Deleted users page for the next 30 days and can be restored during that time. For more information about restoring a user, see Restore or remove a recently deleted user using Azure Active Directory.
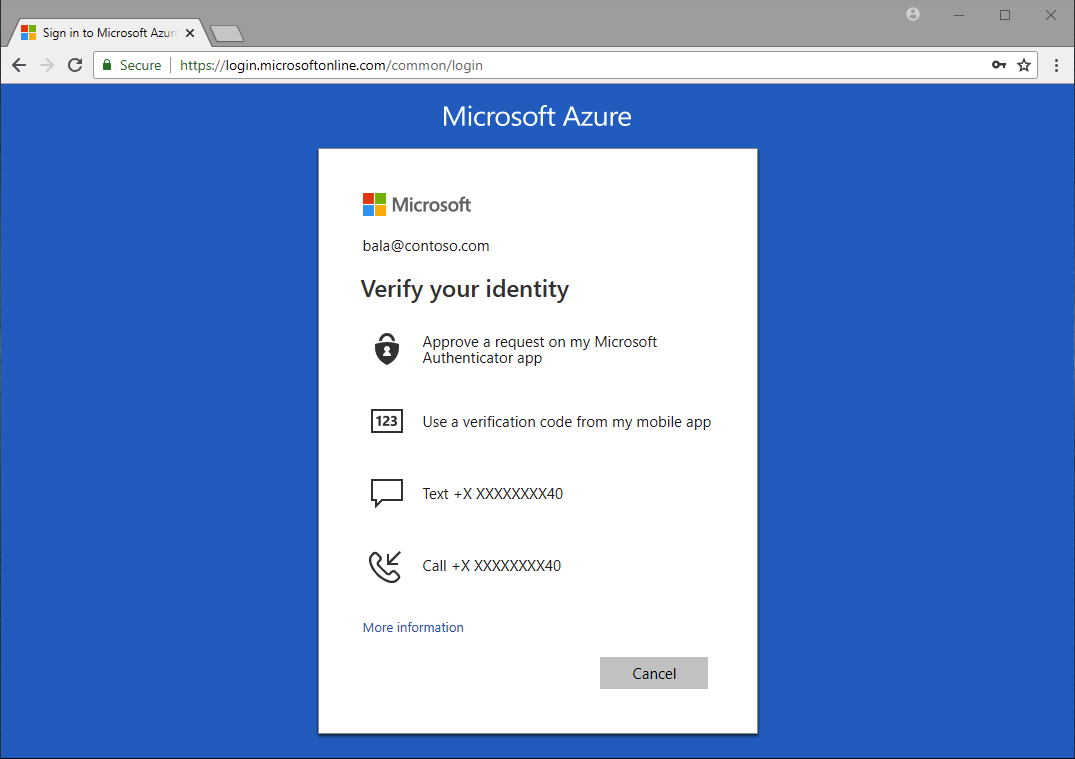
It's recommended that you protect all administrator accounts with multifactor authentication (MFA) for more security. MFA is an identity verification process during sign in that prompts the user for a more form of identification, such as a verification code on their mobile device or a request in their Microsoft Authenticator app.
If you're not using Conditional Access, you can enable Azure AD security defaults to force all administrative accounts to use MFA.
Before you create an Azure AD B2C tenant, make sure that you've the permission to do so. Use these steps to check that you've the permission to create a tenant:
- Sign in to the Azure portal.
- Make sure you're using the directory that contains your Azure AD B2C tenant:
- Select the Directories + subscriptions icon in the portal toolbar.
- On the Portal settings | Directories + subscriptions page, find your Azure AD B2C directory in the Directory name list, and then select Switch.
- In the Azure portal, search for and select Azure Active Directory.
- Under Manage, select User Settings.
- Review your Tenant Creation setting. If it says No, then contact your administrator to assign the tenant creator role to you. The setting is greyed out if you're not an administrator in the tenant.
To get your Azure AD B2C tenant name, follow these steps:
- Sign in to the Azure portal.
- Make sure you're using the directory that contains your Azure AD B2C tenant. Select the Directories + subscriptions icon in the portal toolbar.
- On the Portal settings | Directories + subscriptions page, find your Azure AD B2C directory in the Directory name list, and then select Switch.
- In the Azure portal, search for and select Azure AD B2C.
- In the Overview, copy the Domain name.

To get your Azure AD B2C tenant ID, follow these steps:
- Sign in to the Azure portal.
- Make sure you're using the directory that contains your Azure AD B2C tenant. Select the Directories + subscriptions icon in the portal toolbar.
- On the Portal settings | Directories + subscriptions page, find your Azure AD B2C directory in the Directory name list, and then select Switch.
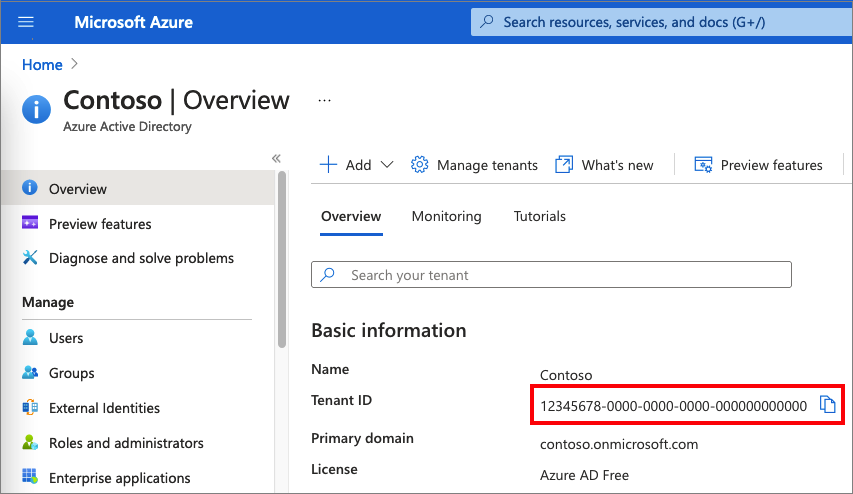
- In the Azure portal, search for and select Azure Active Directory.
- In the Overview, copy the Tenant ID.
You can read your Azure AD B2C's total directory size, and how much of it is in use. To do so, follow the steps in Get tenant usage by using Microsoft Graph API.